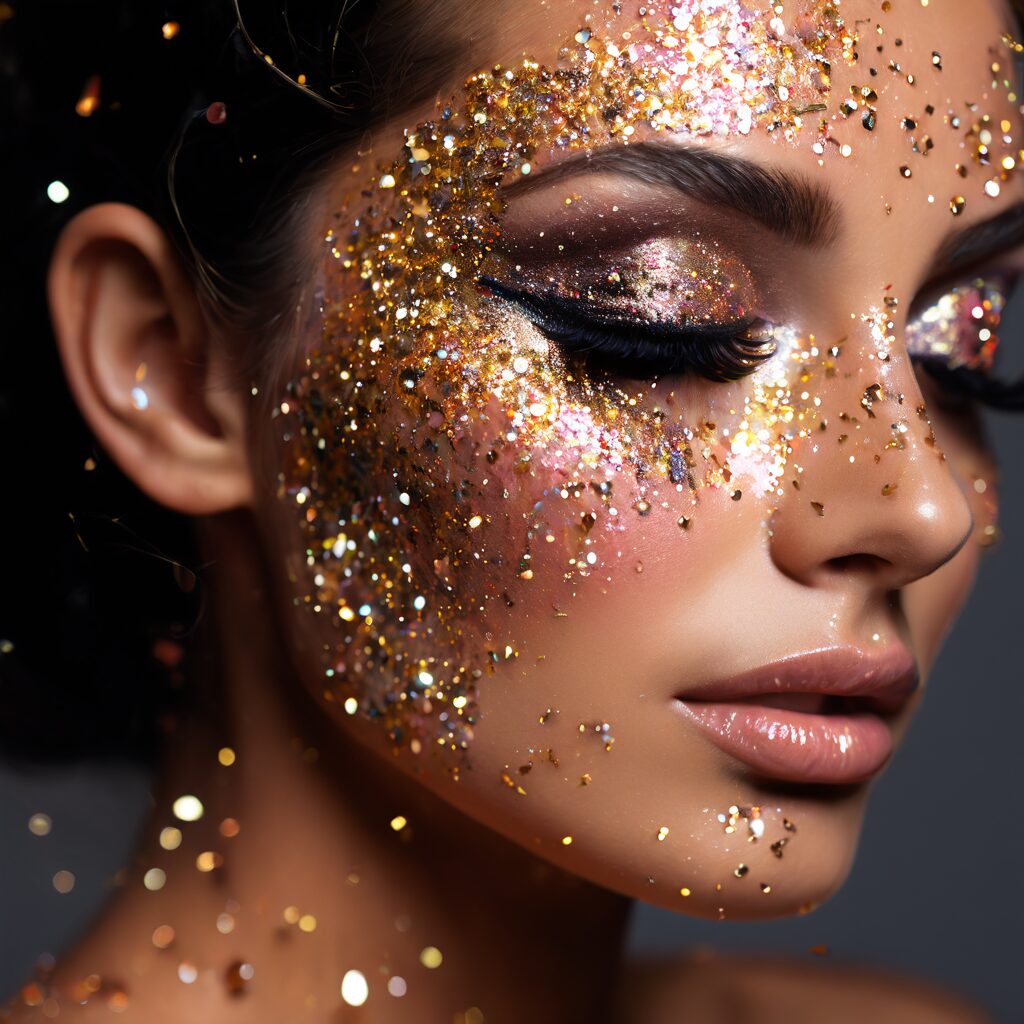
Glitter makeup is a dazzling way to enhance your beauty and make a statement. Whether you are preparing for a night out, a festival, or just want to add some sparkle to your everyday look, mastering the art of glitter makeup application can elevate your makeup game. This guide will walk you through the steps and techniques to flawlessly apply glitter makeup.
Key takeaways
- Use cosmetic-grade glitter rather than craft glitter to avoid skin irritation and ensure safety around the eye area.
- Prevent fallout by applying translucent powder under the eyes or completing eye makeup before foundation and concealer.
- Utilize silicone applicators for precise placement and better adherence compared to traditional makeup brushes.
- Opt for biodegradable eucalyptus cellulose glitters and always perform a patch test with adhesives to check for sensitivity.
- Remove glitter using oil-based makeup removers or micellar water to dissolve binders without scrubbing or irritating the skin.
Choosing the Right Glitter
Not all glitters are created equal. When it comes to makeup, it’s essential to choose cosmetic-grade glitter. This type of glitter is safe for use on the skin and is typically finer and softer than craft glitter. Look for options labeled as eye-safe if you plan to use them around your eyes.
Preparing Your Skin
Preparation is key for a long-lasting glitter makeup look. Start by cleansing and moisturizing your face. Apply a primer to create a smooth base. If you are using glitter on your eyelids, use an eyeshadow primer to ensure the glitter adheres properly and stays in place.
Applying Glitter to Eyes
Eye glitter can make your eyes pop and add a touch of glamour. Follow these steps for the perfect application:
- Apply a base eyeshadow color of your choice.
- Use a glitter adhesive or glitter primer on the area where you want to apply the glitter.
- Using a flat brush or your fingertip, gently press the glitter onto the adhesive.
- Blend the edges carefully to avoid harsh lines.
- Finish with eyeliner and mascara.
Glitter Lips
For a bold and sparkly lip look, follow these steps:
- Exfoliate your lips to remove any dead skin.
- Apply a lip balm to keep your lips hydrated.
- Use a lip liner to outline your lips.
- Apply a lipstick of your choice.
- Apply a glitter adhesive or clear lip gloss over the lipstick.
- Using a flat brush, press the glitter onto your lips.
Remember to keep the rest of your makeup minimal to let your glitter lips stand out.
Removing Glitter Makeup
Removing glitter makeup can be tricky, but it’s crucial to do it gently to avoid irritating your skin. Use an oil-based makeup remover or micellar water to break down the glitter. Soak a cotton pad with the remover and press it onto the glitter for a few seconds before wiping away. Repeat as necessary and follow up with your regular cleansing routine.
Tips and Tricks
Here are some additional tips to help you perfect your glitter makeup look:
- Use a setting spray to lock in your glitter makeup and prevent fallout.
- For a more subtle look, mix a small amount of glitter with your eyeshadow or lip gloss.
- Avoid using glitter near your waterline to prevent irritation.
- Experiment with different glitter colors and sizes to create unique looks.
- Practice makes perfect – don’t be afraid to try and try again until you get the desired effect.
The Chemistry of Adhesion: Choosing the Right Binder
While the glitter itself is the star of the show, the binder is the unsung hero that dictates the longevity and comfort of your look. Not all adhesives are interchangeable. For instance, water-based glitter glues are ideal for loose, fine-milled glitters on the eyelids because they dry clear and remain flexible, preventing the “cracking” effect that occurs with stiffer glues. If you are working with chunky, multi-dimensional sequins, a thicker, wax-based adhesive is superior. These formulas provide the structural integrity needed to hold heavier particles against gravity. For editorial-style “wet” looks, some professionals use a clear, non-toxic lash adhesive; however, this should be reserved for experienced users, as the removal process requires a dedicated oil-based solvent to avoid pulling on the delicate eyelid skin. Always perform a patch test with the adhesive on your inner forearm, as the skin here is thin and sensitive, mimicking the conditions of your eyelids.
Mastering the “Bakery Method” for Fallout Prevention
One of the most common complaints regarding glitter application is the inevitable migration of particles to the cheeks or under-eye area. To combat this, employ the “baking” technique. Before applying any glitter to your eyes, apply a generous layer of translucent setting powder beneath the eye area. This creates a protective barrier; if any stray glitter falls during application, it will land on the powder rather than bonding to your foundation or concealer. Once your eye look is complete, use a large, fluffy fan brush to sweep away the powder, taking the stray glitter with it. For an even more foolproof approach, consider doing your eye makeup entirely before applying your foundation, concealer, or bronzer. This allows you to wipe away any residual sparkle with a makeup wipe without compromising the rest of your complexion.
Curating Multi-Dimensional Textures
To move beyond a flat, monochromatic sparkle, learn to layer textures. The key to professional-looking makeup is depth. Start by applying a base of metallic cream eyeshadow, which provides a high-pigment foundation. On top of this, apply a fine-milled shimmer powder, and finally, place your larger, chunky cosmetic glitters in strategic spots—such as the center of the lid or the inner corner—using a precision silicone tool. Silicone applicators are vastly superior to brushes for this purpose; they pick up the glitter without absorbing it and allow for a “tapping” motion that deposits the particles exactly where you want them without scattering. By mixing textures—fine iridescent dust, medium-sized metallic hex-glitter, and large sequin-style pieces—you create a refractive surface that catches light from multiple angles, providing a much more sophisticated finish than a single-texture application.
Precision Placement and Geometric Glitter Art
Glitter doesn’t have to cover your entire eyelid to be effective. Contemporary trends favor precision placement to emphasize eye shape. For a “floating glitter liner” look, use a fine-tipped eyeliner brush dipped in a clear, tacky glitter base to draw a sharp line along the crease of the eye, then stamp the glitter directly onto that line. This technique frames the eye without overwhelming it. Another technique involves the “teardrop” effect: place a small concentration of fine glitter directly under the center of the lower lash line. This draws light to the iris and makes the eyes appear larger and more alert. When working with geometric shapes, such as stars or hearts, use a pair of precision tweezers to pick up individual pieces. Touch the back of the shape to your adhesive, wait five seconds for the glue to become tacky, then place it on the skin. This patience prevents the shape from sliding out of place.
The Ethics and Safety of Biodegradable Alternatives
As the beauty industry shifts toward sustainability, many users are moving away from traditional plastic-based (PET) glitters. Biodegradable glitter, typically made from sustainably sourced eucalyptus cellulose, is the gold standard for environmentally conscious makeup. However, it is vital to check the label; some biodegradable glitters are designed for crafts and may have sharp edges that are unsafe for the delicate eye area. Always look for “cosmetic-grade” and “biodegradable” labels on the same packaging. Note that cellulose-based glitter behaves slightly differently than plastic; it can sometimes absorb liquid binders more quickly, becoming softer over time. If you use a water-based binder, work in smaller sections to ensure the glitter maintains its shape and brilliance throughout the duration of your event.
Corrective Measures for Glitter Mishaps
Even the most seasoned makeup artists experience glitter migration. If you find yourself in the middle of an event with glitter drifting into your waterline, do not attempt to rub it out with your fingers, as this can cause corneal abrasions. Instead, carry a small spoolie brush or a Q-tip coated in a tiny amount of eye-safe balm or heavy cream. Gently touch the tip of the spoolie to the stray glitter particle; the stickiness of the balm will pick up the glitter instantly without disturbing your base makeup. If a piece of glitter enters the eye itself, flush the eye immediately with sterile saline solution or artificial tears. Never use tap water or aggressive wiping, as these can push the particle deeper into the sensitive tissues of the eye.
FAQ
1. Is glitter makeup safe for sensitive skin?
Yes, as long as you use cosmetic-grade glitter and perform a patch test beforehand to ensure no allergic reactions occur.
2. Can I use craft glitter for makeup?
No, craft glitter is not safe for use on the skin. Always use cosmetic-grade glitter for makeup applications.
3. How do I prevent glitter fallout?
Using a glitter adhesive or primer helps to minimize fallout. Additionally, a setting spray can help lock the glitter in place.
4. Can I wear glitter makeup every day?
While glitter makeup can be worn every day, it’s best suited for special occasions due to the potential for skin irritation with frequent use.
5. How do I make my glitter makeup last longer?
Proper preparation, using a good adhesive, and setting your makeup with a spray can help prolong the wear of your glitter makeup.
Related posts:
 Glitter Face Masks Trend
 The Body-Positive Art Movement Turning Stretch Marks Into Glittery Masterpieces
 The Makeup Tricks That Will Change Your Entire Face
 How to Safely Remove Eyelash Extensions at Home
 Holiday Glitter Nail Trends
 Professional Tricks to Make Your Lipstick Last All Day
 Eyebrow Extensions Are the New Lash Extensions
 The Best Liquid Eyeshadows That Stay Put All Day Long