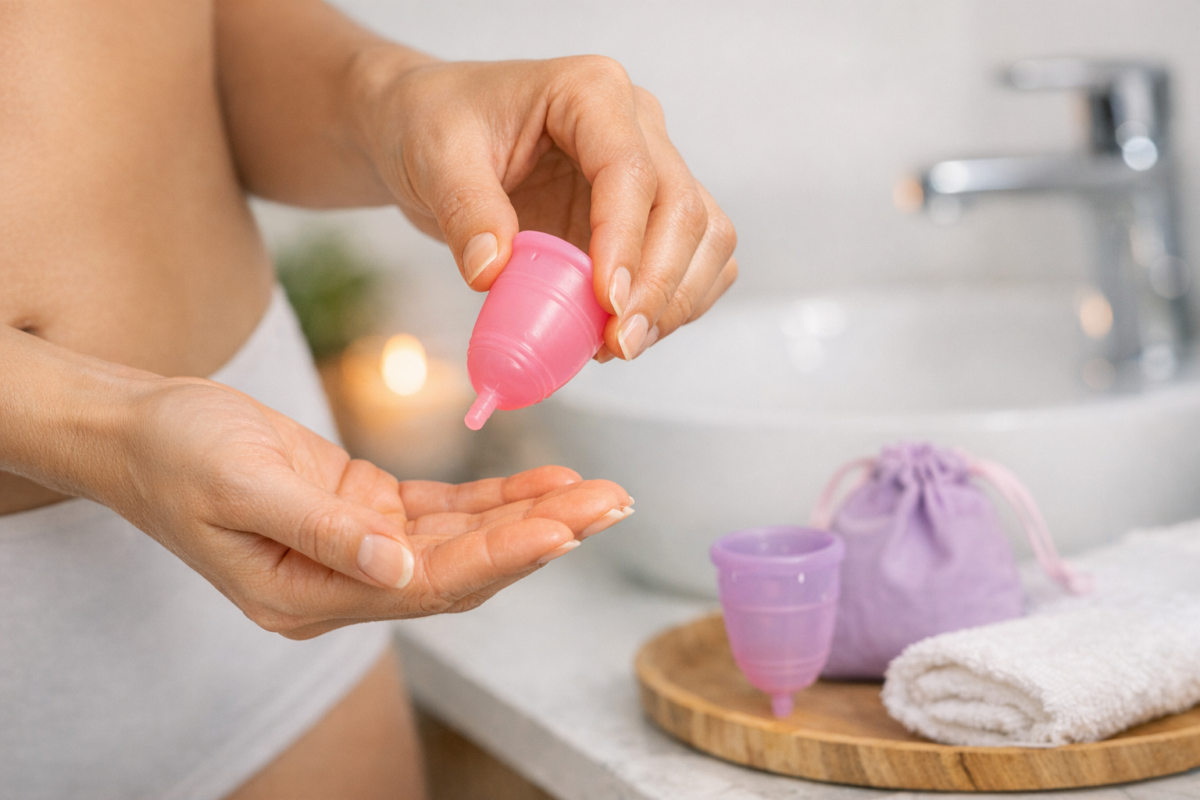
Menstrual cups have become a popular choice for period care because they are reusable, eco‑friendly, and can hold more fluid than many disposable products. Yet the moment of removal can feel intimidating, especially for first‑time users. This guide walks you through every step so that taking the cup out becomes a calm, routine part of your cycle.
Key takeaways
- Relax your pelvic floor muscles before removal to prevent tension and make the process easier.
- Break the suction seal by pinching the cup's base rather than pulling on the stem alone.
- Use a variety of positions, such as squatting or resting one foot on the tub, to find your most comfortable angle.
- Clean your cup with mild, fragrance-free soap after each use and sterilize it by boiling at the end of each cycle.
Understanding Your Menstrual Cup
Before you attempt removal it helps to know how the cup works. The cup sits low in the vaginal canal and forms a gentle seal against the walls. That seal prevents leaks but also means you must break it before the cup can slide out. Most cups are made of medical‑grade silicone, rubber, or thermoplastic elastomer. They have a stem or a ring at the base that you can grip. The rim is flexible and the body is soft enough to fold for insertion but firm enough to hold its shape once open.
Familiarize yourself with the specific model you own. Read the manufacturer’s instructions for any unique features such as a removal loop, a textured base, or a softer rim. Knowing the design details reduces guesswork when you are in the bathroom.
Preparing for Removal
Preparation starts before you even reach for the cup. Wash your hands thoroughly with soap and warm water. Dry them with a clean towel. If you are in a public restroom, carry a small bottle of hand sanitizer and a pack of disposable wipes for extra confidence. Have a clean container or a designated cup‑wash bowl ready for the used cup. Some people like to keep a small wet bag for transport if they need to empty the cup away from home.
Relax your pelvic floor. Tension makes the seal tighter and the muscles around the vaginal opening less cooperative. Take a few deep breaths, inhale through the nose and exhale through the mouth. A brief moment of mindfulness can lower anxiety and make the physical steps smoother.
Finding a Comfortable Position
There is no single correct posture; the goal is to give yourself easy access and a relaxed pelvis. Common positions include sitting on the toilet with knees spread wide, squatting over the toilet, standing with one foot on the edge of the tub, or lying on your back with knees bent. Experiment during a low‑flow day to discover which stance feels most natural.
When you are seated, lean forward slightly. This tilts the pelvis and shortens the vaginal canal, bringing the cup closer to the opening. If you squat, keep your heels on the floor for stability. Standing with a foot raised can also open the pelvic angle. Choose the position that lets you reach the stem without straining.
Breaking the Seal Safely
The seal is the main reason the cup feels stuck. To release it, pinch the base of the cup just above the stem. Use your thumb and forefinger to compress the walls together. You should feel a slight give as the suction breaks. If the cup has a removal loop, gently tug the loop while pinching the base. Avoid pulling on the stem alone; that can stretch the tissue and cause discomfort.
If the cup does not release on the first pinch, try a gentle side‑to‑side wiggle while maintaining the pinch. The motion helps air enter the space between the cup and the vaginal wall. Patience is key; forcing the cup can lead to spillage or irritation.
Guiding the Cup Out
Once the seal is broken, keep the pinch on the base and slowly guide the cup downward. Maintain a steady, controlled motion. If the cup tilts, adjust your grip so the rim stays level. Some users find it helpful to bear down lightly, as if having a bowel movement, which pushes the cup a little farther toward the opening.
When the rim reaches the vaginal entrance, you can slide the cup out completely. Keep the cup upright to avoid spilling the contents. Empty the fluid into the toilet, then rinse the cup with cold water first to prevent staining, followed by warm water and a mild, fragrance‑free soap.
Cleaning and Storing After Removal
Proper cleaning extends the life of the cup and protects your health. After each removal, wash the cup with a gentle cleanser that contains no harsh chemicals, dyes, or fragrances. Rinse thoroughly to remove any soap residue. At the end of your cycle, sterilize the cup by boiling it in water for five to ten minutes, or use a dedicated menstrual cup steam sterilizer if you have one.
Store the cup in a breathable cotton pouch or the original container with ventilation holes. Avoid airtight plastic bags, which can trap moisture and encourage bacterial growth. Keep the storage spot cool, dry, and out of direct sunlight.
Troubleshooting Common Issues
Even with practice, you may encounter hiccups. If the cup feels stuck, re‑apply the pinch‑and‑wiggle technique and give yourself a minute to relax. If the stem is too short to reach, try bearing down more firmly or switching to a position that shortens the canal further. Some users trim the stem slightly, but only do this after confirming the cup still seals well.
Leakage after removal usually means the cup was not fully opened during insertion. Check that the rim has popped open by running a finger around the base. If you experience discomfort, ensure you are not pulling on the stem alone and that your nails are trimmed. Persistent pain warrants a conversation with a healthcare provider.
Building Confidence Over Time
Confidence grows with repetition. Treat each cycle as a learning opportunity. Keep a small journal noting which position worked best, how long removal took, and any sensations you felt. Over a few months you will develop a personal routine that feels automatic.
Share tips with friends or online communities. Peer support normalizes the experience and can reveal tricks you had not considered. Remember that every body is different; what works for one person may need adjustment for another. Celebrate the progress you make toward a waste‑free period.
Choosing the Right Cup Shape for Your Anatomy
Different cup silhouettes are designed to match the natural variations in vaginal depth and cervical position. A bell‑shaped cup, wide at the base and tapered toward the rim, works well for individuals with a low‑lying cervix because the wider opening can reach the canal more easily. A funnel‑shaped cup, which narrows toward the rim, is often preferred when the cervix sits higher, as the narrower tip can glide past the cervical os without excessive pressure. Drop‑shaped cups combine a broader base with a slightly curved tip, offering a middle ground for those with an average anatomy or a slight uterine tilt. To determine which silhouette suits you, gently press the rim of the cup while it is folded; the part that flexes most indicates the shape that will conform best to your canal. Edge cases include people who have undergone pelvic surgery or who have a naturally short canal – a softer, more flexible cup with a rounded tip may reduce the chance of contacting the surgical scar tissue. Selecting the appropriate shape reduces the need for aggressive pinching and makes the seal‑breaking step smoother.
Using Lubrication and Warm Water to Ease Removal
Applying a thin layer of water‑based lubricant to the stem or the rim can create a slippery surface that helps the cup glide out without tugging on delicate tissue. Use only a few drops; too much lubricant may cause the cup to slide out before the seal is fully broken. Warm water, whether from a shower or a basin, relaxes the pelvic floor muscles, making the vaginal walls more compliant. Some users find that soaking the cup in warm water for a minute before removal softens the silicone, allowing it to flex more readily. If you have sensitive skin, choose a fragrance‑free, hypoallergenic lubricant to avoid irritation. In a public restroom where water is limited, a small squeeze bottle of pre‑warmed water can serve the same purpose. This combination of lubrication and warmth often shortens the time needed to break the seal and reduces discomfort.
Mid‑Cycle Emptying Strategies for Heavy Flow
Heavy flow days can fill a cup faster than the typical 12‑hour wear window, especially for those with a high capacity model. Monitoring the cup’s fullness by feeling a slight weight or a gentle tug at the base helps you decide when to empty. Emptying every four to six hours on heavy days prevents overflow and reduces the risk of leaks when the cup is finally removed. Carrying a small, resealable bag for temporary storage allows you to empty the cup in a restroom stall and re‑insert it later without a full wash. If you notice the cup reaching its limit before the scheduled change, consider swapping to a higher‑capacity cup for that cycle or using a thin, disposable liner as a backup until you can empty. Edge cases include long travel days with limited restroom access; in those situations, a cup with a larger volume or a “double‑cup” technique (placing a smaller cup inside a larger one) can provide extra capacity.
Managing Removal in Public or Limited‑Privacy Settings
When you are in a shared bathroom or a stall without a sink, preparation can make the difference between a smooth removal and a rushed, messy experience. Keep a compact kit that includes a folded paper towel or a small microfiber cloth, a travel‑size hand sanitizer, and a resealable bag for the used cup. A discreet handheld mirror or a small, foldable cup‑removal guide can help you locate the stem without needing to look directly at the cup. If a sink is unavailable, a bottle of clean water can be used to rinse the cup before re‑insertion; simply pour the water over the rim while holding the cup over the toilet. Some users place a thin, waterproof mat on the floor to provide a clean surface for the cup after removal. These strategies minimize the need for extensive cleaning on the spot and preserve privacy.
Special Situations: Post‑Surgical, Pregnancy, and Postpartum Use
Physical changes after pelvic surgery, pregnancy, or childbirth can alter the anatomy and affect cup removal. After a C‑section or other abdominal procedure, the pelvic floor may be weaker, so a cup with a shorter stem and a softer rim can be more comfortable. It is advisable to wait until the incision is fully healed and any post‑operative pain has subsided before attempting removal. During pregnancy, the cervix often sits higher and the vaginal walls may be more elastic; a bell‑shaped cup with a flexible rim adapts better to the increased space. Postpartum bodies experience swelling and changes in the shape of the vaginal opening, which may require a cup with a more pliable stem or a slightly larger diameter to maintain a secure seal. In all these scenarios, listening to your body and adjusting the cup choice or position gradually helps prevent pain and ensures a safe removal process.
Cup Removal Tools and Accessories
Several accessories are designed specifically to simplify removal, especially for users with limited dexterity or arthritis. A small, flexible removal loop attached to the stem gives an extra grip point, allowing you to pull gently while maintaining a pinch on the base. A compact, angled mirror can be held in one hand to view the stem without bending over, reducing strain on the back. Silicone removal sticks, which are thin, tapered tools, can be slipped under the rim to help break the seal without direct finger pressure. For those who experience hand fatigue, a pair of nitrile gloves provides a better grip and protects the skin from repeated friction. All accessories should be cleaned with mild soap and rinsed thoroughly after each use to maintain hygiene. Selecting the right tool can turn a potentially difficult removal into a routine step.
Frequently Asked Questions
How do I know if the seal is broken?
You will feel a subtle release of pressure when you pinch the base. The cup may also move slightly more freely. If you are unsure, gently wiggle the cup; a broken seal allows a small amount of air to enter, which you can sense as a faint pop.
Can I remove the cup while standing?
Yes, many people remove the cup while standing with one foot elevated. The key is a relaxed pelvic floor and a stable stance. If you feel unsteady, sit on the toilet instead.
What if the cup overflows before I can remove it?
Menstrual cups typically hold 20 to 30 milliliters, which covers most heavy flow days for up to 12 hours. If you have an exceptionally heavy flow, consider a higher‑capacity cup or empty it more frequently.
Is it safe to use a menstrual cup with an IUD?
Most users with an IUD can use a cup safely. Break the seal carefully and avoid pulling on the IUD strings. Consult your clinician for personalized advice.
How often should I replace my menstrual cup?
With proper care a quality cup can last several years. Inspect it regularly for tears, sticky residue, or changes in texture. Replace it if you notice any damage or if the material feels degraded.
Related posts:
 Everything You Need to Know About Your Vagina’s pH Balance
 Vaginal Dilators: A Tool for Pelvic Floor Health
 Understanding Vaginal Flora Health
 Products That Are Bad for Your Vaginal Health
 Common Kegel Exercise Mistakes: Perfecting Your Pelvic Floor Workouts
 Pelvic Floor Expert’s Advice
 Meet the Woman Making Periods Safer for Everyone
 Tension Headaches and Pelvic Floor