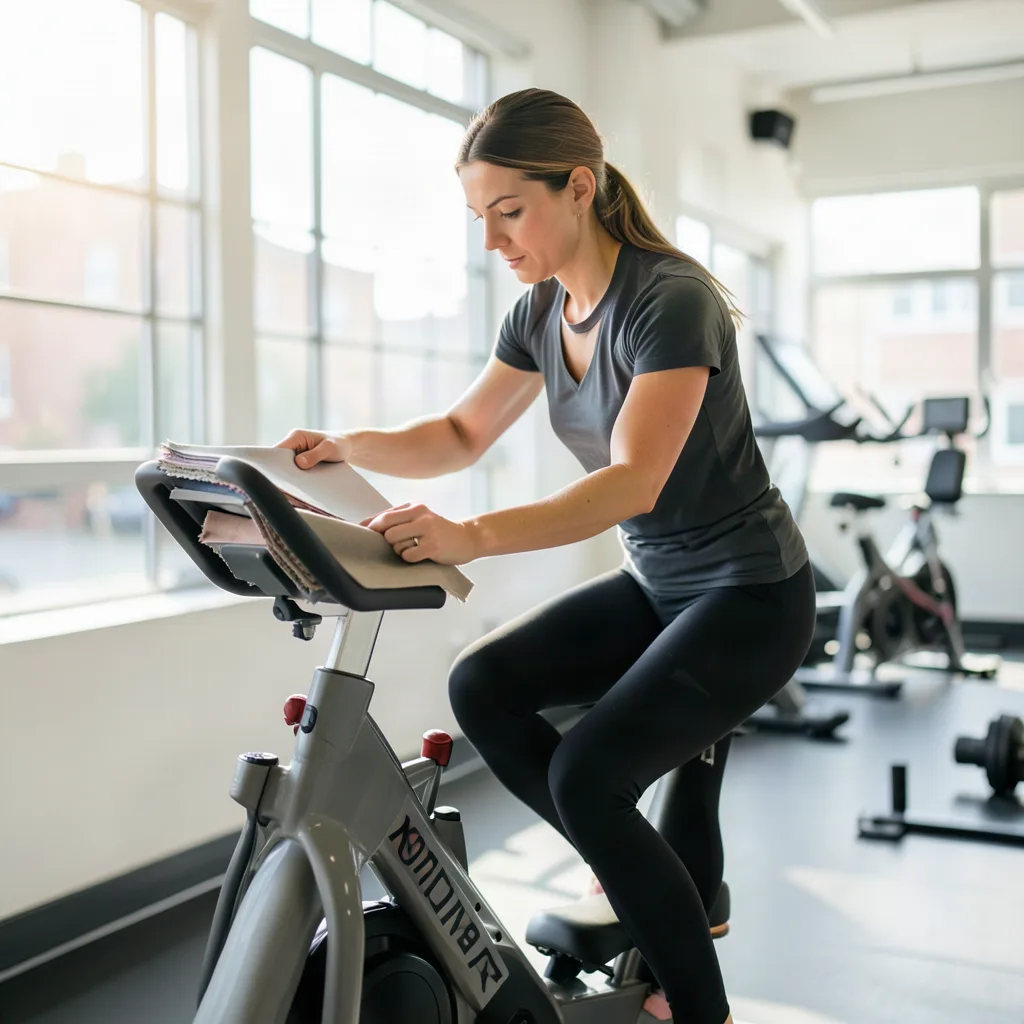
Imagine stepping into your favorite spin studio wearing leggings that not only fit your body perfectly but also showcase a design you created yourself. Personalized activewear is no longer a niche hobby; thanks to advances in digital printing, on‑demand fabric technology, and a growing community of DIY designers, you can turn a simple idea into a high‑performance piece of workout gear. This guide walks you through every step of the process—from picking the right fabric to collaborating with a print partner, budgeting for your project, and caring for the finished product—so you leave the studio feeling confident, comfortable, and uniquely you.
Key takeaways
- Choose moisture-wicking polyester or nylon-spandex blends with a 250-300 gsm weight for durability and comfort.
- Take accurate measurements of your waist, hips, inseam, and thighs to ensure a professional, compression-ready fit.
- Use sublimation or DTF printing for high-stretch fabrics to keep your designs vibrant and flexible during intense rides.
- Turn leggings inside out and wash in cold water without fabric softener to preserve elasticity and print quality.
Why Personalized Leggings Matter for Your Spin Sessions
Spin classes demand a blend of flexibility, compression, and breathability. Standard leggings often compromise on one of those factors, leaving you either too warm, too loose, or lacking support. When you design your own, you control the fit, the performance features, and the visual style. A custom pair can incorporate hidden pockets for keys, reinforced seams for high‑intensity intervals, and moisture‑wicking zones exactly where you need them. Moreover, a design that reflects your personality—whether it’s a bold geometric pattern, a subtle gradient, or a motivational phrase—can boost motivation and create a sense of ownership that translates into better performance.
Understanding Fabric Choices for High‑Intensity Cycling
Fabric is the foundation of any workout garment. For spin, you’ll want a blend that balances stretch, durability, and moisture management. Common options include:
- Polyester‑spandex blends (80/20 or 85/15): Offers excellent stretch and quick‑dry properties. Ideal for tight, compression‑style leggings.
- Nylon‑spandex blends: Slightly softer feel, high abrasion resistance, and good breathability. Works well for longer rides.
- Recycled polyester blends: Sustainable option that performs similarly to virgin polyester while reducing environmental impact.
When selecting a fabric, ask the printer about the GSM (grams per square meter). A range of 250‑300 gsm provides a balance between lightweight feel and enough heft to prevent see‑through during intense movements.
Measuring for the Perfect Fit
Even the most beautiful design will fall flat if the leggings don’t fit your body. Follow these steps to take accurate measurements:
- Wear a pair of tight‑fitting leggings you already own. This gives you a realistic baseline.
- Use a flexible measuring tape. Record the following points:
- Waist circumference: Measure around the natural waist, keeping the tape snug but not compressing the skin.
- Hip circumference: Measure the fullest part of the hips.
- Inseam: From the crotch seam to the desired ankle length.
- Thigh circumference: Measure the widest part of each thigh.
- Calf circumference: Measure where the calf is the thickest.
- Write down each measurement in centimeters (or inches, but stay consistent).
- Most custom‑legging platforms provide a size chart that converts your measurements into a recommended size. Use it as a starting point, then adjust based on personal preference for compression.
Tip: If you’re between sizes, choose the smaller size for a tighter fit and rely on the fabric’s stretch, or request a “relaxed” cut from the printer.
Choosing Color, Patterns, and Custom Details
Now comes the fun part—design! Here are practical ways to create a professional‑looking graphic without needing advanced software:
- Use online design tools: Websites like Canva, Placeit, or the custom‑legging platform’s built‑in editor let you drag‑and‑drop shapes, text, and stock patterns. Stick to high‑contrast colors for visibility on dark fabrics.
- Incorporate your spin studio’s branding: If your studio allows it, add their logo or color palette. This creates a cohesive look for group rides.
- Think about placement: Common zones are the side panels, the back, or a subtle waistband band. For spin, side panels work well because they stay visible even when you’re in a low‑seated position.
- Add functional details: Small reflective strips improve safety in dimly lit studios. Seamless pockets can be indicated with a simple icon on the design.
- Keep file specifications in mind: Export your design as a PNG with a transparent background, 300 dpi resolution, and the exact dimensions requested by the printer (often expressed in inches or centimeters).
Example: A 20‑year‑old spin enthusiast creates a design featuring a gradient from teal to magenta on the left leg, a motivational quote “Ride the Rhythm” on the right thigh, and a tiny reflective strip along the outer seam. The final mock‑up is uploaded to the printer’s portal and reviewed for color accuracy before production.
Working with Local Print Shops or Online Platforms
Two main routes exist for producing custom leggings: a local print shop that can handle small batches or an online on‑demand service that ships worldwide. Consider the following factors when choosing:
- Turnaround time: Local shops may turn around a batch within a week, while online services often need 2‑3 weeks for shipping.
- Minimum order quantity (MOQ): Some printers require a minimum of 5 or 10 pieces, whereas online platforms usually allow single‑item orders.
- Quality control: Visiting a local shop lets you inspect fabric samples and print proofs in person. Online services provide digital proofs; read reviews to gauge consistency.
- Cost per unit: Local shops may have higher per‑item costs but lower shipping fees for bulk orders. Online services often have tiered pricing that becomes cheaper at higher quantities.
Steps to collaborate effectively:
- Request a fabric swatch and a small printed sample (often called a “test print”).
- Confirm the printer uses a heat‑transfer or direct‑to‑fabric (DTF) method that works well on stretchy materials. DTF generally yields softer hand‑feel for leggings.
- Submit your final design file along with exact placement instructions (e.g., “left side panel, 2 in from the waistband, 5 in tall”).
- Approve the digital proof, then place the order with your chosen quantity.
Integrating Your Design with Spin Class Branding
If you attend a boutique spin studio that offers branded apparel, you can often negotiate a partnership. Here’s how to approach it:
- Present a mock‑up that incorporates the studio’s logo, colors, and any taglines they use.
- Highlight benefits: Custom leggings become a marketing tool when members wear them outside the studio, increasing brand visibility.
- Offer a profit‑share model: Suggest a small wholesale discount for the studio’s members, with a portion of each sale returning to the studio.
- Maintain design autonomy: Keep a personal version of the leggings for yourself, while the studio version may have subtle differences (e.g., a small studio badge on the waistband).
Even if the studio declines a formal partnership, you can still wear your personal design to class. Just be sure the design respects any dress‑code policies (no offensive graphics, appropriate length, etc.).
Caring for Your Custom Leggings to Preserve Fit and Color
Proper care extends the life of your leggings and keeps the custom print vibrant. Follow these guidelines:
- Turn inside out before washing to protect the printed surface.
- Use cold water and a gentle cycle. Hot water can cause shrinkage and fade colors.
- Avoid fabric softeners; they can break down the elasticity of spandex.
- Air‑dry or tumble dry low. High heat can weaken seams and cause the print to crack.
- Spot‑clean stubborn stains with a mild detergent rather than soaking the entire garment.
If you notice a small snag, use a fabric shaver to smooth the edge before it enlarges. Regularly inspect the waistband for stretch loss; a well‑made pair should retain its elasticity after 30‑40 washes.
Budgeting and Timeline Planning for Your Custom Leggings
Creating a pair of personalized leggings is an investment in both time and money. Below is a sample budget breakdown for a single pair ordered through an online on‑demand service:
| Item | Estimated Cost (USD) |
|---|---|
| Fabric selection (standard polyester‑spandex) | $12.00 |
| Digital design software (free tier) | $0.00 |
| Design time (self‑service) | $0.00 |
| Printing & production | $18.00 |
| Shipping (domestic) | $5.00 |
| Total | $35.00 |
If you order a set of 5 matching leggings for a group ride, many printers offer a 10‑15 % bulk discount, bringing the per‑pair cost down to around $30. Include a buffer of 1‑2 weeks for design revisions and shipping delays, especially if you’re ordering around holidays.
Final Thoughts: Turning Your Vision into a Performance Asset
Designing your own workout leggings is more than a fashion statement; it’s a chance to align your apparel with the functional demands of spin class while expressing your personal style. By choosing the right fabric, taking accurate measurements, creating a thoughtful design, and partnering with a reliable printer, you end up with a garment that supports your movement, lasts through countless rides, and makes you feel proud every time you clip in.
Exploring Cutting‑Edge Printing Methods for Stretch Fabrics
When you move beyond the basic heat‑transfer approach, a whole ecosystem of printing technologies opens up, each with its own set of trade‑offs for elasticity, color fidelity, and durability. Below is a practical comparison that helps you decide which method aligns with the high‑intensity demands of spin class while preserving the integrity of your custom artwork.
| Method | How It Works | Pros for Leggings | Cons / Edge Cases |
|---|---|---|---|
| Sublimation (heat‑press) | Ink‑based dye is transferred from a printed film onto polyester‑rich fabric under heat and pressure. | Seamless, breathable print that becomes part of the fiber; no feel‑change on the surface. Excellent for all‑over gradients and photographic detail. | Requires at least 65% polyester; colors can shift on darker bases; limited to light‑colored fabrics unless a special coating is used. |
| Direct‑to‑Fabric (DTF) Inkjet | Micro‑droplets of pigment are sprayed directly onto the textile, then cured with infrared heat. | Works on blended knits (poly‑spandex, nylon‑spandex); retains softness; vibrant on both light and dark backgrounds. | Ink layer is slightly thicker; may feel marginally stiffer on tight‑fit panels. Requires a post‑cure step to lock elasticity. |
| Water‑Based Screen Printing | Screen mesh holds a stencil; water‑based inks are pushed through onto the fabric. | Highly durable for small‑area logos; low VOC emissions; cost‑effective for bulk runs. | Limited to flat, non‑stretch zones; each color adds a screen, making complex gradients expensive. |
| Digital UV‑Curing | UV‑curable inks are printed and instantly hardened with ultraviolet light. | Ultra‑fast production; excellent adhesion on coated synthetics; resistant to fading. | Requires a pre‑treated surface; the coating can reduce fabric breathability if applied over large areas. |
Choosing the right method for spin leggings often hinges on two factors: the fabric blend you’ve selected and the visual complexity of your design. For example, a rider who wants a full‑leg gradient that shifts from sunrise orange to midnight navy should opt for sublimation on a 75% polyester‑spandex blend. Conversely, an athlete who prefers a bold, single‑color studio logo on the outer thigh can achieve the same effect with water‑based screen printing, saving both time and money.
Edge case example: If you plan to incorporate a metallic foil accent for a “sparkle” effect, only specialized heat‑transfer foils compatible with DTF or screen printing will work. Test a small swatch because foil can crack on high‑stretch zones if the underlying ink isn’t fully cured.
Designing for Diverse Body Shapes and Performance Needs
Spin studios attract participants ranging from petite beginners to tall endurance athletes, and each body type benefits from subtle tweaks in pattern placement, seam engineering, and compression zones. Below is a step‑by‑step framework that lets you tailor a single design file to multiple fit profiles without recreating the artwork from scratch.
- Create a master vector layout. Use a scalable format (AI, SVG, or EPS) that lets you resize elements without loss of quality. Keep all graphic layers on separate groups (e.g., “side‑panel”, “back‑logo”, “waistband”) so you can shift them independently.
- Define fit‑specific anchor points. Measure the distance from the natural waist to the apex of the gluteal fold for each size tier (XS‑XL). Record these as variables in your design software. When you export a size‑specific file, the side‑panel graphic can be nudged up or down by the exact difference, ensuring the visual focal point stays centered on the thigh regardless of leg length.
- Adjust compression zones. For taller riders, increase the percentage of spandex in the thigh panel (e.g., 85/15 instead of 80/20) to avoid sagging during standing climbs. For shorter riders, a slightly higher GSM (300‑320) can add body‑contouring support without bulk.
- Incorporate adaptive seam placement. Use flatlock stitching on the inner calf for riders with calf‑muscle hypertrophy, while placing a bonded seam on the outer thigh for those who prefer a smoother silhouette. Document these variations in a production brief so the printer can switch seam types per size batch.
- Run a virtual try‑on. Many online platforms now offer a 3‑D body scanner that maps your measurements onto a digital mannequin. Upload your size‑specific file and preview how the design drapes. This step catches misalignments before a physical sample is cut.
Real‑world scenario: A spin instructor who teaches both beginner and advanced classes designs a base legging with a subtle wave pattern that runs along the side panel. By applying the anchor‑point method, she creates three size families (S‑M, L‑XL, XXL‑XXL) where the wave peaks exactly at the midpoint of the thigh for each rider, preserving the visual rhythm across the room.
When you accommodate diverse body shapes, you also reduce the likelihood of post‑production alterations, which can add cost and delay. The upfront design investment pays off in higher customer satisfaction and lower return rates.
Embedding Smart Features: QR Codes, NFC Tags, and Reflective Tech
Activewear is evolving from pure fabric into a platform for data, safety, and brand interaction. By embedding low‑profile smart elements into your custom leggings, you create a functional extension that resonates with tech‑savvy cyclists.
- QR codes for on‑the‑fly workouts. Generate a scannable code that links to a curated Spotify playlist, a class schedule, or a personal performance dashboard. Print the QR at a size of 1.5 in × 1.5 in on the outer calf where it’s easily reachable without compromising movement. Test the code on a fabric swatch before full production; high‑contrast black‑on‑white works best on matte polyester.
- NFC (Near‑Field Communication) tags. Thin, flexible NFC stickers can be sewn into the waistband or hidden under a seam. When a rider taps their phone, the tag can trigger a welcome message, a discount code, or even log the class attendance automatically. Choose an ISO‑14443A tag rated for at least 10,000 flex cycles to survive the repetitive stretching of spin.
- Reflective micro‑prisms. For studios that dim lights during high‑intensity intervals, reflective strips improve visibility without adding bulk. Apply micro‑prism tape in a staggered pattern along the outer seam; the tiny angles bounce light back to the source, creating a subtle “glow” that’s visible from any direction.
Edge case: If you plan to sell leggings internationally, verify that the NFC frequency (13.56 MHz) complies with regional regulations. Some countries restrict active RFID components in clothing intended for children.
Integrating these features does not have to be costly. A bulk purchase of 500 NFC tags can drop the unit price to under $0.30, while a QR code is essentially free after the initial design. The added perceived value often justifies a modest price increase (e.g., $5‑$8 per pair) and creates a talking point that differentiates your leggings from generic store‑bought options.
Sustainable and Ethical Production: Materials, Certifications, and Carbon Footprint
Eco‑conscious consumers increasingly demand transparency about where their garments originate. By sourcing responsibly and documenting the lifecycle of your custom leggings, you turn a personal fashion statement into a sustainability champion.
- Choose certified recycled fibers. Look for fabrics bearing the Global Recycled Standard (GRS) or Recycled Claim Standard (RCS). These certifications verify that the polyester content is derived from post‑consumer plastic bottles and that the supply chain adheres to social and environmental criteria.
- Opt for low‑impact dyes. Water‑based sublimation inks emit fewer volatile organic compounds (VOCs) than traditional solvent inks. Some printers offer “Eco‑Sublime” inks that are certified by OEKO‑Tex Standard 100, guaranteeing they are free from harmful substances.
- Minimize waste with on‑demand cutting. Provide the printer with a detailed nesting file (usually a DXF) that maximizes fabric utilization. This reduces off‑cut scraps, which can be recycled back into the production loop.
- Calculate carbon emissions. Use an online carbon calculator to estimate the footprint of fabric production, shipping, and printing. Many platforms now offset emissions automatically; if not, you can purchase offsets through organizations like Gold Standard or ClimatePartner.
- Communicate transparently. Include a QR‑linked sustainability badge on the garment’s label that details the recycled content percentage, the certifications earned, and the carbon offset amount per pair. This not only educates the wearer but also builds brand trust.
Case study: A group of spin enthusiasts formed a micro‑brand called “CycleGreen”. They sourced 80% recycled polyester‑spandex fabric certified by GRS, used DTF printing with OEKO‑Tex inks, and partnered with a local printer who employed zero‑waste cutting. Their carbon calculator showed a 22% reduction in emissions compared to a conventional polyester legging, and they marketed this achievement on the product tag, resulting in a 15% price premium that customers willingly paid.
Even if you are only producing a single pair for yourself, the same principles apply. Request a swatch that includes the certification label, and ask the printer to share their environmental data. Small actions aggregate into industry‑wide pressure for greener practices.
From Hobby to Small Business: Legal, Licensing, and Scaling Your Custom Legging Line
Turning a personal project into a revenue‑generating line introduces a new set of considerations that go beyond fabric and design. Below is a roadmap that walks you through the essential legal and operational steps, peppered with real‑world pitfalls to avoid.
- Secure intellectual property (IP) rights. If your artwork includes original illustrations, register the copyright with the U.S. Copyright Office (or your local equivalent) before you sell. For logos or brand names, file a trademark application (USPTO TEAS Standard) to protect your brand identity. Keep records of the creation date, drafts, and source files as evidence.
- Obtain a commercial license from the printer. Many on‑demand platforms allow personal use for free but require a paid commercial‑use license for resale. Review the terms‑of‑service carefully; some restrict the number of units per design without a bulk‑pricing agreement.
- Set up a business entity. Forming an LLC shields personal assets from potential liability and simplifies tax filing. Most states allow online formation for under $100. Obtain an EIN (Employer Identification Number) from the IRS for banking and tax purposes.
- Develop a pricing model. Factor in the cost of fabric, printing, packaging, shipping, platform fees, and a margin for profit. A common formula is: Cost per unit × (1 + Desired profit margin) = Retail price. For a premium, sustainable legging that costs $28 to produce, a 45% margin yields a $40.60 retail price.
- Implement quality‑assurance (QA) protocols. Create a checklist that includes seam strength test (minimum 5 kg pull), colorfastness (A‑grade ISO 105‑B02), and elasticity retention after 20 wash cycles. Conduct a pilot run of 10 units; any failure triggers a design or production tweak before scaling.
- Plan for inventory and fulfillment. If you anticipate demand beyond the on‑demand model, negotiate a wholesale agreement with the printer for bulk production at a reduced unit cost. Store the finished leggings in a climate‑controlled space to prevent moisture damage, and use biodegradable poly‑mailers for shipping to stay aligned with your sustainability narrative.
- Navigate sales channels. Options include a dedicated Shopify store, Etsy marketplace, or direct sales through your spin studio. Each channel has distinct fee structures and audience expectations. For example, Etsy charges a 6.5% transaction fee plus a $0.20 listing fee per item, while Shopify’s basic plan costs $29/month plus a 2.9% + $0.30 per transaction.
Legal edge case: If your design incorporates a popular meme or a copyrighted song lyric, you must obtain a license from the rights holder, even if the usage is limited to a small batch. Failure to do so can result in DMCA takedown notices and potential monetary damages.
By following this structured approach, you transform a creative hobby into a scalable, legally sound business that can serve both individual riders and entire spin studios.
Testing, Feedback, and Iterative Improvement of Your Custom Leggings
Even the most meticulously designed garment benefits from real‑world testing. A systematic feedback loop ensures that each production cycle brings you closer to the ideal blend of performance, comfort, and aesthetic appeal.
- Recruit a beta‑testing cohort. Assemble 5‑10 regular spin participants representing a range of body types and skill levels. Offer them the leggings at a discounted rate or for free in exchange for detailed feedback.
- Define measurable criteria. Use a Likert‑scale questionnaire covering fit (1‑5), compression feel, moisture‑wick performance, seam comfort, and visual satisfaction. Include open‑ended questions about any chafing, slipping, or unexpected stretch loss.
- Conduct a wear‑test during a full class cycle. Have testers wear the leggings for at least three consecutive spin sessions (approximately 45 minutes each). Ask them to note any changes after the first, second, and third ride.
- Collect post‑wash data. Instruct testers to wash the leggings according to the care guidelines after the third ride, then repeat the questionnaire. This reveals how the print and fabric hold up after laundering.
- Analyze results with a simple matrix. Assign numeric values to each criterion and calculate an average score. Identify any item that falls below a pre‑set threshold (e.g., 3.5/5). Those items become focal points for the next design iteration.
- Implement targeted adjustments. If testers report that the side‑panel graphic rides up during standing climbs, consider moving the design 0.5 in lower or adding a silicone grip strip beneath the print. If moisture‑wicking feels insufficient in the inner thigh, switch to a fabric blend with a higher polyester ratio or add a mesh panel.
- Document every change. Keep a version‑control log (e.g., v1.0, v1.1, v2.0) that records fabric batch numbers, printer settings, and design file revisions. This documentation is invaluable for troubleshooting future issues and for providing transparency to customers.
Example iteration: After the first beta round, the average compression score was 3.2/5, with multiple riders noting that the waistband lost elasticity after five washes. The design team responded by selecting a 4‑way stretch waistband with a 10% higher spandex content and added a reinforced double‑needle stitch. The second iteration raised the compression score to 4.6/5 and eliminated the stretch‑loss complaint.
Repeat this cycle until the aggregate satisfaction score consistently exceeds your target (commonly 4.5/5). Continuous improvement not only refines the product but also builds a community of engaged users who feel heard and valued.
Frequently Asked Questions
- Can I use any graphic software to create my design?
- Yes. Programs like Adobe Illustrator, Photoshop, Affinity Designer, or free tools such as GIMP and Canva all work, provided you export a high‑resolution PNG or PDF with a transparent background.
- Will the custom print affect the leggings’ stretch?
- Modern DTF and sublimation methods apply ink that remains flexible, so the stretch is comparable to non‑printed leggings. Avoid heavyweight vinyl appliqués on the front of a tight‑fit leg, as they can restrict movement.
- How do I ensure the colors I choose match the final product?
- Ask the printer for a digital proof that shows the exact color profile (usually sRGB or CMYK). If possible, request a physical swatch of the printed fabric before committing to the full order.
- What if the leggings don’t fit as expected?
- Most custom printers offer a satisfaction guarantee. Check their return policy; many will accept a replacement if the garment deviates from the provided measurements by more than 2 cm.
- Can I sell the leggings I design to others?
- Yes, as long as you own the rights to any graphics you use and the printer’s terms allow commercial resale. Some platforms require a separate licensing agreement for bulk or retail sales.
Related posts:
 The Great Leggings Debate That Had United Airlines in Hot Water
 Sparkly Leggings: The Holiday Fashion Statement That Divided the Internet
 Ultracor’s Unicorn Glitter Leggings
 Spanx Leggings Sale Alert
 Girlfriend Collective Leggings Are Back and Selling Out Fast
 Score These Cult-Favorite Leggings on Major Sale
 Stylish Blanket Scarves for Leggings
 Score Big: Sweaty Betty’s Cyber Monday Deals Are Pure Fire