
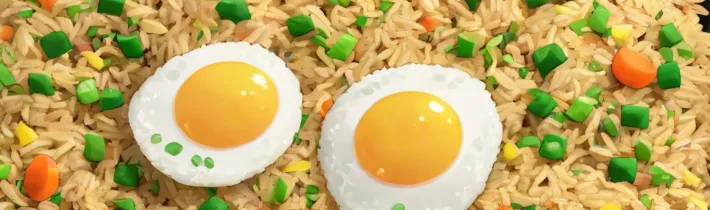
When the workweek piles up and dinner feels like a race against the clock, a reliable, flavorful, and nutritious dish can be a game‑changer. Fried rice is a classic comfort food, but most recipes demand multiple pots, a cascade of prep steps, or a pantry full of obscure sauces. This article introduces a streamlined, one‑pan fried rice method that fits seamlessly into any meal‑prep routine. By the end, you’ll have a versatile base you can customize for vegetarian, protein‑packed, or low‑carb meals, all while keeping cleanup to a minimum.
Why One‑Pan Fried Rice Beats Traditional Methods
Traditional fried rice often calls for a wok, a separate saucepan for rice, and a side skillet for proteins. The one‑pan approach consolidates these steps, saving you time, energy, and dishes. Here are the core benefits:
- Speed: Cooking everything in the same vessel reduces heat‑up time and eliminates the need to transfer ingredients.
- Flavor Integration: Ingredients simmer together, allowing the rice to absorb aromatics, sauces, and juices from vegetables and proteins.
- Consistent Texture: By controlling moisture in a single pan, you can achieve perfectly separated grains without sogginess.
- Meal‑Prep Friendly: The recipe yields 4‑6 servings that store well in airtight containers for up to four days.
Essential Equipment and Ingredients
Investing in a good skillet or a large sauté pan (10‑12 inches) with a sturdy, non‑stick surface or a well‑seasoned cast‑iron pan is the only equipment you truly need. Below is a checklist of pantry staples and optional add‑ins.
Equipment
- 10‑12‑inch non‑stick skillet or cast‑iron skillet
- Wooden spoon or silicone spatula
- Measuring cups and spoons
- Rice cooker or pot (for pre‑cooking rice)
- Instant‑read thermometer (optional, for protein safety)
Base Ingredients (serves 4)
- 2 cups cooked rice (preferably day‑old jasmine or basmati)
- 2 tbsp neutral oil (vegetable, canola, or grapeseed)
- 1 medium onion, finely diced
- 2 cloves garlic, minced
- 1 cup mixed frozen vegetables (peas, carrots, corn)
- 2 large eggs, lightly beaten
- 3 tbsp low‑sodium soy sauce
- 1 tbsp toasted sesame oil
- 1 tsp freshly grated ginger (optional)
- 2 green onions, sliced for garnish
- Salt and pepper to taste
Protein Options (choose one or combine)
- 200 g cooked chicken breast, diced
- 200 g firm tofu, cubed and pressed
- 150 g shrimp, peeled and deveined
- 150 g lean ground turkey
All proteins can be pre‑cooked or added raw and cooked in the pan; the method adjusts accordingly.
Step‑by‑Step: The One‑Pan Process
Follow these detailed steps for consistent results. Timing may vary slightly based on your stove’s heat output.
- Prepare the rice: Cook rice according to package directions, then spread it on a baking sheet to cool. Day‑old rice works best because it’s drier, which prevents clumping.
- Heat the pan: Place the skillet over medium‑high heat and add 1 tbsp oil. Allow the oil to shimmer before adding aromatics.
- Sauté aromatics: Add diced onion and cook 2‑3 minutes until translucent. Stir in garlic (and ginger if using) and cook another 30 seconds, being careful not to burn.
- Cook the protein: Push aromatics to the pan’s edge. Add the remaining 1 tbsp oil to the empty space, then add your chosen protein. Cook until the protein is just done—about 3‑4 minutes for chicken or turkey, 2‑3 minutes for shrimp, or 5‑6 minutes for tofu until golden.
- Scramble the eggs: Create a small well in the center of the pan, pour the beaten eggs, and scramble gently. Once set, break the egg pieces into the rest of the mixture.
- Incorporate vegetables: Add frozen mixed vegetables directly to the pan. Stir and cook for 2‑3 minutes until they are heated through but still retain a slight bite.
- Add the rice: Sprinkle the cooled rice over the pan. Using the spatula, break up any clumps and toss everything together. The key is to keep the rice moving to prevent sticking.
- Season: Drizzle soy sauce evenly, then add sesame oil. Toss again to coat each grain. Taste and adjust with salt, pepper, or a splash more soy sauce if needed.
- Finish and serve: Remove the pan from heat. Garnish with sliced green onions and, if desired, a sprinkle of toasted sesame seeds. Serve hot, or let cool before portioning into containers.
Customizing the Base: Flavor Variations
The beauty of a one‑pan fried rice lies in its adaptability. Below are three distinct flavor profiles you can achieve with minimal extra ingredients.
1. Thai‑Inspired Coconut Lime Fried Rice
- Replace half the soy sauce with 2 tbsp coconut aminos.
- Add zest of one lime and 1 tbsp lime juice after cooking.
- Stir in a handful of chopped cilantro and a pinch of red‑pepper flakes.
- Optional: top each serving with a drizzle of coconut milk for extra creaminess.
2. Spicy Szechuan Fried Rice
- Swap regular soy sauce for 2 tbsp low‑sodium dark soy sauce.
- Add 1 tsp Szechuan peppercorn oil and ½ tsp chili garlic sauce.
- Include ¼ cup diced bell pepper and ¼ cup sliced bok choy for crunch.
- Finish with a sprinkle of toasted peanuts for texture.
3. Mediterranean Herb Fried Rice
- Use 2 tbsp olive oil in place of neutral oil.
- Season with 1 tsp dried oregano, ½ tsp dried thyme, and a pinch of smoked paprika.
- Add ½ cup chopped sun‑dried tomatoes and ¼ cup crumbled feta after removing from heat.
- Garnish with fresh parsley and a squeeze of lemon.
Nutrition Snapshot: What You’re Getting
Understanding the macro‑ and micronutrient profile helps you fit the dish into specific dietary goals. Below is an approximate breakdown for a standard serving (1/5 of the recipe) using chicken as the protein.
- Calories: 380 kcal
- Protein: 22 g
- Carbohydrates: 45 g (including 3 g fiber)
- Fat: 12 g (mostly from healthy oils)
- Sodium: 620 mg (reduced by using low‑sodium soy sauce)
- Key micronutrients: Vitamin A, Vitamin C, iron, and potassium from vegetables.
Adjust the portion size, swap brown rice for added fiber, or use cauliflower rice for a low‑carb version. The flexibility makes the recipe suitable for weight‑management plans, active‑lifestyle fueling, or balanced family meals.
Storing and Reheating: Keep It Fresh for the Week
Proper storage preserves texture and flavor. Follow these guidelines:
- Cool quickly: Spread the cooked rice in a shallow container and let it reach room temperature within 30 minutes.
- Portion control: Divide into 4‑5 airtight containers (about 350 g each).
- Refrigeration: Store in the fridge for up to four days. For longer storage, freeze for up to two months.
- Reheating: In a microwave, sprinkle a teaspoon of water over the rice, cover loosely, and heat for 1‑2 minutes, stirring halfway. On the stovetop, add a splash of broth or water, cover, and warm over medium heat for 3‑4 minutes, stirring occasionally.
Adding a fresh garnish—like sliced green onions, a drizzle of sesame oil, or a handful of fresh herbs—after reheating revives the dish’s brightness.
Common Mistakes and How to Avoid Them
Even seasoned cooks can stumble on a few pitfalls. Here are the most frequent issues and quick fixes.
- Clumpy rice: Use day‑old rice or spread freshly cooked rice on a tray to dry. If rice still sticks, increase the pan’s heat slightly and keep the grains moving.
- Soggy texture: Over‑adding sauces or not pre‑cooking the rice can release excess moisture. Measure sauces carefully and consider a splash of broth only if the rice looks dry.
- Unevenly cooked protein: Cut protein into uniform pieces and give it enough space in the pan. Crowding leads to steaming instead of browning.
- Burnt aromatics: Garlic and ginger can scorch quickly. Add them after the onions have softened and keep the heat at medium‑high, not full blast.
- Lack of flavor depth: Finish with a dash of acid (lime, lemon, or rice vinegar) and a hint of sweetness (a teaspoon of honey or maple syrup) to balance salty soy sauce.
Scaling Up or Down: Adjusting the Recipe
Whether you’re cooking for a single serving or feeding a crowd, the method scales smoothly.
For One‑Person Meals
- Use ½ cup cooked rice, ½ tbsp oil, ¼ onion, 1 clove garlic, ½ cup frozen veggies, 1 egg, 1 tbsp soy sauce, and ½ tsp sesame oil.
- Cook in a small non‑stick skillet (8‑inch) to avoid excess oil.
For Large Batch Prep (12‑15 Servings)
- Multiply each ingredient by 3 – 4, using a large sauté pan or a wok.
- Cook in two rounds if your pan cannot accommodate the full volume without overcrowding.
- Keep the cooked rice warm in a low oven (≈ 90 °C) while you finish the remaining batches.
Remember to adjust seasoning proportionally, but taste as you go—large volumes can sometimes mute flavors.
Advanced Ingredient Swaps for Specialized Diets
While the core one‑pan method is deliberately flexible, many home cooks need to tailor the dish to specific dietary frameworks—whether you’re following a keto plan, managing a gluten intolerance, or adhering to a paleo lifestyle. Below is a systematic guide to swapping each component without compromising texture or flavor.
- Grain Substitute: Replace traditional jasmine or basmati rice with cauliflower rice for a sub‑250‑calorie, low‑carb version. To keep the rice from turning mushy, dry the cauliflower florets in a clean kitchen towel after pulsing them in a food processor. Lightly sauté the cauliflower “rice” in the pan for 3‑4 minutes before adding the remaining ingredients; this step creates a gentle caramelization that mimics the toasted notes of real rice.
- Protein Alternatives:
- Keto: Use diced pork belly or bacon, which adds both fat and a smoky depth. Render the fat first, then proceed with aromatics in the rendered oil.
- Gluten‑Free: Opt for tempeh, canned tuna, or pre‑cooked shrimp. Ensure any pre‑marinated tofu or meat is labeled gluten‑free, as many Asian sauces contain wheat.
li>Paleo: Choose wild‑caught fish (e.g., salmon), grass‑fed ground beef, or chicken thighs. Avoid soy‑based sauces; instead, season with coconut aminos (which is soy‑free) and a splash of fish sauce for umami.
- Keto & Paleo: Replace soy sauce with a blend of tamari (gluten‑free) and a teaspoon of liquid aminos, then add a pinch of sea salt.
- Vegan: Substitute the egg with a chickpea flour scramble (mix 2 tbsp chickpea flour, ¼ cup water, pinch of turmeric, and whisk; pour into the pan and stir like you would an egg).
- For a heart‑healthy spin, swap neutral oil for extra‑virgin olive oil or avocado oil. Both have higher monounsaturated fat profiles and can withstand the high heat required for a good sear.
- If you’re avoiding dairy, skip butter entirely and rely on the oil‑based base. The sesame oil finish still provides a nutty richness without dairy.
Edge Cases: When using cauliflower rice, the moisture content can vary dramatically depending on the cauliflower’s freshness. If the cauliflower releases too much water, finish the dish with a brief high‑heat burst and a splash of rice vinegar to restore a slight tang and keep the grains separate. For paleo cooks, fish sauce can be a hidden source of gluten if it’s not specifically labeled; always read the ingredient list.
Transforming Leftover Fried Rice into New Meals
One‑pan fried rice is a culinary canvas, and leftovers don’t have to languish in the fridge. By repurposing the base, you can create entirely new dishes that feel fresh and exciting. Below are three proven transformations, each with a step‑by‑step outline.
- Rice‑Based Patties (Fried Rice Cakes):
- Combine 1 cup cold leftover fried rice with 1 egg (or flax egg for vegans) and ¼ cup finely chopped scallions.
- Add 2 tbsp grated Parmesan (optional) and season with a pinch of black pepper.
- Form the mixture into ½‑inch patties. Heat a thin layer of oil in the same skillet over medium heat and fry each side for 3‑4 minutes until golden and crisp.
- Serve with a dollop of sriracha mayo or a citrus‑yogurt dip for a quick snack.
- Hearty Fried Rice Soup:
- In a saucepan, bring 2 cups low‑sodium chicken or vegetable broth to a simmer.
- Add 1 cup leftover fried rice, a handful of baby spinach, and a splash of soy sauce.
- Cook for 5‑6 minutes, allowing the rice to absorb broth and thicken the soup.
- Finish with a drizzle of toasted sesame oil and a soft‑boiled egg for added protein.
- Fried Rice Burrito Wrap:
- Warm a large flour or low‑carb tortilla on a dry skillet for 15 seconds per side.
- Spread a thin layer of refried beans, then layer ¾ cup fried rice, sliced avocado, and shredded lettuce.
- Roll tightly, seam side down, and give the burrito a quick press in the skillet to seal and add a light crunch.
- Slice in half and serve with pico de gallo and a squeeze of lime.
Edge Cases: If the leftover rice has become dry, sprinkle a tablespoon of water or broth before reheating; the steam will re‑hydrate the grains without making them soggy. For the soup version, avoid adding too much extra broth if the rice is already moist, as it can dilute the flavor.
The Science Behind Perfect Fried Rice: Starch, Moisture, and Maillard
Understanding the chemistry of fried rice can elevate a good dish to great. Three scientific principles dominate the outcome: starch gelatinization, moisture management, and the Maillard reaction.
- Starch Gelatinization: Freshly cooked rice contains a high proportion of gelatinized starch, which traps water and makes the grains sticky. Allowing the rice to cool (ideally overnight) lets the starch retrograde, forming a firmer structure that resists clumping. If you must use fresh rice, spread it on a tray and refrigerate for at least 30 minutes to achieve a similar effect.
- Moisture Management: Each ingredient contributes its own water content—frozen vegetables release ice crystals, proteins exude juices, and sauces add liquid. The key is to keep the pan’s temperature high enough to evaporate excess moisture quickly. A practical rule: when you hear a steady sizzle, the pan is hot enough to vaporize water without steaming the rice.
- Maillard Reaction: This browning reaction occurs when proteins and sugars reach temperatures above 140 °C (284 °F). It creates the nutty, savory notes that distinguish excellent fried rice from a bland stir‑fry. To maximize Maillard, avoid overcrowding the pan; work in batches if necessary, and give the rice a brief period of undisturbed contact with the pan’s surface before tossing.
Edge Cases: On induction cooktops, the surface can stay hotter longer than gas, which may increase the risk of burning aromatics. Reduce the heat slightly after the initial sear, then raise it again when adding the rice. For high‑altitude kitchens, water boils at a lower temperature, so the rice may retain more moisture; increase the pan’s heat a notch to compensate.
Batch Cooking and Freezer‑Friendly Strategies for the Busy Week
Meal‑prep enthusiasts often grapple with the paradox of wanting variety while minimizing daily effort. The one‑pan fried rice lends itself to batch cooking, but a few strategic tweaks can preserve quality throughout a week‑long rotation.
- Pre‑Portion Rice and Veggies: Before you even fire up the stove, portion out day‑old rice into freezer‑safe zip‑lock bags (about 2 cups per bag). Do the same with mixed vegetables, separating them into 1‑cup portions. This allows you to pull exactly what you need without thawing the entire batch.
- Flash‑Freeze Protein: If you’re using shrimp, chicken, or tofu, spread the cooked pieces on a baking sheet and freeze for 20‑30 minutes. Once solid, transfer to a bag. Flash‑freezing prevents the pieces from sticking together, making it easy to dump a handful directly into the pan.
- Separate Sauces: Store soy‑based sauces in small silicone containers. Adding sauce at the last minute prevents the rice from becoming soggy during the freeze‑thaw cycle.
- Reheat with a Steam‑Boost: When reheating from frozen, place the frozen rice in a skillet with a splash of broth, cover, and let steam melt the ice crystals for 3‑4 minutes before uncovering to finish the crispness. This method restores the original texture better than microwaving alone.
- Label with Date and Variant: Use a marker to write the preparation date and the flavor profile (e.g., “Thai Lime – 09/12”). Rotate the oldest containers first to ensure freshness.
Edge Cases: If you notice ice crystals forming on the surface of frozen rice, it’s a sign the bag wasn’t sealed tightly. Transfer the rice to a vacuum‑sealed bag or double‑bag it to prevent freezer burn, which can cause off‑flavors.
Eco‑Friendly and Budget‑Smart Practices in One‑Pan Fried Rice
Cooking sustainably doesn’t have to be a separate chore; it can be woven directly into the fried‑rice workflow. Below are practical tips that cut waste, lower cost, and still deliver a tasty plate.
- Utilize Vegetable Scraps: Save onion tops, carrot peels, and garlic skins in a freezer bag. When you have a handful, simmer them in water for 10 minutes to create a quick stock. Strain and use the liquid as a flavor boost instead of commercial broth.
- Turn Overripe Produce into Add‑Ins: Slightly wilted kale, bruised bell peppers, or soft mushrooms are perfect for the pan. Their texture softens further during cooking, and the flavors become more concentrated.
- Bulk‑Buy Staples: Purchasing rice, soy sauce, and neutral oil in larger quantities reduces per‑serving cost. Store rice in airtight containers to protect it from pests and moisture.
- Energy‑Efficient Cooking: Use a lid for the first two minutes after adding rice; the trapped heat reduces the time the burner stays on high. Remove the lid for the final toss to restore crispness.
- Zero‑Waste Garnishes: Instead of buying separate sesame seeds, toast the leftover sesame oil in a dry pan and sprinkle the resulting crumbs. Similarly, use the green onion roots to flavor soups or stocks.
Edge Cases: In regions with hard water, rice can become gummy. Rinse the rice thoroughly before cooking and consider a quick soak in filtered water. This small step prevents mineral buildup and extends the shelf‑life of your pantry rice.
Equipment Alternatives: From Woks to Air Fryers
While a non‑stick skillet is the workhorse for the base recipe, many kitchens already house other tools that can achieve comparable—or even superior—results. Below is a comparative guide to three popular alternatives.
| Tool | Heat Distribution | Pros | Cons |
|---|---|---|---|
| Carbon‑Steel Wok | Excellent, especially over high flame | Creates a pronounced wok‑hei (smoky flavor); large surface for batch cooking. | Requires seasoning; can be heavy for small stovetops. |
| Cast‑Iron Skillet | Even, retains heat well | Ideal for searing protein; naturally non‑stick when well‑seasoned. | Long pre‑heat time; not ideal for rapid temperature changes. |
| Air Fryer (large basket) | Circulates hot air, not direct contact | Minimal oil needed; hands‑free cooking once set. | Limited capacity; achieving a true “fried” texture can be tricky. |
Using a Wok: Heat the wok until a drop of water evaporates instantly. Add oil, then immediately toss the aromatics. The high heat will sear the protein in seconds, preserving juiciness. Because the wok’s sides are steep, you can push ingredients up the wall to keep the center hotter for a quick final crisp.
Cast‑Iron Strategy: Pre‑heat the skillet for 5 minutes on medium‑high. The retained heat allows you to add the rice and let it sit undisturbed for 1‑2 minutes, creating a caramelized crust that mimics the “fried” edge often missed in thinner pans.
Air Fryer Hack: Lightly coat the pre‑cooked rice with a teaspoon of oil, then spread it in a single layer in the basket. Air‑fry at 200 °C (390 °F) for 8‑10 minutes, shaking halfway. Once the rice is lightly crisp, toss it with pre‑cooked protein and sauce in a mixing bowl. This method is perfect for those who want a hands‑off approach and a reduced oil footprint.
Edge Cases: If your air fryer basket is too small, work in two batches to avoid overcrowding, which leads to steaming rather than crisping. With a wok, be cautious of “hot spots” on electric stovetops; rotate the wok continuously to distribute heat evenly.
FAQ
1. Can I use brown rice or another grain?
Yes. Brown rice adds a nutty flavor and extra fiber but requires a longer cooking time. Use day‑old brown rice, or pre‑cook it and let it cool completely before adding to the pan. Quinoa, farro, or barley work as well; just follow the same dry‑grain principle.
2. Is it safe to use raw eggs in the recipe?
Cooking the eggs until they are fully set eliminates the risk of salmonella. If you have concerns, you can substitute the eggs with silken tofu crumbles or a plant‑based scramble.
3. How do I keep the fried rice from becoming too salty?
Choose low‑sodium soy sauce and add it gradually, tasting after each addition. You can also balance salt with a splash of rice vinegar or a squeeze of citrus, which brightens the dish without extra sodium.
4. What’s the best way to reheat frozen fried rice?
Thaw the portion in the refrigerator overnight for best texture. Then reheat in a skillet with a teaspoon of oil, stirring until hot. This restores the slight crispness that microwaving alone can’t achieve.
5. Can I make this recipe vegetarian or vegan?
Absolutely. Omit animal protein and replace eggs with scrambled tofu, chickpea flour “omelet” pieces, or a store‑bought vegan scramble. Ensure the soy sauce you use is gluten‑free if needed, and add extra vegetables for protein, such as edamame or tempeh.
Related posts:
 Vegetable-Rich Dinner Ideas
 Keto Mexican Night: Cauliflower Enchiladas That Actually Taste Amazing
 15-Minute Dairy-Free Dinner Ideas
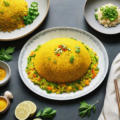 Candice Kumai’s Healthy Turmeric Fried Rice Recipe
 Delicious Ground Chicken Recipes
 Beyond Breakfast: The Plant-Based Sausage That’s Changing the Morning Game
 The Slow Beauty Movement’s Secret Hydration Recipes
 Rice Revealed: Is This Pantry Staple Actually Good for You