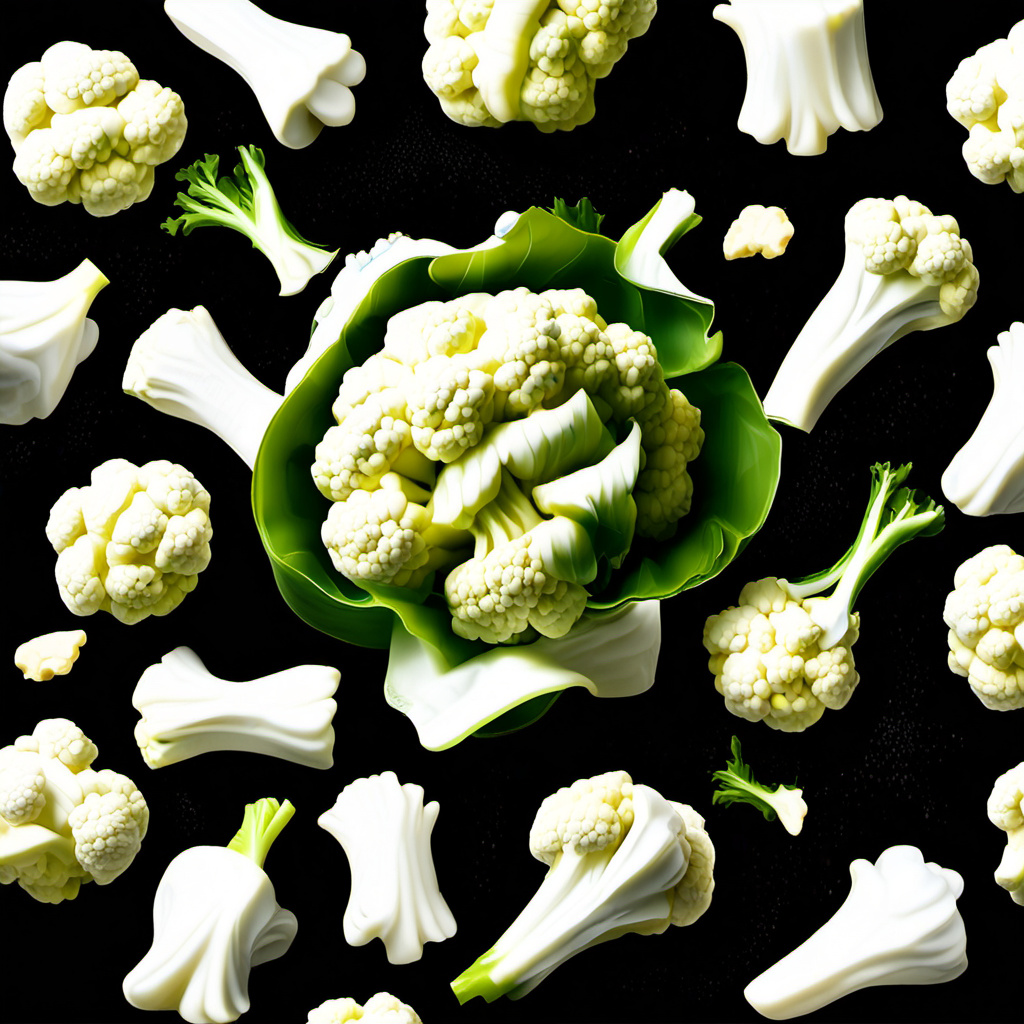
If you have ever prepared a head of cauliflower by simply hacking away at the top with a large chef’s knife, you are already familiar with the primary frustration of this versatile vegetable: the “cauliflower snow.” Within seconds, your cutting board, your countertop, and even your floor are covered in thousands of tiny, crumbly white bits that seem to defy the laws of gravity. This mess isn’t just a nuisance to clean up; it represents wasted food and damaged florets that won’t cook evenly.
Key takeaways
- Flip the cauliflower upside down and remove the central core first to let florets naturally fall away.
- Use a sharp chef's knife for the woody base and a paring knife for precision work on individual florets.
- Avoid slicing through the top of the curd to prevent crumbly debris and unevenly sized pieces.
- Snip the stems and pull florets apart by hand to maintain their natural tree-like shape.
- Don't discard leaves or stalks; peel the stalk for soups or roast the leaves like kale chips.
For years, home cooks have approached cauliflower as if it were a head of cabbage or lettuce, slicing straight through the dense canopy of the vegetable. However, cauliflower has a unique anatomical structure that requires a specific strategy. The secret to a clean, efficient, and professional-looking prep lies in understanding how the florets are attached to the central stem. By changing your perspective—literally turning the vegetable upside down—you can achieve perfect florets every time without the dreaded crumbly mess. This is the only way to cut cauliflower that actually makes sense for the modern home cook.
The Anatomy of a Cauliflower: Why Traditional Slicing Fails
To understand why the traditional “top-down” method is flawed, we have to look at how a cauliflower grows. A cauliflower is not a solid mass; it is a collection of undeveloped flower buds, known as the curd, which are all connected to a central, thick stalk. These buds are incredibly delicate. When you take a knife and slice through the top of the curd, you are essentially decapitating hundreds of these tiny buds, which results in the crumbly white debris scattered across your kitchen.
Furthermore, slicing through the top makes it nearly impossible to get uniform pieces. You end up with some large chunks, some tiny fragments, and a lot of dust. In the culinary world, uniformity is key to even cooking. If your cauliflower pieces vary wildly in size, some will turn to mush while others remain raw and crunchy. By approaching the cauliflower from the bottom—the stem side—you can bypass the delicate curds entirely and focus your cuts on the hardy branches that hold the vegetable together. This preserves the integrity of the florets and ensures they stay whole and beautiful.
The Essential Gear for Efficient Prep
Before you make your first cut, it is important to have the right tools. While you can technically cut a cauliflower with a dull steak knife, it won’t be a pleasant experience. For the most efficient prep, you should have two specific knives ready: a sharp 8-inch chef’s knife and a smaller, more nimble paring knife. The chef’s knife provides the leverage needed to handle the thick, woody base of the cauliflower, while the paring knife allows for surgical precision when separating individual florets from the core.
In addition to your knives, a large, stable cutting board is a must. Because cauliflower is round and can be prone to rolling, you need a surface that won’t slide around on your counter. A damp paper towel placed under your cutting board can provide extra stability. Finally, keep a large bowl nearby for your finished florets and a separate container for the scraps. As we will discuss later, the stems and leaves are perfectly edible and shouldn’t be tossed into the trash without a second thought.
Step 1: The Foundation and Leaf Removal
The first step in the sensible method of cutting cauliflower is to create a stable base. Place the cauliflower on your cutting board with the stem facing up. If the leaves are particularly long and obstructive, you can use your chef’s knife to trim them away or simply pull them off with your hands. Many people treat these leaves as waste, but they are actually delicious when roasted—think of them as a heartier version of kale chips.
Once the outer leaves are removed, you will have a clear view of the central stalk. This is your roadmap. Notice how the individual branches of the florets emerge from this central core. Instead of cutting through the entire head, your goal is to remove this core entirely, which will cause the cauliflower to naturally disassemble itself with very little effort. If the stem is too long to sit flat, trim a small slice off the very bottom so the cauliflower can stand upside down without wobbling.
Step 2: The Core-First Technique
With the cauliflower standing upside down, take your paring knife and insert it at an angle into the base of the central stalk. You want to cut in a circular motion around the core, much like you would remove the stem from a strawberry, but on a much larger scale. By angling the knife toward the center of the cauliflower, you are severing the connection points where the floret branches meet the main stalk.
As you complete the circle, you should be able to pull the central core straight out. If it doesn’t come easily, don’t force it; simply run your knife around the circle one more time, cutting slightly deeper. Once the core is removed, you will notice that the outer layer of florets is already beginning to fall away. This is the hallmark of the “sensible” method: the vegetable is essentially doing the work for you. You are no longer fighting against the structure of the plant; you are working with it.
Step 3: Separating the Florets with Precision
Now that the core is gone, you can easily pull the large branches of florets apart with your hands. For the larger branches that need to be broken down into bite-sized pieces, do not cut through the top. Instead, flip the branch over so the stem is facing you. Use your knife to make a small slit in the stem of the floret, and then use your fingers to gently pull the two sides apart. This technique, often called “scoring and snapping,” ensures that the florets break along their natural lines.
By snapping the florets rather than slicing through them, you maintain that iconic “tree” shape that looks so beautiful on a platter or in a bowl. This also prevents the creation of more crumbs. Continue this process until all of your cauliflower is broken down into the desired size. If you are roasting the cauliflower, aim for pieces that are roughly the size of a golf ball. For stir-fries or salads, you may want them slightly smaller.
Sizing Your Florets for Different Cooking Methods
Not all cauliflower dishes are created equal, and the way you cut your florets should reflect your intended cooking method. If you are planning to roast the cauliflower at a high temperature, you want a flat surface on each floret. This is the one time when a direct cut is beneficial. Once you have your florets separated, you can slice them in half through the stem to create a flat side. This flat surface will make direct contact with the hot baking sheet, leading to that deep, caramelized browning that makes roasted cauliflower so addictive.
If you are steaming or boiling the cauliflower for a mash, size is less important than uniformity. As long as the pieces are roughly the same size, they will cook at the same rate. For those making “cauliflower wings,” larger florets are better as they provide a substantial “meaty” bite that can stand up to heavy batters and sauces. Conversely, if you are adding raw cauliflower to a grain bowl or salad, small, dainty florets are more pleasant to eat and easier to toss with dressing.
Don’t Toss the Stalk: How to Use Cauliflower Scraps
One of the biggest mistakes in the kitchen is throwing away the cauliflower stalk and leaves. The stalk, once peeled of its tough outer skin, has a texture and flavor very similar to broccoli stems—sweet, crunchy, and mild. You can slice the peeled stalk into matchsticks for a slaw, dice it into small cubes for a soup base, or even steam and blend it along with the florets for a smoother, more nutrient-dense mash.
The leaves are equally versatile. Small, tender leaves can be tossed directly into a sauté or roast. Larger, tougher leaves can be treated like collard greens or kale; simply remove the thick midrib and thinly slice the green parts. They take on a lovely charred flavor when roasted alongside the florets. By using the entire vegetable, you are not only being more sustainable but also getting more value for your money. A single head of cauliflower can provide enough material for a main dish, a side salad, and a soup base if you use every part of it.
Preparing Cauliflower Steaks Without the Crumble
If you want to make cauliflower “steaks,” the approach is slightly different, but the principle of preserving the core remains. To get a steak that doesn’t fall apart, you actually need the core to stay intact. Start with a whole, trimmed head of cauliflower. Instead of removing the core, you will slice the entire head into 1-inch thick planks, starting from the center and working your way out.
Only the center two or three slices will remain held together by the core; these are your “steaks.” The outer edges will naturally fall away into florets, which you can save for another use. The key to a successful cauliflower steak is thickness. If you cut them too thin, they will become flimsy and break when you try to flip them in the pan. A one-inch thickness is the “goldilocks” zone—thick enough to be hearty and hold its shape, but thin enough to cook through before the outside burns.
Washing and Storing Your Cut Cauliflower
Once your cauliflower is cut into perfect, crumb-free florets, it needs to be cleaned. Because cauliflower grows close to the ground and has many nooks and crannies, it can harbor dirt or small insects. The best way to wash it is to place the cut florets in a large bowl of cold water with a pinch of salt. Swish them around vigorously and let them sit for a few minutes. The salt will help dislodge any hidden debris. Drain the florets in a colander and pat them dry with a clean kitchen towel.
If you aren’t using the cauliflower immediately, storage is key. Cut cauliflower has a much shorter shelf life than a whole head. To keep it fresh, store the dry florets in a sealed container or a zip-top bag with a paper towel tucked inside to absorb excess moisture. They will stay crisp for about 3 to 5 days. If you find yourself with more cauliflower than you can eat, you can freeze it. However, you must blanch it first. Boil the florets for 2 minutes, immediately plunge them into an ice bath, dry them thoroughly, and then freeze them in a single layer on a baking sheet before transferring them to a freezer bag. This prevents the cauliflower from becoming mushy when you eventually thaw and cook it.
Troubleshooting Common Cauliflower Cutting Mistakes
Even with the best intentions, things can go wrong. If you find that your cauliflower is still creating a mess, check your knife. A dull knife requires more pressure, which crushes the cells of the cauliflower rather than slicing through them. If you find your florets are turning brown shortly after cutting, this is likely due to oxidation. To prevent this, you can toss the cut florets in a little lemon juice or vinegar, though this is usually only necessary if you plan to serve them raw or wait several hours before cooking.
Another common mistake is trying to work with a cauliflower that is past its prime. If the head has many dark brown spots or feels soft and rubbery, it will be much harder to cut cleanly. Look for cauliflower that is heavy for its size, with tightly packed curds and bright green leaves. A fresh, firm cauliflower is much more structurally sound and will respond better to the core-removal technique. If you do have a few small brown spots, don’t worry; you can easily scrape them off with a microplane or a paring knife before you start your main cuts.
Creative Ways to Use Your Perfectly Cut Cauliflower
Now that you have mastered the art of the perfect cut, the culinary possibilities are endless. Beyond the standard roasted side dish, consider using your florets for cauliflower “buffalo wings.” The florets provide the perfect surface area for spicy sauce and blue cheese dressing. You can also pulse your florets in a food processor to create “rice,” which serves as a low-carb base for stir-fries or burrito bowls. Because you used the sensible cutting method, your rice will be made of whole floret pieces rather than the “dust” created by improper cutting.
For a sophisticated appetizer, try pickling your small florets with turmeric, mustard seeds, and vinegar. The cauliflower stays remarkably crunchy and absorbs the vibrant yellow hue of the turmeric. You can also shave raw florets thinly using a mandoline to create a crunchy, sophisticated slaw that pairs beautifully with grilled fish or chicken. The goal of mastering the cut is to make the preparation so easy that you feel inspired to experiment with this incredibly versatile vegetable in ways you never considered before.
Advanced Slicing: Shaving and Carpaccio Techniques
While the floret is the most common form of cauliflower, the culinary world has recently embraced the beauty of the longitudinal shave. This technique transforms the dense, crunchy vegetable into delicate, translucent ribbons that are perfect for raw salads or elegant garnishes. To achieve this without the vegetable shattering, you must start with a whole, chilled head of cauliflower. The cold temperature firms up the cellular structure, making it less likely to crumble under the pressure of a blade.
Using a mandoline is the most efficient way to achieve these paper-thin slices. Set your mandoline to its thinnest setting—roughly one-sixteenth of an inch. Grip the cauliflower by the stem (which acts as a natural handle) and run the curd side across the blade. You will get beautiful, cross-sectional shavings that look like tiny white trees. If you find the head is too large to handle safely, cut it in half through the core first, then use the flat, cut surface against the mandoline. This provides more stability and reduces the risk of the vegetable slipping. These shavings can be tossed with lemon juice, high-quality olive oil, and shaved parmesan for a sophisticated cauliflower carpaccio that highlights the vegetable’s natural nuttiness.
If you do not own a mandoline, you can achieve a similar effect with a very sharp chef’s knife. The key is to use a long, drawing motion rather than a downward chop. Place the cauliflower flat-side down on the board and slice as thinly as possible. Because you are cutting across the grain of the florets, you will still encounter some “snow,” but the resulting ribbons are worth the extra cleanup. These thin slices are also excellent for quick-pickling, as the increased surface area allows the vinegar and spices to penetrate the vegetable in a matter of minutes rather than hours.
Handling Specialized Varieties: Romanesco, Purple, and Orange
Not all cauliflower is created equal, and the rise of heirloom and colorful varieties in grocery stores requires a slight adjustment to your cutting strategy. Romanesco, with its striking lime-green color and fractal patterns, is significantly denser and more fibrous than standard white cauliflower. When cutting Romanesco, you must follow the natural spirals. Instead of a circular cut around the core, you should spiral your knife inward, following the lines of the conical florets. Because Romanesco is pointier, the tips are even more prone to breaking; use a lighter touch and ensure your paring knife is at its sharpest.
Purple and orange cauliflowers are generally similar in structure to white varieties, but they have unique chemical properties that affect how you should handle them post-cut. Purple cauliflower gets its color from anthocyanins—the same antioxidants found in red wine and blueberries. These pigments are water-soluble. If you cut purple cauliflower and then soak it in water for too long, you will notice the color leaching out, leaving you with a dull, greyish vegetable. To preserve the vibrant hue, cut it dry and use a quick rinse rather than a soak. Orange cauliflower, on the other hand, contains high levels of beta-carotene. It is slightly softer and creamier in texture than white cauliflower, meaning it can easily be crushed if you use a heavy-handed chopping motion. Treat orange cauliflower with the same delicacy you would a ripe fruit to maintain the integrity of the florets.
The Manual Rice Method: Beyond the Food Processor
Cauliflower rice has become a staple for those seeking low-carb alternatives, but many people find that using a food processor turns the vegetable into a wet, mushy paste. To get a distinct, grain-like texture, manual cutting is often superior. Using the “sensible” method of removing the core first, take your large florets and prepare to transform them into rice. There are two primary manual ways to do this: the box grater method and the hand-chopping method.
For the box grater method, use the side with the largest holes. Hold a large floret by the stem—this is why keeping the stems long during your initial breakdown is beneficial—and grate the curd side against the holes. The stem acts as a safety guard for your fingers. Stop when you reach the stem, then finely dice the remaining stem with a knife to ensure no waste. For the hand-chopping method, take your cleaned florets and slice them into thin planks. Stack a few planks at a time and cut them into thin matchsticks (julienne), then turn the matchsticks and cut them into tiny cubes (brunoise). While this takes longer than a machine, the resulting “rice” is uniform, dry, and has a much better mouthfeel when sautéed, as it retains its structural integrity instead of releasing all its moisture at once.
Maximizing Surface Area for the Maillard Reaction
If your goal is a deep, savory char, the way you cut the cauliflower is the most important factor in the success of the dish. The Maillard reaction—the chemical reaction between amino acids and reducing sugars that gives browned food its distinctive flavor—requires direct contact with a heat source. When you leave cauliflower in its natural, rounded floret shape, only a tiny fraction of the vegetable touches the pan or roasting sheet. To maximize browning, you need to create artificial flat surfaces.
After you have separated your florets using the core-removal method, look at each piece. Most will be somewhat spherical. Take your chef’s knife and slice each floret in half, or even into thirds, through the vertical axis (from the top of the curd down through the stem). This creates two perfectly flat faces on every single piece. When you toss these in oil and place them flat-side down on a preheated baking sheet, the entire surface area of that cut will caramelize. This technique effectively doubles the amount of browned, flavorful bits in your final dish. For even more surface area, you can “crag” the cauliflower. This involves using a knife to score the flat surface in a cross-hatch pattern about an eighth of an inch deep. These tiny crevices catch oil and seasonings, and the thin edges of the scores will crisp up into dark, crunchy ridges that provide a spectacular textural contrast to the tender interior.
Large-Scale Prep and Batch Processing
When preparing cauliflower for a large crowd or for a week of meal prep, the standard one-head-at-a-time approach can feel tedious. To scale your efficiency, adopt an assembly-line mentality. Start by lining up all your heads of cauliflower. Instead of finishing one head completely, perform the same action on all of them in sequence. First, use a large chef’s knife to lop off the very bottom of every stem so they all stand upright. Next, go down the line and strip the outer leaves from every head.
Once the heads are prepped, move to the core removal. By doing all the cores at once, you develop a rhythmic muscle memory that speeds up the process. After the cores are out, place all the “hollow” heads into a large basin of water. This allows you to wash the entire head’s worth of florets at once while they are still somewhat held together by their outer structure. Finally, pull the heads out and break them down into florets into a single large container. If you are prepping for a restaurant or a large event, keep the florets slightly larger than bite-sized. They are easier to store and transport when they are larger, and you can perform a final quick cut right before cooking. To prevent the cut edges from drying out during long-term storage, cover the container with a damp cloth rather than an airtight lid, which allows the vegetable to breathe while maintaining humidity.
Preserving the Crunch: Fermentation and Brining Prep
Cutting cauliflower for fermentation, such as for a traditional giardiniera or a spicy kimchi, requires a different mindset regarding size and density. Because the cauliflower will be sitting in an acidic or salty brine for days or weeks, it will naturally soften. If you cut the florets too small, they will lose their crunch and become unpleasantly soft. For fermentation, you want “sturdy” florets—meaning you should leave more of the stem attached than you would for a stir-fry.
The stem is the densest part of the floret and takes the longest to break down, so it acts as the structural backbone of your ferment. When cutting for this purpose, aim for florets that are about two inches long, with at least an inch of that being the stem. Furthermore, avoid the “flat-face” cutting method used for roasting. You want the natural, rounded curd to remain intact, as the tiny crevices between the buds are where the beneficial bacteria and spices will congregate. If you are making a fermented mash or a cauliflower-based kraut, you can use the manual ricing method described earlier, but be sure to include the finely diced core. The core contains the highest concentration of sugars, which feed the lactobacillus bacteria and result in a faster, more robust fermentation process.
The “Hidden” Cuts: Preparing for Smooth Purées and Sauces
When cauliflower is destined to be blended into a silky purée or a vegan “cheese” sauce, the aesthetic beauty of the floret is irrelevant, but the way you cut it still affects the final texture. The goal here is to minimize the cooking time to prevent the cauliflower from developing a sulfurous, overcooked smell. To do this, you want to create as much surface area as possible for the cooking liquid (milk, broth, or water) to penetrate.
Instead of pretty florets, you should aim for thin, irregular shards. Start by quartering the head through the core. Then, using a chef’s knife, shave the quarters into thin slices, roughly a quarter-inch thick. This is often called the “rough chop,” but it should still be intentional. By slicing through the stems and the curds equally, you ensure that everything softens at the same rate. If you leave large chunks of stem and tiny bits of curd, the curd will dissolve into the liquid while the stem remains grainy, leading to a lumpy purée. Once the shards are fork-tender, they will blend into a perfectly homogenous cream. If you find that your purée is still slightly gritty, it is likely because the woody outer layer of the main stalk wasn’t peeled deeply enough. Always take the extra ten seconds to shave off the outermost eighth-of-an-inch of the main stem before slicing it for a sauce; that fibrous skin will never fully break down, no matter how powerful your blender is.
FAQ: Mastering Cauliflower Prep
1. Why is my cauliflower always so messy when I cut it?
The mess is usually caused by cutting through the top of the florets (the curd). When the knife hits those tiny flower buds, they shatter into small crumbs. To avoid this, always cut from the stem side or the bottom. By severing the branches at the base rather than the top, you keep the florets intact and your counter clean.
2. Can I really eat the leaves and the stem?
Yes, absolutely! The leaves and the stem are not only edible but delicious. The stem has a mild flavor similar to the florets but with a crunchier texture once the woody outer skin is peeled away. The leaves can be roasted until crispy or sautéed like spinach. Using the whole vegetable reduces waste and adds different textures to your meals.
3. What is the best knife to use for cutting cauliflower?
A combination of a sharp chef’s knife and a paring knife is ideal. Use the chef’s knife for the heavy lifting, like trimming the base or cutting the head in half if it’s very large. Use the paring knife for the delicate work of circling the core and separating the individual florets. Sharpness is key; a dull knife will crush the vegetable and create more mess.
4. How do I make sure my cauliflower florets cook evenly?
Uniformity is the secret to even cooking. When you break down your cauliflower, try to ensure that all the pieces are roughly the same size. If you have some very large florets and some small ones, the small ones will overcook and become mushy by the time the large ones are tender. If you have a large floret, use the “score and snap” method to break it into smaller, uniform pieces.
5. How should I store cauliflower after it has been cut?
Cut cauliflower should be stored in an airtight container or a resealable bag in the refrigerator. To prevent it from getting soggy, place a dry paper towel inside the container to absorb any moisture that the vegetable releases. It will typically stay fresh for 3 to 5 days. For longer storage, blanching and freezing is the best option.
Related posts:
 Fall Cauliflower Recipes You’ll Love
 Creative Cauliflower Recipe Collection
 The Best Carving Knives for a Picture-Perfect Thanksgiving Turkey
 Keto Mexican Night: Cauliflower Enchiladas That Actually Taste Amazing
 How to Propagate Succulents
 Vegetable-Rich Dinner Ideas
 The Essential Knives Every Home Cook Needs in Their Kitchen
 From Salads to Pasta: The Versatile Veggie That Tastes Like Everything