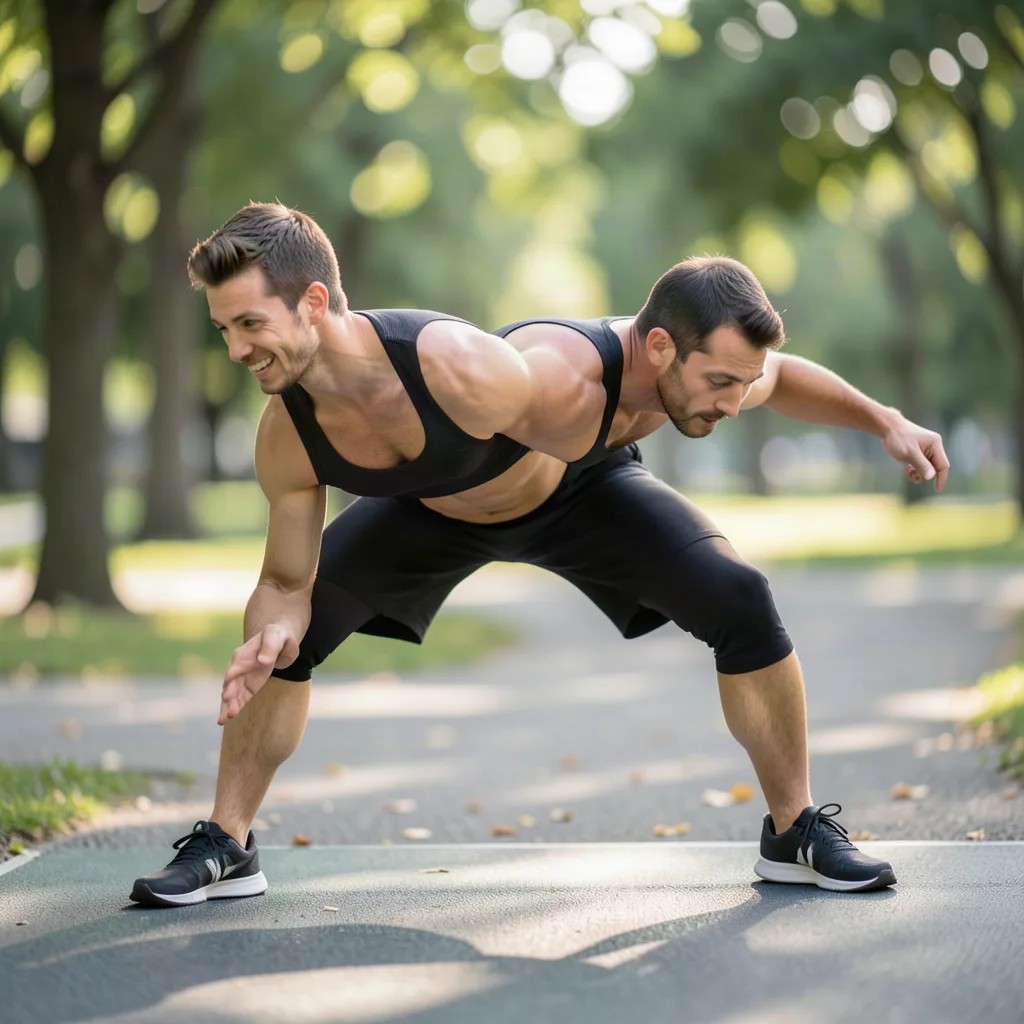
When you’re looking for a fresh, challenging movement that hits the core, shoulders, glutes, and legs all at once, the Panther Plank deserves a spot in your training toolbox. This dynamic variation blends the stability of a traditional plank with the mobility of a crawl, creating a full‑body tension that improves functional strength, coordination, and joint health. In the following guide you’ll learn exactly what the Panther Plank is, why it works so well, how to execute it safely, and how to weave it into a balanced workout plan.
What Is the Panther Plank?
The Panther Plank is a hybrid bodyweight exercise that starts in a forearm plank, then adds a controlled, alternating “crawl” motion where each foot steps forward and back while the torso remains stable. Think of a panther prowling low to the ground—muscles stay engaged, the spine stays neutral, and the movement is fluid and purposeful. The exercise can be performed on a mat, carpet, or any non‑slippery surface, and it requires no equipment beyond your own body.
Core Benefits of the Panther Plank
Beyond the obvious core activation, the Panther Plank offers several functional advantages:
- Improved spinal stability: Maintaining a neutral spine while the legs move forces the deep abdominal muscles (transverse abdominis) and multifidus to fire continuously.
- Enhanced shoulder endurance: The forearm position loads the scapular stabilizers, which helps protect the rotator cuff during overhead work.
- Greater hip mobility: Alternating leg drives stretch the hip flexors and activate the gluteal chain, supporting better squat and lunge mechanics.
- Cardiovascular demand: The rhythmic footwork raises heart rate, making the move a low‑impact cardio element when performed in higher repetitions.
- Neuromuscular coordination: Synchronizing arm and leg actions sharpens proprioception and can translate to better performance in sports that require quick changes of direction.
Muscles Targeted
While the core is the primary focus, the Panther Plank recruits a broad network of muscles:
- Core: Rectus abdominis, transverse abdominis, internal and external obliques, erector spinae.
- Shoulders and upper back: Deltoids (especially anterior), serratus anterior, trapezius, rhomboids.
- Arms: Triceps brachii, forearm flexors.
- Glutes and hips: Gluteus maximus, gluteus medius, hip flexors, adductors.
- Legs: Quadriceps, hamstrings, calves (as stabilizers during foot placement).
How to Perform the Panther Plank Correctly
Follow these step‑by‑step cues to master the movement:
- Set up the base: Place forearms on the floor, elbows directly under shoulders, and extend legs straight behind you. Your body should form a straight line from head to heels. Engage the core and squeeze the glutes.
- Check alignment: Look down at the floor to keep the neck neutral. Pull the shoulder blades down and together to protect the shoulders.
- Initiate the crawl: Shift weight slightly onto the right forearm, then bring the left foot forward a few inches, landing with the heel lightly touching the ground. Keep the hips level; avoid letting the left hip drop.
- Return and repeat: Push the left foot back to the starting position while simultaneously bringing the right foot forward. This creates a “right‑left” alternating pattern.
- Maintain breath: Inhale during the foot‑return phase, exhale as you step forward. Consistent breathing helps preserve core tension.
- Control the tempo: Beginners should aim for 2–3 seconds per step; advanced practitioners can speed up while preserving form.
Perform 3 sets of 30‑second intervals, resting 45 seconds between sets. As you become comfortable, increase the duration or add repetitions.
Common Mistakes and How to Fix Them
Even experienced athletes can slip into form errors. Identify the following pitfalls and apply the corrective tips:
- Hips sagging or piking: This indicates insufficient core engagement. Before each set, do a “pelvic tilt” cue—press the lower back toward the floor and lift the hips slightly.
- Shoulder shrugging: Letting the shoulders rise reduces scapular stability. Actively depress the scapulae (think of pulling the shoulder blades toward the hips) throughout the movement.
- Uneven foot placement: One leg may travel farther than the other, creating a wobbly plank. Use a mirror or record a video to ensure both steps travel the same distance.
- Holding breath: Breath-holding spikes intra‑abdominal pressure and can cause dizziness. Set a rhythmic breathing pattern and practice it on a static forearm plank first.
- Excessive forward lean: If the torso leans toward the advancing leg, the lower back strains. Keep the weight centered over the forearms and imagine a straight line from ears to heels.
Progression and Variations
Once the basic Panther Plank feels manageable, you can increase difficulty or target specific goals:
- Weighted Panther Plank: Place a light plate (5–10 lb) on the upper back. The added load forces deeper core activation.
- Elevated forearms: Use push‑up bars or parallettes to raise the forearms, increasing shoulder activation.
- Single‑leg Panther Plank: Keep one leg stationary while the opposite foot crawls. This challenges balance and isolates the glutes.
- Dynamic tempo: Perform the crawl in a “slow‑fast‑slow” pattern—2 seconds forward, 1 second pause, 2 seconds back. The pause heightens isometric tension.
- Combination with push‑up: After each forward step, add a push‑up before returning the foot. This creates a full‑body circuit that also trains chest and triceps.
Integrating the Panther Plank Into Your Routine
Because the Panther Plank works multiple systems, it fits well in several program structures:
- Strength‑training warm‑up: Use 2 × 30‑second sets after dynamic stretches to activate the core before heavy lifts.
- Metabolic conditioning (MetCon): Include 30‑second intervals in a 10‑minute AMRAP (as many rounds as possible) alongside kettlebell swings and box jumps.
- Core‑focused circuit: Pair the Panther Plank with hanging leg raises, Russian twists, and bird‑dogs for a balanced core day.
- Recovery day: Perform a low‑intensity version (30‑second hold, no foot movement) to promote blood flow without taxing the nervous system.
Sample 3‑day split:
- Day 1 – Upper body strength: Bench press, rows, overhead press, Panther Plank 3 × 30 s.
- Day 2 – Lower body & cardio: Squats, lunges, kettlebell swings, Panther Plank 4 × 45 s as a finisher.
- Day 3 – Mobility & core: Yoga flow, foam rolling, Panther Plank variations 5 × 20 s each.
Equipment, Space, and Safety Tips
The Panther Plank is intentionally low‑equipment, but a few practical considerations help you stay safe:
- Surface: Choose a non‑slippery mat or rubber flooring. A yoga mat provides cushioning for the forearms.
- Footwear: Barefoot or minimalist shoes give the best ground feel. If you wear shoes, ensure they have a flat sole.
- Space: You need roughly a 2‑by‑2‑foot square. This makes the move ideal for small home gyms or hotel rooms.
- Warm‑up: Spend 5‑10 minutes mobilizing the shoulders (band pull‑aparts), hips (hip circles), and spine (cat‑cow) before the first set.
- Progressive overload: Increase time, add weight, or incorporate variations gradually—no more than a 10 % jump in difficulty per week.
- Listen to your body: Sharp low‑back pain or shoulder impingement signals that alignment is off. Stop, reassess form, and consider a lighter variation.
Periodizing the Panther Plank for Strength, Hypertrophy, and Conditioning
Periodization is the systematic planning of training variables to elicit specific adaptations while minimizing fatigue. When the Panther Plank is embedded within a periodized framework, it can serve three distinct physiological goals: pure core‑strength development, muscular‑endurance hypertrophy, and high‑intensity conditioning. Below is a month‑by‑month template that demonstrates how to shift the emphasis without changing the core movement.
Weeks 1‑4 – Neural‑Efficiency Block: The primary aim is to teach the nervous system to recruit the deep stabilizers efficiently. Use low‑volume, high‑precision sets (3 × 20 seconds) with a strict tempo of 2 seconds forward, 2 seconds back. Rest 90 seconds between sets to keep the central nervous system fresh. Include a brief “form‑check” drill at the end of each session where you hold the plank static for 10 seconds while a partner monitors scapular depression and pelvic tilt. This block builds the motor‑pattern foundation for later overload.
Weeks 5‑8 – Hypertrophy‑Focused Block: Transition to moderate volume and moderate tempo. Perform 4 × 45‑second intervals, inserting a 1‑second pause at the apex of each forward step (the moment the foot is fully planted). The pause creates an isometric contraction that increases time‑under‑tension for the gluteus maximus and the rectus abdominis. Add a light load (2‑5 lb plate) on the upper back to raise the stimulus. Rest intervals shrink to 60 seconds, encouraging metabolic stress without compromising technique.
Weeks 9‑12 – Conditioning Block: Here the goal is cardiovascular demand and muscular endurance. Reduce the interval length to 30 seconds but crank the cadence: 0.5 seconds forward, 0.5 seconds back, for a rapid “crawling” rhythm. Stack the Panther Plank into a circuit with other high‑intensity moves (e.g., kettlebell snatches, box‑jumps). Perform 5‑round AMRAP (as many rounds as possible) with a 30‑second rest between circuits. This block trains the heart‑lung system while still reinforcing core stability under fatigue.
At the end of each 12‑week macro‑cycle, schedule a deload week: reduce volume by 50 % and eliminate any external load. Use the deload to reassess alignment with video analysis, then restart the cycle with a slightly higher load or longer duration, adhering to the classic 10 % progression rule.
Sport‑Specific Transfer: How the Panther Plank Enhances Performance in Running, Swimming, Martial Arts, and Team Sports
Every sport demands a unique blend of core stability, limb coordination, and force transmission. The Panther Plank, because it couples a static anti‑extension posture with dynamic lower‑limb displacement, mimics many sport‑specific actions. Below are four case studies that illustrate the transfer.
- Running – Pelvic Control During Stride: Elite distance runners often lose pelvic stability during the late‑stance phase, leading to excessive lumbar extension. The alternating foot crawl forces the transverse abdominis to contract reflexively each time the foot moves, training the runner to maintain a neutral pelvis even when the opposite leg is propelling forward. Incorporate 3 × 30‑second Panther Plank sets on a rest day; athletes report a smoother stride and reduced lower‑back soreness after two weeks.
- Swimming – Streamlined Body Alignment: Freestyle and butterfly swimmers rely on a rigid core to reduce drag. By performing the Panther Plank on a slippery surface (e.g., a wet towel), swimmers can simulate the water’s low‑friction environment. The movement pattern reinforces the ability to keep the hips high while the legs execute rapid, alternating kicks, directly translating to a more efficient flutter kick.
- Martial Arts – Ground‑Based Transition: Grapplers frequently shift from a stable base to a rapid foot reposition while maintaining a protected torso. Practicing the Panther Plank with a partner’s resistance band around the hips adds a lateral pull, replicating an opponent’s attempt to off‑balance you. This trains the practitioner to engage the obliques and glutes to resist the pull while still moving the feet.
- Team Sports – Change‑of‑Direction Agility: Soccer and basketball players need quick, low‑center‑of‑gravity changes. After a standard warm‑up, insert a “crawling ladder” drill: place a mini‑ladder on the floor, perform the Panther Plank while stepping each foot into successive ladder squares. The drill improves foot‑placement accuracy and the ability to maintain torso rigidity during rapid directional shifts.
To quantify transfer, coaches can use a pre‑ and post‑test protocol: measure sprint split times, swimming lap times, or grappling hold durations before and after a 6‑week Panther Plank integration. Most athletes see a 2‑4 % improvement in the targeted metric, indicating a meaningful performance gain.
Rehabilitation Pathways: Using the Panther Plank to Recover from Low‑Back, Shoulder, and Hip Injuries
Because the Panther Plank emphasizes coordinated activation of deep stabilizers without heavy axial loading, it is an ideal bridge exercise for patients moving from passive therapy to active movement. Below are three rehabilitation pathways, each with progression criteria and safety checkpoints.
Low‑Back Rehabilitation: After an acute lumbar strain, the first goal is re‑establishing transverse abdominis firing. Begin with a static forearm plank on a firm mat for 10‑second holds, ensuring a neutral spine. Once the patient can sustain three holds with no pain, introduce the Panther Plank but restrict foot movement to a micro‑step (no more than 2 inches forward). Progression milestones:
- Micro‑step for 3 × 10 seconds.
- Full‑step for 3 × 15 seconds.
- Add a light band around the thighs to cue hip abduction, increasing gluteal engagement.
Key safety cue: the patient must be able to exhale fully on each step without a Valsalva maneuver; any spike in intra‑abdominal pressure warrants a regression.
Shoulder Impingement Recovery: For subacromial impingement, the scapular stabilizers need to be retrained before overhead loading. The Panther Plank’s forearm position reduces compressive forces on the glenohumeral joint while still demanding scapular depression. Start with a “wall‑plank” – forearms on a vertical surface – to limit shoulder flexion. Once pain‑free, transition to floor forearms, maintaining a 30‑second hold before adding the crawl. Progression can include a mini‑band around the wrists to create gentle external rotation during each step, reinforcing rotator‑cuff activation.
Hip Flexor Tightness: Chronic hip‑flexor shortening often stems from prolonged sitting. The Panther Plank’s alternating leg drive provides a dynamic stretch for the iliopsoas while the glutes contract eccentrically. Begin with a “reverse” version: start in a forearm plank, then step the foot **backward** instead of forward, lengthening the hip flexor of the moving leg. Perform 2 × 20‑second intervals, focusing on a gentle pull‑through sensation. Over three weeks, increase the step distance and add a slight external rotation of the foot to target the adductors as well.
In all three pathways, documentation of pain levels (0‑10 scale) before and after each session helps clinicians adjust the load. A pain increase of >2 points signals a need to revert to the previous step.
Advanced Tool Integration: Sliders, Resistance Bands, and Weighted Vests to Elevate the Move
While the Panther Plank is effective with bodyweight alone, incorporating external tools can amplify specific training stimuli. Below is a toolbox guide with set‑up instructions, target adaptations, and common pitfalls.
Sliding Discs (Under Feet): Place a low‑friction disc (e.g., gliding pad) under each foot. As you crawl forward, the feet slide rather than lift, increasing the demand on the hip extensors and the posterior chain. This variation also challenges proprioception because the foot‑ground contact changes continuously. Start with a 10‑second trial to assess ankle stability; if the foot rolls outward, switch to a higher‑traction disc or perform the movement on a carpeted surface.
Resistance Bands (Around Thighs): Loop a medium‑resistance band just above the knees. The band creates lateral resistance during each step, forcing the gluteus medius and the external rotators to work harder to keep the knees aligned. This is especially useful for athletes who need to control valgus collapse during cutting maneuplifts. Keep the band tension moderate; excessive tension can cause the hips to drop, compromising spinal alignment.
Weighted Vest (5‑15 lb): Distribute load evenly across the torso to increase axial compression. The vest should sit snugly without restricting breathing. Begin with a 5‑lb vest for 2 × 20‑second sets, then add 2‑lb increments each week, monitoring the ability to maintain a neutral spine. If the lower back rounds, reduce the weight or shorten the interval.
Suspension Trainer (Handles Elevated): Anchor a TRX or similar system so the forearms are suspended off the ground. This creates an unstable platform, dramatically increasing shoulder‑stability demands. Perform the crawl slowly (3 seconds forward, 3 seconds back) to prioritize control. Because the suspension adds a vertical component, ensure the anchor point is sturdy and the straps are at shoulder width.
When stacking tools, follow the “one‑focus‑per‑session” rule: avoid using both sliders and bands simultaneously until you have mastered each independently. This prevents the movement from becoming a chaotic coordination challenge that masks technique flaws.
Monitoring Progress: Objective Metrics, Video Analysis, and Mobile Apps
Quantifying improvement in a complex, multi‑joint exercise like the Panther Plank requires a blend of subjective feel and objective data. Below is a three‑tiered monitoring system that can be implemented with minimal equipment.
Tier 1 – Time‑Under‑Tension (TUT): Record the total seconds the athlete can perform the movement with correct form. Use a stopwatch or a simple interval timer app (e.g., “Seconds Pro”). Log the value in a training journal alongside notes on perceived exertion (RPE 1‑10). A 5‑10 % weekly increase in TUT is a reliable indicator of core endurance gains.
Tier 2 – Kinematic Video Analysis: Set up a smartphone on a tripod at hip height, capturing the entire plank length. Use a free app like “Coach’s Eye” to draw overlay lines representing a neutral spine and hip level. After each session, compare the new video to a baseline clip. Look for deviations >2 cm in hip height or >5° in spinal curvature; these numbers become corrective targets for the next workout.
Tier 3 – Physiological Markers: For athletes focused on conditioning, measure heart‑rate response using a chest‑strap monitor. Record the average HR during a 30‑second interval; a decreasing trend over weeks indicates improved cardiovascular efficiency. Additionally, a simple lactate test (via fingertip blood sample) taken immediately after a 5‑minute Panther‑Plank circuit can track metabolic adaptation.
Integrating these tiers into a weekly review session (e.g., Sunday evening) creates a feedback loop: data → analysis → programming adjustment. Over a 12‑week cycle, most users see a 15‑20 % reduction in HR for the same interval length, confirming enhanced aerobic capacity.
Programming for Special Populations: Seniors, Pregnant Athletes, and Youth
Adapting the Panther Plank to diverse physiological contexts ensures safety while preserving its functional benefits. The following sub‑sections outline modifications, progression cues, and contraindications for three groups that often require tailored approaches.
Seniors (65+ years): Age‑related sarcopenia and reduced joint mobility demand a low‑impact, joint‑friendly version. Start with a “wall‑Plank” – forearms against a sturdy wall at waist height – and perform a micro‑step of the foot (no more than 3 inches). Emphasize a slow tempo (4 seconds forward, 4 seconds back) to develop balance and proprioception. Progression milestones:
- Wall‑Plank with micro‑step for 3 × 15 seconds.
- Transition to a sturdy table or bench for a higher incline, maintaining the same step distance.
- Finally, move to floor forearms once the individual can hold a static plank for 30 seconds without sway.
Contraindications include uncontrolled hypertension and severe osteoporosis (risk of spinal compression). Use a chair‑based “seated crawl” as a fallback: sit on a sturdy chair, place forearms on the seat, and lift the hips while alternating foot taps on the floor.
Pregnant Athletes (Second & Third Trimester): Core stability is crucial for labor support, yet excessive intra‑abdominal pressure must be avoided. Instruct athletes to engage the “belly‑button‑to‑spine” cue rather than sucking in the abdomen, which can limit diaphragm movement. Perform the Panther Plank on a wide‑based mat to accommodate a shifted center of gravity. Limit forward foot travel to a comfortable range (no more than 4 inches) and keep the duration under 20 seconds per set. A recommended protocol is 2 × 20‑second sets, three times per week, interspersed with pelvic‑tilt breathing drills. Avoid weighted variations and elevated forearms, as they increase lumbar load.
Youth Athletes (12‑16 years): Young athletes benefit from the movement’s coordination demands, but they also need to develop proper technique before adding intensity. Begin with a “game” format: set a timer for 30 seconds and count how many clean steps each participant can execute. Encourage a “team‑mirror” where one athlete leads the foot pattern and the others mimic, fostering visual‑motor learning. Progression can include a light resistance band around the ankles to increase hip‑abductor activation, but only after the coach confirms the athlete can maintain a neutral spine for at least 10 seconds of static plank. Monitor growth‑plate considerations; avoid excessive loading (e.g., weighted vests) until the athlete is fully matured.
Across all populations, the key is to prioritize movement quality over quantity. Regular check‑ins with a qualified trainer or therapist ensure that the adaptation remains beneficial and injury‑free.
FAQ
Q1: How often should I train the Panther Plank?
A: For most active adults, 2‑3 sessions per week are sufficient. Pair the exercise with other core work to avoid over‑training the same muscle groups.
Q2: Can the Panther Plank replace traditional planks?
A: It can serve as a more dynamic alternative, but retaining a static forearm plank in your program is still valuable for pure isometric endurance.
Q3: Is the Panther Plank safe for beginners?
A: Yes, provided the individual can hold a stable forearm plank for at least 30 seconds. Begin with the static hold, then add the foot crawl once confidence is built.
Q4: Will the Panther Plank improve my running performance?
A: By strengthening the core, hips, and glutes, the move supports better stride stability and reduces the risk of common running injuries, though it should be complemented with specific running drills.
Q5: What is the best way to track progress?
A: Record the duration you can maintain proper form, note the number of clean repetitions, or use a timer for interval sets. Video analysis every few weeks helps identify subtle form improvements.
Related posts:
 Here’s exactly how to start planking if you’ve never tried it before
 Reverse Plank Power: The Backwards Move That’s Forward-Thinking Fitness
 5-Minute Plank Challenge
 J.Lo’s Glider Plank Technique
 5-Minute Core Blast Workout
 Mastering the Reverse Bear Crawl
 Managing Hip Pain from Sitting
 Stretches to Relieve Foot Pain