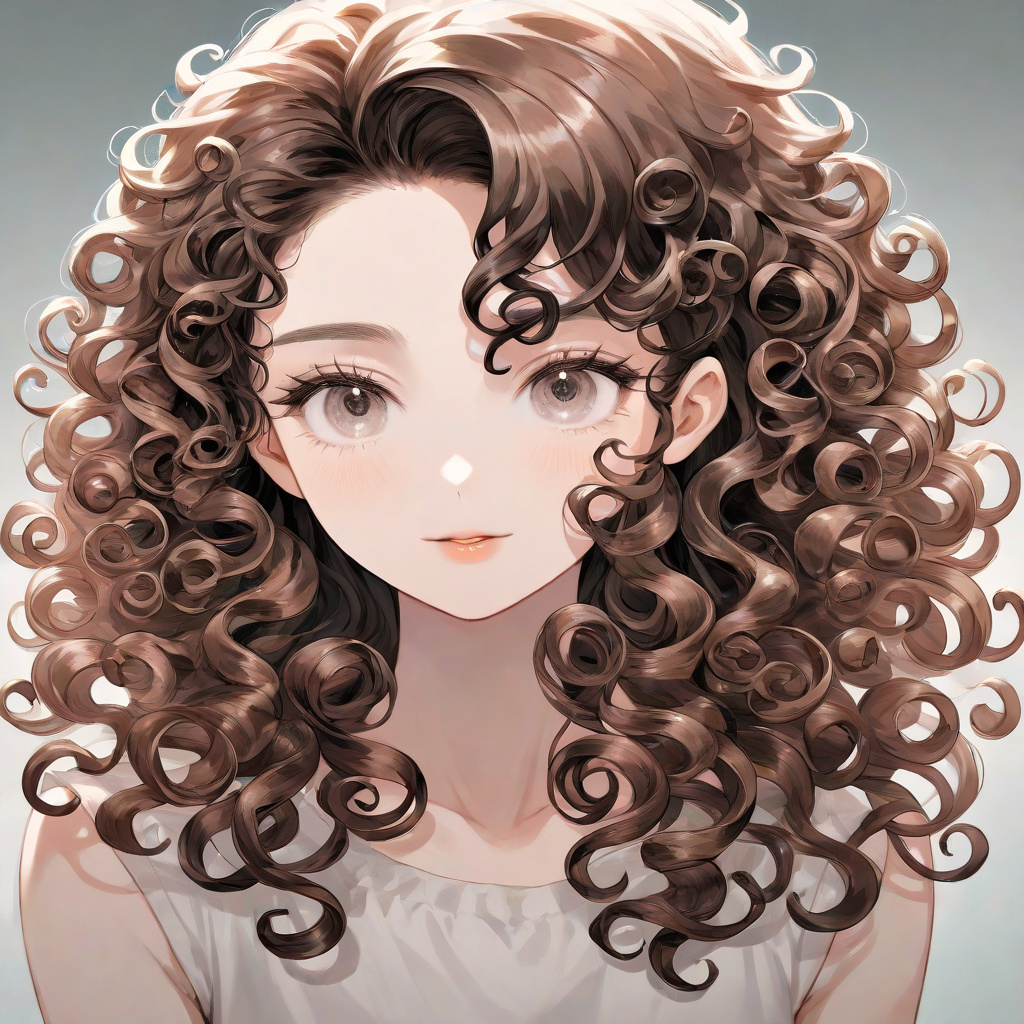
If you have curly hair, you know the struggle is real. One day your curls are bouncing with definition, and the next they’re a frizzy mess that no amount of product seems to tame. Building a consistent curly hair routine isn’t about following trends or buying every product on the shelf. It’s about understanding your unique curl pattern, giving your hair what it actually needs, and sticking with it long enough to see results.
Key takeaways
- Use sulfate-free shampoos or co-wash with conditioner to avoid stripping natural oils from the hair and scalp.
- Apply the L.O.C. method (Liquid, Oil, Cream) to damp hair to maximize moisture retention and prevent breakage.
- Use a diffuser on low heat or air dry without touching the hair to define curls and minimize frizz.
- Sleep on a silk or satin pillowcase to reduce friction, breakage, and frizz during the night.
- Use a chelating shampoo monthly to remove mineral buildup from hard water that can make curls dull and dry.
Understanding Your Curl Pattern
Before diving into products and techniques, you need to know what you’re working with. Curly hair isn’t one-size-fits-all. The curl classification system, originally developed by hairstylist Andre Walker, breaks curls into three main categories with subcategories that help identify your specific pattern.
Type 2 hair is wavy, ranging from loose S-shaped waves (2A) to more defined, frizz-prone waves (2C). Type 3 is what most people think of as true curly hair, with spirals that range from loose loops (3A) to tight corkscrews (3C). Type 4 hair is coily or kinky, with tight Z-shaped angles (4A through 4C) that require significant moisture and careful handling.
Knowing your pattern matters because different curls have different needs. A 2A wave might get weighed down by heavy creams that a 4C coil would drink up happily. Your routine should be built around your specific pattern, not what works for someone on Instagram with completely different hair.
It’s also worth noting that many people have multiple curl patterns on their head. You might have looser waves at the crown and tighter curls underneath. That’s completely normal and just means you may need to adjust your technique or product application in different areas.
The Foundation: Cleansing Without Stripping
Traditional shampoos can be harsh on curly hair. They often contain sulfates, which are cleansing agents that create that satisfying lather but can strip natural oils from your hair and scalp. For straight hair, that’s not necessarily a problem because sebum travels easily down the hair shaft. For curls, that oil has to navigate twists and turns, and stripping it away can lead to dryness, frizz, and breakage.
This is where the concept of co-washing comes in. Co-washing means using conditioner to cleanse your scalp instead of shampoo. It sounds counterintuitive, but conditioners contain mild surfactants that can lift dirt and product buildup without the harsh effects of sulfates. Many people with curls alternate between co-washing and using a gentle, sulfate-free shampoo.
How often you wash depends on your hair and lifestyle. Some people cleanse every three days, while others go a week or more between washes. Pay attention to your scalp. If it feels itchy, looks flaky, or your roots are visibly oily, it’s time to cleanse. If your curls still look good and your scalp feels comfortable, you can stretch it another day.
When you do use shampoo, focus on your scalp rather than rubbing it through your lengths. The suds will run down and clean the rest of your hair without direct manipulation. Follow immediately with conditioner, applying it from the mid-lengths to ends, where your hair is oldest and driest.
Moisture: The Non-Negotiable Step
If there’s one thing every curly hair routine needs, it’s moisture. Curly hair is naturally drier than straight hair because the shape of the hair shaft makes it harder for scalp oils to travel down. Each bend in a curl is also a potential weak point, so keeping hair well-moisturized helps prevent breakage.
Conditioner is your daily driver, but deep conditioning is where the real work happens. A deep conditioner or hair mask contains higher concentrations of moisturizing ingredients and is designed to penetrate the hair shaft. For most curl patterns, doing a deep conditioning treatment once a week makes a noticeable difference in softness and manageability.
Apply your deep conditioner to clean, damp hair, focusing on the mid-lengths and ends. Many people find that applying heat—either with a warm towel, a shower cap, or a hooded dryer—helps the product penetrate better. Leave it on for the time recommended on the product, usually somewhere between 15 and 30 minutes, then rinse thoroughly with cool water to help seal the cuticle.
The L.O.C. method is a popular technique for maximizing moisture retention. It stands for Liquid (or Leave-in), Oil, and Cream. After washing, you apply a water-based leave-in conditioner first, then seal it with a hair oil, then lock everything in with a cream-based styler. Some people find the L.C.O. method works better for them, swapping the order of oil and cream. Experiment to see what your hair prefers.
Styling: Techniques That Define Curls
Styling curly hair is less about creating curls and more about encouraging them to form their natural pattern. The products and techniques you use can make the difference between defined spirals and a frizzy halo.
Styling products for curls generally fall into a few categories. Gels provide hold and definition but can leave hair feeling crunchy. Creams offer softness and moisture but less hold. Mousses add volume and light hold. Many people layer products, using a cream for moisture and a gel on top for hold.
Application matters as much as product choice. The squish-to-condish technique involves applying your styler to soaking wet hair, then cupping and scrunching sections up toward your scalp. This encourages curl formation and helps the product distribute evenly. The praying hands method involves smoothing product between your palms and gliding your hands down sections of hair, which helps with frizz control.
Ribbons and clumps are terms you’ll hear in curly communities. Ribbons are elongated, defined curl groupings, while clumps are thicker, more uniform curl formations. Both are desirable and show that your curls are grouping together rather than separating into individual strands. Using the right amount of product and applying it to thoroughly wet hair helps encourage this grouping.
Drying: Air vs. Diffuser
How you dry your hair affects your final result. Air drying is the gentlest option, but it takes time—sometimes hours depending on your hair density and length. It also requires patience. Touching your hair while it dries can disrupt curl formation and create frizz.
Diffusing is a technique that uses a blow dryer with a diffuser attachment to dry curls gently. The diffuser disperses air over a larger area, reducing frizz and encouraging curl definition. It’s faster than air drying and can also add volume at the roots.
If you diffuse, start with low heat and low speed. High heat can cause frizz, and high speed can blow your curls around before they’ve had a chance to set. Hover the diffuser over your hair without touching it until your roots are about 50 percent dry, then gently cup sections of hair in the diffuser bowl and bring it up to your scalp. Hold for 10-15 seconds, then release and move to the next section.
However you dry, wait until your hair is completely dry before touching it. If you’ve used gel, you might have what’s called a cast—a hardened layer over your curls. Once dry, you can scrunch your hair to break the cast, which leaves you with soft, defined curls rather than a helmet of gel.
Protecting Curls Overnight
Your curly hair routine doesn’t end at bedtime. How you sleep can make or break your second-day curls. Cotton pillowcases create friction that causes frizz and breakage. Switching to a satin or silk pillowcase allows your hair to glide, reducing damage and helping your style last.
A pineapple is a popular overnight styling technique. You gather your hair into a loose, high ponytail on top of your head using a satin scrunchie. This protects your curls from being smashed while you sleep and helps preserve volume at the roots. In the morning, you take it down, shake your head, and refresh as needed.
Some people prefer sleeping in a satin or silk bonnet. This covers your entire head and protects all your hair from friction. It can take some getting used to, but many find it’s the most effective way to maintain their curls overnight.
For shorter hair or tighter curl patterns, a bonnet might work better than a pineapple. Experiment with different methods to see what keeps your curls looking fresh with minimal morning effort.
Refresh Routines for Second-Day Hair
Not everyone washes their hair daily, and for curly hair, that’s actually beneficial. Stretching the time between wash days preserves moisture and saves time. But second- or third-day curls often need a little help to look their best.
A refresh routine doesn’t have to be complicated. Start by assessing what your hair needs. If it’s just a bit flat at the roots, you might just need to flip your head over and give it a good shake. If curls are starting to frizz or lose definition, a spritz of water might be enough to reactivate your products.
For more substantial refreshing, a water-and-conditioner mixture in a spray bottle can help. Spray it lightly over your hair, then scrunch to encourage curl reformation. You can also use a ready-made curl refresher spray. Follow with a small amount of styler if needed, focusing on areas that have lost definition.
Some people find that sleeping with their hair in twists or braids helps preserve their curl pattern for multiple days. In the morning, they unravel, fluff, and go. This technique works particularly well for tighter curl patterns.
Common Mistakes and How to Avoid Them
Even with the best intentions, it’s easy to make mistakes that sabotage your curly hair routine. One of the most common is using too much product. It’s tempting to layer on creams, gels, and oils, but product buildup can weigh hair down and cause issues over time. Start with less than you think you need—you can always add more.
Another mistake is skipping the trim. Curly hair is prone to split ends, and once a split starts, it can travel up the hair shaft. Regular trims every 8-12 weeks keep ends healthy and prevent breakage from working its way up. If you’re trying to grow your hair out, ask your stylist for a dusting—just the very tips—to maintain health without losing length.
Heat damage is another concern. If you do choose to use heat tools, always use a heat protectant first. But ideally, minimize heat styling altogether. If you’ve been using heat regularly and notice your curl pattern has changed or become looser, stopping heat styling can help your curls recover their natural pattern over time.
Finally, don’t fall into the trap of thinking there’s a perfect routine out there that will fix everything. Curly hair is affected by humidity, hormones, health, and countless other factors. What works in summer might not work in winter. What worked last year might not work now. The goal isn’t perfection; it’s learning to work with your hair as it is today.
Porosity: The Hidden Factor in Your Routine
Curl pattern gets a lot of attention, but porosity might actually matter more for how your hair behaves. Porosity refers to how easily your hair absorbs and retains moisture, and it’s determined by the condition of your hair’s cuticle layer. High porosity hair has gaps or raised cuticles that let moisture in quickly but also let it escape just as fast. Low porosity hair has tightly packed cuticles that resist absorption but hold onto moisture once it gets in. Normal porosity sits somewhere in the middle, absorbing and retaining moisture at a balanced rate.
You can test your porosity at home with a simple water test. Take a clean strand of hair—preferably one that’s fallen out naturally—and drop it in a glass of water. If it sinks immediately, you have high porosity hair. If it floats for a while before slowly sinking, you have low porosity hair. If it sinks gradually over a few minutes, you’re in the normal range. This isn’t a perfect test, but it gives you a starting point.
High porosity hair often results from heat damage, chemical processing, or environmental wear. It craves protein treatments to help fill in the gaps in the cuticle, and it benefits from heavier products that can coat and protect the strand. Layering products is particularly effective for high porosity hair because you need those barrier layers to prevent moisture loss. Leave-in conditioners, oils, and creams all help seal the cuticle and keep hydration where it belongs.
Low porosity hair presents different challenges. Products tend to sit on top rather than absorbing, which can lead to buildup and make hair feel heavy or greasy despite being dry underneath. Heat is your ally here—using a warm towel, steamer, or even warm water helps open the cuticle enough for products to penetrate. Lightweight, water-based formulas work better than heavy butters and oils. Applying products to damp rather than soaking wet hair can also help low porosity hair absorb more effectively without becoming overwhelmed.
Understanding your porosity explains why that product your friend swears by does nothing for you, or why your hair seems to drink up moisture but still feels dry an hour later. It also helps you choose ingredients strategically. High porosity hair responds well to proteins like hydrolyzed keratin, silk amino acids, and wheat protein. Low porosity hair does better with humectants like glycerin and aloe vera that attract moisture without requiring deep penetration.
Hard Water and Mineral Buildup
If you’ve ever felt like your products stopped working overnight, or your hair consistently feels dry, dull, and coated no matter what you do, hard water might be the culprit. Hard water contains high concentrations of dissolved minerals, particularly calcium and magnesium. These minerals bind to your hair over time, creating a layer that blocks moisture and makes it nearly impossible for products to do their job.
The signs of hard water buildup are distinctive once you know what to look for. Your hair might feel filmy or waxy even right after washing. It could take an unusually long time to get a lather from shampoo, or your conditioner might seem to sit on top of your hair rather than absorbing. You might notice a greenish tint on lighter hair, or brassiness on darker shades. Curls that used to spring back might hang limp, and no amount of deep conditioning seems to help.
A chelating shampoo is designed specifically to remove mineral deposits. Unlike regular clarifying shampoos, which target product buildup, chelating formulas contain ingredients that bind to minerals and pull them off the hair shaft. You don’t need to use one frequently—once a month is usually sufficient unless your water is exceptionally hard. Follow a chelating treatment with a deep conditioner, because the process can be drying.
For ongoing management, a shower filter can make a significant difference. These filters attach to your showerhead and reduce mineral content before water hits your hair. They vary in effectiveness and need regular replacement, but many people notice an immediate improvement in how their hair feels and responds to products. If you’re not ready to install a filter, a final rinse with distilled water can help, though it’s a more temporary solution.
Some ingredients naturally counteract mineral buildup. Citric acid and vitamin C (ascorbic acid) help neutralize the effects of hard water. You’ll find them in some shampoos and rinses designed for hard water conditions. An apple cider vinegar rinse—diluted with water and applied after conditioning—can also help remove surface minerals and restore shine. Use these treatments between chelating sessions to maintain results without over-drying your hair.
Seasonal Adjustments for Consistent Curls
Your curly hair routine shouldn’t be static because your environment isn’t static. Humidity, temperature, and seasonal changes all affect how your hair behaves, and what works perfectly in July might be completely wrong come January. Learning to read these shifts and adjust accordingly keeps your curls consistent year-round.
Humidity is the most obvious seasonal factor. High humidity means excess moisture in the air, which curly hair readily absorbs. This can cause curls to expand, frizz, and lose definition. Anti-humidity products contain ingredients that form a barrier around the hair shaft, preventing moisture from penetrating and disrupting your style. Gels and serums with humectant-blocking properties become your allies. You might also need more hold in your styling routine during humid months to keep curls from expanding beyond recognition.
Low humidity presents the opposite challenge. In dry winter air, curls can become static-prone and brittle. Moisture evaporates from your hair faster than you can replace it, leading to that crackly, dry feeling that no amount of oil seems to fix. This is when heavier creams, butters, and oils earn their place in your routine. Overnight treatments become more valuable, and you might find yourself deep conditioning twice a week instead of once. A humidifier in your bedroom helps counteract dry indoor heating and benefits both your hair and skin.
Temperature affects your routine beyond just humidity levels. Cold air holds less moisture than warm air, which is why winter is typically dry even without indoor heating. Hot weather might mean more sweating, which can affect your scalp and require more frequent cleansing. If you’re spending time in chlorinated pools or salt water during summer months, you need strategies to protect your hair before swimming and remove residue afterward.
Transition seasons—spring and fall—often bring unpredictable conditions. You might experience a humid day followed by a dry one, requiring flexibility in your product choices. This is when having a range of products becomes valuable rather than excessive. A lightweight gel for humid days, a heavier cream for dry ones, and a versatile styler that works in moderate conditions give you options without requiring a complete routine overhaul every time the weather changes.
Scalp Health as the Foundation
Product conversations tend to focus on the hair itself, but your scalp is where everything starts. A healthy scalp produces healthy sebum at an appropriate rate, maintains a balanced microbiome, and provides the foundation for strong hair growth. When your scalp is off—whether from dryness, excess oil, product buildup, or inflammation—your curls suffer for it.
Scalp care for curly hair has some unique considerations. The same sebum that travels easily down straight hair shafts gets trapped at the roots of curly hair, potentially leading to buildup even when your scalp isn’t particularly oily. This can cause itching, flaking, and inflammation that affects hair growth and comfort. Regular but not excessive cleansing keeps the scalp balanced without stripping it entirely.
Exfoliation isn’t just for your face. Your scalp benefits from occasional removal of dead skin cells and product residue. You can use a physical scalp scrub—applying it before shampooing and massaging in circular motions—or a chemical exfoliant containing ingredients like salicylic acid or glycolic acid. These chemical options are particularly effective for dissolving buildup without abrasion, which can be gentler for sensitive scalps. Aim to exfoliate every two to four weeks, depending on how much product you use and how prone you are to buildup.
Scalp massage offers benefits beyond relaxation. Using your fingertips or a scalp massaging tool, you can stimulate blood flow to the hair follicles, which supports healthy growth. Massage also helps distribute natural oils from your roots down the hair shaft. Some people incorporate oils into their scalp massage routine—tea tree oil for dandruff-prone scalps, peppermint oil for stimulation, or jojoba oil, which closely mimics natural sebum. Always dilute essential oils in a carrier oil before applying to your scalp directly.
Pay attention to signs that your scalp needs attention. Persistent itching, visible flakes, redness, or bumps could indicate conditions like seborrheic dermatitis, psoriasis, or folliculitis. These require specific treatments rather than general scalp care. If over-the-counter solutions like medicated shampoos don’t resolve the issue within a few weeks, a dermatologist can help identify the underlying cause and prescribe targeted treatments. Your curls will only be as healthy as the scalp they grow from.
Product Layering and Application Order
The order in which you apply products matters as much as the products themselves. Each layer needs to work with the ones before and after it, and the wrong sequence can leave you with products that pill, don’t absorb, or cancel each other out. Understanding the logic behind layering helps you customize your routine rather than following arbitrary rules.
The general principle is thinnest to thickest, water-based to oil-based. Water-based products penetrate the hair shaft and provide hydration. Oil-based products seal that hydration in. If you apply an oil before your water-based leave-in, you’ve created a barrier that prevents the hydrating product from doing its job. This doesn’t mean oils are always last—some people successfully apply oil before cream—but understanding the reasoning helps you experiment intentionally.
Leave-in conditioners usually come first after washing. They provide a foundation of moisture and often contain ingredients that prepare your hair for subsequent products. Apply leave-in to soaking wet hair for maximum distribution, using your fingers or a wide-tooth comb to ensure even coverage. If you have low porosity hair, you might apply leave-in to damp hair instead, giving your hair a chance to absorb without being overwhelmed.
Styling products come next, and here’s where personal preference and hair type drive decisions. Cream stylers provide moisture and light hold. Gels provide definition and stronger hold. Mousses add volume. Many people layer multiple stylers—a cream for moisture followed by a gel for hold, or a mousse at the roots for volume and a cream through the lengths for definition. The key is applying each product thoroughly before adding the next, giving each layer a moment to absorb.
Oils can function as sealants or finishers depending on when you apply them. As a sealant—applied after your leave-in but before your styler—oil helps lock in moisture. As a finisher—applied after styling, once your hair is dry—oil breaks the gel cast, adds shine, and reduces frizz. Some oils are better suited to one function than others. Lightweight oils like argan and grapeseed work well as finishers without weighing hair down. Heavier oils like castor and jojoba make effective sealants but might be too heavy for a finishing step unless your hair is particularly thick or dry.
Haircuts and Trims for Curly Hair
Curly hair presents unique challenges when it comes to cutting and trimming. The same curl that looks bouncy and defined when dry shrinks significantly when wet, meaning a cut that looks even on wet hair can result in uneven lengths once your hair dries. This is why many stylists who specialize in curly hair cut dry, allowing them to see exactly how each curl falls and trim accordingly.
Finding a stylist who understands curls is worth the effort. A straight-across cut that works for straight hair can create a triangle effect on curly hair, where the bottom appears shelf-like and bulky. Curly-specific techniques like deva cutting, where each curl is trimmed individually in its natural state, or slide cutting, which removes bulk while maintaining length, create shapes that work with your curl pattern rather than against it. Ask potential stylists about their training and approach to curly hair before booking an appointment.
Between salon visits, you can maintain your ends at home with careful trimming. Use sharp, dedicated hair scissors—never kitchen shears or regular scissors, which can crush the hair shaft and actually cause more split ends. Work with dry, styled hair so you can see your curl pattern. Trim conservatively, taking small amounts at a time, and remember that curly hair shrinks when cut, so what looks like a quarter inch might result in more length loss once your hair bounces back.
The dusting technique mentioned earlier deserves more detail. Rather than a traditional trim where you cut across sections of hair, dusting involves trimming only the very tips of your hair, removing split ends without affecting your overall length. This requires patience and good lighting, but it extends the time between major cuts significantly. You can dust your hair every six to eight weeks, gradually removing damage before it travels up the hair shaft.
If you’re growing out heat damage or a bad cut, the transition period can be frustrating. Your roots might curl beautifully while damaged ends hang straight or frizz. You have options during this process. You can continue to trim damaged ends gradually while the healthy hair grows in. You can use styling techniques like pin curls or rollers to encourage damaged sections to match your natural pattern. Or you can embrace the texture variation as part of your hair’s journey, accepting that it’s temporary and focusing on maintaining health rather than achieving uniformity.
Building a Minimalist Routine That Works
Not everyone wants a ten-step routine with seven products. Maybe you’re new to embracing your curls and feel overwhelmed by options. Maybe you’re a busy parent who doesn’t have time for an elaborate process. Maybe budget constraints mean you need to focus on essentials. A minimalist routine can absolutely deliver great results when it’s built strategically.
At minimum, you need a cleanser, a conditioner, and a styler. Your cleanser can be a sulfate-free shampoo, a co-wash, or a cleansing conditioner, depending on your hair’s needs and your wash schedule. Your conditioner should provide the slip you need for detangling and the moisture your hair requires. Your styler gives you hold and definition. Three products, three steps, and you’re done.
The key to a minimalist routine is choosing multi-tasking products. A leave-in conditioner that doubles as a styler eliminates a step. A gel-cream hybrid provides both moisture and hold in one product. A co-wash cleanses and conditions simultaneously, though you might still want a separate deep conditioner for weekly treatments. Read product descriptions carefully and look for formulas that address multiple needs.
Technique becomes even more important when you’re using fewer products. Applying styler to soaking wet hair and using squish-to-condish helps ensure even distribution and maximum definition. Taking time to detangle thoroughly while conditioning prevents issues that might otherwise require additional products to address. Being patient while your hair dries—whether air drying or diffusing—produces better results than rushing and disrupting your curl pattern.
You can always expand your routine later as you learn more about what your hair responds to. Starting simple lets you establish the habit of caring for your curls without getting overwhelmed by options. Once you have a solid foundation, you can introduce additional steps one at a time—a weekly deep conditioner, a scalp treatment, a refresh routine—and observe how your hair responds. The best routine is one you’ll actually follow consistently, and for many people, that means keeping it simple.
Frequently Asked Questions
How often should I wash curly hair?
Most people with curly hair benefit from washing every 3-7 days, though this varies based on your scalp, hair density, and lifestyle. If your scalp feels itchy or oily, it’s time to cleanse. If your curls still look good and your scalp feels comfortable, you can wait longer between washes. Many people find that their curls actually look better on day two or three after the products have had time to settle.
Do I really need to avoid all sulfates and silicones?
Sulfates can be drying for curly hair, but you don’t have to avoid them religiously. Some people use a sulfate shampoo occasionally for a deep clean, especially if they use heavy products. As for silicones, some are water-soluble and wash out easily, while others require a stronger cleanser to remove. If you’re experiencing buildup that regular washing isn’t addressing, a sulfate shampoo used periodically can help reset your hair.
Why does my curly hair look frizzy even when I use products?
Frizz can have many causes. You might not be using enough product, or you might be applying it to hair that’s too dry. Your products might not be right for your curl pattern or the current weather conditions. Frizz can also indicate that your hair needs more moisture overall. Try deep conditioning more frequently, applying products to wetter hair, or experimenting with different application techniques like squish-to-condish.
How do I know if a product is right for my curl type?
Look for products formulated for your specific concerns—moisture for dry hair, hold for curls that drop easily, lightweight formulas for fine hair that gets weighed down. Reviews from people with similar hair can be helpful, but remember that what works for someone else might not work for you. Give new products at least a few tries before deciding, and introduce them one at a time so you can identify what’s working and what isn’t.
Can I change my curl pattern with products or techniques?
Products and techniques can enhance your natural curl pattern, but they can’t fundamentally change it. If you have wavy hair, no amount of product will give you tight corkscrews. What you can do is optimize your routine to help your curls form the best version of themselves. Healthy, well-moisturized hair with the right products will always curl better than dry, damaged hair with no support.
Related posts:
 Zoe Kravitz’s Coconut Oil Hair Care Secret
 Ariana Grande’s Hair Savior: Why Lavender Coconut Oil Is Her Secret Weapon
 Hair Slugging Beauty Trend Guide
 Should You Wash Your Hair After Every Gym Session?
 Removing Scalp Buildup
 Best Scalp Scrubs Review
 The Bowl Method for Curly Hair
 Living Proof Scalp Treatment Review