
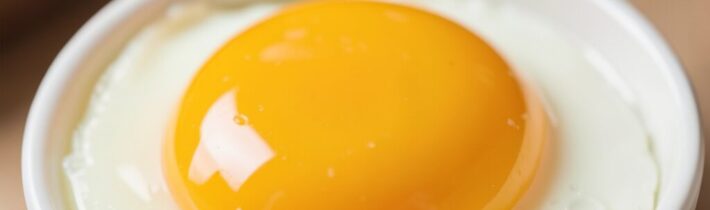
There is perhaps no kitchen task more deceptively simple, yet more frequently botched, than boiling an egg. We have all been there: you crack open a shell only to find a mess of gray, sulfurous sludge, or perhaps a yolk that looks like it has been steamed into a chalky, unappetizing texture. Whether you are prepping weekly snacks for children, adding protein to a salad, or creating the perfect centerpiece for a deviled egg platter, the difference between a failure and a masterpiece lies in the minutiae of temperature, timing, and post-boil handling.
Mastering the hard-boiled egg is a fundamental culinary skill that saves time and reduces food waste. When done correctly, the egg white is tender and opaque, and the yolk is a vibrant, creamy yellow without that unsightly green ring around the edge. This guide provides a definitive roadmap to achieving perfection every single time, regardless of your stove type or the size of your eggs.
The Science of the Perfect Egg: Understanding Temperature and Time
To master the boil, one must understand what is happening inside the shell. An egg is a delicate balance of proteins and fats. When heat is applied, these proteins begin to denature and coagulate. If they coagulate too slowly or at too low a temperature, the texture can become rubbery. If they coagulate too quickly or stay at high heat for too long, the iron in the yolk reacts with the sulfur in the white, creating the dreaded green ring (ferrous sulfide).
The secret to the perfect egg isn’t just “boiling water”; it is controlled heat. There are two primary methods: the “Cold Start” and the “Boiling Water Start.” The Cold Start method involves placing eggs in cold water and bringing them to a boil together. This is gentler and less likely to crack the shells. The Boiling Water Start method involves lowering cold eggs directly into simmering water. This method is widely preferred by professional chefs because it allows for much more precise timing, making it easier to achieve soft, medium, or hard results.
For a standard large egg, a hard-boiled result is typically achieved between 9 and 12 minutes of simmering. Anything beyond 13 minutes risks the sulfur reaction mentioned above. Timing is the most critical variable; even a two-minute difference can change an egg from a jammy, soft-boiled delicacy to a dry, crumbly hard-boiled egg.
Essential Equipment for Error-Free Boiling
While you can certainly boil an egg in a standard saucepan, having the right tools makes the process significantly more efficient and less messy. To achieve professional results, consider the following:
- A Heavy-Bottomed Pot: A stainless steel or enamel-coated pot distributes heat more evenly, preventing hot spots that might cause eggs to crack prematurely.
- A Slotted Spoon: This is essential for gently lowering eggs into boiling water and retrieving them without cracking the shells against the side of the pot.
- An Ice Bath: This is non-negotiable. A large bowl filled with water and plenty of ice is necessary to immediately stop the cooking process the moment the timer goes off.
- An Egg Pierker: If you struggle with shells cracking during the boiling process, a small egg pierker can create a tiny hole in the large end of the egg, allowing pressure to escape.
- A Microplane or Grater: For those beautiful deviled eggs, a fine grater helps create a uniform, professional texture for the yolk filling.
Using these tools transforms egg boiling from a guessing game into a precise culinary technique. The ice bath, in particular, is the single most important tool for ensuring a clean peel and preventing overcooking.
Step-by-Step: The Boiling Water Method
For those seeking the most consistent results, we recommend the Boiling Water Method. This method ensures that the eggs start cooking immediately, giving you total control over the yolk’s consistency.
Step 1: The Boil. Fill a medium pot with enough water to cover the eggs by at least an inch. Bring the water to a rolling boil over high heat.
Step 2: The Descent. Once the water is boiling, reduce the heat to a simmer. Using a slotted spoon, gently lower the cold eggs from the refrigerator into the water. Do not drop them; the impact against the bottom of the pot is the number one cause of shell breakage.
Step 3: The Simmer. Once all eggs are in the pot, turn the heat back up slightly to maintain a gentle simmer (not a violent boil) and start your timer immediately.
Step 4: The Timing. For a soft-boiled egg (liquid yolk), set the timer for 6 minutes. For a medium-boiled egg (jammy yolk), set it for 8 minutes. For a perfect hard-boiled egg (solid but creamy yolk), set it for 11 minutes.
Step 5: The Shock. While the eggs boil, prepare your ice bath. As soon as the timer rings, use the slotted spoon to move the eggs directly from the hot water into the ice bath. Let them sit in the ice for at least 5-10 minutes before attempting to peel.
The Art of the Easy Peel: Tips for Smooth Shells
There is nothing more frustrating than a hard-boiled egg that refuses to peel, leaving you with jagged chunks of white stuck to the shell. The “difficulty” of peeling an egg is often tied to the age of the egg. Freshly laid eggs have a lower pH level, which causes the membrane to stick tightly to the shell. As eggs age, the pH rises, making them much easier to peel.
If you are buying eggs specifically to boil, try to buy them a week in advance. This “aged” status is your best friend. However, if you must use fresh eggs, the ice bath method described above is your best defense. The sudden temperature shock causes the egg to contract slightly away from the shell, creating a small gap that makes peeling easier.
When peeling, always peel under cool, running water. The water helps lubricate the space between the membrane and the egg white, allowing the shell to slide right off. Start at the wider end of the egg, where there is usually a small air pocket, and peel in a circular motion around the entire egg. This ensures you aren’t tearing into the delicate white.
Flavor Infusions: Elevating the Simple Egg
p
While a plain hard-boiled egg is a nutritional powerhouse, it doesn’t have to be boring. You can infuse flavor into the egg during the cooking process or through post-boil seasoning.
In-Water Infusion: During the simmering phase, you can add aromatics to the water. A few cloves of smashed garlic, a sprig of fresh rosemary, or a pinch of sea salt can subtly influence the exterior of the egg. While the flavor won’t penetrate deeply into the yolk, it can add a wonderful subtle aroma to the white.
Post-Boil Seasoning: This is where the real magic happens. Once peeled, eggs are a blank canvas. Try these combinations:
- The Mediterranean: A drizzle of extra virgin olive oil, a sprinkle of dried oregano, and a pinch of flaky sea salt.
- The Spicy Kick: A dash of Sriracha, toasted sesame oil, and a sprinkle of Furikake (Japanese seasoning).
- The Everything Bagel: A generous coating of Everything Bagel seasoning for a crunchy, savory texture.
- The Classic: High-quality smoked paprika and freshly cracked black pepper.
By treating the egg as a base rather than a finished product, you can turn a simple snack into a gourmet experience.
Storage and Food Safety Guidelines
Because eggs are highly perishable, knowing how to store them correctly is vital for both flavor and safety. Once boiled, eggs should be treated differently than raw eggs.
Refrigeration is Mandatory: Never leave hard-boiled eggs at room temperature for more than two hours. The moisture and protein content make them a prime breeding ground for bacteria if left out.
In-Shell vs. Peeled: It is highly recommended to store hard-boiled eggs in their shells. The shell acts as a protective barrier against odors in the refrigerator and prevents the egg from drying out. If you must peel them ahead of time, store them in a sealed container with a damp paper towel to maintain moisture.
<pShelf Life: Properly refrigerated hard-boiled eggs (in their shells) will stay fresh for up to one week. Once peeled, they should be consumed within 24 hours for the best quality and safety. When storing, place them in a dedicated egg carton or a small airtight container on the middle shelf of your refrigerator, where the temperature is most stable.
Remember, if an egg has a strong, unpleasant odor when you crack it open, even if it has been stored correctly, discard it immediately. Food safety should always be your first priority.
Common Troubleshooting: Why Did My Egg Fail?
Even with a guide, mistakes happen. Here is a quick troubleshooting list to help you identify what went wrong with your previous batches:
Problem: The yolk has a green ring.
Solution: You cooked the egg for too long or the heat was too high. Reduce the simmering time or lower the heat setting.
Problem: The shell cracked during boiling.
Solution: The eggs were likely too cold when they hit the water, or the water was boiling too violently. Lower the eggs gently with a slotted spoon and maintain a gentle simmer rather than a rolling boil.
Problem: The egg is very difficult to peel.
Solution: You are likely using very fresh eggs. Try using slightly older eggs or ensure you are using the ice bath method immediately after cooking.
Problem: The egg white is rubbery.
Solution: Overcooking. The proteins have become too tightly bound. Reduce your cooking time by 1-2 minutes.
Problem: The egg smells like sulfur.
Solution: This is usually a sign of overcooking, but if the egg smells this way immediately upon opening a fresh egg, it may have spoiled. Always check the freshness of your raw eggs before boiling.
Advanced Techniques: Steaming vs. Boiling vs. Pressure Cooking
While the traditional water-immersion methods are the gold standard for reliability, modern kitchen technology offers alternative ways to cook eggs that can alter the final texture and efficiency. Understanding when to use these methods can help you tailor your results to specific culinary needs.
Steaming: The Gentle Alternative
Steaming eggs involves placing them in a steamer basket over a small amount of simmering water. This method is arguably the gentlest way to cook an egg. Because the eggs are not being tossed around by turbulent, boiling water, the risk of shell breakage is significantly reduced. Furthermore, steam provides a very consistent, even heat transfer. Steamed eggs often result in a slightly more tender white compared to the traditional boiling method, which can sometimes cause the protein structure to tighten too aggressively. If you are working with extremely delicate or large eggs, steaming for 12-13 minutes (starting from when the water boils) can yield a remarkably smooth finish.
Pressure Cooking: The Speed Demon
For those using an electric pressure cooker (like an Instant Pot), the “5-5-5 method” has become a viral sensation for a reason. This involves 5 minutes of high pressure, 5 minutes of natural pressure release, and 5 minutes in an ice bath. Pressure cooking uses high-pressure steam to force heat into the egg much faster than traditional boiling. This is an excellent method for batch-cooking a large quantity of eggs for meal prep. However, be cautious: the margin for error is much slimmer. An extra minute of pressure can be the difference between a perfect yolk and a rubbery mess. Always ensure you use the correct amount of water required by your specific appliance to avoid the “burn” error or insufficient steam.
The Sous Vide Method: The Scientist’s Approach
For absolute precision, sous vide cooking—cooking food in a temperature-controlled water bath—is the ultimate way to achieve specific textures. By setting the water bath to a precise temperature, such as 63u00b0C (145u00b0F) for a very soft, custard-like yolk, you remove the guesswork of timing entirely. While this is more time-consuming (often taking 30-45 minutes), it is the only way to guarantee a perfectly consistent result every single time, regardless of egg size or starting temperature.
Egg Sizing and Its Impact on Culinary Timing
In most recipes, eggs are referred to as “Large,” which is the industry standard. However, when you are boiling eggs for specific textures, the size of the egg becomes a critical variable that can override your timer. A “Jumbo” egg contains significantly more mass than a “Medium” egg, meaning it requires more thermal energy to reach the desired internal temperature.
Adjusting for Size
If you find that your 9-minute timer is consistently producing undercooked yolks for your specific brand of eggs, it is likely due to size discrepancies. To compensate, use this general rule of thumb: if you are using Medium eggs, reduce your boiling time by approximately 60-90 seconds. If you are using Jumbo eggs, increase your time by 2-3 minutes. When precision is paramount, it is best to weigh your eggs in grams rather than relying on the shell size. A standard large egg (without shell) is roughly 50 grams.
The Density Factor
Egg density also changes as an egg ages. An older egg has a larger air cell because moisture evaporates through the porous shell over time. This air cell can act as a buffer during the cooking process. If you are using older eggs (which we have established are better for peeling), you may find they require an additional minute of simmering to ensure the yolk is fully set, as the larger air pocket can create a slight temperature lag during the initial heating phase.
Culinary Applications: Beyond the Hard-Boiled Egg
Once you have mastered the perfect hard-boiled egg, you unlock a vast array of culinary applications that go far beyond a simple snack. The texture and flavor profile of a perfectly cooked egg can elevate complex dishes or serve as a sophisticated component in simpler ones.
The Art of the Deviled Egg Upgrade
The deviled egg is a classic for a reason, but it is often treated with a lack of creativity. To elevate them, focus on the texture of the yolk filling. Instead of just mashing with mayonnaise, try incorporating a teaspoon of Dijon mustard or a touch of crème frau00e7e for a brighter, more acidic profile. For a gourmet twist, top your deviled eggs with a tiny piece of smoked salmon, a single caper, or a dusting of truffle salt. The key is contrast: the creamy, rich yolk filling needs a sharp, textural, or acidic counterpoint to prevent it from feeling overly heavy.
Salad Componentry and Protein Boosts
In salads, the egg should act as a textural anchor. For a Niu00e7oisse-style salad, use medium-boiled eggs (8 minutes) so the yolk is jammy and creates a natural dressing when broken. For heavy, grain-based salads like quinoa or farro, hard-boiled eggs (11 minutes) provide a stable, chunky protein source that won’t disintegrate when tossed with heavy vinaigrettes. When slicing eggs for salads, use a dedicated egg slicer rather than a knife; a knife often applies uneven pressure, causing the yolk to crumble and create a messy, unappealing yellow coating over the rest of your ingredients.
Garnish and Aesthetic Presentation
In professional plating, the egg is often used as a color accent. A perfectly peeled, bright white egg with a vibrant yellow center provides a striking visual contrast against dark leafy greens or rich, dark stews. To achieve this, ensure your peeling technique is flawless—any jagged edges on the white will be magnified when the egg is sliced. When slicing for presentation, use a very sharp, thin-bladed knife dipped in hot water between slices to ensure a clean, surgical cut through the yolk.
Seasonal and Storage Nuances: Dealing with Environmental Factors
While we have discussed general storage, environmental factors like humidity and altitude can subtly change how eggs behave and how long they stay fresh. A chef must be aware of these nuances to maintain consistency.
The Altitude Variable
If you are cooking at high altitudes, the boiling point of water is lower than at sea level. This means that at 5,000 feet, water might boil at roughly 155u00b0F (68u00b0C) instead of 212u00b0F (100u00b0C). Consequently, your timing will be off. An egg that takes 11 minutes at sea level might require 14 or 15 minutes at high altitude to achieve the same level of coagulation. If you find your eggs are consistently undercooked despite following the guide, check your local elevation.
Humidity and Shell Porosity
Eggshells are not solid barriers; they are porous membranes. In environments with extremely high humidity, eggs can absorb moisture from the air, which can slightly alter the weight and the internal pressure during boiling. While this won’t ruin an egg, it can occasionally contribute to the “leaking” effect if a shell develops a micro-crack. In very dry environments, eggs may lose moisture faster, making them “older” and easier to peel more quickly than expected. If you live in a desert climate, you might find that eggs stay “fresh” for a shorter period of time if not strictly refrigerated.
Managing Batch Prep and Oxidation
When prepping a large batch of eggs for the week, be aware of oxidation. Even in the refrigerator, the yolk can begin to darken slightly if exposed to air. To prevent this, once you have peeled your eggs, store them in a container with a very small amount of cold, filtered water. This keeps the surface of the egg white hydrated and prevents the rubbery, shriveled texture that occurs when the egg white dries out. This technique is especially useful for eggs intended for salads or garnishes where visual perfection is required.
Advanced Troubleshooting: The “Invisible” Errors
Sometimes, despite following every step, the result is still not quite right. These “invisible” errors are often caused by subtle chemical or physical interactions that are harder to spot than a simple timing error.
The “Slippery White” Phenomenon
If you find that your egg whites feel slimy or slippery even after they have been boiled and cooled, it is often due to an issue with the water chemistry or the egg’s freshness. If the water used for boiling is extremely hard (high mineral content), it can react with the proteins in the egg white, creating a gelatinous layer that doesn’t fully set. Using filtered water for boiling can mitigate this. Additionally, if the egg was extremely fresh, the thick albumen (the thick part of the white) may not have fully coagulated at the edges, leaving a translucent, jelly-like ring. This is not a safety issue, but a texture issue; increasing the simmer time slightly can help ensure a more uniform set.
The “Gray/Green” Ring: Beyond Overcooking
We have established that overcooking causes the sulfurous green ring. However, there is a secondary cause: the presence of excess iron in your cooking water. If you are using well water or water with high mineral content, the iron can react with the sulfur in the egg even if you haven’t overcooked them. If you consistently see this ring despite perfect timing, try using distilled or filtered water for your boiling process. Furthermore, using a stainless steel pot versus a cast iron pot can make a difference; cast iron can leach iron into the water, exacerbating the reaction.
The “Crumbly Yolk” Mystery
If your yolk is crumbly but the timing was correct, you may be dealing with an egg that has begun to age significantly before you even started cooking. As eggs age, the yolk becomes more concentrated and less moisture-retaining. While these eggs are the easiest to peel, they are the most prone to a dry, sandy texture once heat is applied. If you find yourself with a batch of crumbly yolks, try reducing your cook time by 2 minutes and using a more aggressive ice bath to “lock in” the moisture before it can evaporate through the yolk’s structure.
The Professional’s Pantry: Essential Egg Seasonings and Pairings
To move from a home cook to a culinary enthusiast, you must view the hard-boiled egg as a vehicle for flavor profiles. The neutral, creamy nature of the egg allows it to pair with almost any flavor profile, from sweet to intensely savory.
Umami Bombs
To maximize the savory depth of a hard-boiled egg, look toward ingredients high in umami. A light dusting of nutritional yeast can provide a cheesy, nutty flavor without the heaviness of dairy. Alternatively, a drop of aged balsamic glaze or a tiny amount of miso paste (mixed with a bit of oil) can transform a simple egg into a complex appetizer. For an Asian-inspired profile, marinating peeled eggs in a mixture of soy sauce, mirin, and ginger (known as Ajitsuke Tamago) is a technique used in ramen shops to create incredibly flavorful, soft-boiled eggs.
Acidity and Brightness
Because eggs are high in fat, they benefit immensely from acid. This is why deviled eggs often include mustard or vinegar. For a sophisticated snack, try a squeeze of fresh lime juice and a sprinkle of Tajin (chili-lime seasoning) over a hard-boiled egg. The acidity cuts through the richness of the yolk, cleansing the palate and making the next bite even more flavorful. Another excellent option is a dash of high-quality sherry vinegar, which provides a much more nuanced acidity than standard white vinegar.
Texture and Crunch
The most common complaint about hard-boiled eggs is their uniform, soft texture. You can fix this by adding a crunchy element. Beyond the “Everything Bagel” seasoning, consider toasted pine nuts, crushed pistachios, or even finely diced raw radishes. A sprinkle of flaky Maldon sea salt is also essential; the large crystals provide a momentary burst of salinity and a textural crunch that regular table salt simply cannot replicate. This contrast between the creamy yolk and the sharp, crunchy salt is what separates a basic snack from a gourmet bite.
Frequently Asked Questions
1. Can I boil eggs directly from the freezer?
No, you should never boil eggs that have been frozen. The freezing process causes the liquid inside to expand, which will crack the shell and ruin the texture of the egg. Always thaw eggs completely in the refrigerator before cooking.
2. How do I know if a raw egg is still good before I boil it?
The easiest way is the “Float Test.” Fill a bowl with water and gently place the raw egg in it. If it sinks to the bottom and stays there, it is fresh. If it sits on the bottom but stands on its end, it is older but still good. If it floats to the surface, it is old and should be discarded.
3. Is it better to boil eggs in vinegar or salt?
Adding salt or vinegar to the water can help prevent egg whites from leaking out if a shell cracks. However, it won’t significantly change the ease of peeling. The ice bath is much more effective for peeling than adding ingredients to the water.
4. Can I cook eggs in a microwave?
Absolutely not. You should never attempt to boil a whole egg in its shell in a microwave. The trapped steam will cause the egg to explode, which can be extremely dangerous. Use a stovetop or a specialized microwave egg cooker designed for this purpose.
5. Why are my yolks gritty or chalky?
Gritty yolks are a classic sign of overcooking. When the yolk is exposed to high heat for too long, the fats and proteins separate in a way that creates a dry, sandy texture. Shorten your cooking time to ensure a creamy center.
Related posts:
 Perfect Somen Noodles Recipe
 The Only Guide You Need to Make Perfect Eggs—Every Time
 48. Perfect Jammy Eggs Recipe
 Perfectly Cooked Hard-Boiled Eggs in the Air Fryer: A Game-Changer
 Smart Egg Storage Hack
 Simple Vegan Ice Cream Recipe
 Master the Art of Cooking Eggs: Techniques for Every Style
 Perfect Hard-Boiled Eggs