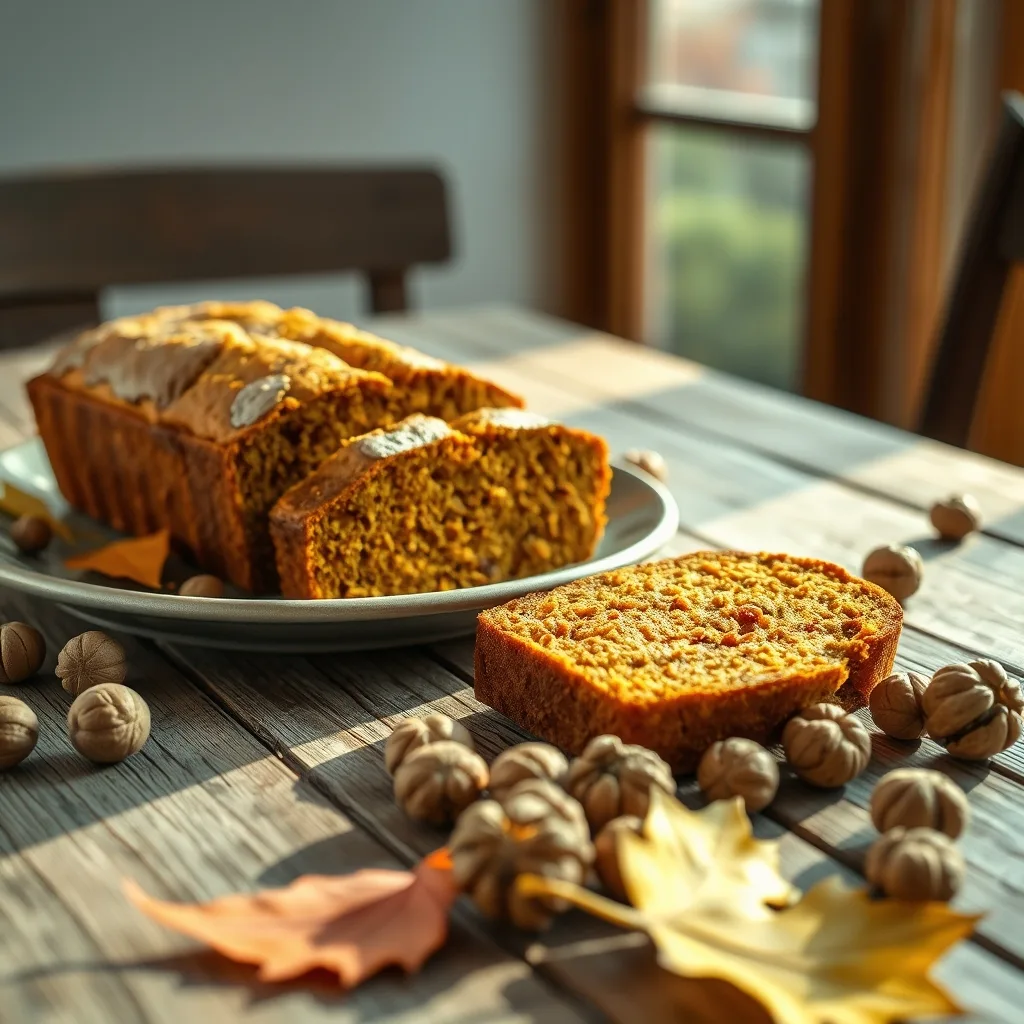
When the air turns crisp and the leaves begin to change, few things evoke the cozy spirit of the season quite like the aroma of a freshly baked pumpkin loaf. This classic treat strikes a perfect balance between dense, moist crumb and warm, aromatic spices. Whether you are looking for the ideal accompaniment to your morning coffee or a thoughtful gift for a neighbor, mastering a high-quality pumpkin loaf is a quintessential kitchen skill.
Key takeaways
- Avoid overmixing the batter to prevent a tough, rubbery texture and ensure a tender loaf.
- Use a digital scale to measure flour precisely, as volume-based measuring often leads to dry, dense results.
- Emulsify wet ingredients thoroughly and use room-temperature eggs to ensure a smooth, stable batter.
- Cool the loaf on a wire rack for 360-degree airflow to prevent a soggy crust from trapped steam.
- Toast mix-ins like nuts or chocolate in a little flour before folding to keep them evenly suspended.
Understanding the Chemistry of a Perfect Loaf
The secret to a superior pumpkin loaf lies in the moisture content and the interaction between leavening agents and spices. Unlike standard cakes, pumpkin bread relies on the natural pectin and water content found in pumpkin puree. To achieve that signature tender texture, you must avoid overmixing. When flour meets liquid, gluten strands begin to form. If you beat the batter vigorously, these strands tighten, resulting in a tough or rubbery loaf. Instead, use a gentle folding motion until the flour streaks just disappear. Furthermore, the use of brown sugar over white sugar is intentional; the molasses content in brown sugar adds a deep, caramel-like complexity that complements the earthy profile of the squash.
Selecting Your Pumpkin and Essential Spices
While canned pumpkin puree is the standard for consistency, ensure you are using 100% pure pumpkin, not pumpkin pie filling, which is pre-sweetened and spiced. If you choose to roast your own pumpkin, select a sugar pumpkin or pie pumpkin rather than a large carving variety, as the latter is often watery and fibrous. For the spice blend, freshness is paramount. A mixture of Ceylon cinnamon, ground ginger, cloves, and a whisper of freshly grated nutmeg provides the classic profile. If you want to elevate the flavor, add a pinch of cardamom or black pepper, which cuts through the sweetness and enhances the warmth of the other spices.
The Essential Ingredient List
To bake one standard 9×5 inch loaf, gather the following ingredients: 1 3/4 cups of all-purpose flour, 1 teaspoon of baking soda, 1/2 teaspoon of baking powder, 1/2 teaspoon of salt, 1 tablespoon of ground cinnamon, 1 teaspoon of ground ginger, 1/4 teaspoon of ground cloves, 1/4 teaspoon of freshly grated nutmeg, 1 cup of canned pumpkin puree, 1/2 cup of neutral oil (such as avocado or grapeseed), 1 cup of packed light brown sugar, 1/2 cup of granulated sugar, 2 large room-temperature eggs, and 1 teaspoon of pure vanilla extract. Optional additions for texture include 1/2 cup of toasted walnuts or dark chocolate chips.
Step-by-Step Mixing Technique
Begin by preheating your oven to 350°F (175°C) and greasing your loaf pan generously with butter or non-stick spray, lining the bottom with parchment paper for easy removal. In a medium bowl, whisk together the dry ingredients—flour, baking soda, baking powder, salt, and spices—to ensure they are perfectly distributed. In a separate large bowl, whisk the pumpkin, eggs, sugars, oil, and vanilla until the mixture is smooth and emulsified. Gradually add the dry ingredients to the wet, stirring with a rubber spatula just until combined. If adding nuts or chocolate, fold them in at the very last second. Pour the batter into your prepared pan and smooth the top with your spatula.
Mastering the Bake and Cooling Process
Baking time is critical for a loaf of this density. Place the pan in the center rack of your oven and bake for 55 to 65 minutes. You will know it is done when a wooden skewer inserted into the center emerges clean or with only a few moist crumbs. Resist the urge to open the oven door during the first 45 minutes, as the sudden change in temperature can cause the center to collapse. Once removed, allow the loaf to cool in the pan for 10 minutes. This resting period allows the structure to set. Afterward, transfer the loaf to a wire rack to cool completely. Slicing while hot will cause the crumb to tear, so patience is key for the perfect presentation.
Storage and Preservation Strategies
Pumpkin bread is notoriously better on the second day, as the spices have more time to permeate the crumb. To store, wrap the loaf tightly in plastic wrap or store it in an airtight container at room temperature for up to three days. For longer storage, you can refrigerate it for a week, though this may slightly alter the texture. If you want to keep the loaf for months, slice it first, wrap each slice individually in parchment paper, and place them in a freezer-safe bag. This allows you to pull out a single serving whenever the craving strikes, which can be toasted or thawed at room temperature.
Customizing Your Pumpkin Loaf
While the classic recipe is timeless, personalization allows you to make the loaf your own. For a crunchy topping, sprinkle turbinado sugar or pepitas over the batter before baking. If you prefer a decadent dessert-style loaf, drizzle a simple glaze made of powdered sugar, a splash of maple syrup, and heavy cream over the top once the loaf is entirely cool. For those who prefer a more nutritious profile, you can swap half of the all-purpose flour for white whole wheat flour or almond flour, though note that this will result in a slightly denser bake that requires a few extra minutes in the oven.
Troubleshooting Common Baking Issues
If your loaf sinks in the middle, it is often due to either opening the oven too early or an incorrect ratio of leavening agents. Check your baking soda to ensure it is fresh; if it is expired, the loaf will not rise properly. If the top of your loaf browns too quickly before the inside is cooked, tent a piece of aluminum foil over the top of the pan for the final 15 minutes of baking. If you find the loaf is too dry, reduce the baking time by five minutes next time, or ensure you are measuring your flour by weight rather than volume; scooping flour directly with a measuring cup often packs it down, leading to an excess of flour in the recipe.
The Science of Emulsification and Fat Ratios
Achieving a bakery-style crumb is largely dependent on how effectively your fats and liquids emulsify. While many recipes suggest simply whisking wet ingredients together, taking an extra two minutes to ensure the oil, pumpkin, and eggs have reached a uniform, creamy consistency makes a measurable difference. When oil remains separated in pools within the batter, it creates uneven pockets of density during the bake. To perfect this, use a balloon whisk to beat the mixture until it turns a lighter, opaque shade of orange. This aeration introduces tiny air bubbles that the baking soda will later expand, resulting in a lighter lift. If you find the mixture is breaking, ensure your eggs are strictly at room temperature; cold eggs will cause the oil to coagulate instantly, inhibiting a smooth, stable emulsion.
Selecting the Right Pan Material for Heat Conductivity
The vessel you choose for your pumpkin loaf dictates the final crust quality and internal moisture retention. A heavy-gauge, light-colored aluminum pan is the gold standard because it reflects heat evenly, preventing the edges from turning dark and bitter before the center has finished baking. Conversely, dark-coated or glass pans absorb heat much faster, which often results in a thick, scorched exterior while the middle remains raw. If you only own dark pans, you must reduce your oven temperature by 25°F (about 15°C) and extend the baking time by roughly 10 minutes. Furthermore, lining the pan with parchment paper that extends above the rim serves as a convenient handle, allowing you to lift the loaf out without it cracking or sticking to the sides of the pan.
The Importance of Flour Weighing and Hydration
Volume measurement is the most common cause of dry or “bready” pumpkin loaves. A single cup of flour can fluctuate by as much as 20% depending on how tightly it is packed into the measuring cup. For consistent, tender results, invest in a digital kitchen scale. One cup of all-purpose flour should weigh exactly 120 grams. When working with high-moisture ingredients like pumpkin, precision is vital because the flour must be able to absorb the puree without becoming overwhelmed. If you suspect your humidity levels are high—perhaps on a rainy day—you may find that your flour needs a slight adjustment. Always start with the base weight, and only add an extra tablespoon of flour if the batter appears excessively runny, rather than thick and ribbon-like.
Balancing Spice Profiles with Infusion Techniques
To take your pumpkin loaf from standard to artisanal, consider the “blooming” technique for your spices. Instead of whisking them into the flour, stir your cinnamon, ginger, cloves, and nutmeg directly into the warm oil (or even melt them into a small amount of butter) before combining with the pumpkin. This process, known as fat-soluble extraction, releases the essential oils within the spices, creating a much more aromatic profile that permeates the entire loaf rather than just sitting on the palate. If you are using pre-ground spices that have been in your pantry for more than six months, consider refreshing them by lightly toasting them in a dry skillet for 30 seconds until fragrant; this small step can revive stale aromatics and significantly deepen the flavor profile of the finished bread.
Managing Internal Steam and Crust Softness
A frequent challenge with high-moisture quick breads is the “soggy top” phenomenon that occurs as the loaf cools. As the bread sits, steam trapped inside the loaf migrates upward, potentially softening the crust you worked so hard to bake. To combat this, remove the loaf from the pan after the initial 10-minute rest and place it on a wire rack elevated at least two inches above the counter. This allows for 360-degree airflow, which is critical for moisture regulation. If you desire a slightly sturdier crust, brush the top of the loaf with a very thin layer of melted butter or simple syrup immediately after removing it from the oven. This creates a protective barrier that seals in the moisture while preventing the top from becoming tacky or damp during the cooling process.
Advanced Add-ins and Texture Contrast
While walnuts and chocolate chips are common, you can elevate the texture of your loaf by incorporating ingredients that offer a snap or a chew. For instance, folding in crystallized ginger pieces provides a sharp, spicy bite that contrasts beautifully with the mellow sweetness of the pumpkin. Alternatively, try adding toasted pepitas (pumpkin seeds) inside the batter; they retain their crunch even after baking, providing a sophisticated texture change. Another professional touch is to toss your mix-ins in a teaspoon of flour before folding them into the batter. This prevents the nuts or chips from sinking to the bottom of the pan due to gravity during the first half of the bake, ensuring they remain suspended evenly throughout the entire loaf.
Frequently Asked Questions
Q: Can I replace the eggs with flax eggs to make this vegan? A: Yes, you can substitute the two eggs with two flax eggs (2 tablespoons of ground flaxseed meal mixed with 6 tablespoons of water, set for 10 minutes). The loaf will be slightly denser but remain delicious. Q: Why is my pumpkin bread oily? A: This usually happens if the oil and pumpkin were not whisked together thoroughly before adding the dry ingredients. Ensure the wet base is completely emulsified before moving on to the next step. Q: Is it possible to use fresh pumpkin instead of canned? A: Absolutely. If using fresh pumpkin, roast it until tender and then puree it in a food processor. It is vital to strain the puree through cheesecloth for at least an hour to remove excess water, otherwise, the bread will be soggy. Q: Can I bake this in muffin tins instead of a loaf pan? A: Yes, you can. Reduce the baking time to approximately 20–25 minutes at the same temperature. Start checking for doneness with a toothpick at the 18-minute mark. Q: What is the best way to reheat a slice? A: A light toast in a toaster oven or a quick sear in a buttered skillet provides the best texture, warming the spices and crisping the edges while keeping the center soft.
Related posts:
 Perfect Meatless Meatloaf Recipe
 Perfect Scrambled Eggs Tutorial
 Gluten-Free Spinach Muffins Recipe
 Matcha Banana Bread Recipe That’s Actually Healthy
 Perfect Pumpkin Loaf Recipe
 Guilt-Free Cinnamon Roll Recipe
 Essential Baking Tools for Your Kitchen
 Keto Cookies That Actually Taste Like Real Cookies