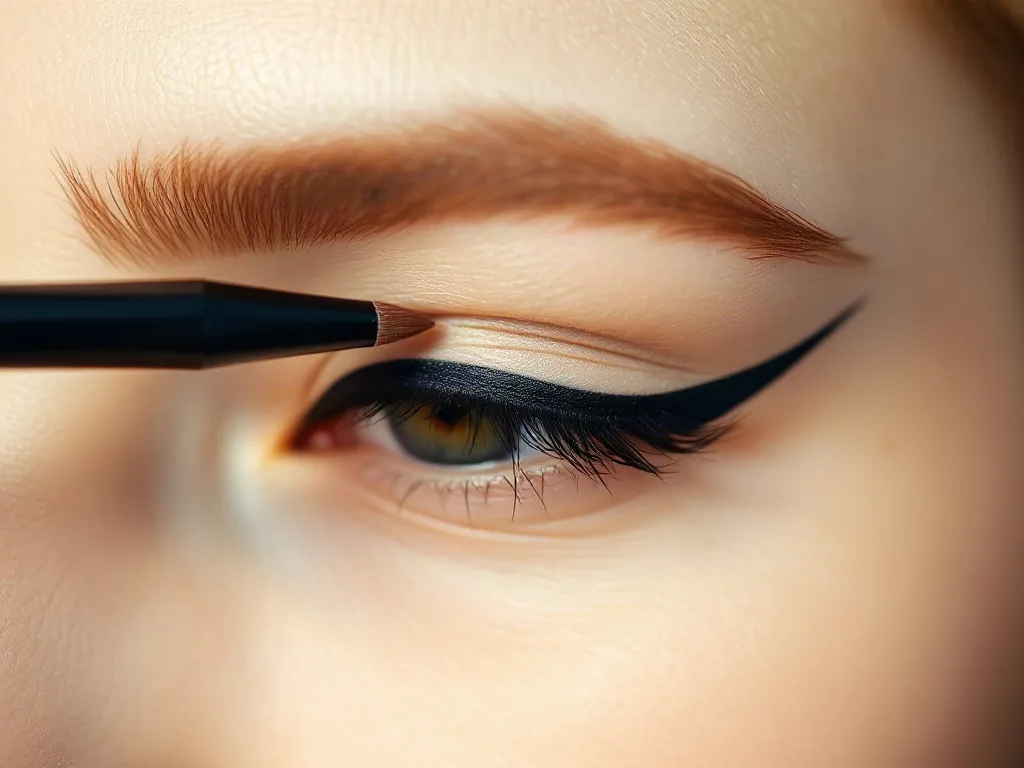
The perfect winged eyeliner is a makeup milestone that can transform any look from everyday natural to dramatic evening glam. Whether you’re a beginner or looking to refine your technique, mastering the winged liner creates a stunning focal point that enhances the eyes and brings balance to the face. This comprehensive tutorial breaks down everything you need to know to achieve that flawless, Instagram-worthy wing every single time.
Understanding the Winged Eyeliner Foundation
Before picking up any eyeliner, it’s essential to understand the anatomy of a perfect wing. The wing consists of three key components: the base line that follows your upper lash line, the wing itself that extends outward, and the connection between the two. The angle and length of your wing should complement your eye shape and face structure. For most face shapes, a wing that sits at approximately a 45-degree angle from the outer corner creates the most flattering effect.
The first step is determining your wing length. A good rule of thumb is to imagine a line from the outer edge of your eye extending outward – this is where your wing should begin. The length of this extension should be roughly proportional to your eye size; larger eyes can handle longer wings, while smaller eyes benefit from more subtle extensions. The key is finding what flatters your unique features rather than following generic rules.
Choosing the Right Tools for Success
Your eyeliner choice significantly impacts your results. For beginners, liquid eyeliner with a fine tip offers precision and longevity. Brands like Kat Von D, NYX, and Stila offer excellent options with built-in brushes that provide control. If you prefer gel eyeliner, pairing it with a angled brush gives you flexibility in line thickness. Pencil liners are great for smudging and creating soft looks but require more practice for sharp wings.
Equally important is your tool selection. A high-quality angled brush can make gel application effortless. For liquid liner, choose products with a felt tip rather than a brush tip for better control. An angled mirror setup allows you to see your eye shape clearly while applying. Some makeup artists even recommend using a clean spoolie brush to blend any harsh lines after application, creating a seamless finish.
Preparing Your Eyelid Canvas
Successful winged eyeliner begins with proper preparation. Start by cleansing your eyelids and ensuring no residual eye cream or moisturizer remains, as this can cause liner to slide or fade prematurely. Apply a thin layer of translucent powder or eyelid primer to create a smooth base. This step is particularly crucial for oily eyelids, where products tend to migrate throughout the day.
If you’re using cream or gel products, allow each layer to dry completely before applying eyeliner. A quick trick is to use a clean cotton swab to remove any smudges or imperfections that appear during the drying process. For extra longevity, especially in humid conditions or when wearing contacts, lightly dust your eyelid with setting powder before beginning your liner application.
Creating the Perfect Wing Template
p>Begin by drawing a small dot at the outer corner of your eye where the wing should start. This dot serves as your anchor point and helps maintain symmetry between both eyes. Next, create a second dot approximately 1/8 inch away from the first, extending diagonally upward toward your temple. Connect these two dots with a gentle curve, forming the outer edge of your wing.
To ensure perfect symmetry, use the same distance measurement on both eyes. Many makeup artists recommend using a clean eyeliner brush or the edge of a credit card to measure consistently. The wing should appear as a natural extension of your lower lash line, not an abrupt angle. If the wing feels too dramatic, shorten its length or adjust the angle to better suit your features.
Step-by-Step Wing Application Technique
Start by applying a thin line along your upper lash line using steady, controlled strokes. Begin at the inner corner and work outward, keeping your eyelid slightly elevated to prevent puckering. The line should be thin initially – you can always thicken it later. Take your time with each stroke, building the line gradually rather than attempting to cover the entire lash line in one pass.
When you reach the outer corner, pause and take a deep breath to maintain steady hands. Using your template dots as guides, carefully draw the wing following your predetermined angle. The wing should start where your lash line naturally ends and extend outward in a smooth, upward motion. If you make a mistake, use an eyeliner remover pen or cotton swab dipped in makeup remover to correct the line before it dries completely.
Once the wing is dry, go back and thicken your base line to connect seamlessly with the wing. This connection should flow naturally without any gaps. For a more dramatic look, you can thicken the entire line, but for a subtle everyday wing, keep the base line thin and let the wing be the focal point.
Common Mistakes and How to Fix Them
One of the most frequent errors is creating an uneven wing. To avoid this, measure both eyes using the same reference point and ensure your angles match perfectly. If you find your wings are different lengths, use makeup tape or a stencil to guide consistent application. Another common issue is a wing that appears too steep or flat – adjusting the angle slightly can make a dramatic difference in the final result.
Misalignment between the wing and the eye shape is another pitfall. The wing should enhance, not overpower, your natural eye structure. If your wing connects awkwardly to your lash line, try shortening it or adjusting its angle. For hooded eyes specifically, keep the wing shorter and more subtle to prevent it from disappearing when the lid is open. Remember that practice improves precision – don’t get discouraged by initial imperfections.
Advanced Techniques for Different Eye Shapes
For almond-shaped eyes, a medium wing that follows the natural curve of the eye works beautifully. These eyes can handle both subtle and dramatic wings depending on the occasion. Round eyes benefit from slightly elongated wings that create the illusion of more defined shape. Extend the wing beyond the outer corner to elongate the eye visually.
Hooded eyes require special consideration – a shorter, more subtle wing prevents it from being completely hidden when the lid is open. The wing should sit just above the crease line for maximum visibility. For droopy or uneven eyes, create a slightly higher wing on the droopier side to create balance. This optical illusion technique makes both eyes appear more symmetrical without appearing forced.
Finishing Touches and Longevity Tips
After achieving your perfect wing, use a clean eyeliner brush or small stipple brush to soften any harsh edges if desired. For a more natural look, gently blend the outer part of the wing with a clean brush. To set your wing and prevent smudging, lightly dust translucent powder over the area using a small, fluffy brush. This step is optional but helpful for longwear applications.
For maximum longevity, avoid touching your eyes after application and use an oil-free setting spray to lock in your makeup. If you wear contacts, consider applying the wing slightly above the contact line to prevent discomfort. Store your eyeliner with the tip up to prevent drying, and replace products that have dried out or developed clumps, as these can ruin an otherwise perfect application.
Practice Routines and Building Confidence
Mastering winged eyeliner requires consistent practice, ideally 10-15 minutes daily rather than marathon sessions. Start with pencil liners to build muscle memory before progressing to liquid or gel formulas. Take photos of your work from different angles to identify areas for improvement and track your progress over time. Consider practicing on a practice pad or your hand before working on your actual eyes.
Join online communities or follow makeup artists on social media to learn new techniques and stay motivated. Remember that everyone’s face is different, so what works for others may need adjustment for your unique features. Celebrate small improvements and don’t compare your progress to professionals who have years of experience. With dedication and patience, the perfect wing will become second nature.
FAQ
What type of eyeliner is best for beginners?
For beginners, liquid eyeliner with a fine tip is often the most forgiving option. Brands like NYX Professional Makeup Epic Ink Liner or Stila Stay All Day Waterproof Liquid Eye Liner provide good control without requiring specialized tools. The key is choosing a formula that dries quickly to prevent smudging while offering enough flexibility for corrections. Gel eyeliner with an angled brush is another excellent option, as it allows for easy blending and precise application once you get comfortable with the technique.
How can I make my wing look more symmetrical?
Creating symmetry starts with proper measurement and consistent technique. Use a clean eyeliner brush or the edge of a credit card to measure the distance from your inner eye corner to where your wing should begin on both eyes. Mark these points lightly with a pencil first. When applying the actual eyeliner, work slowly and check your progress frequently in the mirror. If you notice asymmetry, use makeup remover to gently correct before the liner dries. Taking photos of your work can help you identify subtle differences that aren’t immediately visible in the mirror.
What should I do if I make a mistake while applying eyeliner?
Mistakes happen to everyone, but there are several ways to fix them quickly. For fresh applications, use a cotton swab dipped in makeup remover or micellar water to carefully clean up the error. For dried eyeliner, use a Q-tip with a small amount of remover and be gentle to avoid irritating your eyes. If the mistake is significant, you can always start over with a clean eye after properly removing all product. To prevent future errors, work slowly, take breaks between eyes, and keep your tools clean and within reach.
How do I adapt winged eyeliner for different occasions?
The beauty of winged eyeliner is its versatility across different looks. For everyday wear, keep the wing thin and close to the lash line with a thin base line. For work or school settings, extend the wing slightly but maintain a soft, blended edge. Evening or special occasion looks can feature thicker lines and more dramatic wings. For photoshoots or camera work, make the wing slightly more pronounced as it tends to appear smaller in photographs. Always consider the lighting conditions where you’ll be wearing your look.
How long does winged eyeliner typically last, and how can I make it last longer?
}
Related posts:
 Professional Tricks to Make Your Lipstick Last All Day
 Is Honest Beauty’s Mascara Worth the Hype? Our Honest Review
 How to Safely Remove Eyelash Extensions at Home
 Long-Lasting Eyeliner Tips
 Wander Beauty High Line Liquid Eyeliner: Precision and Style in One
 The Makeup Tricks That Will Change Your Entire Face
 The Best Drugstore Eyelash Serums That Actually Work
 Waterline Eyeliner Guide