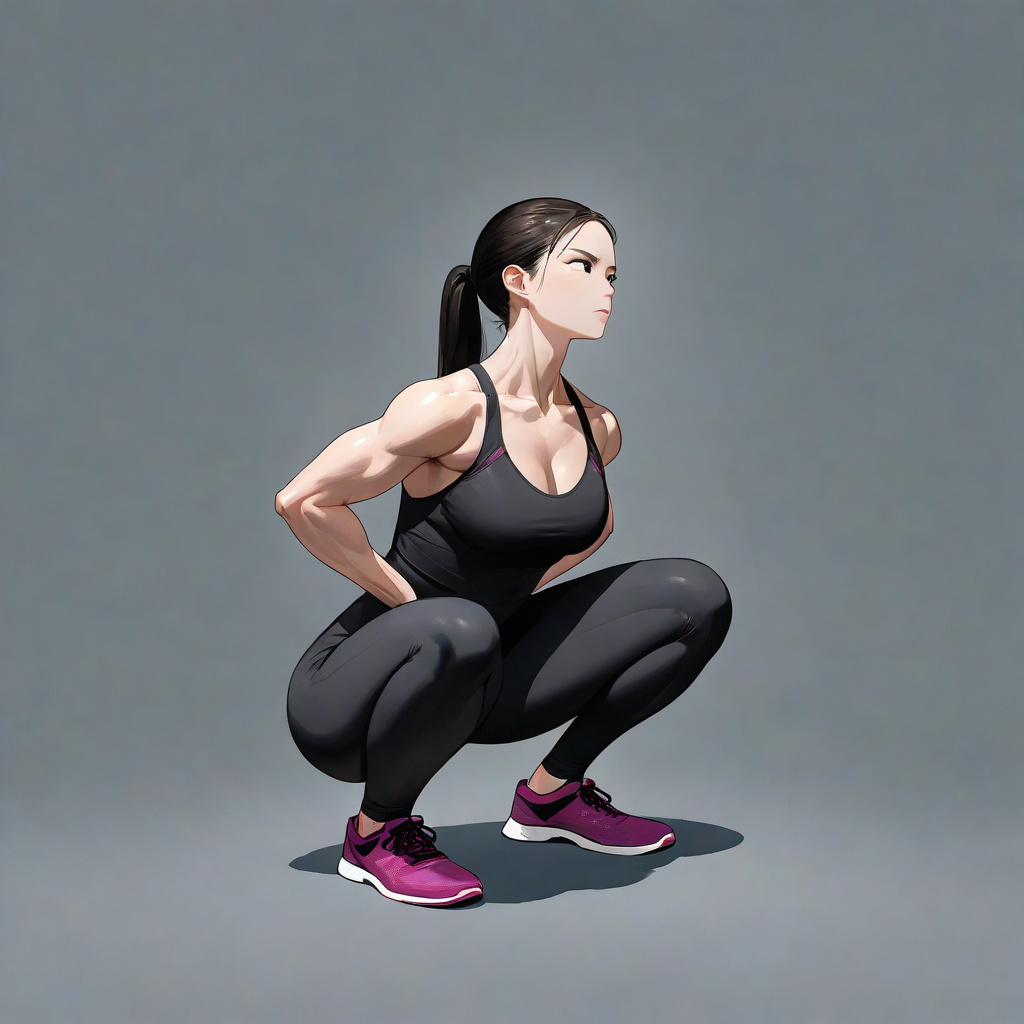
The squat is one of the most fundamental movement patterns in human movement. It’s how we sit down, stand up, pick things off the ground, and navigate our daily lives. Yet despite its natural origins, many people struggle with squat form, leading to missed gains, frustration, and potential injury. Whether you’re a seasoned lifter looking to break through a plateau or a complete beginner learning the movement for the first time, understanding proper squat mechanics will transform your training.
Why Squat Form Matters for Every Body
Squatting isn’t just for bodybuilders or powerlifters. This compound movement builds strength in your quadriceps, hamstrings, glutes, and calves while engaging your core and lower back for stability. The functional carryover to everyday activities is substantial. Every time you sit in a chair, bend to pick up a child, or lower yourself to reach a low shelf, you’re performing a variation of a squat.
Proper form ensures you’re loading your muscles effectively while minimizing stress on your joints. Poor form, on the other hand, can place excessive pressure on your knees, lower back, and hips. The good news is that squat technique can be learned, refined, and mastered at any age or fitness level. The key is understanding the mechanics and practicing with intention.
Bodyweight Squat Fundamentals
Before adding weight, master the bodyweight squat. This foundation teaches your body the proper movement pattern without the complexity of managing external load.
Starting position: Stand with your feet shoulder-width apart or slightly wider. Your toes should point forward or turn outward slightly, typically between 5 and 30 degrees. This toe angle varies based on individual hip anatomy, so experiment to find what feels most comfortable for your body.
The descent: Initiate the movement by pushing your hips back, as if reaching for a chair behind you. This hip-hinge initiation is crucial. As your hips move backward, begin bending your knees. Your torso will naturally lean forward slightly, but avoid excessive forward lean. Keep your chest up and your gaze straight ahead.
Depth: Lower yourself until your thighs are at least parallel to the ground, assuming you have the mobility to do so safely. Going deeper, where your hips drop below your knees, can provide additional glute activation and is often called “ass to grass” in fitness circles. However, depth should never come at the expense of form. If your lower back rounds or your heels lift at the bottom, you’ve gone too deep for your current mobility level.
The ascent: Drive through your heels and midfoot to stand back up. Think about spreading the floor apart with your feet, which helps engage your glutes and maintain proper knee tracking. Your hips and shoulders should rise together. Exhale as you push upward.
Common Squat Mistakes and How to Fix Them
Even experienced lifters fall into bad habits. Recognizing these common errors is the first step toward correcting them.
Knees caving inward: Valgus collapse, where your knees pinch inward during the squat, places tremendous stress on the knee joints. This often stems from weak glute medius muscles or poor motor control. To correct it, consciously think about pushing your knees outward in line with your toes. Strengthening exercises like clamshells and banded side steps can help address the underlying weakness.
Heels lifting off the ground: If your heels rise during the squat, you’re likely leaning too far forward or have limited ankle mobility. Work on calf stretches and ankle mobility drills. You can also temporarily use a small heel lift, such as a thin weight plate under each heel, while you develop better mobility.
Excessive forward lean: Some forward lean is normal, but if your chest collapses toward the ground, you place your lower back in a vulnerable position. Focus on keeping your chest proud and your core braced. A mental cue like “show the logo on your shirt to the wall in front of you” can help maintain an upright torso.
Butt wink at the bottom: Posterior pelvic tilt, commonly called butt wink, occurs when your lower back rounds at the bottom of the squat. This can happen due to limited hip mobility or going too deep for your current flexibility. Reduce your squat depth slightly and work on hip mobility exercises like deep squats holds and pigeon pose.
Barbell Back Squat Technique
Once you’ve mastered the bodyweight squat, the barbell back squat offers a powerful way to build strength. This variation allows you to move the most weight and is a staple in strength training programs.
Setting the rack: Position the bar in the squat rack at approximately mid-chest height. Step under the bar and position it across your upper back. You have two main options: the high-bar position, where the bar rests on your traps, and the low-bar position, where the bar sits lower on your rear deltoids. High-bar is more upright and quad-dominant, while low-bar allows for a more forward lean and typically heavier loads. Choose the position that feels most comfortable for your body and goals.
Unracking: Grip the bar firmly, with hands positioned wide enough to provide stability but not so wide that your upper back loses tension. Take a breath, brace your core, and lift the bar out of the hooks. Take one or two small steps backward to clear the rack. Your feet should be in your squat stance before you begin the descent.
The lift: Perform the same movement pattern as the bodyweight squat, maintaining core tension throughout. The added weight shifts your center of gravity, so you may need to lean forward slightly more than in an unweighted squat. Keep the bar tracking over the middle of your foot throughout the movement.
Reracking: After completing your set, walk forward until the bar touches the uprights of the rack. Lower the bar onto the hooks while maintaining control. Never dump the bar onto the rack.
Front Squat and Goblet Squat Variations
Not everyone needs to back squat, and variations offer unique benefits. Two excellent alternatives deserve attention.
Front squat: In this variation, the barbell rests on the front of your shoulders, held in place by your hands. This positioning forces a more upright torso, making the front squat particularly effective for quad development and core strength. The front squat also places less compressive force on the spine, making it a good option for those with lower back concerns. However, wrist flexibility is required for the traditional clean-grip position. Alternatives include the cross-arm grip or using lifting straps to hold the bar.
Goblet squat: This beginner-friendly variation holds a single dumbbell or kettlebell at chest height with both hands. The front-loaded weight naturally encourages an upright posture and proper depth. Goblet squats are excellent for learning squat mechanics, warming up before heavier lifts, or training in home gyms without a barbell setup. They also provide a significant core challenge, as your abdominal muscles work to keep your torso upright against the forward pull of the weight.
Both variations allow many lifters to achieve greater depth with better form than the back squat, making them valuable tools for developing hip mobility and squat pattern proficiency.
Mobility Work for Better Squats
Limited mobility is often the hidden barrier to better squat form. Addressing these restrictions can unlock deeper, more comfortable squats.
Ankle mobility: Your ankles need sufficient dorsiflexion to allow your knees to travel forward over your toes. Tight calves restrict this motion, causing your heels to lift or your torso to pitch forward. Try kneeling calf stretches against a wall, where you drive your knee toward the wall while keeping your heel down. Ankle circles and banded joint mobilizations can also help.
Hip mobility: Tight hip flexors and limited hip joint range of motion can restrict squat depth and contribute to butt wink. Incorporate dynamic stretches like leg swings, hip circles, and deep squat holds. The 90/90 stretch, where you sit with one leg in front and one to the side, both bent at 90 degrees, targets hip rotation. Pigeon pose and butterfly stretch address hip external rotation and adductor flexibility.
Thoracic spine mobility: A stiff upper back makes it difficult to hold the bar and maintain an upright chest. Thoracic extensions over a foam roller and cat-cow stretches can improve this area. Thread-the-needle is another effective movement that encourages rotation through the upper spine.
Perform mobility work regularly, ideally as part of your warm-up routine and on rest days. Consistent practice yields better results than occasional intense sessions.
Building a Progressive Squat Program
Improving your squat requires consistent practice and progressive overload. This principle means gradually increasing the challenge over time, whether through weight, repetitions, or depth.
For beginners: Start with bodyweight squats, focusing on pattern quality over quantity. Two to three sessions per week with 3 sets of 10-15 reps provides ample practice without overwhelming recovery. Once bodyweight feels comfortable for 3 sets of 15, progress to goblet squats with a light weight.
Intermediate lifters: With solid form established, begin barbell training. A common approach is 3 sets of 5-8 reps, adding weight gradually each session. Many programs follow linear progression, adding 2.5 to 5 pounds per workout when all reps are completed with good form. This works well for several months before more complex periodization becomes necessary.
Advanced considerations: As you progress, recovery becomes more critical. Consider squatting twice per week with varying intensities, perhaps a heavier session and a lighter, technique-focused session. Accessory exercises like Romanian deadlifts, lunges, and leg presses support squat strength by addressing weak points and building muscle mass.
Record your workouts, noting weight, sets, reps, and any form observations. This data helps identify patterns and informs future training decisions. Video recording your sets from the side angle provides valuable feedback on depth, knee tracking, and torso position.
Breathing and Core Bracing Techniques
Proper breathing and core bracing create the stability needed for safe, strong squats. This often-overlooked aspect can make the difference between a shaky rep and a confident one.
The Valsalva maneuver: Before initiating the squat, take a deep breath into your belly, expanding your diaphragm rather than your chest. Hold this breath and bear down, creating intra-abdominal pressure. This pressure acts like an internal weight belt, stabilizing your spine throughout the movement. Exhale forcefully at the top of the rep or after completing the most challenging portion.
Core bracing cues: Think about preparing your torso as if someone were about to punch you in the stomach. Your abdominal muscles should tighten all the way around, including your obliques and lower back. This 360-degree bracing provides better stability than just sucking in your stomach.
Breathing between reps: After each rep at the top position, take a new breath and rebrace. Avoid the temptation to hold your breath through multiple reps, as this can cause dizziness and blood pressure spikes. Resetting between each repetition ensures consistent stability throughout your set.
While the Valsalva maneuver is standard in heavy lifting, those with certain cardiovascular conditions should consult a healthcare provider before using this technique. A modified approach with continuous bracing and controlled breathing is an alternative for general fitness populations.
Understanding Your Individual Squat Mechanics
The “perfect” squat looks different on every body. Anthropometry—the measurements and proportions of your skeleton—plays a significant role in determining your optimal squat stance, depth, and torso angle. Two people with identical training experience can look dramatically different at the bottom of a squat, and both can be executing perfect form for their structure.
Femur length relative to tibia length creates the most visible differences. Longer femurs require more forward torso lean to keep the bar over the midfoot, while shorter femurs allow a more upright posture. This isn’t a form flaw—it’s physics. Fighting your anatomy by trying to force an upright torso when your structure doesn’t allow it leads to ineffective movement patterns and potential injury.
Hip socket depth and orientation also vary considerably. Deeper hip sockets may limit depth before the femur contacts the pelvis, causing the pelvis to tuck under (butt wink). Shallow sockets often allow greater range of motion. The angle at which your femur sits in the socket—your femoral anteversion or retroversion—affects optimal toe angle. Someone with significant anteversion may need toes pointed further outward to achieve depth comfortably, while retroverted hips might feel better with a narrower, more forward-facing stance.
Discovering your optimal stance requires experimentation. Start with the standard shoulder-width stance with toes pointed slightly out, then systematically vary one element at a time. Try a wider stance, then narrower. Experiment with toe angles from nearly straight ahead to 45 degrees outward. Pay attention to where you feel most stable, achieve the smoothest descent, and reach the best depth without compensations. Video yourself or work with a knowledgeable coach to identify the stance that allows your hips to move freely while maintaining spinal neutrality.
The Warm-Up Protocol That Prepares Your Body
A proper warm-up does more than raise your body temperature—it activates the specific muscles and movement patterns you’re about to train. Skipping or rushing through warm-up sets is one of the most common mistakes that limits performance and increases injury risk.
Begin with five to ten minutes of general movement to increase blood flow. Walking, cycling, or rowing at moderate intensity prepares your cardiovascular system and warms your muscles. Avoid high-intensity cardio that leaves you fatigued before your first working set.
Dynamic stretching differs from static stretching and is far more appropriate pre-lift. Static stretching temporarily reduces force production when performed before strength training. Instead, move through controlled dynamic patterns: leg swings front-to-back and side-to-side, hip circles in both directions, and bodyweight walking lunges with rotation. These movements take your joints through their range of motion while keeping muscles engaged.
Activation drills prime specific muscles that often fail to fire adequately. Glute bridges and single-leg glute bridges wake up the gluteus maximus, helping prevent the knees-caving error. Mini-band walks, where you step laterally with a resistance band around your knees or ankles, target the glute medius. Wall ankle mobilizations, where you place your foot a few inches from a wall and drive your knee toward it while keeping your heel down, prepare your ankles for the dorsiflexion demands of squatting.
Warm-up sets bridge the gap between activation and your working weight. Start with an empty barbell, performing 5-10 reps to groove the pattern. Add weight progressively: 3-5 reps at 50% of your working weight, 2-3 reps at 70%, and 1-2 reps at 85-90%. These heavier singles or doubles prepare your nervous system for the load without causing fatigue. Rest briefly between warm-up sets, but keep the rest periods shorter than your working sets to maintain elevated tissue temperature.
The entire warm-up protocol should take 15-20 minutes. This investment pays dividends in movement quality, confidence under the bar, and long-term joint health. Think of it as part of your training, not a barrier to it.
Accessory Exercises That Build Squat Strength
Your squat strength is only as strong as your weakest link. Accessory exercises target the muscles and movement patterns that support your squat, addressing imbalances and building the foundation for continued progress.
Pause squats develop starting strength out of the bottom position. By pausing for two to three seconds at the bottom of a squat before driving up, you eliminate the stretch reflex that normally helps you rebound. This builds pure concentric strength and teaches you to maintain tension in the most challenging position. Start with 50-60% of your regular squat weight and perform 3-5 reps per set, focusing on staying tight during the pause.
Tempo squats add another layer of challenge by controlling the speed of each phase. A common prescription is 3-1-3: three seconds to descend, a one-second pause, and three seconds to ascend. This increases time under tension, improves motor control, and highlights any stability issues in your pattern. The controlled descent prevents diving into the bottom and forces you to own every inch of the movement.
Box squats teach proper hip hinge initiation and build explosive power. Squat down to a box or bench, sit briefly while maintaining tension, then drive up. The box provides a target for consistent depth and removes the fear of getting stuck at the bottom. Powerlifters use box squats to develop starting strength, as the seated position mimics the bottom of a squat without the stretch reflex.
Single-leg work addresses bilateral imbalances that can develop from exclusively bilateral movements. Bulgarian split squats, with your rear foot elevated on a bench, target the quads and glutes while challenging balance and hip stability. Step-ups onto a box develop single-leg pressing strength. Lunges in all variations—forward, reverse, walking, and lateral—build leg strength through a different range of motion. If one leg is significantly weaker, prioritize these movements to prevent the stronger leg from perpetually compensating.
Posterior chain strength supports the squat indirectly. Romanian deadlifts strengthen the hamstrings and glutes through hip extension, building the muscles responsible for the hip drive component of the squat. Good mornings, where a barbell rests on your back as you hinge forward at the hips, strengthen the entire posterior chain while teaching you to maintain spinal position under load. Glute-ham raises target the hamstrings through knee flexion, providing strength that supports knee stability during squats.
Troubleshooting Pain and Discomfort During Squats
Pain is a signal that something in your movement, programming, or anatomy needs attention. Learning to interpret and address different types of discomfort keeps you training productively rather than destructively.
Anterior knee pain at the front of the knee often relates to quad dominance and insufficient posterior chain engagement. When the quads take over, they pull excessively on the patellar tendon. Shift your focus to initiating with your hips, driving through your glutes, and ensuring your knees track over your toes rather than collapsing inward. Strengthening your glutes with hip thrusts and banded work redistributes the load. Quadriceps and hip flexor stretching, along with foam rolling the IT band and lateral quad, can provide relief.
Posterior knee pain at the back of the knee may indicate overstretching at the bottom of your squat or insufficient hamstring strength. If you’re squatting extremely deep with limited control, the hamstrings can be placed under excessive eccentric load. Consider a slightly shallower depth while you build strength, and ensure you’re not bouncing violently at the bottom. Romanian deadlifts strengthen the hamstrings through their functional range.
Lower back pain during squatts typically stems from one of several issues. Excessive forward lean places the spine in a mechanically disadvantaged position under load. Butt wink, where the pelvis tucks at the bottom, causes flexion under load that stresses the lumbar discs. Weak core musculature fails to stabilize the spine adequately. Address each potential cause: work on thoracic spine mobility to allow a more upright posture, reduce depth to prevent butt wink, and strengthen your core with planks, side planks, and loaded carries. Consider whether your low-bar position might be contributing to forward lean, and experiment with a high-bar or front squat variation.
Hip pain can result from impingement, where the femur contacts the pelvis at depth, or from tight hip flexors being stretched under load. If you experience a pinching sensation at the front of the hip at the bottom of your squat, experiment with a wider stance and more toe-out angle, which can create more room in the joint. Hip impingement is structural, and no amount of stretching will change the bone shape—if certain positions consistently cause pain, avoid them. Work within your pain-free range of motion and consult a physical therapist or sports medicine physician if hip pain persists.
Wrist pain in the front squat or back squat often relates to bar position and grip. In the front squat, the clean grip requires significant wrist extension that many people lack. The cross-arm grip or using lifting straps as handles reduces wrist demands while maintaining the front-loaded position. In the back squat, a grip that’s too narrow forces the wrists into extension under load. Widen your grip gradually until your wrists can remain neutral. Wrist wraps provide additional support during heavy sets.
Mental Cues and Visualization for Better Squats
The mind-muscle connection isn’t just bodybuilding mythology—what you think about during a lift directly affects your movement quality. Effective mental cues simplify complex biomechanics into actionable thoughts that improve your squat instantly.
External cues, which focus on the environment or outcome, consistently outperform internal cues that focus on specific body parts. Telling yourself to “push your knees out” is an internal cue that can lead to overthinking and awkward movement. An external equivalent like “rip the floor apart with your feet” achieves the same knee position through a more natural, powerful thought process. The external cue gives your body a goal, and your nervous system figures out the details.
For the descent, useful cues include “sit back into a low chair,” “spread the floor with your feet,” and “pull yourself down between your legs.” These thoughts encourage proper hip initiation and depth without conscious knee tracking adjustments. For the ascent, “drive the floor away,” “lead with your chest,” and “push your traps into the bar” promote strong, coordinated movement patterns.
Visualization before your set primes your nervous system for success. Close your eyes and see yourself completing a perfect rep from start to finish. Feel the weight on your back, the tension in your core, the smooth descent, and the powerful drive upward. Athletes across disciplines use visualization extensively because it works—the same neural pathways activate whether you’re imagining a movement or actually performing it. A few seconds of focused visualization before approaching the bar can improve your execution.
Routine and ritual create a consistent mental state. Develop a pre-lift routine that you follow before every working set: approach the bar the same way, set your feet the same way, take your breath at the same moment, and initiate the lift with the same mental trigger. This consistency reduces decision fatigue and anxiety, allowing you to focus entirely on execution. Elite lifters often have elaborate routines that look superstitious, but the consistency serves a real neurological purpose.
Managing fear and doubt under heavy weight requires specific mental skills. When the bar feels heavy on your back, acknowledge the sensation without catastrophizing. Heavy is what you came for—it’s the stimulus that drives adaptation. Trust your preparation, focus on your cue, and commit fully to the rep. Partial commitment under heavy weight leads to failed lifts and injury. If you’re going to squat the weight, squat it with everything you have.
Squatting for Specific Populations and Goals
Different populations require different approaches to squatting. What works for a 25-year-old powerlifter won’t necessarily serve a 65-year-old looking to maintain independence, and the high-level athlete needs programming that a casual gym-goer would find unsustainable.
Older adults benefit enormously from squatting, as the movement directly addresses the functional decline that threatens independence. Rising from a chair, getting off the floor, and navigating stairs all require squatting strength. For this population, bodyweight squats and box squats to a bench or chair provide a safe, effective starting point. The box offers a target and safety net—if strength fails, the person simply sits down rather than falling. Progress slowly and prioritize consistency over intensity. Two sessions per week with 2-3 sets of 8-12 reps builds strength without overwhelming recovery capacity.
Women often hear they shouldn’t train differently than men, and while the fundamental movement pattern is identical, certain considerations apply. Women tend to have greater natural hip range of motion and may achieve deeper squats more easily. The Q-angle—the angle between the hip and knee—is typically larger in women, which can increase valgus collapse tendency. Extra attention to glute medius strengthening helps counter this. Many women find they respond well to higher volume and can tolerate more training frequency than men, though individual variation is substantial.
Youth athletes can safely squat with appropriate supervision and loading. The old myth that weightlifting stunts growth has been thoroughly debunked—resistance training with proper technique carries less injury risk than most youth sports. For adolescents, focus on bodyweight mastery first, then progressive loading with technique as the non-negotiable requirement. A youth athlete who can’t perform 10 perfect bodyweight squats has no business under a barbell. Keep the programming fun and varied to maintain engagement.
During pregnancy, squatting remains valuable but requires modification. Squats strengthen the pelvic floor and prepare the body for the demands of labor and motherhood. However, the growing belly shifts your center of gravity forward, and relaxin hormone increases joint laxity. Widen your stance to accommodate your belly, reduce depth if it feels uncomfortable, and prioritize stability over load. Postpartum, gradually rebuild your squat with bodyweight before progressing back to loaded variations. Always work with your healthcare provider to determine appropriate activity during and after pregnancy.
For pure strength development, lower rep ranges with heavier loads drive adaptation. Sets of 1-5 reps with 3-5 minutes of rest between sets target the nervous system and contractile tissue most effectively. For hypertrophy, higher rep ranges of 6-12 with moderate loads and 1-3 minutes of rest provide the metabolic stimulus and time under tension that builds muscle size. Most programs include elements of both. Athletic performance often requires explosive variations like jump squats and loaded plyometrics, developing the rate of force development that transfers to sprinting, jumping, and changing direction.
Frequently Asked Questions About Squat Form
How deep should I squat?
For most people, squatting to parallel, where your hip crease drops below your knee, provides an excellent balance of muscle activation and joint safety. Going deeper can offer additional benefits for glute development and mobility, but only if you can maintain proper form throughout the range. If your lower back rounds or your heels lift at the bottom, reduce your depth. Quality always supersedes quantity in strength training.
Why do my knees hurt when I squat?
Knee pain during squats can stem from several sources, including improper form, muscle imbalances, or pre-existing conditions. Common form issues include knees caving inward, initiating the movement with your knees rather than your hips, or allowing your knees to travel excessively forward past your toes. Ensure your glutes and hip muscles are actively engaged. If pain persists despite form corrections, consult a physical therapist or sports medicine physician to rule out structural issues.
Should my knees go past my toes when squatting?
The old advice to never let your knees pass your toes is outdated and overly restrictive. For many people, some forward knee travel is natural and necessary, especially in deeper squats. The key is that your knees track in line with your toes rather than caving inward. People with longer femurs relative to their tibias may need more forward knee travel to maintain balance. Focus on overall form quality rather than rigidly adhering to this arbitrary rule.
How often should I squat?
Most people can squat two to three times per week with adequate recovery between sessions. Beginners may start with two sessions, allowing time for movement pattern development and muscle adaptation. More experienced lifters might handle higher frequencies, often varying intensity across sessions. Listen to your body and adjust based on how you feel. Persistent soreness, declining performance, or form breakdown may indicate insufficient recovery.
What shoes should I wear for squatting?
Flat, firm-soled shoes are ideal for squatting. Running shoes with cushioned heels create instability and can throw off your balance. Many lifters prefer dedicated weightlifting shoes with an elevated, rigid heel, which can improve ankle mobility and help you reach depth. Converse-style canvas shoes work well for those who prefer a completely flat sole. Some experienced lifters squat in socks or barefoot for maximum ground contact, though check your gym’s policy first. The right footwear provides a stable base for force transfer and proper alignment.
Related posts:
 7 Best Hip Flexor Stretches
 Want Strong, Sexy Legs? Here’s How To Do The Perfect Squat
 The Ultimate Guide to Lunge Variations That Actually Work
 Front Squats vs. Back Squats: Which Is Better for You?
 The full-body strength workout to master the front squat, from pelvic floor to shoulders
 Wall Squat Technique: Mastering This Lower Body Exercise
 Perfect Your Knee-to-Squat Jump
 Why Your Knees Hurt on Inclines and How to Fix It