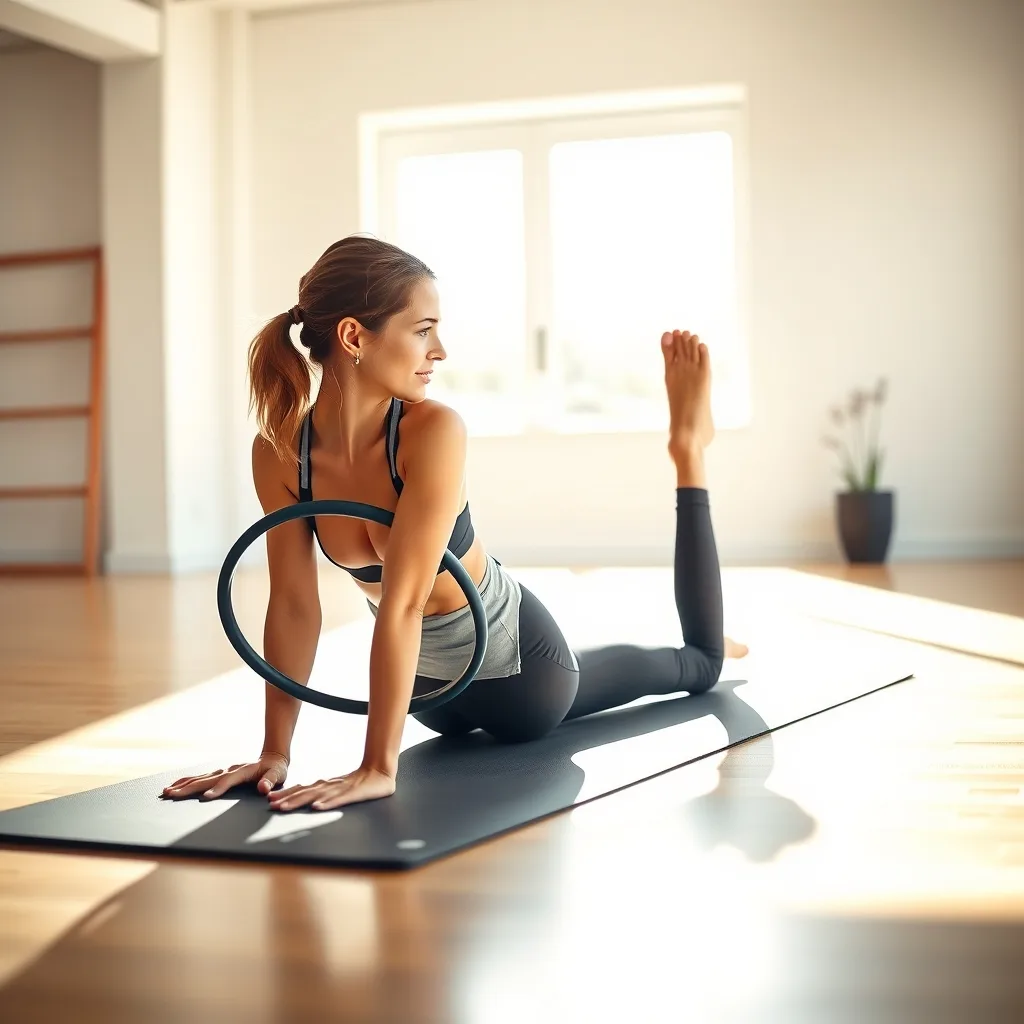
The Pilates ring looks almost too simple: a flexible circle that you squeeze between your hands, knees, or ankles. Yet that small prop can make a familiar exercise feel completely different. It adds resistance, sharpens body awareness, and gives immediate feedback about whether you are moving with control or just rushing through the reps. Often called a magic circle, the ring is a favorite in Pilates studios because it can wake up muscles that are easy to miss, especially the inner thighs, glutes, deep core, and upper back.
Key takeaways
- Focus on a slow, controlled release over three to five seconds to maximize muscle engagement and protect your joints.
- Maintain a steady, rhythmic breath throughout your workout to prevent unnecessary neck and jaw tension during challenging squeezes.
- Use the ring as a proprioceptive tool to correct form, ensuring even pressure and keeping your ribs and pelvis aligned during all movements.
- Prioritize clean, stable form over maximum resistance; if you cannot breathe or maintain posture, reduce the intensity of your squeeze.
This guide covers how the ring works, how to choose and set it up, the form rules that matter most, a complete 20-minute full-body routine, ways to progress or regress each move, common mistakes, and a simple weekly plan. It is general fitness information, not medical advice. If you have an injury, are pregnant, or have a condition that affects exercise, check with a qualified professional before adding new resistance work.
What the Pilates Ring Brings to a Workout
The ring is a resistance tool, but it is also a feedback tool. When you press inward, the ring pushes back. That resistance is gentle compared with a dumbbell, yet it is enough to make small movements feel demanding. Because the ring is unstable and flexible, your muscles must adjust continuously rather than simply lift and lower a fixed load.
One of the ring’s best features is that it creates resistance in both directions. When you squeeze, you work the muscles that press inward. When you release slowly, you work the muscles that control the return. That controlled release is where many people lose form. If you let the ring snap back, you miss the benefit and may irritate joints. If you release over three to five seconds, you train control.
The ring also improves proprioception, which is your sense of where your body is in space. Placing it between your knees can help you feel whether one side is pressing harder. Holding it between your palms can show you whether your ribs are flaring or your shoulders are creeping up. In a mat class, those details are easy to overlook. The ring makes them harder to ignore.
What the ring does not do is replace progressive strength training or guarantee a specific body change. It is a portable, low-impact way to add muscular endurance, stability, and alignment work to your routine. Used well, it is a serious challenge. Used carelessly, it becomes a prop you crush while holding your breath.
Choose and Set Up Your Ring Before You Squeeze
Most Pilates rings are about 12 to 14 inches across, but size and firmness vary. A ring should feel firm enough to offer resistance without requiring maximum force. If you have to strain to bring the sides together, it is too stiff for your current level. If the ring collapses with almost no effort, it may be too soft or underinflated. Check the manufacturer’s instructions for any inflation or care guidance.
Look for padded handles or padded contact points. The ring presses into your hands, knees, or ankles, and hard plastic can become uncomfortable. A light texture can help prevent slipping, especially during side-lying work. Wipe the pads after use, particularly if you share the ring or use it barefoot.
Set up on a non-slip mat with enough space to lie down and extend your arms. Wear clothing that lets you move without fighting the fabric. If you are working on a smooth floor, place the mat so it cannot slide. For standing exercises, stand near a wall or chair if balance is uncertain.
Before you begin, test the ring in three positions: between your palms at chest height, between your knees with feet hip-width apart, and between your ankles while lying on your side. Notice whether you can press evenly without shrugging, gripping, or twisting. If one position feels awkward, adjust the ring rather than forcing your body to fit it. A small towel under the head or a pillow under the knees can make floor work more comfortable.
Five Form Rules That Matter More Than Resistance
1. Breathe before you press. Inhale to prepare, then exhale as you squeeze or move. If you cannot breathe through the effort, reduce the force. Holding your breath raises tension everywhere, including the neck and jaw, and makes it harder to control the return.
2. Keep the ribs and pelvis connected. The ring should not pull you into an arched back. Before each rep, lengthen the spine and gently lower the ribs toward the pelvis. During overhead or standing presses, watch that the lower back does not take over. The movement should feel supported through the center, not braced by clenching.
3. Use spring, not crush. Aim for a smooth, steady squeeze over three to five seconds, then an equally controlled release. You do not need to close the ring completely. In many exercises, a partial squeeze with perfect alignment is more useful than a full crush with a collapsed posture.
4. Keep pressure even. The ring will expose one-sided dominance. If your right hand or left knee always presses harder, slow down and match the effort. Even pressure is especially important in side-lying inner-thigh work and in bridge variations, where one hip may try to do more.
5. Stay in your range, not the ring’s range. The ring can tempt you to move farther than your joints want. Choose a range where you can keep the neck long, shoulders relaxed, and pelvis stable. A smaller, cleaner movement beats a large, wobbly one.
A 20-Minute Full-Body Pilates Ring Workout
This routine uses two rounds of a six-move circuit. Warm up for three minutes, move through the circuit for about twelve minutes, and cool down for five. Rest 30 to 45 seconds between exercises if needed. Start with one round if you are new to the ring.
Warm-up: Stand tall with the ring between your palms at chest height. Inhale and widen the ribs; exhale and press the ring gently for three seconds. Repeat five times. Then sit or stand and twist slowly side to side, holding the ring at chest height, for five slow reps per side. Finish with a gentle standing roll-down and roll-up.
| Exercise | Reps or time | Key cue |
|---|---|---|
| Tabletop knee squeeze | 8 reps, 5-second squeeze | Lie on your back with knees bent to 90 degrees and the ring between the knees. Exhale, press evenly, and release slowly without letting the knees drift apart. |
| Chest press | 8 to 10 reps | Hold the ring between your palms at chest height. Press inward for five seconds, then release for five. Keep shoulders down and ribs stacked over the pelvis. |
| Glute bridge with ring | 10 reps | Place the ring between the knees. Bridge up, squeeze the ring at the top, and lower with control. Do not let the ribs flare. |
| Side-lying inner-thigh press | 8 reps per side | Lie on your side with the ring between the ankles or lower calves. Press the ring together, lift the top leg slightly if comfortable, and release slowly. |
| Dead bug with ring | 8 reps per side | Hold the ring between the knees or hands. Extend the opposite arm and leg while keeping the lower back supported. Move only as far as you can control. |
| Standing posture press | 8 reps | Stand with soft knees and the ring between the palms at chest height. Press inward while keeping the ribs down and the neck long. |
Cool-down: Lie on your back and breathe with the ring resting lightly on the ribs, feeling the inhale widen the rib cage. Then stretch the hips with a figure-four stretch on each side, follow with a gentle cat-cow, and finish with five slow breaths.
If the circuit feels too easy, add a second round before increasing resistance. If it feels unstable, reduce the squeeze force and shorten the range. The goal is controlled effort, not a battle with the ring.
Ring Exercises for Arms, Core, Hips, and Posture
The ring is not a spot-reduction tool. You cannot choose where fat leaves your body by squeezing a particular muscle. What you can do is strengthen specific areas, improve endurance, and practice better alignment. That is where the ring shines.
Arms and upper body: The chest press is the most accessible upper-body move. Hold the ring between the palms, press in, and release slowly. An overhead press works similarly: extend the arms overhead, press the ring inward, and keep the ribs down. For a single-arm variation, press one palm into the ring against a wall or thigh, but keep the effort modest and the shoulder stable. These moves build endurance in the chest, shoulders, and arms, but they are not a substitute for heavier progressive loading if strength is your main goal.
Core: The ring gives the core a job while the limbs move. In the dead bug, squeezing the ring between the knees helps keep the pelvis steady as the arms and legs extend. In a bridge, the ring encourages the knees to stay aligned instead of collapsing inward. In a plank, a gentle ring squeeze between the thighs can help you feel the deep hip and core connection, but do not squeeze so hard that you lose your breath or round the upper back.
Hips and glutes: The inner thighs are a natural fit for the ring. Side-lying presses, seated squeezes, and bridge holds all ask the adductors to work. The glutes join in during bridges and clamshells, especially when the ring is placed just above the knees and you resist the urge to let the knees roll inward. Keep the movement small and the pelvis stacked.
Posture: Standing presses and seated twists with the ring can reinforce an upright spine. The ring gives your hands something to press against, which can make it easier to feel the upper back engage. Think of lengthening through the crown of the head rather than pulling the shoulders back with force.
How to Progress or Regress Each Move
Progress by changing leverage, tempo, range, or stability, not by crushing the ring harder. A longer lever is more demanding: extending the legs in a dead bug is harder than keeping the knees bent. A slower tempo is harder than a quick squeeze. A pause at the point of maximum tension is harder than a smooth pass through. A single-leg bridge is harder than a two-leg bridge. Choose one variable at a time so you can tell whether your form is holding.
To regress, make the exercise more supported. Sit in a chair instead of standing. Keep the knees bent instead of extending the legs. Reduce the squeeze to 30 or 40 percent of your maximum. Shorten the range. Place a pillow under the head or knees. Do fewer reps with more rest. If you cannot breathe smoothly or keep the neck relaxed, the exercise is currently too hard.
A simple progression for the chest press is to start seated, then move to standing, then add a slow overhead press. For the bridge, start with the ring between the knees, then pause for three seconds at the top, then try a single-leg bridge only if the pelvis stays level. For side-lying work, begin with the ring between the ankles, then move it slightly higher or add a small leg lift. Always stop before fatigue turns into sloppy form.
Common Mistakes and Quick Fixes
Crushing the ring: A full-force squeeze often brings the shoulders up and the breath to a halt. Fix: use a moderate press and focus on a slow release. The return is part of the rep.
Holding the breath: This is especially common during bridges and overhead presses. Fix: count out loud or exhale through the squeeze. If you cannot speak a short sentence, reduce the effort.
Ribs flaring: The lower back arches when the core does not stay connected. Fix: lower the ribs slightly, shorten the range, and place one hand on the abdomen to feel the support.
Neck tension: The jaw and neck often join in when the ring is squeezed hard. Fix: soften the jaw, lengthen the back of the neck, and support the head with a small pillow during floor work.
Uneven pressure: One side may dominate without you noticing. Fix: slow down and press in stages, checking that both hands or both knees feel the ring equally.
Rushing the release: Letting the ring spring back skips the eccentric work. Fix: count three seconds on the way out and three on the way back.
Using the ring as a crutch: The ring should support good movement, not replace it. If an exercise only feels stable when you squeeze hard, regress the movement and rebuild control.
A Simple Weekly Plan
Two or three ring sessions per week are enough for most people to build familiarity and endurance. A practical week could look like this: Day 1, the full 20-minute circuit. Day 2, a shorter hips and core session with bridges, side-lying presses, and dead bugs. Day 3, an upper-body and posture session with chest presses, overhead presses, and standing twists. Fill the other days with walking, mobility, or rest.
If you are busy, use a 10-minute version: one warm-up, four exercises, one round, and a short cool-down. Consistency matters more than duration. Increase difficulty only when you can complete the current routine with steady breathing and clean alignment. If you feel sharp pain, dizziness, or joint discomfort, stop and seek appropriate guidance.
Where the Ring Fits Among Other Training Tools
Once the basics feel comfortable, it helps to see the ring as one option in a toolbox rather than the whole kit. Resistance bands offer elastic pull that increases as the band stretches, which is useful for rows, pull-aparts, and lateral steps. Mini bands are hard to beat for hip abduction work. Dumbbells give you measurable, progressive load for genuine strength building. The ring occupies a narrower niche: adduction resistance (pressing inward), isometric holds, and real-time feedback about alignment. A band cannot easily replicate a squeeze between the knees, and a dumbbell cannot tell you whether your ribs are flaring.
Practical rule: choose the tool that matches the goal. For maximal strength, weights win. For outer-hip endurance, a mini band wins. For inner-thigh work, knee tracking cues, and core connection during limb movement, the ring wins. The tools also stack well together. Try a bridge with a mini band above the knees and the ring below them: the band resists the knees falling out, the ring resists them falling in, and the hips learn to hold a neutral corridor between the two. Or add a slow ring chest press between sets of banded rows to keep the session moving without extra equipment.
One limitation to accept: ring resistance cannot be quantified in pounds. Progress is tracked through hold time, tempo, and control, not load. If your training log demands numbers, record seconds and reps, not weight.
Programming Variables: Tempo, Pauses, Density, and Ladders
Specific schemes turn general advice into a trainable plan. Tempo notation works well here: a 3-1-3 tempo means three seconds of squeeze, one second held at peak tension, three seconds of release. A 5-0-5 version removes the pause and stretches the effort across ten seconds per rep, which is brutally effective for endurance. Start most exercises at 3-1-3 and reserve 5-0-5 for one or two moves per session.
Isometric ladders are another option. Hold a gentle squeeze for three seconds, rest ten, hold five seconds, rest ten, hold eight seconds. That counts as one set. Two to three ladders per exercise is plenty, because the later holds degrade quickly once the ribs flare or the neck tightens. For density training, keep the same exercises but shrink rest from 45 seconds to 30, then 20. An EMOM format (every minute on the minute, for ten minutes) also works: perform eight slow chest presses at the top of each minute and use the remaining time as rest. Cluster sets suit bridges: five reps, rest ten seconds, five more reps, then stop.
Two guardrails. First, keep effort at roughly an RPE of 6 to 8 out of 10; the ring is not a tool for training to failure, because failure here usually means a crushed ring, a held breath, and a recruited neck. Second, change one variable per block. If you slow the tempo, do not also add rounds, or you will not know which change created the result.
Five-Minute Ring Primers Before Runs, Lifts, and Long Sits
The ring earns its keep as a primer, and priming is different from training. A primer is submaximal, short, and designed to wake up patterns you are about to use. Before a run, try 90 seconds of side-lying inner-thigh presses (eight per side) followed by ten bridges with the ring between the knees. The adductors contribute to hip stability during stance phase, and a brief, gentle squeeze can make their job easier to find. Keep the effort around 40 to 60 percent; a hard primer leaves legs heavy before you start.
Before an upper-body session, do ten slow chest presses and eight overhead presses with the ring, focusing on ribs stacked over pelvis and shoulders staying down. This is a cueing drill, not a chest workout, and it pairs well with band pull-aparts. Before a long desk day, a seated sequence helps: five five-second knee squeezes, ten seated presses, five slow twists per side.
Edge case: aggressive adductor priming first thing in the morning can provoke cramping in some people. If a squeeze locks up, halve the force, warm up first, and never stretch into a cramp. A primer should leave you feeling ready, not gripped.
A Four-Week Progression Map
Use this map on top of any routine you already own. It changes the demand without inventing new exercises.
| Week | Focus | Example adjustment | Exit criteria |
|---|---|---|---|
| 1 | Learn the feel | One round, 3-second squeezes, note which side presses first | Even pressure on most reps, steady breathing |
| 2 | Tempo | Move two exercises to 5-0-5 tempo | Full control on the release, no breath-holding |
| 3 | Leverage and pause | Add a 3-second hold at the top of bridges; lengthen one lever in the dead bug | Pelvis stays level, ribs stay down through the pause |
| 4 | Density | Cut rest to 20-30 seconds, or run the circuit EMOM-style | Same alignment at shorter rest |
After week four, reset to week two tempo work but apply it to the harder variation you earned in week three. If any week feels like a struggle, repeat it rather than pushing through. And every fourth to sixth week, consider a lighter deload week at roughly half the volume, especially if soreness lingers into the next session or sleep worsens. The map is a template, not a contract; swap exercises freely as long as the weekly focus stays intact.
Self-Assessment: Measuring What the Ring Actually Teaches
Because the ring resists quantification, you need simple field tests. The even-pressure audit: press at 50 percent for five seconds and notice which hand or knee engages first, then recheck every two weeks. Asymmetry that shrinks over time is real progress, even if nothing else changes. The hold test: bridge with the ring between the knees and count seconds until the knees drift, the pelvis drops, or the ribs flare. Track that number; it is your most honest metric. The breath test: can you say a short sentence mid-rep? If not, the effort is too high for that day.
Log three things per session: tempo used, hold seconds, and RPE. Progress then looks like longer holds at the same RPE, or the same holds with less neck and jaw tension. A plateau is two consecutive sessions with no change in hold time at the same effort. The fix is a new variable (pause, lever, tempo), never more force. Skip max-crush testing entirely; it teaches compensation, not capacity, and it risks irritating the neck, ribs, or jaw.
Desk, Travel, and Micro-Session Formats
The ring travels well, so build formats around the places you actually are. At a desk, a six-minute block works: five five-second knee squeezes with feet flat, ten seated chest presses, five slow twists per side, then stand for eight posture presses. Lock the chair wheels first, and skip the squeeze entirely if the chair rolls or the floor is slick. Standing ankle squeezes are best done near a wall for balance.
For travel, the ring slides into a suitcase corner. A hotel-room session needs no mat: tabletop knee squeezes, bridges on the carpet, side-lying presses with a folded towel under the head, chest presses, and standing twists. Ten minutes covers it. For daily life, try the micro-session rule: three minutes of gentle ring work every 90 to 120 minutes of sitting. Awareness work compounds, and three minutes never conflicts with a meeting.
Edge case: in shared or hotel spaces, keep the effort quiet and the ring quiet. A squeaking ring means you are crushing it; ease off until the sound disappears.
Care, Longevity, and When to Replace the Ring
Rings fail quietly, and a tired ring gives false feedback. Wipe the pads after each session with mild soap and water, then air dry; avoid soaking glued padding in alcohol. Store the ring flat, out of direct sun, and never in a hot car trunk or under stacked weights. Inspect it monthly: run a finger along the frame for cracks, check padding seams, and squeeze slowly to confirm the spring-back is smooth and symmetrical. If the ring dents, wobbles, or no longer returns evenly, retire it.
If your ring is inflatable, follow the manufacturer’s pressure guidance; overinflation stiffens it beyond useful resistance and stresses the seams. For shared use, disinfect between users, especially after barefoot or bare-knee work. Expect roughly one to three years of regular use from a well-cared-for ring. Replacement is cheap; the neck strain or knee irritation from a failing prop is not.
FAQ
Is a Pilates ring suitable for beginners?
Yes, provided you start with gentle pressure and simple positions. Seated presses, supported bridges, and tabletop knee squeezes are good entry points. Use a moderate squeeze rather than closing the ring completely, and keep the reps slow. A beginner should finish feeling worked but not strained. If you are unsure about your form, a few sessions with a qualified instructor can help.
Can ring workouts replace weights?
Not entirely. The ring is excellent for muscular endurance, stability, and body awareness, but its resistance is limited and not easily measured. If your goal is maximal strength or bone-building load, you still need progressive resistance from weights, machines, or other external loads. The ring works best as a complement to a broader routine, not as the only strength stimulus.
Will the ring slim my inner thighs?
No exercise can guarantee fat loss from a specific area. The ring strengthens the inner thighs and can improve how the hips and knees track during movement, but spot reduction is not a realistic goal. Changes in body composition depend on overall training, nutrition, sleep, and genetics. The ring can help you build strength and control, which is valuable regardless of appearance.
How often should I use a Pilates ring?
Two or three sessions per week is a reasonable starting point for most people. A 15- to 25-minute session can be enough, especially if you are new to resistance work. Increase frequency or difficulty gradually. If you feel lingering soreness or joint irritation, take an extra rest day and reduce the volume next time.
Is the ring safe for my back, neck, or during pregnancy?
Many ring exercises can be modified, but safety depends on your individual situation. Use a small pillow for neck support, keep the ribs connected, and avoid positions that cause pain or pressure. During pregnancy or after an injury, ask a qualified professional who knows your history. Stop immediately if you feel sharp pain, numbness, dizziness, or unusual shortness of breath, and seek medical advice.
Related posts:
 Jimmyjane Deimos Ring Review
 $5 iPhone Ring Holder Health Hack
 Best Garlic Press Guide
 PHA Bodyweight Workout: Efficient Fitness Anywhere, Anytime
 Understanding Gym Equipment
 Rep Reality Check: How Many is Actually Enough for Results
 Full-Body Workout Routines for Your Home
 This Full-Body Resistance Band Workout Will Transform Your Home Gym