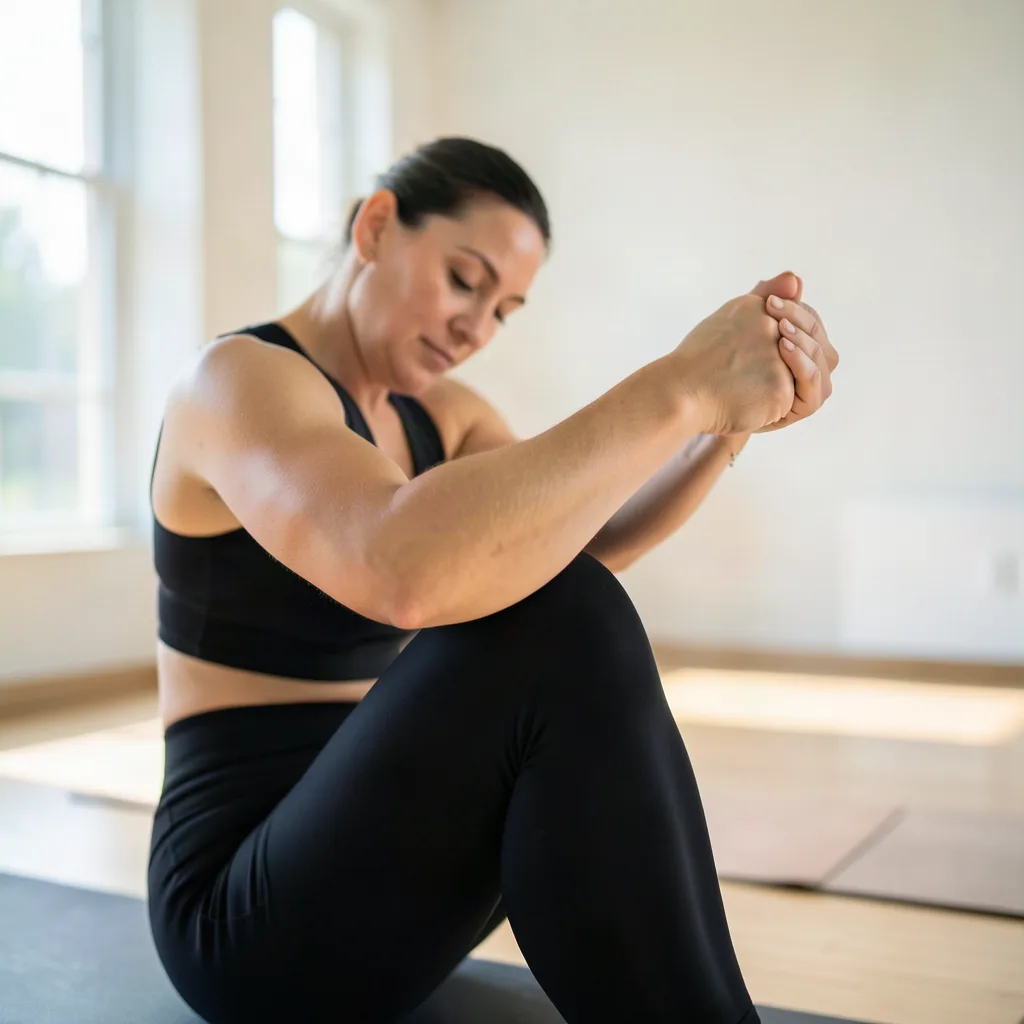
Wrist mobility often gets overlooked in fitness routines, yet strong, supple wrists are essential for everything from weightlifting and yoga to daily tasks like typing or cooking. Limited range of motion can lead to discomfort, reduced performance, and even injury over time. This article walks you through practical, evidence‑based exercises that improve wrist flexibility, strength, and joint health. You’ll learn how to assess your current mobility, integrate warm‑ups, progress safely, and apply these movements to real‑world activities.
Key takeaways
- Perform a baseline self-assessment to identify specific limitations in wrist flexion, extension, and deviation.
- Incorporate a 2-3 minute warm-up sequence before training to increase blood flow and joint lubrication.
- Use dedicated stretches like table flexor and wall extensor movements to target tight muscles from daily activities.
- Apply consistent progression by gradually increasing load, hold times, and range of motion over several weeks.
Understanding Wrist Anatomy and Common Mobility Limitations
The wrist is a complex joint formed by eight carpal bones that articulate with the radius and ulna. Its primary motions include flexion, extension, radial deviation (tilting toward the thumb), and ulnar deviation (tilting toward the little finger). When any of these planes are restricted, you may feel stiffness, experience pain during push‑ups, or notice reduced grip strength.
Common factors that limit wrist mobility are:
- Prolonged typing or smartphone use, which keeps the wrist in flexion for hours.
- Insufficient warm‑up before strength training or gymnastics.
- Previous sprains or fractures that cause scar tissue.
- Age‑related loss of connective tissue elasticity.
Recognising the specific restriction—whether it’s limited flexion, extension, or deviation—helps you choose the most effective exercises.
How to Test Your Wrist Range of Motion
Before starting a program, perform a quick self‑assessment. Use a ruler or a measuring tape for consistency.
- Flexion test: Place your palm flat on a table, fingers pointing toward you. Measure the distance between the table surface and the back of your hand. A gap larger than 2 cm often indicates limited flexion.
- Extension test: With your palm down, lift the back of your hand as high as possible without moving the forearm. Measure the vertical distance from the table to the tip of your middle finger. Less than 1 cm suggests restricted extension.
- Radial/ulnar deviation: Hold your forearm on a table, palm down, and slide your hand sideways toward the thumb (radial) and then toward the little finger (ulnar). Note any discomfort or a noticeable lack of movement.
Record these baseline numbers; they will guide your progress and help you stay motivated.
Essential Warm‑Up Routine for Wrist Preparation
Warming the wrists increases blood flow, reduces stiffness, and prepares the joint for deeper stretches. Perform the following sequence for 2‑3 minutes before any mobility work:
- Wrist circles: Extend one arm in front of you, palm down. Rotate the wrist clockwise ten times, then counter‑clockwise ten times. Switch arms.
- Prayer stretch: Press your palms together at chest height, elbows out, and lower the hands toward the waist while keeping the palms together. Hold for 20 seconds.
- Reverse prayer stretch: Place the backs of your hands together, fingers pointing down, and gently press them toward your lower back. Hold for 20 seconds.
- Finger flexor pulls: Extend one arm, palm up, and use the opposite hand to gently pull each finger back toward the forearm. Hold each finger for 5 seconds.
These movements activate the small stabilising muscles and prepare the joint capsule for deeper work.
Core Wrist Mobility Exercises
The following exercises target each major plane of motion. Perform 2‑3 sets of each, holding each stretch for 30‑45 seconds and completing 8‑12 repetitions for dynamic movements. Adjust the volume based on comfort and schedule.
1. Wrist Flexor Stretch on a Table
Place your palm on a table with fingers pointing toward you, then slowly lean forward, allowing the back of the hand to drop toward the floor. You should feel a gentle stretch in the palm and forearm. To increase intensity, place a light weight (e.g., a 1‑lb dumbbell) on the back of the hand.
2. Wrist Extensor Stretch on a Wall
Stand facing a wall, place the back of your hand on the wall with fingers pointing upward, and gently press the hand into the surface while keeping the forearm flat on the floor. Hold the stretch, then release. This targets the extensor muscles that are often tight in people who type a lot.
3. Radial Deviation Mobilisation
Hold a light dumbbell (1‑2 lb) in a neutral grip. With the forearm supported on a bench, slowly slide the hand toward the thumb side, then return to centre. The movement should be smooth and pain‑free. Perform 10‑12 repetitions.
4. Ulnar Deviation Mobilisation
Using the same setup, slide the hand toward the little‑finger side. This exercise balances the wrist by strengthening the muscles that control ulnar deviation.
5. Wrist Curl and Reverse Wrist Curl
Sit with your forearm resting on a thigh or bench, palm up for wrist curls and palm down for reverse curls. Hold a light dumbbell (2‑5 lb) and curl the wrist upward, then slowly lower. Perform 12‑15 reps each direction. These dynamic movements build functional strength while preserving mobility.
6. Finger Extension with Rubber Band
Wrap a small resistance band around the tips of your fingers and thumb. Open your hand against the band’s tension, then close slowly. This strengthens the extensor tendons that support wrist stability.
7. “Prayer to Reverse Prayer” Flow
Begin in a prayer position, hold for 10 seconds, then transition to reverse prayer and hold for another 10 seconds. Repeat the flow five times. The continuous movement promotes joint lubrication and improves range in both flexion and extension.
Integrating Wrist Mobility Into Everyday Activities
Mobility gains are reinforced when you apply them throughout the day. Here are practical ways to keep the wrists moving:
- Keyboard ergonomics: Keep wrists neutral while typing. Use a split or ergonomic keyboard and a wrist rest that supports a flat posture.
- Phone handling: Alternate hands and use voice commands when possible to avoid prolonged flexion.
- Strength training: Incorporate wrist‑specific warm‑ups before bench presses, overhead presses, or kettlebell swings.
- Yoga and Pilates: Pose variations like dolphin pose or forearm plank naturally stretch the wrists; use blocks or a rolled towel for support if needed.
Consistent micro‑movements throughout the day compound the benefits of dedicated exercise sessions.
Progression Strategies and When to Scale Back
As flexibility improves, you’ll need to increase the challenge to keep adapting. Consider these progression cues:
- Increase load: Add 0.5‑1 lb to wrist curls or use a thicker resistance band for finger extensions.
- Extend hold time: Move from 30‑second holds to 60‑second holds for static stretches.
- Advance range: For deviation exercises, gradually increase the angle of slide by using a longer lever (e.g., a longer dumbbell).
- Combine movements: Perform “prayer to reverse prayer” flow while holding a light weight to add strength demand.
If you notice sharp pain, swelling, or a sudden loss of strength, reduce intensity, revert to the warm‑up routine, and consider consulting a healthcare professional. Mobility work should feel mildly uncomfortable at most, never painful.
Creating a Weekly Wrist Mobility Schedule
Consistency is key. Below is a sample weekly plan that fits into most lifestyles. Adjust the days based on your training split.
| Day | Activity |
|---|---|
| Monday | Warm‑up + Core Mobility Routine (10 min) + 2 sets of each dynamic exercise |
| Tuesday | Strength training (upper body) – include wrist curls and reverse curls as accessory work |
| Wednesday | Yoga or Pilates session – focus on forearm‑based poses, add static stretches post‑class |
| Thursday | Active rest – 5‑minute wrist warm‑up in the morning, phone‑handling ergonomics review |
| Friday | Full mobility circuit – 3 sets of all core exercises, longer holds (45‑60 seconds) |
| Saturday | Functional activity (e.g., rock climbing, gardening) – incorporate wrist‑specific drills before starting |
| Sunday | Recovery – gentle stretches, foam‑rolling forearms, and mindful breathing |
Rotate the focus each week, gradually increasing volume or load as tolerated. Track your baseline measurements monthly to see objective progress.
Common Mistakes and How to Avoid Them
Even well‑intentioned practitioners can hinder their own progress. Watch out for these pitfalls:
- Skipping the warm‑up: Jumping straight into deep stretches can strain the joint capsule.
- Using excessive weight: Heavy wrist curls before flexibility work may reinforce tightness rather than loosen it.
- Holding breath: Proper breathing promotes relaxation and better tissue pliability.
- Neglecting opposite side: Focusing only on flexion or extension creates imbalances; always work both planes.
- Rushing progress: Mobility improves slowly; respect the body’s signals and add load only when the current level feels easy.
By staying mindful of these errors, you’ll maximise gains while protecting joint health.
Advanced Wrist Mobility Techniques for Sport‑Specific Performance
While the foundational stretches covered earlier are sufficient for general health, athletes often need targeted variations that mimic the mechanical demands of their sport. Below are three sport‑focused protocols, each built around the principle of specificity: the joint is trained through the same angles, speeds, and loads encountered during competition.
1. Olympic Weightlifting – “Snatch Grip” Wrist Extension Drill
During the snatch, the bar rests deep in the palm with a very wide grip, forcing the wrist into extreme extension and ulnar deviation simultaneously. To prepare, set up a pair of short, sturdy wooden dowels (about 12 inches long) on a low bench. Place the dowels shoulder‑width apart, then position the hands as you would for a snatch grip, palms down, fingers wrapped around the bar‑like dowels. Gently press the wrists upward while maintaining the wide grip, holding for 8‑10 seconds before releasing. Perform 3 sets of 5 repetitions per hand. The key cue is to keep the forearms flat on the bench; any lifting of the forearm reduces the stretch and shifts the load to the shoulder.
Progression: once the static hold feels comfortable, add a light plate (2–5 lb) on top of each dowel and repeat the same hold. This overload mimics the added weight of an actual barbell while preserving the joint angle.
2. Rock Climbing – “Crimp‑Lock” Flexor‑Strengthening Circuit
Climbers frequently use a crimp grip, which forces the fingers into near‑full flexion and places the wrist in a slightly flexed, pronated position. To condition the wrist for this stress, use a hangboard with a small edge (approximately 10 mm). Grip the edge with the fingertips, then place a thin rubber wrist strap around the forearm just above the wrist joint. As you hang, actively pull the wrist into extension while keeping the fingers crimped – this creates a counter‑balance that forces the forearm flexors to work isometrically. Hold for 5 seconds, rest 10 seconds, and repeat for 6 reps per side. Perform the circuit twice per session, three times per week.
Edge Cases: climbers with a history of tendonitis should start with a larger edge (15–20 mm) and reduce the hold time to 2–3 seconds, gradually increasing as tolerance improves.
3. Martial Arts – “Punch‑Ready” Dynamic Wrist Rotation
Striking arts such as boxing or Muay Thai require rapid wrist pronation/supination while maintaining a tight fist. To simulate this, attach a 3‑lb medicine ball to a short, flexible chain (approximately 12 inches). Stand in a fighting stance, hold the ball with a semi‑closed fist, and rotate the wrist in a controlled, circular motion for 30 seconds, alternating clockwise and counter‑clockwise. The chain adds an inertial component, forcing the wrist stabilisers (especially the pronator teres and supinator) to engage dynamically.
Safety Tip: keep the elbow close to the body and avoid excessive elbow extension; the movement should originate from the wrist, not the shoulder.
By integrating these sport‑specific drills into a regular mobility routine, athletes can develop joint resilience that directly translates to performance gains.
Rehabilitation‑Oriented Wrist Mobility Protocols
Recovering from a sprain, fracture, or post‑surgical immobilisation demands a cautious, graduated approach. The following protocol aligns with the three‑phase model commonly used by physiotherapists: (1) acute protection, (2) controlled mobilisation, and (3) functional reintegration. Each phase includes measurable criteria for progression, ensuring that the wrist is not overstressed.
Phase 1 – Protective Mobilisation (Days 1‑7)
Goal: maintain synovial fluid circulation without stressing healing tissues. Perform passive range‑of‑motion (PROM) movements within a pain‑free envelope of 0‑30° of flexion and extension. Use a therapist‑grade wooden dowel placed across the dorsum of the hand; gently guide the wrist through the limited arc for 10 repetitions, 3 times daily. The dowel distributes force evenly, reducing point‑load stress on the injured ligaments.
Progress Indicator: reduction in swelling (measured by circumference of the forearm at a fixed point) by at least 10 % compared to the initial post‑injury measurement.
Phase 2 – Active Assisted Mobilisation (Days 8‑21)
Goal: re‑establish active control while still protecting the joint capsule. Introduce an elastic therapeutic band (light resistance, ~2 lb). Secure the band to a stable anchor, loop it around the palm, and perform assisted wrist extensions and flexions. The band provides a gentle counter‑force, encouraging muscular activation without requiring full strength.
Exercise Example – Assisted Wrist Extension:
- Anchor the band to a door frame at waist height.
- Stand facing away, grasp the band with the injured hand, palm down.
- With the elbow flexed at 90°, slowly pull the band forward, extending the wrist to the point of mild tension.
- Hold for 3 seconds, then return to the starting position.
Complete 2 sets of 12 repetitions, twice daily. Monitor for any sharp pain; if present, revert to Phase 1.
Phase 3 – Functional Reintegration (Weeks 4‑8)
Goal: restore full, pain‑free motion and integrate wrist loading patterns required for daily activities. Incorporate closed‑chain weight‑bearing drills such as “wall‑supported push‑up” variations. Begin with a kneeling position, hands placed on a wall at shoulder height, and perform a controlled 5‑second lowering and raising motion. Progress to a full plank on the floor once the wrist can tolerate 30 seconds of weight‑bearing without discomfort.
Outcome Measure: ability to perform a standard push‑up with the wrist in neutral alignment for at least 10 repetitions without pain.
Periodised Wrist Mobility Programming Within Strength Training Cycles
Integrating wrist mobility into a broader periodisation plan prevents the joint from becoming a limiting factor during progressive overload. Below is a 12‑week template that aligns mobility work with the classic macro‑cycle phases: hypertrophy, strength, and power. The template assumes three training days per week dedicated to upper‑body work.
Weeks 1‑4 – Hypertrophy Emphasis (Higher Volume, Moderate Load)
During this phase, the nervous system is primed for muscle growth, and joint stress is relatively low. Allocate 10 minutes at the start of each upper‑body session for mobility, focusing on static holds (45 seconds) and low‑load dynamic drills (e.g., 2 lb wrist curls). Example Session:
- Warm‑up: 2 minutes of wrist circles.
- Mobility Block: 3 × 45 seconds of “Wrist Flexor Stretch on a Table” (add a 1‑lb weight for overload).
- Dynamic Block: 2 sets of 12 reps of “Radial Deviation Mobilisation” with a 1‑lb dumbbell.
The emphasis on longer static holds promotes tissue extensibility without compromising the hypertrophy stimulus.
Weeks 5‑8 – Strength Emphasis (Higher Load, Lower Volume)
As the load on the barbell increases (e.g., bench press > 80 % 1RM), the wrist experiences greater compressive forces. Shift the mobility focus to strength‑oriented movements that also improve joint stability. Replace static holds with “Weighted Wrist Curl” and “Reverse Wrist Curl” using 5‑10 lb dumbbells, performing 4 sets of 6‑8 reps. Add a “Wrist Roller” (rope + 2‑lb weight) for forearm endurance: roll the weight up and down for 30 seconds, 3 times per session.
Progression Cue: increase the weight on wrist curls by 2 lb when you can complete 8 reps with perfect form for two consecutive sessions.
Weeks 9‑12 – Power Emphasis (Explosive Movements, Low Reps)
Power phases demand rapid force transmission through the wrist, especially for Olympic lifts and plyometric push‑ups. Introduce “Explosive Wrist Extension” using a light resistance band: anchor the band, hold the wrist in slight flexion, then rapidly extend the wrist against the band’s tension, mimicking the snap of a kettlebell swing. Perform 3 sets of 5 explosive reps, focusing on minimal ground contact time.
Complement this with “Weighted Prayer‑to‑Reverse‑Prayer Flow” – hold a 2‑lb plate while moving between the two positions for 6 seconds each, 4 reps total. This blends static stretch, dynamic control, and load, perfectly aligning with the neuromuscular demands of power training.
By aligning mobility work with the overarching training phase, athletes can maintain joint health while still achieving progressive overload.
Equipment and Tools for Enhanced Wrist Mobility Work
Beyond bodyweight movements, a variety of low‑cost tools can deepen the stretch, increase loading precision, and provide quantifiable feedback. Each tool is described with a specific use case, set‑up instructions, and safety considerations.
1. Therapy Putty (Medium‑Resistance)
Therapy putty allows for multi‑directional grip challenges that simultaneously stretch the flexors and extensors. Shape the putty into a ball, then perform the following sequence:
- Pinch the putty between thumb and index finger, hold 10 seconds.
- Roll the putty across the palm, extending each finger individually.
- Compress the putty into a flat disc, then stretch the fingers outward as far as comfortable.
Repeat the circuit 3 times. The compress‑and‑release action promotes proprioceptive feedback, essential for fine motor control.
2. Wrist‑Specific Roller (e.g., “Wrist Roller” with rope)
Attach a 2‑lb weight to a short rope, loop the rope around a sturdy bar, and grip the bar with both hands. Roll the bar forward to wind the rope, then reverse the motion to unwind. This exercise builds forearm endurance and improves the wrist’s capacity to handle sustained tension, beneficial for climbers and kettlebell athletes.
Progression: increase the weight by 1 lb increments once you can complete two full cycles without excessive forearm fatigue.
3. Adjustable Wrist Stretching Device
Commercial devices (e.g., “WristFlex” or “Wrist Extender”) consist of a padded bar that holds the hand in a fixed position while a screw mechanism gradually increases the angle of stretch. Set the device to a comfortable starting angle (usually 10° of flexion or extension), then turn the screw 1‑2 mm per day. The incremental nature prevents overstretching and is ideal for individuals with chronic tightness.
Safety Note: never force the device beyond a point of mild tension; pain indicates the need to pause progression.
4. Resistance Bands (Light to Heavy)
Loop a light band around the fingers for “Finger Extension” (as described in the original article) and a heavier band for “Wrist Supination/Pronation” drills. Anchor the band, hold the forearm parallel to the ground, and rotate the palm outward (supination) or inward (pronation) against the band’s resistance. Perform 3 sets of 15 seconds per direction.
Edge Cases: individuals with limited shoulder mobility should perform the band work seated, with the elbow supported on a bench to isolate wrist movement.
Wrist Mobility for Special Populations: Age, Occupation, and Injury History
Different demographic groups encounter unique wrist challenges. Tailoring mobility strategies to these contexts maximises compliance and effectiveness.
Older Adults (60+ years)
Age‑related collagen loss reduces capsular elasticity, and osteoarthritis can limit joint glide. Prioritise low‑impact, joint‑friendly movements:
- Gentle Supination/Pronation with a Cane: Hold a lightweight cane horizontally, rest the forearm on a table, and rotate the wrist slowly for 10 repetitions each side.
- Heat‑Enhanced Stretch: Apply a warm towel to the forearm for 3 minutes before performing static stretches; heat increases tissue extensibility, reducing discomfort.
- Frequency Over Duration: Perform 2‑minute micro‑sessions five times per day rather than a single 15‑minute block, which aligns with reduced endurance in older tissues.
Progress Monitoring: use a simple goniometer (or a smartphone angle app) to record wrist extension; a 5° improvement over a month is a realistic target.
Office Workers and Gamers
Prolonged static flexion leads to adaptive shortening of the flexor carpi radialis and ulnaris. Counteract this with “Desk‑Bound Wrist Release”:
- Place a small silicone stress ball on the desk.
- Every hour, perform 10 seconds of “ball‑squeeze” followed by 10 seconds of “ball‑roll” (roll the ball across the palm from thumb to little finger).
This intermittent loading restores circulation and prevents chronic flexor dominance.
Ergonomic Adjustment Example: set the keyboard height so that the forearms are parallel to the floor and the wrists remain neutral. Combine this with a 5‑minute wrist warm‑up before the start of the workday.
Individuals with Prior Wrist Fractures
Even after radiographic healing, the joint capsule may retain adhesions. A “Scar‑Mobility” routine using a silicone massage roller can break down these adhesions. Roll the device gently along the dorsal wrist for 30 seconds, then flip and repeat on the palmar side. Follow with a light “Wrist Flexor Stretch on a Table” (no added weight) to maintain length.
Critical Warning: any crepitus (grating) that persists after three weeks of gentle mobilisation warrants a follow‑up X‑ray to rule out mal‑union.
Quantifying Wrist Mobility Progress: Metrics, Apps, and Feedback Loops
Objective data turns subjective feelings of improvement into measurable outcomes, fostering motivation and informing program adjustments. Below are three practical methods to track wrist mobility over time.
1. Digital Goniometer Apps
Smartphones equipped with accelerometers can act as goniometers when paired with free apps (e.g., “Clinometer” or “Angle Meter”). To measure wrist extension:
- Place the phone on a flat surface.
- Rest the forearm on the same surface, palm down.
- Lift the back of the hand as high as possible while keeping the forearm stationary.
- Capture the angle displayed by the app; record the value.
Repeat weekly; a 2‑3° increase after four weeks indicates meaningful progress.
2. Grip Strength Correlation
While grip strength primarily reflects forearm musculature, it indirectly signals wrist health. Use a calibrated hand‑grip dynamometer to record maximum force (three attempts, best value retained). Plot grip strength alongside wrist extension measurements; a concurrent rise suggests that mobility gains are translating into functional strength.
3. Subjective Mobility Scale (SMS)
Develop a 0‑10 self‑rating scale for each movement plane (flexion, extension, radial, ulnar). After each session, note the perceived ease of achieving the full range. Over a month, a shift of 2 points or more typically aligns with objective angle improvements.
Feedback Loop: combine the three data sources (digital angle, grip strength, SMS) into a simple spreadsheet. Apply conditional formatting to highlight weeks where any metric plateaus; this signals the need for a new stimulus (e.g., increased load or altered stretch angle).
Micro‑Habits for Wrist Health: Integrating Mobility Into Daily Routines
Large, structured workouts are valuable, but the cumulative effect of tiny, frequent movements often determines long‑term joint health. The following micro‑habits are designed to be performed in under a minute, making them easy to embed into any routine.
Morning Wake‑Up Sequence (60 seconds)
- While still in bed, extend both arms overhead, palms facing each other, and gently shake the wrists for 10 seconds.
- Transition to a seated position, place palms on the mattress, and perform a “reverse prayer” stretch for 15 seconds.
- Finish with a “finger‑spread” drill: spread all fingers as wide as possible, hold 5 seconds, then relax; repeat three times.
Mid‑Day Desk Break (30 seconds)
Set a timer to remind yourself every hour. Stand, place forearms on a desk, and perform a “wrist push‑away” – palms down, fingers pointing forward, gently push the hands away from the desk while keeping the forearms stationary. Hold 5 seconds, release, repeat twice.
Evening Wind‑Down (90 seconds)
Before bedtime, lie on your back with arms extended overhead. Use a lightweight yoga strap (or a towel) to gently pull the palms toward the ceiling, creating a mild extension stretch. Hold for 20 seconds, then release. Follow with a “wrist curl with a water bottle” – hold a 500 ml bottle, perform 10 slow curls, then reverse for 10 reps. This low‑intensity loading promotes circulation and aids recovery during sleep.
Consistency is the cornerstone of these micro‑habits. Even on rest days, performing the 2‑minute morning routine can preserve the range of motion gained during dedicated training sessions.
FAQ
Q1: How long does it typically take to notice improved wrist mobility?
Improvement varies by individual, but most people report measurable gains within 4‑6 weeks of consistent practice (3‑4 sessions per week). Tracking your baseline measurements helps you see subtle changes even before they feel obvious.
Q2: Can wrist mobility exercises help prevent carpal tunnel syndrome?
While they are not a cure, regular stretching and strengthening of the forearm flexors and extensors can reduce tension on the median nerve, which may lower the risk of developing carpal tunnel symptoms, especially for those who type extensively.
Q3: Is it safe to perform wrist mobility work if I have a recent sprain?
After the acute inflammation subsides (usually 48‑72 hours), gentle range‑of‑motion exercises can promote healing. Start with very light movements, avoid pain, and consult a physiotherapist if swelling persists.
Q4: Should I use foam rollers or massage balls for my forearms?
Self‑myofascial release with a massage ball can complement mobility work by loosening tight fascia. Spend 30‑60 seconds on each forearm, focusing on tender spots, before you begin your stretching routine.
Q5: How do I know if I’m over‑doing wrist mobility training?
Signs of over‑training include persistent soreness lasting more than 48 hours, reduced grip strength, or joint swelling. If any of these occur, reduce volume, increase rest days, and prioritize gentle static stretches until symptoms resolve.
Related posts:
 Mind Reading Through Grip Strength
 Band Together: Transform Your Core With Just One Simple Tool
 Hand Stretches for Relief
 $5 iPhone Ring Holder Health Hack
 Wrist Mobility Stretches
 The Wrist Trainer: Enhancing Your Grip Strength and Dexterity
 Understanding Gym Equipment
 This Full-Body Resistance Band Workout Will Transform Your Home Gym