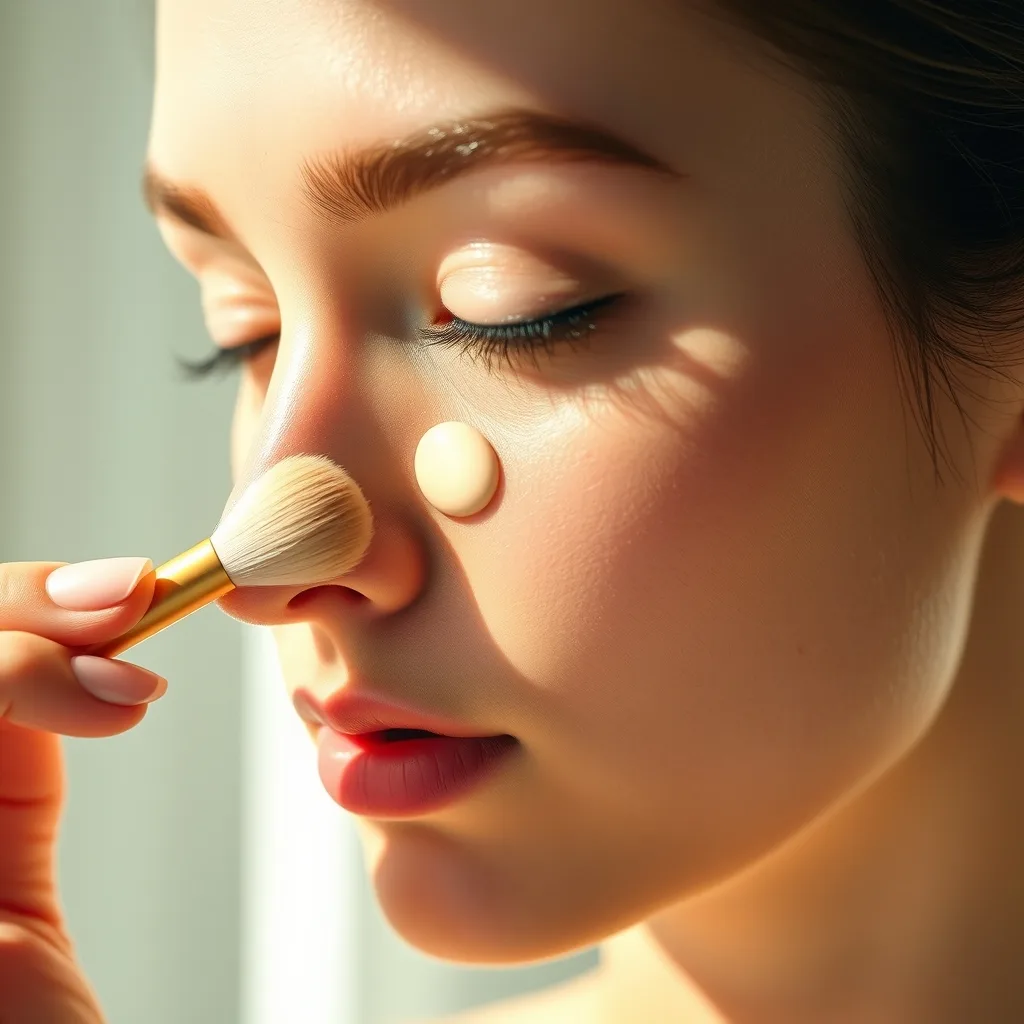
Concealer can feel like the most intimidating product in your makeup bag. You’ve probably stared at the tiny tube, wondered why it never seems to match, and worried that a little dab could turn into a full‑face disaster. You’re not alone. In this guide we cut through the myths, answer the questions that make you blush, and give you step‑by‑step methods you can trust. By the end you’ll know exactly how to pick the right shade, apply it without caking, and keep it looking fresh from morning coffee to evening drinks.
Key takeaways
- Identify your skin's undertone by checking wrist veins to select the most natural-looking concealer shade.
- Use a damp beauty sponge for seamless blending and a small brush for precise blemish coverage.
- Apply concealer in thin, buildable layers to avoid a heavy, cakey finish that settles into fine lines.
- Prep skin with targeted primers and set makeup with translucent powder or spray for all-day wear.
- Store products in cool, dark, and dry locations to maintain formula integrity and prevent bacterial growth.
1. How Do I Choose the Right Concealer Shade?
Shade selection is the foundation of every successful concealer routine. A mismatch can highlight the very imperfection you’re trying to hide. Here’s a quick, repeatable process:
- Identify your undertone. Look at the veins on the inside of your wrist. Greenish veins suggest a warm (yellow) undertone, bluish veins a cool (pink) undertone, and a mix of both indicates neutral.
- Match to your foundation. If you already use a foundation, the concealer should be one to two shades lighter for brightening (e.g., under‑eyes) or the exact shade for covering blemishes.
- Test in natural light. Swatch three shades—one lighter, one matching, one darker—on the jawline. The correct shade will disappear into the skin without leaving a noticeable line.
- Consider the purpose. For dark circles, choose a peach or orange‑based corrector before applying a neutral‑toned concealer on top.
Pro tip: Many brands now offer multi‑tone palettes that blend cool, neutral, and warm tones in a single pan. These are lifesavers for mixed‑undertone complexions.
2. Which Application Tool Gives the Best Finish?
The tool you use determines how the product sits on the skin. Below is a breakdown of the three most common options:
| Tool | Best For | How to Use |
|---|---|---|
| Fingers | Quick, natural‑looking coverage | Warm your concealer by rubbing it between thumb and forefinger, then pat gently onto the area. The heat helps the formula melt into the skin. |
| Brush (small flat or tapered) | Precise coverage on blemishes | Load the brush with a small amount, tap off excess, and dab onto the spot. Blend outward using a stippling motion. |
| Beauty sponge (wet) | Airbrushed, seamless finish | Moisten the sponge, squeeze out excess water, then bounce the concealer onto the skin. The damp surface prevents product from settling into fine lines. |
Experiment with each method on a small area of your face. You’ll discover that a combination—fingers for under‑eyes, brush for spot‑concealing, sponge for overall blending—often yields the most polished result.
3. How Much Concealer Is Too Much?
Over‑application is the fastest route to a cakey, unnatural look. The rule of thumb is “less is more.” Follow these steps to gauge the perfect amount:
- Start with a pea‑sized dot for each problem area.
- Pat, don’t rub, the product into the skin. This keeps the coverage thin and even.
- Assess the coverage after a few seconds. If the blemish still shows, add another tiny dot and blend again.
- Remember that layering thinly builds opacity without heaviness.
For under‑eye brightening, a single swipe of a creamy concealer is usually sufficient. For stubborn hyperpigmentation, you may need two light layers, but never a thick slab.
4. What Blending Techniques Work for Oily vs. Dry Skin?
Skin type dictates how a concealer behaves under the microscope of your makeup routine.
Oily Skin
- Choose a matte or oil‑free formula. Silicone‑based liquids tend to sit on top of the skin and resist slipping.
- Apply with a silicone brush or a damp sponge, then set quickly with a translucent powder.
- Avoid heavy creams; they can slide off throughout the day.
Dry Skin
- Opt for hydrating, creamy concealers that contain glycerin or hyaluronic acid.
- Apply with a soft brush or fingertip, allowing the warmth of your hand to melt the product.
- Finish with a light, luminous setting spray rather than powder to keep the area supple.
Hybrid skin types benefit from a balanced approach—use a creamy base and set only the areas prone to oiliness.
5. Why Does My Concealer Cake or Crease, and How Do I Fix It?
Caking occurs when the product sits on top of skin rather than melding with it. Creasing is the opposite: the formula sinks into fine lines, leaving a darker shadow. Both are usually caused by one of three factors:
- Improper hydration. Dry patches create a barrier. Prep the skin with a lightweight moisturizer or a hydrating primer before concealing.
- Wrong texture. Thick, heavy formulas are prone to cake; ultra‑thin liquids can settle into lines. Match the texture to the area (creamy for under‑eyes, matte for blemishes).
- Insufficient setting. Skipping powder on oily zones lets the product move. Use a finely milled translucent powder and press it on with a fluffy brush.
To rescue a caked area, gently tap a clean damp sponge over the top and blend. For creasing, apply a thin layer of a luminous primer or a dab of facial oil before the concealer, then blend quickly.
6. Which Concealer Works Best for Specific Concerns?
Not all blemishes are created equal. Here’s a quick cheat‑sheet:
- Dark circles: Use a peach or orange corrector (color‑correcting) followed by a light‑reflecting concealer one shade lighter than your foundation.
- Redness (rosacea, acne):
Choose a green‑tinted corrector to neutralize the red, then apply a neutral concealer that matches your skin tone. - Acne spots: A full‑coverage, matte concealer that matches your skin tone will camouflage without drawing attention.
- Hyperpigmentation: Look for a concealer with a slight yellow undertone to counteract dark brown spots, and blend outward to avoid a harsh line.
Layering is key: corrector first, then concealer, then foundation if needed. This three‑step method prevents the “muddy” look that occurs when you try to cover everything with one product.
7. How Do I Set My Concealer for All‑Day Wear?
Even the best concealer can fade after a few hours if it’s not locked in. Follow this three‑step setting routine:
- Press, don’t sweep. Using a small, fluffy brush, press translucent powder onto the concealed area. This creates a barrier without moving the product.
- Use a setting spray. Hold the bottle 8‑10 inches away and mist lightly. A spray with a touch of glycerin adds a dewy finish while keeping the makeup intact.
- Touch‑up wisely. Keep a mini powder puff in your bag. If shine appears, lightly press again rather than re‑applying more concealer.
Pro tip: For under‑eye areas, a finely milled setting powder applied with a tapered brush prevents fallout while keeping the skin looking fresh.
8. What Are the Most Common Mistakes and How Can I Fix Them?
Even seasoned makeup lovers slip up. Identify the error, then apply the corrective technique:
| Common Mistake | Why It Happens | Quick Fix |
|---|---|---|
| Applying concealer before foundation | Leads to uneven texture and makes blending harder. | Swap the order: foundation first, then spot‑conceal and blend. |
| Using the wrong shade for brightening | Creates a “mask” effect. | Pick a shade 1‑2 tones lighter than your skin, not just a lighter version of your foundation. |
| Skipping primer on oily T‑zone | Causes sliding and creasing. | Apply a mattifying primer to oily zones before concealer. |
| Over‑powdering | Leaves a chalky finish. | Use a light hand—press only, and finish with a setting spray for a natural look. |
| Using a dry brush on dry skin | Creates a flaky, patchy appearance. | Moisten the brush slightly or switch to a damp sponge. |
By catching these pitfalls early, you’ll save time and avoid the frustration of a makeup mishap.
9. Can I Find Quality Concealer on a Budget?
Excellent performance doesn’t always require a luxury price tag. Here are three budget‑friendly options that consistently receive high ratings:
- Maybelline Fit Me Concealer – Lightweight, natural finish, available in 48 shades.
- L.A. Girl Pro Conceal – Full coverage, creamy texture, excellent for acne spots.
- NYX Professional Makeup HD Concealer – Thin, blendable formula ideal for under‑eyes.
When shopping, focus on three criteria: shade range, finish (matte vs. luminous), and ingredient list (look for hydrating components like glycerin). Test the product in store if possible; many retailers allow a small sample on the back of your hand.
How to Store Concealer to Preserve Its Freshness
Even the most high‑performing concealer will lose its efficacy if it’s not stored correctly. Below is a step‑by‑step storage protocol that works for liquid, cream, and stick formats.
- Temperature matters. Keep your concealer in a cool, dry place—ideally between 60°F and 75°F (15°C‑24°C). Extreme heat can cause the emollients to separate, while cold temperatures make the formula stiff and difficult to blend.
- Limit exposure to light. UV rays break down pigments and antioxidants. Store tubes or pots in a drawer, a makeup bag with a zip, or a dedicated cosmetic organizer that blocks direct sunlight. If you prefer a visible display, choose a UV‑filtered acrylic case.
- Seal the lid tightly. Air is the enemy of any product that contains oils or water‑based ingredients. After each use, wipe the rim with a clean tissue to remove residue, then snap the cap shut. For stick concealers, push the product back in fully before closing the cap.
- Mind the expiration date. Most concealers have a PAO (Period After Opening) symbol: 12M, 18M, or 24M. Mark the date you first opened the product on the packaging with a fine‑point pen. If the texture becomes grainy, changes color, or develops an off‑smell, discard it—even if the PAO hasn’t elapsed.
- Use a small, airtight container for travel. When you’re on the go, transfer a pea‑sized amount into a silicone travel pot. This reduces the number of times the main tube is opened, extending its lifespan.
Edge case: If you live in a humid climate, consider a dehumidifier drawer or a silica‑gel packet (the kind that comes with new shoes) placed near your makeup stash. This prevents excess moisture from encouraging bacterial growth, which is especially important for cream‑based concealers that contain water.
Concealer Beyond the Face: Body, Scars, and Tattoo Touch‑Ups
Most tutorials focus on the face, but concealer can be a secret weapon for other parts of the body that need quick camouflage. Below are three common scenarios and the best practices for each.
1. Covering Small Body Blemishes
- Choose a cream or stick with a matte finish. Body skin tends to be thicker and sweats more, so a matte texture reduces the risk of transfer onto clothing.
- Apply with a small, flat brush. A ½‑inch synthetic brush lets you target the blemish without spreading the product too far.
- Set with a translucent powder. Lightly dust the area using a mini puff; this locks the product in place for up to eight hours.
Example: A red spider bite on the forearm can be neutralized with a green‑tinted corrector followed by a skin‑tone matte concealer. Blend in a circular motion, then press powder on top.
2. Camouflaging Surgical Scars or Keloids
Scars often have an uneven texture that can cause concealer to settle into crevices. To achieve a smoother appearance:
- Apply a silicone‑based scar primer (e.g., a silicone gel sheet) for at least 30 minutes. This creates a uniform surface.
- Use a high‑coverage, oil‑free concealer that contains dimethicone for added slip.
- Blend with a stippling brush, then set with a setting spray that includes a film‑forming polymer. The polymer acts like a light mask, preventing the product from cracking as the skin moves.
Edge case: For very raised scars, a thin layer of a mineral‑based powder (such as zinc oxide) can be dusted over the concealed area before setting. This reduces shine and adds a matte barrier.
3. Touch‑Up for Tattoo Fading
When a fresh tattoo is still healing, you might want to hide it for a special event. Here’s a safe method:
- Choose a hypoallergenic, fragrance‑free concealer that lists “non‑comedogenic” on the label.
- Apply a thin layer using a synthetic brush, then immediately seal with a breathable setting spray (alcohol‑free). Avoid heavy powders that could irritate the fresh skin.
- Remove the concealer with a micellar water wipe before showering to prevent clogging pores.
Remember: Concealer is a temporary cover, not a substitute for proper tattoo aftercare.
Advanced Color‑Correcting Strategies for Complex Skin Concerns
The basic color‑correction wheel (green for red, peach for blue‑purple, lavender for yellow) works for most situations, but many skin tones present mixed undertones that require a layered approach. Below is a three‑step correction system for “multichromatic” problem areas.
Step 1: Identify the Dominant Hue
Hold a white sheet of paper next to the blemish and note the most prominent color shift. For example, a post‑acne mark might appear pinkish‑red on the outer edge and brown in the center.
Step 2: Apply the Primary Corrector
- Red‑dominant areas: Use a green corrector with a slightly yellow undertone (green‑yellow) to avoid making the skin look ashen.
- Blue‑purple dark circles: Opt for a peach corrector that leans toward orange if you have warm undertones, or a true peach for neutral/ cool tones.
- Brown hyperpigmentation on deeper skin: Choose a bright orange corrector (instead of the usual peach) because orange provides more contrast against deeper melanin.
Step 3: Layer a Secondary Neutralizer
After the primary corrector has been blended, apply a neutral‑toned concealer that matches your foundation. This second layer evens out any residual hue and creates a seamless transition to the surrounding skin.
Edge Cases & Pro Tips
- Mixed‑tone blemishes: For a spot that is both red on the periphery and dark brown in the center, apply green corrector first, blend outward, then dab orange corrector only on the center before the neutral concealer.
- Very fair skin with pink undertones: A yellow‑based corrector can neutralize pink without turning the skin too sallow. Test on the jawline before full application.
- Using multiple correctors in one session: Keep a small mixing palette (a disposable silicone mat works well) and blend the correctors together before applying. This prevents harsh lines where colors meet.
Layering Concealer with Primer, Foundation, and Highlighter for a Seamless Finish
Concealer rarely works in isolation; its true power emerges when it is strategically layered with other base products. Below is a step‑by‑step workflow that maximizes coverage while preserving a natural radiance.
- Prep with a targeted primer. Use a silicone‑based primer on oily zones (T‑zone, forehead) and a hydrating, peptide‑rich primer on dry or mature areas (under‑eyes, cheeks). This creates a uniform canvas and prevents the concealer from sliding or creasing.
- Apply a thin veil of foundation. Choose a lightweight, buildable foundation and apply it with a damp beauty sponge. The goal is to even out overall skin tone without fully covering the problem area.
- Spot‑conceal. Using a small brush, dab concealer only where needed. Because the foundation already provides a base, you can use a slightly deeper shade for blemishes and a lighter one for brightening.
- Blend outward. With a stippling brush, blend the edges of the concealer into the foundation in a feather‑light motion. This avoids a “mask” effect.
- Lock with a translucent setting powder. Press the powder onto the concealed spots with a tapered brush. For oily zones, use a mattifying powder; for dry zones, a luminous powder works better.
- Optional: Highlight the high points. After the powder has set, apply a cream or liquid highlighter on the cheekbones, bridge of the nose, and cupid’s bow. The highlight should sit above the concealer, not beneath it, to keep the skin looking three‑dimensional.
- Finish with a setting spray. Choose a spray that matches your desired finish—dewy for a fresh look, matte for a photograph‑ready appearance. Hold the bottle 8‑10 inches away and mist in an “X” pattern.
Edge case: If you have extremely oily skin and notice the concealer slipping after a few hours, incorporate a blotting step before the final setting spray. Gently press a clean oil‑absorbing sheet onto the area, then re‑apply a light dusting of powder.
Concealer Techniques for Mature Skin and Fine Lines
As skin ages, it loses elasticity and becomes more prone to creasing. Traditional heavy‑coverage concealers can settle into fine lines, accentuating rather than hiding them. The following methods are designed specifically for mature skin.
Choose the Right Texture
- Light‑diffusing, serum‑infused formulas. Look for ingredients like hyaluronic acid, niacinamide, and peptide complexes. These not only hydrate but also create an optical blur.
- Avoid thick, matte sticks. They can cake and emphasize texture. Instead, opt for a liquid‑cream hybrid that spreads thinly.
Application Method
- Apply a thin layer of a hydrating primer that contains dimethicone. This creates a slip surface.
- Using a damp beauty sponge, gently bounce a pea‑sized amount of concealer onto the area. The damp sponge prevents the product from sinking into fine lines.
- Immediately follow with a luminous setting powder that contains finely milled mica. Press, don’t sweep, to avoid pulling the product into wrinkles.
Special Edge Cases
- Deep nasolabial folds. Instead of a traditional concealer, use a creamy, skin‑tone corrector mixed with a drop of facial oil. The oil adds flexibility, allowing the product to move with facial expressions.
- Under‑eye hollows. Apply a brightening concealer in a triangular shape (point toward the cheek) and blend outward. This lifts the visual field and reduces the appearance of depth.
- Dry patches on the cheeks. Pat a thin layer of a moisturizing concealer, then seal with a hydrating setting spray that contains glycerin. Avoid powder on these zones.
Pro tip: For an all‑day dewy finish, re‑mist with a setting spray that contains a light veil of hyaluronic acid every 3‑4 hours. This refreshes the skin without adding extra product.
Adapting Concealer for Different Lighting Scenarios (Photography, Stage, Everyday)
Lighting dramatically changes how concealer appears. A formula that looks flawless under fluorescent office lights may appear flat on camera or washed out under stage spotlights. Below are three lighting environments and the adjustments you should make.
1. Natural Daylight (Outdoor, Window Light)
- Finish: Opt for a luminous or satin concealer. Natural light reflects off the skin, so a subtle glow looks healthy.
- Shade: Stick to the shade that is 1‑2 tones lighter than your foundation for under‑eyes; match exactly for blemishes.
- Setting: Light dusting of translucent powder, followed by a hydrating mist.
2. Studio or Flash Photography
Flash creates harsh, direct light that can expose texture.
- Finish: Choose a matte concealer with a slightly higher pigment density. This reduces shine and prevents flashback.
- Layering: Apply two thin layers rather than one thick one. Each layer should be blended before the next is added.
- Extra Step: Use a blurring primer (silicone‑based) on the entire face before foundation. This creates a smooth surface that diffuses light.
3. Stage or Performance Lighting
Stage lights are often bright, colored, and move across the performer.
- Finish: A full‑coverage, long‑wear matte concealer is essential. Look for formulas labeled “24‑hour wear” or “theater grade.”
- Color Correction: If the stage lighting has a strong blue hue, a subtle warm undertone in the concealer can counteract a washed‑out look.
- Fixative: After setting powder, spray a high‑hold setting spray (often called “lock‑in” spray) to prevent smudging under sweat.
Edge Cases
- Mixed lighting (e.g., indoor with natural window light): Start with a luminous concealer for the majority of the face, then spot‑apply a matte concealer on areas that will face direct artificial light.
- Video calls with low‑resolution cameras: A slightly lighter concealer under the eyes can compensate for the camera’s tendency to darken shadows.
DIY Custom Concealer Mixes and Travel‑Friendly Kits
Creating a personalized concealer blend can solve the problem of “in‑between” shades and allow you to travel light. Below is a step‑by‑step guide for mixing, testing, and packing your own custom concealer kit.
Materials Needed
- Two or three concealer shades that bracket your skin tone (e.g., one light, one true, one deep).
- A small, sterile mixing palette – a silicone makeup mat works well.
- A set of mini spatulas or the tip of a disposable brush.
- Travel‑size airtight containers (preferably with a silicone seal).
- A dropper bottle for adding liquid additives (e.g., hyaluronic acid serum).
Mixing Process
- On the silicone mat, place a pea‑sized dot of each base concealer.
- Using a spatula, blend the dots together in a circular motion until a uniform color is achieved. Adjust the ratio until the shade matches the mid‑jawline in natural light.
- If the blend is too thick, add one drop of a lightweight serum (e.g., hyaluronic acid) and mix again. This creates a fluid consistency that spreads easily.
- Transfer the final blend into a travel container using a clean spatula. Label the container with the date and the shade ratio (e.g., “2L‑1M‑1D”).
Testing for Longevity
Before committing to a full‑face application, perform a 24‑hour wear test:
- Apply the custom concealer to a small area of the jawline.
- Wear it through a typical day, noting any changes in texture, oxidation, or creasing.
- If the color shifts, add a stabilizing ingredient such as a pinch of zinc oxide (for matte) or mica (for luminous) to the mix.
Travel Kit Assembly
For a minimalist makeup bag, include the following:
- One custom‑mixed concealer (the most frequently used shade).
- A dual‑ended brush – one side flat for precise spots, the other side tapered for blending.
- A mini translucent powder puff.
- A 5‑ml setting spray (choose a version that matches your skin’s finish preference).
- A compact mirror with LED lighting for on‑the‑go color checks.
All items should fit into a zip‑top pouch no larger than 6 × 4 inches, making it airline‑friendly and easy to locate in a handbag.
Edge Cases & Pro Tips
- Allergic reactions: If you have a known sensitivity to fragrance, ensure all components in your custom mix are fragrance‑free. Test a small amount on the inner forearm for 48 hours before using on the face.
- Temperature fluctuations while traveling: Store the kit in a insulated pouch or a zip‑lock bag with a small silica‑gel packet to maintain consistency.
- Mixing with tinted moisturizers: For ultra‑light coverage, blend a drop of your custom concealer with a tinted moisturizer. This creates a “skin‑tint” that evens tone without the heaviness of full concealer.
Frequently Asked Questions
- 1. Should I use a different concealer for daytime vs. nighttime?
- Daytime looks benefit from a lightweight, luminous concealer that doesn’t settle into fine lines. For evening events, a slightly fuller‑coverage, matte formula can withstand longer wear and more intense lighting.
- 2. Can I mix two concealer shades together?
- Yes. Mixing a lighter and a deeper shade on the back of your hand can create a custom match, especially for uneven skin tones. Blend well before applying.
- 3. Is it okay to apply concealer over sunscreen?
- Absolutely. In fact, applying sunscreen first protects the skin and creates a smooth base. Allow the sunscreen to absorb for a minute before applying concealer.
- 4. How often should I clean my concealer brushes?
- Brushes used on the face should be washed at least once a week with a gentle brush cleanser. This prevents bacterial buildup that can cause breakouts.
- 5. Do I need to set my concealer if I have dry skin?
- If your skin is very dry, a light dusting of translucent powder can still help, but finish with a hydrating setting spray to maintain dewiness. Avoid heavy powders that can accentuate dryness.
Related posts:
 The Best Liquid Eyeshadows That Stay Put All Day Long
 The Eyeshadow Application Method That Actually Works
 The Makeup Tricks That Will Change Your Entire Face
 NARS Concealer Review
 Foundation’s Impact on Skin
 Top Concealer Picks at Sephora
 Katey Denno’s Must-Have Products
 Merit Foundation Concealer Review