
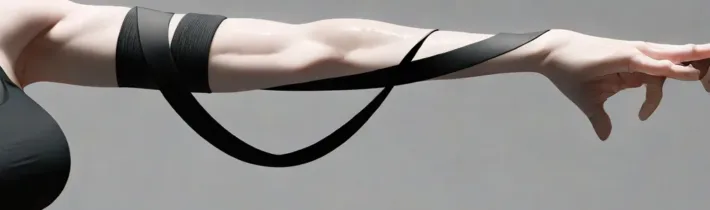
Resistance bands have long been a staple in physical therapy clinics, but their utility for aesthetic toning and functional strength is often overlooked in favor of heavy iron. For arm sculpting, however, resistance bands offer a unique advantage: constant tension. Unlike dumbbells, which rely on gravity, resistance bands provide resistance throughout the entire range of motion, forcing your muscles to remain engaged during both the concentric (lifting) and eccentric (lowering) phases of every repetition.
Understanding the Mechanics of Band Resistance
The primary benefit of using resistance bands for arm training is the variable resistance curve. As you stretch the band, the resistance increases, which perfectly mirrors the natural strength curve of your biceps and triceps. By incorporating these tools into your routine, you can effectively fatigue the muscle fibers without the need for heavy gym equipment. This makes them an ideal choice for home workouts, travel, or supplementing a traditional weightlifting routine to break through strength plateaus.
Essential Equipment and Safety Tips
To begin, you will need a set of loop bands or tube bands with handles. A set typically includes light, medium, and heavy resistances. Before starting, always inspect your bands for small tears or cracks, as these can lead to snapping during use. When performing movements, ensure you have a secure anchor point—such as a sturdy door frame or a heavy piece of furniture—if the exercise requires it. Always maintain a neutral spine and avoid locking your joints at the peak of the movement to keep the tension strictly on the muscle tissue rather than the connective structures.
The Bicep Focus: Curls and Variations
The bicep brachii is the primary muscle responsible for elbow flexion. To sculpt the biceps, stand on the center of your band with your feet shoulder-width apart. Hold the handles with your palms facing forward. Keep your elbows tucked tightly against your ribcage as you curl your hands toward your shoulders. To increase difficulty, utilize the ‘slow-tempo’ method: take three seconds to curl up and three seconds to lower. This time-under-tension approach is highly effective for muscle hypertrophy using lighter resistance tools.
Targeting the Triceps: The Back of the Arm
The triceps make up two-thirds of your upper arm volume. To sculpt this area, you must focus on overhead extensions and pushdowns. For overhead extensions, stand on the center of the band and bring the handles behind your head, keeping your elbows pointed toward the ceiling. Extend your arms upward until they are straight, then return to the starting position. For tricep pushdowns, anchor your band to a high point and keep your elbows pinned to your sides, pressing the handles down toward your thighs. This movement isolates the lateral and long heads of the triceps.
Sculpting the Shoulders for Toned Arms
Arm definition is incomplete without well-rounded deltoids. Lateral raises are the gold standard for creating the ‘cap’ on the shoulder that makes the arms appear more sculpted. Stand on the band with one foot, holding the handles at your sides. With a slight bend in your elbows, raise your arms out to the sides until they reach shoulder height. Control the descent carefully; do not let the band snap your arms back down. This movement builds the medial deltoid, which adds width and definition to the upper arm silhouette.
Incorporating Compound Movements
To maximize efficiency, integrate compound movements that hit multiple muscle groups simultaneously. A classic example is the ‘banded thruster’ or ‘lunge with a row.’ By combining a lower body movement with an upper body pull or push, you increase your heart rate and caloric expenditure while still providing sufficient stimulus to the arm muscles. This approach is particularly beneficial for those with limited time who want a full-body effect while prioritizing arm toning.
Structuring a Weekly Routine
Consistency is more important than intensity when it comes to sculpting. Aim for three sessions per week, allowing at least one day of rest between sessions to facilitate muscle repair. A sample workout could include 3 sets of 15 repetitions for bicep curls, 3 sets of 15 for tricep overhead extensions, and 3 sets of 12 for lateral raises. As you grow stronger, progress by increasing the band resistance or decreasing the rest periods between sets to 30 seconds, rather than increasing the volume of sets.
Common Mistakes to Avoid
Many beginners make the mistake of using momentum to complete their repetitions. If you find yourself swinging your torso to get the band moving, the resistance is too high or your form is breaking down. Another common error is failing to complete the full range of motion. To get the most out of your bands, ensure your arms are fully extended at the bottom of a curl and fully contracted at the top. Remember that the quality of the contraction is far more important than the number of repetitions performed.
Mastering the Isometric Hold and Peak Contraction
To accelerate muscle fiber recruitment, incorporate isometric holds into your routine. Instead of moving continuously, pause at the point of maximum tension—the top of a bicep curl or the full extension of a tricep pushdown—and hold for three to five seconds. During this hold, consciously squeeze the muscle as hard as possible, as if you are trying to crush an object in your hand. This technique forces the nervous system to recruit more motor units, leading to greater metabolic stress within the muscle belly. For the triceps, performing a ‘squeeze-and-hold’ at the bottom of the pushdown prevents the elbow from snapping back and ensures the long head of the tricep remains under peak tension, which is essential for that coveted ‘horseshoe’ definition.
The Role of Unilateral Training for Symmetry
One of the most common aesthetic issues in arm training is an imbalance between the left and right side. Resistance bands are inherently more effective than dumbbells for correcting these discrepancies because they allow for independent limb movement without the risk of the stronger arm assisting the weaker one. By performing unilateral exercises—such as single-arm overhead extensions or single-arm rows—you can focus your mental energy on the specific side that needs more development. When training unilaterally, always start with your weaker arm. Match the number of repetitions and the quality of the movement with your stronger arm, even if the strong side could technically do more. This simple protocol ensures that your arms develop symmetrically over time, which significantly improves the visual balance of your physique.
Advanced Band Positioning for Targeted Hypertrophy
Beyond standard standing positions, you can manipulate the band’s anchor point to change the ‘angle of attack’ on your arm muscles. For instance, instead of standing on the band for a bicep curl, anchor the band behind you at hip height for a ‘behind-the-back’ curl. This position places the biceps in a stretched state at the beginning of the movement, which is scientifically linked to increased muscle growth through mechanical tension. Similarly, for the triceps, try anchoring the band at chest height and performing a ‘kickback’ movement. By leaning forward and extending the arm backward, you emphasize the lateral head of the tricep. Experimenting with these unconventional anchor points prevents the body from adapting to the stimulus, forcing your muscles to continually evolve and grow.
Integrating Drop Sets and Supersets for Density
For those looking to increase muscle density and vascularity, density training techniques like supersets and drop sets are invaluable. A superset involves performing two exercises back-to-back with no rest; for example, pair a bicep movement with a tricep movement, such as standing curls followed immediately by overhead extensions. This ‘antagonist superset’ keeps the blood flowing through the entire upper arm, creating a significant ‘pump’ that stretches the muscle fascia, potentially allowing for more growth. Alternatively, use a drop-set protocol at the end of your session: perform a set with your heaviest band until failure, then immediately switch to a lighter band and continue for another 10-15 repetitions. This technique pushes the muscle beyond its normal capacity, ensuring that you have exhausted both fast-twitch and slow-twitch muscle fibers.
Optimizing Tempo for Neuromuscular Connection
The speed at which you perform a repetition, known as tempo, is often the missing link in arm sculpting. Many people rush through their sets, relying on momentum rather than muscle control. To maximize the effectiveness of bands, adopt a 4-1-2 tempo: take four seconds for the eccentric (lowering) phase, one second for the isometric pause at the bottom, and two seconds for the concentric (lifting) phase. The four-second eccentric phase is particularly critical because it creates micro-tears in the muscle fibers that, when repaired, lead to greater hypertrophy. By slowing down the lowering phase, you eliminate the ‘bouncy’ nature of the elastic band, forcing your muscles to fight the tension throughout the entire descent, which is the most effective way to build lean, sculpted arm mass.
Addressing the Forearms and Grip Strength
A frequently ignored component of sculpted arms is the forearm. Well-developed forearms act as the foundation for your biceps and triceps, making the entire arm look more powerful and defined. You can train the forearms using bands by performing ‘wrist curls’ and ‘reverse wrist curls’ while holding the band handles. Place the band under your feet and rest your forearms on your thighs. Flexing your wrists upward targets the flexors, while extending them downward targets the extensors. Additionally, simply focusing on a ‘crushing grip’—squeezing the handles as hard as you can during every arm exercise—will improve your forearm engagement. This extra attention to the lower arm adds a layer of refinement that distinguishes a beginner’s physique from a well-sculpted one.
Mastering the Isometric Hold and Peak Contraction
To accelerate muscle fiber recruitment, incorporate isometric holds into your routine. Instead of moving continuously, pause at the point of maximum tension—the top of a bicep curl or the full extension of a tricep pushdown—and hold for three to five seconds. During this hold, consciously squeeze the muscle as hard as possible, as if you are trying to crush an object in your hand. This technique forces the nervous system to recruit more motor units, leading to greater metabolic stress within the muscle belly. For the triceps, performing a ‘squeeze-and-hold’ at the bottom of the pushdown prevents the elbow from snapping back and ensures the long head of the tricep remains under peak tension, which is essential for that coveted ‘horseshoe’ definition.
The Role of Unilateral Training for Symmetry
One of the most common aesthetic issues in arm training is an imbalance between the left and right side. Resistance bands are inherently more effective than dumbbells for correcting these discrepancies because they allow for independent limb movement without the risk of the stronger arm assisting the weaker one. By performing unilateral exercises—such as single-arm overhead extensions or single-arm rows—you can focus your mental energy on the specific side that needs more development. When training unilaterally, always start with your weaker arm. Match the number of repetitions and the quality of the movement with your stronger arm, even if the strong side could technically do more. This simple protocol ensures that your arms develop symmetrically over time, which significantly improves the visual balance of your physique.
Advanced Band Positioning for Targeted Hypertrophy
Beyond standard standing positions, you can manipulate the band’s anchor point to change the ‘angle of attack’ on your arm muscles. For instance, instead of standing on the band for a bicep curl, anchor the band behind you at hip height for a ‘behind-the-back’ curl. This position places the biceps in a stretched state at the beginning of the movement, which is scientifically linked to increased muscle growth through mechanical tension. Similarly, for the triceps, try anchoring the band at chest height and performing a ‘kickback’ movement. By leaning forward and extending the arm backward, you emphasize the lateral head of the tricep. Experimenting with these unconventional anchor points prevents the body from adapting to the stimulus, forcing your muscles to continually evolve and grow.
Integrating Drop Sets and Supersets for Density
For those looking to increase muscle density and vascularity, density training techniques like supersets and drop sets are invaluable. A superset involves performing two exercises back-to-back with no rest; for example, pair a bicep movement with a tricep movement, such as standing curls followed immediately by overhead extensions. This ‘antagonist superset’ keeps the blood flowing through the entire upper arm, creating a significant ‘pump’ that stretches the muscle fascia, potentially allowing for more growth. Alternatively, use a drop-set protocol at the end of your session: perform a set with your heaviest band until failure, then immediately switch to a lighter band and continue for another 10-15 repetitions. This technique pushes the muscle beyond its normal capacity, ensuring that you have exhausted both fast-twitch and slow-twitch muscle fibers.
Optimizing Tempo for Neuromuscular Connection
The speed at which you perform a repetition, known as tempo, is often the missing link in arm sculpting. Many people rush through their sets, relying on momentum rather than muscle control. To maximize the effectiveness of bands, adopt a 4-1-2 tempo: take four seconds for the eccentric (lowering) phase, one second for the isometric pause at the bottom, and two seconds for the concentric (lifting) phase. The four-second eccentric phase is particularly critical because it creates micro-tears in the muscle fibers that, when repaired, lead to greater hypertrophy. By slowing down the lowering phase, you eliminate the ‘bouncy’ nature of the elastic band, forcing your muscles to fight the tension throughout the entire descent, which is the most effective way to build lean, sculpted arm mass.
Addressing the Forearms and Grip Strength
A frequently ignored component of sculpted arms is the forearm. Well-developed forearms act as the foundation for your biceps and triceps, making the entire arm look more powerful and defined. You can train the forearms using bands by performing ‘wrist curls’ and ‘reverse wrist curls’ while holding the band handles. Place the band under your feet and rest your forearms on your thighs. Flexing your wrists upward targets the flexors, while extending them downward targets the extensors. Additionally, simply focusing on a ‘crushing grip’—squeezing the handles as hard as you can during every arm exercise—will improve your forearm engagement. This extra attention to the lower arm adds a layer of refinement that distinguishes a beginner’s physique from a well-sculpted one.
Frequently Asked Questions
Q: Can I really get toned arms using only resistance bands? A: Yes. Resistance bands provide constant tension, which is excellent for muscle endurance and hypertrophy. By focusing on slow, controlled movements, you can achieve significant definition without heavy weights. Q: How do I know which band strength to choose? A: Start with the lightest band and perform 15 repetitions. If you can complete them with perfect form but feel muscle fatigue by the final three reps, that is the correct starting resistance. Q: How often should I increase the resistance? A: Once you can easily complete 20 repetitions with perfect form, move up to the next resistance level. There is no set timeline; listen to your body and progress at your own pace. Q: Can resistance bands help with arm flabbiness? A: ‘Flabbiness’ is usually a combination of muscle tone and body fat percentage. Resistance training builds the muscle underneath, which creates a firmer appearance, while a balanced diet supports the reduction of overall body fat. Q: Are these exercises safe if I have joint pain? A: Resistance bands are generally easier on the joints than free weights because they provide a smoother resistance curve. However, if you experience sharp or shooting pain, stop immediately and consult a healthcare professional to ensure your form is correct.
Related posts:
 Perfect Your Glute Bridge
 Arm Strength for Longevity
 Resistance Band Glute Workouts
 How to Change Your Fitness Routine to Avoid Plateau
 How to Do Tricep Dips: Technique, Variations, and Benefits
 Understanding Gym Equipment
 This Full-Body Resistance Band Workout Will Transform Your Home Gym
 Sled Training Secrets: Lucy Hale’s Killer Workout for Sculpted Arms and Back