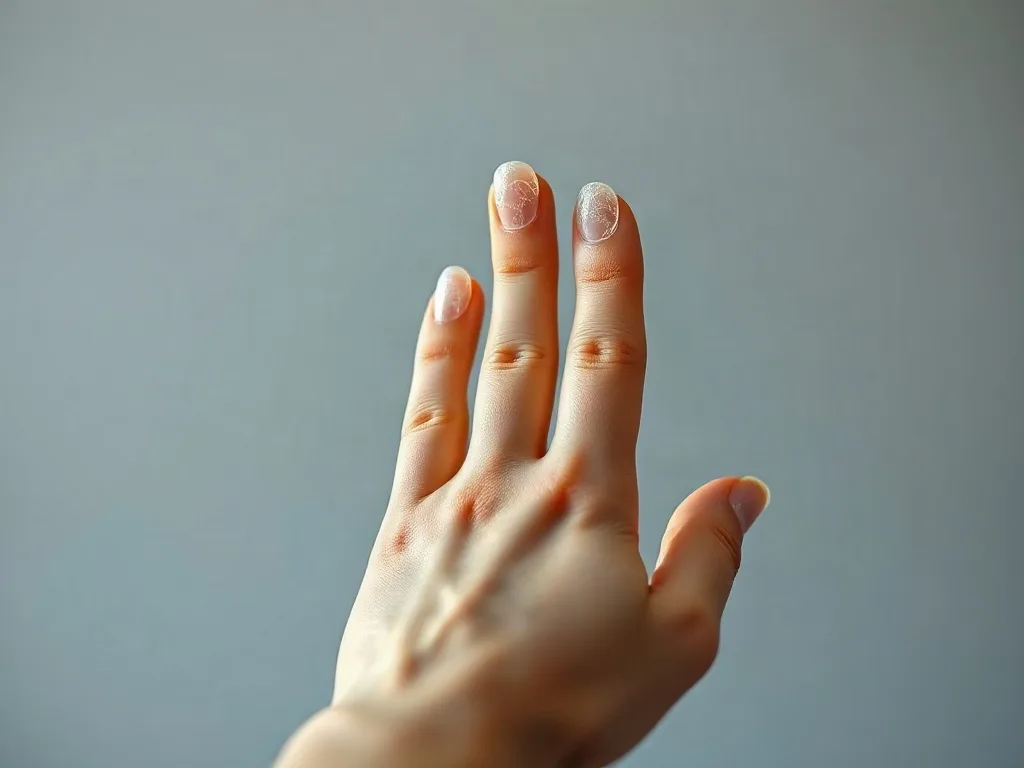
The world of nail art has always been a playground for creativity, from simple polish swatches to intricate hand‑painted designs. In the last few years, a new frontier has emerged that blends fashion, technology, and personal expression: 3D printed nail art. This technology allows designers and DIY enthusiasts to produce three‑dimensional embellishments, custom‑shaped extensions, and even fully printed nail caps that were once impossible to create by hand. In this article we explore the rise of 3D printed nail art, explain how the technology works, walk you through the design and production process, and provide practical tips for incorporating these futuristic pieces into your beauty routine. Whether you are a professional nail technician, a beauty‑savvy entrepreneur, or simply curious about the next big trend, you will find actionable guidance to start experimenting today.
Key takeaways
- Use biocompatible, dental-grade resins to ensure safety and prevent allergic reactions when applying 3D printed pieces to skin.
- Design ornaments using software like Tinkercad or Blender, keeping dimensions between 2mm and 10mm for a comfortable fit.
- Post-process prints by rinsing in isopropyl alcohol and curing under UV light before sanding and polishing for a smooth finish.
- Attach printed pieces using medical-grade nail glue and seal with a top coat to maintain the bond and shine.
- Maintain 3D nails by avoiding harsh chemicals and reapplying a clear gel top coat every few days for durability.
What Is 3D Printed Nail Art?
3D printed nail art refers to the use of additive manufacturing—commonly known as 3D printing—to create decorative elements that are applied to the fingernail surface. Unlike traditional nail polish or hand‑applied gems, these pieces are fabricated layer by layer from digital models, allowing for precise geometry, complex textures, and repeatable designs. The result can be anything from tiny sculptural charms that sit atop a manicure to full‑coverage nail caps that replace traditional acrylic extensions.
From Classic Manicures to Digital Design: A Brief History
Traditional nail art dates back to ancient Egypt, where henna and mineral pigments were used to decorate nails. The modern era began in the 1920s with the introduction of nail polish, followed by the rise of acrylic and gel extensions in the 1970s and 2000s. Each technological leap made nail decoration faster, more durable, and more elaborate. The introduction of 3D printing in the early 2010s marked the next logical step: a method that could produce ultra‑fine details without the need for manual sculpting. Early adopters were mainly high‑end salons and experimental designers, but the decreasing cost of desktop printers has opened the field to hobbyists and small businesses.
How 3D Printing Works for Nails
At its core, 3D printing builds objects by depositing material in thin layers, guided by a digital file (usually an STL or OBJ). For nail art, two printer types dominate:
- Resin (SLA/DLP) printers: These use a photosensitive liquid resin cured by a laser or projector. They produce smooth, high‑resolution pieces ideal for delicate ornaments.
- Fused filament (FDM) printers: These melt a thermoplastic filament and extrude it through a nozzle. While less detailed, they are cheaper and can print larger, structural components like full‑cap extensions.
Both technologies require a post‑processing step—cleaning, curing (for resin), and sometimes sanding—to achieve a nail‑ready finish. Safety is paramount: only biocompatible, non‑toxic resins should be used on skin, and proper ventilation is essential.
Design Process: From Concept to Printable File
Creating a 3D printed nail piece begins with a digital design. Here’s a streamlined workflow:
- Sketch your idea: Use paper or a tablet to outline the shape, size, and decorative elements.
- Choose software: Beginners can start with free tools like Tinkercad or SculptGL. More advanced users may prefer Blender, Fusion 360, or ZBrush for intricate sculpting.
- Model the piece: Keep the final dimensions in mind—most nail ornaments are 2‑10 mm in height and no wider than 10 mm to fit comfortably on a nail plate.
- Export as STL: Ensure the model is watertight (no holes) and scaled correctly.
- Slice the file: Import the STL into slicing software (e.g., Cura, PrusaSlicer). Set layer height (0.025 mm for high detail), exposure time (for resin), and support structures if needed.
- Print a test: Run a small batch to verify fit and finish before committing to a larger run.
Pro tip: Incorporate a small “tab” or “hole” into the design to make removal easier after the piece is glued onto the nail.
Step‑by‑Step Guide to Making Your Own 3D Printed Nails
Below is a practical, beginner‑friendly process that you can follow with a modest budget desktop resin printer (approximately $250‑$400) and a set of basic nail supplies.
- Gather materials:
- Biocompatible UV‑curable resin (e.g., dental‑grade or “nail‑safe” resin).
- Resin printer and UV curing station.
- Fine‑grade sandpaper (2000‑3000 grit) and polishing pads.
- Nail glue (medical‑grade cyanoacrylate).
- Base coat, top coat, and optional nail prep solution.
- Design a simple ornament: For your first piece, try a tiny geometric star or a miniature flower. Keep the height under 5 mm.
- Print the design: Load the resin, set the printer to 0.03 mm layer height, and enable supports if the model has overhangs.
- Post‑process: Rinse the printed parts in isopropyl alcohol for 2‑3 minutes, then cure under UV light for 2‑5 minutes. Sand any support marks and polish to a smooth finish.
- Prepare the nail: Clean the natural nail, push back cuticles, and apply a thin base coat. Allow it to dry completely.
- Attach the piece: Apply a drop of nail glue to the back of the printed ornament, press gently onto the nail, and hold for 10‑15 seconds. Seal with a top coat to protect the bond.
- Finishing touches: Use a fine brush to add tiny metallic dust or nail polish accents to the printed piece for extra sparkle.
After mastering a simple design, you can experiment with layered structures, color‑changing resins, or even incorporate tiny LED micro‑lights for a futuristic glow.
Choosing Materials and Finishes for Safety and Style
Not all 3D printing materials are suitable for direct contact with skin. Here are the most reliable options:
- Dental‑grade resin: Formulated for intra‑oral devices, it meets strict biocompatibility standards and is the safest choice for nail art.
- UV‑curable nail resin: Some manufacturers produce resins specifically marketed for nail extensions. These often include pigments that are safe for cosmetic use.
- PLA filament (for FDM): While PLA is generally considered non‑toxic, it is porous and may trap moisture, making it less ideal for long‑term wear on nails.
Finishing techniques can dramatically affect appearance:
- Polishing: Use a buffing wheel or polishing paste to achieve a glass‑like surface.
- Coating: A thin layer of clear UV gel over the printed piece adds durability and a high‑gloss finish.
- Coloring: Dipping the cured piece in a dip‑in nail polish or applying airbrush paint allows for endless color combinations.
Always test a small piece on a single nail before applying to a full set, to ensure there is no allergic reaction.
Cost, Accessibility, and Where to Find 3D Printed Nail Services
While the initial investment in a resin printer and safety gear can be $300‑$600, the per‑piece cost after that drops dramatically. A single small ornament may cost less than $0.10 in resin plus electricity. For salons that prefer not to invest in equipment, several online platforms now offer on‑demand 3D printed nail accessories. Popular options include:
- Etsy shops: Many designers sell downloadable STL files or ready‑made printed ornaments.
- Specialty beauty marketplaces: Sites like NailTechSupply.com host a curated selection of salon‑grade printed caps.
- Local makerspaces: Community labs often have resin printers and can print your custom files for a modest fee.
Pricing for a full set of printed nail caps ranges from $30 to $80, depending on complexity and material. For DIY enthusiasts, a starter kit (printer, resin, and basic tools) can be assembled for under $400, making the hobby accessible to a wide audience.
Caring for 3D Printed Nails: Maintenance and Removal
Because 3D printed pieces are typically heavier than traditional gel or acrylic extensions, proper care extends their lifespan:
- Gentle handling: Avoid using nails as tools; treat them like any other extension.
- Top‑coat refresh: Reapply a clear gel top coat every 3‑4 days to maintain shine and protect the adhesive bond.
- Avoid harsh chemicals: Acetone can soften some resins, so use non‑acetone nail polish removers when possible.
When it’s time to remove the pieces, soak a cotton ball in acetone‑free remover, place it over the nail, and wrap with foil for 10‑15 minutes. Gently push the printed piece off with a cuticle pusher. If any resin residue remains, file it lightly with a fine nail file and finish with a nourishing cuticle oil.
Future Trends and Ethical Considerations
As 3D printing technology continues to evolve, several trends are likely to shape the nail industry:
- Smart nails: Integration of tiny NFC chips or LED micro‑lights could enable interactive or light‑responsive designs.
- Eco‑friendly resins: Researchers are developing plant‑based, biodegradable photopolymers that reduce environmental impact.
- Mass customization: AI‑driven design platforms may allow customers to generate personalized STL files in seconds, streamlining the ordering process.
With any new technology, ethical questions arise. Designers should consider the carbon footprint of resin production and the waste generated by support structures. Choosing recyclable or biodegradable materials, and offering a take‑back program for used pieces, can mitigate environmental concerns.
Parametric and Generative Design for Nail‑Scale Artistry
When a designer moves beyond hand‑drawn sketches, the true power of digital fabrication emerges through parametric modeling. By defining key variables—such as nail curvature, desired height, and pattern repetition—software like Grasshopper for Rhino or Fusion 360’s parametric tables can automatically generate families of nail ornaments that adapt to any finger size. For example, a designer might set a base radius of 7 mm (average nail width) and a height variable ranging from 2 mm to 8 mm; the algorithm then produces a gradient of cascading lattice shells that maintain structural integrity while offering a unique visual rhythm.
Generative design pushes this further: using evolutionary algorithms, the system evaluates thousands of lattice configurations against constraints like minimum wall thickness (to avoid breakage) and maximum weight (to keep the nail comfortable). The result is a set of optimized geometries that a human might never conceive. Designers can export the winning candidates directly as STL files, preserving the exact mesh fidelity required for high‑resolution resin printers.
Practical tip: embed a small “fit‑guide” cylinder (≈2 mm diameter, 1 mm tall) into every generative model. After printing, this guide can be measured against a calibrated nail gauge to confirm that the piece will sit flush without excessive pressure. If the guide is too tight, adjust the parametric constraints and re‑slice. This iterative loop reduces waste and accelerates the path from concept to market‑ready product.
Edge case example: designing for nail‑shaped extensions (e.g., almond or coffin) requires a non‑uniform curvature. By importing a 3‑D scan of the client’s nail as a reference surface, the parametric script can map the ornament onto the exact topology, ensuring a seamless blend between the printed piece and the natural nail plate.
Augmented‑Reality Try‑On and Virtual Fitting Workflows
One of the biggest adoption barriers for 3D printed nail art is the uncertainty customers feel about how a design will look on their own hands. Augmented‑reality (AR) platforms solve this by overlaying a 3‑D model onto a live camera feed of the user’s fingers. Developers can integrate the AR SDKs of Apple’s Vision Pro or Android’s ARCore with a custom nail‑art library. When a user selects a design, the app aligns the model using fingertip detection and adjusts scale in real time.
Implementation steps for a boutique salon:
- Capture a high‑resolution 3‑D scan of a client’s hand using a portable structured‑light scanner (e.g., Structure Sensor). Export the mesh as an OBJ.
- Import the OBJ into a Unity or Unreal Engine project, applying a transparent material to simulate nail polish translucency.
- Attach the 3‑D printed ornament model to the nail mesh, ensuring the pivot point matches the nail’s center.
- Deploy the AR scene to a tablet or smart mirror, allowing the client to rotate their hand and view the design from multiple angles.
Beyond visual confirmation, AR can drive data collection: the app records which designs receive the most interactions, informing inventory decisions. It also enables “instant‑order” functionality—clients tap a button to purchase the exact STL file or a pre‑printed set, streamlining the sales funnel.
Edge case: clients with very short or irregular nails may experience scaling errors. To mitigate, the AR system should include a manual calibration slider that lets the user fine‑tune the model’s size, ensuring a realistic preview even when the algorithm’s automatic fit is imperfect.
Scaling Production: From One‑Off Creations to Subscription‑Based Collections
Turning a hobbyist operation into a sustainable business demands a shift from ad‑hoc printing to a repeatable production pipeline. The first step is to establish a “design‑to‑manufacture” (D2M) workflow that separates creative iteration from batch fabrication. Designers lock the final STL version in a version‑controlled repository (e.g., Git LFS), tagging each file with metadata such as material, print orientation, and recommended support settings.
With the design locked, a small‑scale production line can be set up using a fleet of identical resin printers. By synchronizing the printers through a print‑farm manager like OctoPrint‑Farm, the operator can queue hundreds of identical ornaments, monitor resin levels, and automatically rotate prints to even out wear on the build platform. This approach reduces per‑unit labor to under five minutes and drives resin utilization above 85 %.
Subscription models add recurring revenue and customer loyalty. For instance, a “Monthly Nail Capsule” could deliver a curated set of three complementary ornaments, each printed in a limited‑edition color palette. Subscribers receive a QR code linking to a digital lookbook, where they can virtually try the pieces via AR before the physical package arrives. To keep the offering fresh, designers can employ generative algorithms to produce a new batch of variations every quarter, ensuring that the catalog never repeats.
Logistics considerations include packaging that protects delicate pieces while showcasing them—think recyclable acrylic blister packs with a clear window. For international sales, be aware of customs classifications: 3‑D printed resin items are often listed under “plastic accessories” and may require a material safety data sheet (MSDS) attached to the shipment.
Regulatory Landscape: Navigating Cosmetic Compliance and Toxicology Testing
While the existing article mentions biocompatible resins, a deeper dive into regulatory requirements is essential for any commercial venture. In the United States, the Food and Drug Administration (FDA) regulates cosmetics under the Federal Food, Drug, and Cosmetic Act (FD&C Act). A 3‑D printed nail accessory is classified as a “cosmetic device” if it is intended to be attached to the body for a decorative purpose. Manufacturers must ensure that the resin complies with the FDA’s “Cosmetic Ingredient Review” (CIR) list of approved substances.
Key compliance steps:
- Material certification: Obtain a Certificate of Analysis (CoA) from the resin supplier confirming that the photoinitiators, pigments, and monomers meet ISO 10993‑1 biocompatibility standards.
- Stability testing: Conduct accelerated aging tests (e.g., 40 °C/75 % RH for 14 days) to verify that the printed piece does not leach harmful substances over time.
- Dermal irritation and sensitization: Perform in‑vitro cytotoxicity assays (e.g., NRU) followed by a human repeat‑insult patch test (HRIPT) on a small volunteer group.
- Labeling: Include a clear “For external use only” statement, ingredient list, and a batch number traceable to the resin lot.
European Union regulations are stricter: the EU Cosmetics Regulation (EC) No 1223/2009 requires a “Product Information File” (PIF) that contains a safety assessment by a qualified safety assessor. The assessor must evaluate the toxicological profile of each component, calculate the “Maximum Allowable Concentration” (MAC) for any restricted substances, and document the intended use.
Edge case: when incorporating metallic powders or glitter for sparkle, the metal content may trigger additional heavy‑metal limits (e.g., lead < 10 ppm). Designers should source certified cosmetic‑grade pigments and run inductively coupled plasma mass spectrometry (ICP‑MS) analysis to verify compliance.
Eco‑Friendly Practices: Resin Recycling, Waste Reduction, and Circular Design
Environmental stewardship is becoming a competitive differentiator in the beauty industry. Traditional photopolymer resins generate waste in the form of uncured liquid, support structures, and post‑print excess. Several emerging strategies can dramatically lower the ecological footprint of 3‑D printed nail art.
Closed‑loop resin recycling: After a print run, leftover resin can be filtered through a fine mesh to remove cured particles, then mixed with a small amount of fresh resin (typically 5‑10 %) to restore its viscosity. Companies such as Formlabs offer a “recycling kit” that includes a UV‑curable stabilizer to extend the resin’s shelf life up to six months.
Support‑structure optimization: By designing ornaments with built‑in self‑supporting geometry—like lattice ribs or curved overhangs that require no external scaffolding—printers can eliminate the need for disposable supports. This not only reduces material waste but also cuts post‑processing time.
Biodegradable photopolymers: Research labs are commercializing plant‑based acrylate resins derived from soybean oil or lignin. These resins meet ISO 10993‑5 cytotoxicity standards while offering a degradation timeline of 12‑18 months under composting conditions. Early adopters can label their products as “bio‑resin” and appeal to eco‑conscious consumers.
Take‑back programs: Salons can encourage clients to return used ornaments for recycling. By assigning each piece a QR‑coded batch number, the salon can track the volume of material reclaimed and report it in sustainability reports. Re‑melted PLA or reclaimed resin can then be used for non‑cosmetic prototypes, closing the material loop.
Edge case: if a client experiences an allergic reaction, the returned piece must be quarantined and disposed of according to hazardous waste regulations, as the resin may have absorbed skin oils or contaminants.
Cross‑Disciplinary Collaborations: Merging Fashion, Art, and Technology
The most striking 3‑D printed nail collections arise when nail technicians partner with professionals outside the traditional beauty sphere. Fashion designers can translate runway motifs—like avant‑garde origami folds or kinetic fabrics—into nail‑scale structures using parametric tools. Visual artists, especially those working with digital sculpture, can provide high‑resolution meshes that capture organic forms, which are then scaled down and printed in translucent resin to mimic glass‑like jewelry.
Case study: A collaboration between a streetwear brand and a tech startup resulted in a limited‑edition line of “LED‑infused” nail caps. The designers used micro‑LED strips embedded in a flexible silicone matrix, which was then over‑molded with a clear UV resin. The final piece could be programmed via Bluetooth to pulse in sync with music, creating an immersive concert‑goer experience.
To manage such collaborations, establish a clear IP framework: the nail technician retains rights to the physical ornament, while the artist holds the digital model copyright. Joint licensing agreements can then allow both parties to monetize the design across different channels (e.g., retail, digital downloads).
Practical workflow for a multi‑disciplinary project:
- Kickoff meeting to define aesthetic goals, material constraints, and target market.
- Digital asset exchange using a shared cloud repository (e.g., Dropbox Business) with version control.
- Prototype iteration: print a small batch, gather user feedback, and refine the model.
- Finalize the production file, embed a discreet watermark (tiny QR code) for authenticity verification.
Edge case: when collaborating with a brand that has strict color guidelines, the resin supplier may need to formulate a custom pigment batch to meet Pantone specifications while still maintaining biocompatibility.
Troubleshooting Print Defects Specific to Nail‑Scale Objects
Even seasoned makers encounter print anomalies that are amplified at the tiny scale of nail ornaments. Below is a diagnostic checklist tailored to common issues and actionable remedies.
| Symptom | Likely Cause | Solution |
|---|---|---|
| Layer lines visible after curing | Layer height set too high (≥0.05 mm) for the desired finish | Reduce layer height to 0.025 mm; enable anti‑aliasing in the slicer. |
| Support marks remain after sanding | Supports placed too close to delicate features | Adjust support density; use “tree” supports that contact only at broader bases. |
| Print warps upward, causing a dome shape | Excessive exposure time leading to over‑curing | Calibrate exposure; perform a resin test chart to find optimal cure time. |
| Fracture at the attachment point | Insufficient wall thickness (<0.5 mm) at the tab | Increase wall thickness; add a fillet radius of ≥0.2 mm to reduce stress concentration. |
| Resin residue clings to the nail after removal | Incomplete post‑cure causing tackiness | Extend UV post‑cure by 30 seconds; verify cure using a handheld UV meter (target > 400 mJ/cm²). |
Advanced tip: for designs that require a hollow interior (e.g., light‑weight caps), incorporate a “drain hole” of at least 0.8 mm diameter. After printing, flush the interior with isopropyl alcohol using a syringe to remove uncured resin, then cure the piece fully. This prevents trapped resin from leaching onto the nail.
Edge case: printing on a highly reflective build plate can cause unintended over‑exposure at the base of the model, leading to a thicker “foot” that interferes with fit. Apply a thin matte coating (e.g., a layer of painter’s tape) to the plate in the print area to diffuse the light and achieve uniform curing.
FAQ
Q1: Are 3D printed nail accessories safe for people with nail allergies?
A: Safety depends on the resin used. Dental‑grade or nail‑specific UV resins are formulated to be hypoallergenic and meet cosmetic safety standards. Always perform a patch test on a single nail before applying a full set, and avoid resins that contain known irritants such as certain photoinitiators.
Q2: How long does a 3D printed nail extension typically last?
A: With proper application and regular top‑coat maintenance, printed extensions can last 2‑3 weeks, similar to high‑quality gel extensions. Heavy use or exposure to harsh chemicals may shorten this timeframe.
Q3: Can I print nail designs at home without a professional printer?
A: Yes. Entry‑level SLA/DLP printers are affordable and capable of producing detailed nail ornaments. However, you must follow safety guidelines—use a well‑ventilated area, wear gloves, and select a resin certified for cosmetic use.
Q4: What is the best way to store my STL files for future use?
A: Keep a organized folder structure on your computer or cloud storage, naming each file with the design name, size, and version (e.g., “star_5mm_v2.stl”). Back up the folder regularly to avoid data loss.
Q5: Are there any legal restrictions on selling 3D printed nail art?
A: Commercial sellers must ensure that the materials comply with local cosmetic regulations (e.g., FDA in the United States or EU Cosmetics Regulation). Providing clear material safety data sheets (MSDS) and labeling the product as “for external use only” helps meet compliance.
Related posts:
 Target Just Dropped Society6 Art Prints and We’re Obsessed
 Mindful Manicures: How to Finally Stop Biting Your Nails for Good
 Brush Stroke Genius: The Nail Art Technique Anyone Can Master
 Spring Fling Fingers: The Nail Colors That Scream New Season Energy
 How to Fix an Ingrown Toenail Like a Pro
 The Avocado Oil Nail File That’s Changing Everything
 Ten Out of Ten: The Clean Nail Polish Brand That’s Worth the Splurge
 Clean Manicure Essentials