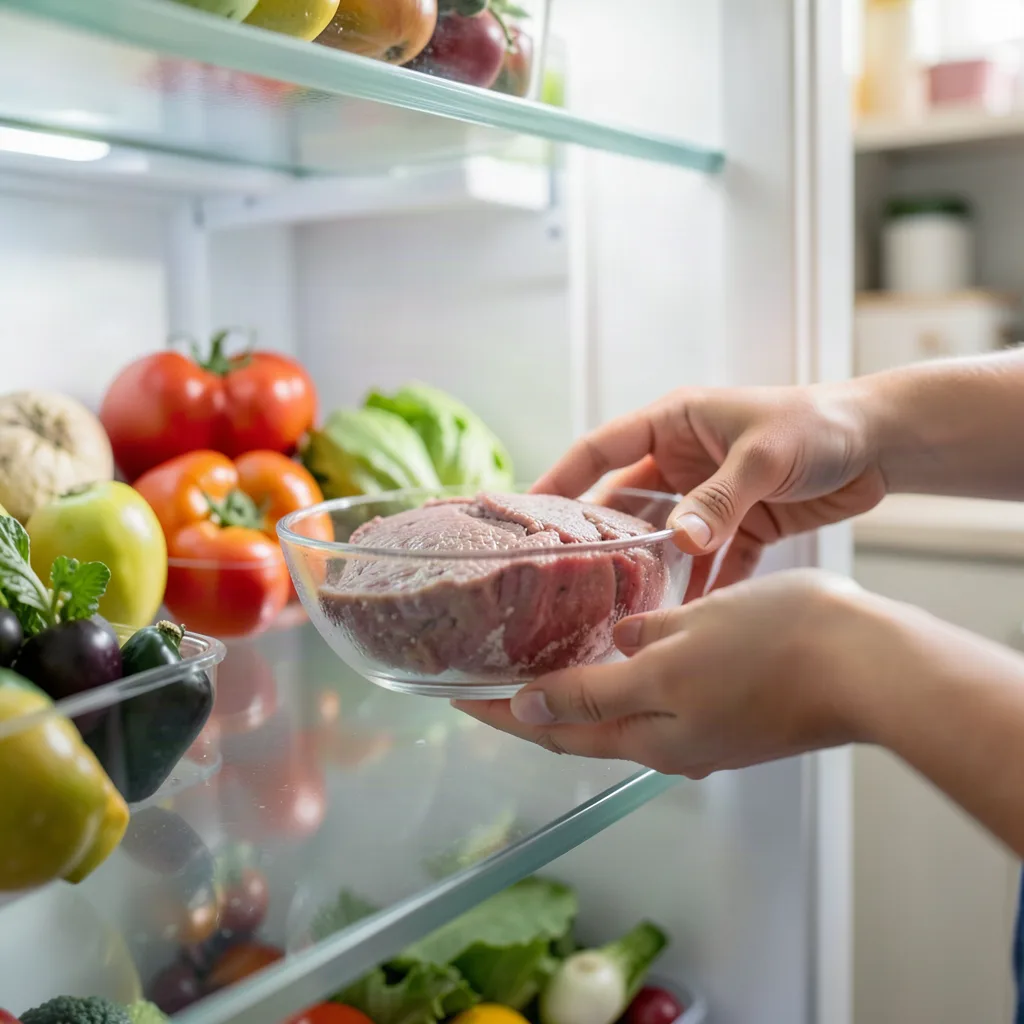
Thawing frozen food may seem simple, but doing it incorrectly can lead to bacterial growth, off‑flavors, and texture loss. Whether you’re preparing a family dinner, meal‑prepping for the week, or just reheating a leftover, following scientifically backed, practical steps ensures the food stays safe and tasty. This guide walks you through the most reliable thawing methods, explains why temperature control matters, highlights common pitfalls, and gives you a ready‑to‑use checklist so you can confidently move food from the freezer to the plate without risking illness.
Key takeaways
- Thaw food in the refrigerator at or below 40°F, allowing 24 hours for every 4-5 pounds of weight.
- For cold-water thawing, seal food in leak-proof bags and change the water every 30 minutes to maintain safety.
- Cook food immediately after microwave thawing to prevent bacteria from growing in sections that may have partially cooked.
- Increase cooking time by 50% when preparing items directly from frozen to ensure they reach safe internal temperatures.
- Avoid thawing food at room temperature or using hot water, as these methods allow bacteria to multiply rapidly.
Understanding Food Safety Basics
Food safety revolves around three core principles: time, temperature, and hygiene. Bacteria such as Salmonella and Listeria multiply rapidly between 40°F (4°C) and 140°F (60°C), a range known as the “danger zone.” When frozen food begins to thaw, the outer layers can enter this temperature range long before the interior is fully defrosted. Controlling how quickly food moves through the danger zone is the key to preventing food‑borne illness.
Here are the foundational facts you need to keep in mind:
- Cold is safe: Below 40°F (4°C) bacterial growth is dramatically slowed.
- Heat kills, but not instantly: Cooking to an internal temperature of 165°F (74°C) eliminates most pathogens, but only if the food reaches that temperature throughout.
- Cross‑contamination matters: Raw juices from thawing meat can contaminate surfaces, utensils, and other foods.
By respecting these principles, you set the stage for safe thawing regardless of the method you choose.
Why Thawing Method Matters
Each thawing technique balances speed, convenience, and safety differently. The fastest methods—microwave and hot water—can create uneven temperature zones, leaving pockets of food in the danger zone while other parts remain frozen. Slower methods—refrigerator and cold‑water thawing—maintain a consistently low temperature, minimizing bacterial growth but requiring more planning.
Choosing the right method depends on three factors:
- Time available: Do you have hours, or do you need the food ready in minutes?
- Food type: Delicate items like fish benefit from gentle thawing, while sturdy cuts of meat tolerate quicker methods.
- Equipment at hand: Not everyone has a microwave with a defrost setting, and some kitchens lack a large basin for cold‑water thawing.
Understanding these trade‑offs helps you pick a method that fits your schedule without compromising safety.
Refrigerator Thawing – Step by Step
Refrigerator thawing is the gold standard for safety because the food stays at or below 40°F (4°C) the entire time. It requires advance planning but yields the best texture, especially for meat, poultry, and seafood.
How to do it:
- Place the frozen item on a tray or shallow pan to catch any liquid that may escape.
- Position the tray on the bottom shelf of the refrigerator. This prevents drips from contaminating other foods.
- Allow 24 hours for every 4‑5 pounds (1.8‑2.3 kg) of solid food. Smaller items (e.g., a pound of chicken breasts) may thaw in 12‑18 hours.
- Once thawed, the food can remain in the refrigerator for 1‑2 days (poultry) or up to 3‑4 days (beef, pork) before cooking.
Tip: If you’re short on space, keep the thawing tray in a dedicated “cold‑food” drawer and label it with the date you started the process.
Cold Water Thawing – When and How
Cold‑water thawing speeds up the process while still keeping the food out of the danger zone, provided you follow strict timing and water‑temperature rules.
Procedure:
- Seal the food in a leak‑proof plastic bag. This prevents water from contaminating the surface of the food and stops the food’s juices from entering the water.
- Submerge the bag in a bowl or sink filled with cold tap water (below 70°F / 21°C). Do not use warm or hot water.
- Change the water every 30 minutes to maintain a consistently cold temperature.
- Estimate thawing time: about 30 minutes per pound (0.45 kg) for most cuts of meat. Small items like shrimp may thaw in 10‑15 minutes.
- Cook the food immediately after thawing; do not refrigerate unless you plan to use it within the next two hours.
Cold‑water thawing is ideal for busy households that need a reliable method faster than the refrigerator but safer than the microwave.
Microwave Thawing – Tips for Even Defrost
Microwaves are convenient, but they can partially cook the edges of food, creating a perfect environment for bacteria if not handled correctly. Follow these guidelines to keep the process safe.
Key steps:
- Use the microwave’s “defrost” setting, which typically operates at 30‑50% power.
- Arrange food in a single layer on a microwave‑safe plate. Larger items should be cut into smaller portions if possible.
- Pause the cycle every 2‑3 minutes to rotate or flip the food. This helps distribute heat evenly.
- Stop the microwave when the food is still icy in the center; the remaining thawing will finish during cooking.
- Cook the food immediately after microwave thawing—ideally within 30 minutes—to prevent any bacteria that may have started growing.
Microwave thawing works best for small cuts, ground meat, and pre‑portioned items. For whole poultry or large roasts, consider the refrigerator or cold‑water methods instead.
Cooking Directly from Frozen – Safe Practices
Some foods, such as frozen vegetables, pre‑cooked meals, and certain fish fillets, can be cooked without prior thawing. This eliminates the thawing step entirely, but you must adjust cooking times and ensure the interior reaches a safe temperature.
Guidelines for cooking from frozen:
- Increase cooking time by roughly 50%. For example, a chicken breast that normally cooks in 20 minutes will need about 30 minutes from frozen.
- Use a thermometer to verify that the internal temperature reaches the recommended safe level (165°F / 74°C for poultry, 145°F / 63°C for fish).
- Cover dishes with a lid or foil to promote even heat distribution, especially for casseroles or stews.
- Avoid refreezing food that has been cooked from frozen unless you cool it rapidly (within 2 hours) and store it promptly.
Cooking from frozen is a practical option for quick meals, but it’s not suitable for items that rely on a specific texture after thawing, such as steaks or bread dough.
Common Mistakes to Avoid
Even experienced cooks can slip into unsafe habits. Here are the most frequent errors and how to correct them:
- Leaving food at room temperature: Never set a frozen turkey on the counter to thaw. Bacteria multiply quickly on the surface while the interior stays frozen.
- Using hot water: Hot water raises the surface temperature into the danger zone, creating a breeding ground for pathogens.
- Thawing in a sealed container without ventilation: Moisture builds up, promoting bacterial growth. Use breathable packaging or a perforated bag for cold‑water methods.
- Re‑freezing thawed food without cooking: This can cause texture loss and increase the risk of cross‑contamination.
- Skipping the hand‑wash step: Always wash hands, surfaces, and utensils with soap and hot water after handling raw, thawed foods.
By being mindful of these pitfalls, you keep your kitchen safe and your meals delicious.
Storing Thawed Food Safely
After thawing, proper storage is essential to maintain safety until you’re ready to cook.
- Refrigerate promptly: Place thawed food in the refrigerator within two hours of removal from the freezer (one hour if the ambient temperature is above 90°F / 32°C).
- Use shallow containers: This speeds up cooling and keeps the food at a uniform temperature.
- Label with date and time: A simple “Thawed on 10/17/2026 – 2 pm” note helps you track freshness.
- Follow recommended holding times: Cook poultry within 1‑2 days, beef/pork within 3‑4 days, and seafood within 24‑48 hours.
If you notice any off‑odors, slimy texture, or discoloration, discard the food—these are signs of spoilage that no cooking method can fully reverse.
Checklist for Safe Thawing
Keep this printable checklist on your fridge door. A quick glance ensures you never miss a safety step.
- ☐ Choose the appropriate method (refrigerator, cold water, microwave, or cook‑from‑frozen).
- ☐ Verify packaging is airtight and leak‑proof.
- ☐ Place food on a tray to catch drips.
- ☐ Record start time and estimated finish time.
- ☐ Change water every 30 minutes for cold‑water thawing.
- ☐ Rotate or flip food during microwave thawing.
- ☐ Cook immediately after thawing (unless refrigerated within 2 hours).
- ☐ Clean and sanitize all surfaces and utensils after handling raw food.
- ☐ Store leftovers promptly and label with date.
Following this list reduces the chance of accidental food‑borne illness and makes your kitchen routine smoother.
Thawing Specialty Items: Bread Dough, Cheese, and Fresh Produce
While meat, poultry, and seafood dominate most thaw‑in‑the‑kitchen conversations, a surprising number of home cooks struggle with the best way to bring delicate or high‑moisture foods back to a usable state. Each of these categories reacts differently to temperature changes, so applying a one‑size‑fits‑all method can ruin texture, flavor, or safety.
Artisan Bread Dough
Fermented dough is a living system; yeast activity slows dramatically below 45°F (7°C) but does not stop entirely. When a frozen loaf or bulk dough is thawed too quickly, the outer layer can over‑proof while the interior remains icy, resulting in an uneven crumb and a crust that may become gummy.
- Cold‑room rise: Transfer the dough from the freezer to a refrigerator set at 38‑40°F (3‑4°C). Allow 12‑24 hours for a 1‑pound loaf to reach a pliable state. The low temperature keeps yeast dormant, preserving the dough’s structure.
- Controlled ambient rise: For a faster option, place the dough in a sealed container on the countertop covered with a damp kitchen towel. Keep the ambient temperature between 65‑70°F (18‑21°C) and monitor every 30 minutes. Once the dough is soft enough to shape, proceed with the final proof.
- Water‑bowl method: Submerge a sealed, double‑zippered bag containing the dough in a bowl of cold water (below 70°F/21°C). Change the water every 15 minutes. This method thaws a 2‑pound dough in roughly 45 minutes without shocking the yeast.
Never use hot water or a microwave for dough; the rapid temperature shift can kill the yeast and cause a dense loaf.
Cheese and Soft Dairy Products
Hard cheeses (e.g., Parmesan) can tolerate freezer storage, but soft cheeses (brie, mozzarella, cream cheese) are prone to moisture separation and texture breakdown. The goal is to restore the original consistency without encouraging mold growth.
- Gradual refrigeration: Move the cheese from the freezer to the refrigerator and let it sit for 4‑6 hours per inch of thickness. This slow rise prevents ice crystals from melting too quickly, which would otherwise create watery pockets.
- Vacuum‑sealed thawing: If the cheese is still in a vacuum pack, place the sealed package in a bowl of cold water for 30‑45 minutes. The water conducts heat evenly, and the airtight barrier stops bacterial exposure.
- Room‑temperature finish: After the initial cold‑water phase, unwrap the cheese and let it sit on a plate at room temperature for 10‑15 minutes before serving. This short exposure restores the creamy mouthfeel without entering the danger zone for an extended period.
Fresh Produce and Berries
Freezing preserves most fruits and vegetables, but thawing can cause cell walls to rupture, leading to mushy textures. The technique chosen depends on whether the produce will be eaten raw, cooked, or blended.
- Cold‑water rinse for berries: Place frozen berries in a colander and run cold tap water over them for 1‑2 minutes. The water removes ice glaze, reduces surface frost, and speeds up thawing without heating the fruit.
- Refrigerator thaw for leafy greens: For spinach or kale destined for sautéing, spread the frozen leaves on a shallow tray and thaw in the fridge for 6‑8 hours. The slow melt retains most of the chlorophyll, preserving color.
- Microwave burst for cooking: When using frozen corn or peas directly in a stir‑fry, apply the microwave’s “high‑power 30‑second burst” twice, shaking the container between bursts. This quick melt prevents over‑cooking once the vegetables hit the hot pan.
By matching the thawing approach to the food’s structural characteristics, you keep flavor, texture, and safety intact.
Sous‑Vide and Vacuum‑Sealed Thawing: Precision Meets Safety
Modern kitchens increasingly feature sous‑vide immersion circulators, which maintain water at a precise temperature within ±0.1°F (±0.05°C). Leveraging this technology for thawing offers unparalleled control, especially for high‑value cuts or items that demand exact texture preservation.
How Sous‑Vide Thawing Works
Set the circulator to a temperature just above the food’s safe storage limit—typically 38‑40°F (3‑4°C) for meat, 35‑37°F (1‑3°C) for fish, and 45‑50°F (7‑10°C) for delicate pastries. The sealed bag prevents water from entering, while the low, steady heat gently raises the internal temperature.
- Time estimates: A 2‑inch steak (≈1 lb) thaws in roughly 45 minutes at 38°F. A whole turkey (≈12 lb) requires about 6‑7 hours at 40°F.
- Safety margin: Because the water never exceeds 45°F (7°C), bacterial growth remains minimal. The food stays in the “cold‑hold” zone throughout the process.
Advantages Over Traditional Methods
- Uniformity: Heat penetrates evenly, eliminating the cold‑core problem common in refrigerator thawing.
- Speed with control: You can double the speed of a refrigerator thaw without risking the danger zone, simply by raising the water temperature a few degrees.
- Flavor retention: The vacuum seal locks in juices, preventing dehydration that often occurs during prolonged refrigerator thawing.
Practical Tips for Home Use
- Always use food‑grade, BPA‑free vacuum bags. If you lack a vacuum sealer, the water‑displacement method (submerging a zip‑top bag, pushing out air, then sealing) works well.
- Label each bag with the start time; sous‑vide devices run continuously, so you can walk away without monitoring.
- After thawing, pat the surface dry with paper towels before searing or grilling. Moisture on the surface can impede browning.
For cooks who already own a sous‑vide system, this method turns thawing into a low‑effort, high‑precision step that dovetails neatly with the cooking stage.
Nutritional and Textural Effects of Thawing: What Happens at the Molecular Level
Beyond safety, thawing influences the nutritional profile and mouthfeel of food. Understanding the science helps you choose a method that preserves vitamins, minerals, and the desired texture.
Ice Crystal Formation and Cell Damage
When food freezes, water expands and forms ice crystals. Slow freezing creates few, large crystals that puncture cell walls; rapid freezing (as in blast freezers) yields many tiny crystals that cause less damage. During thawing, those broken cells release intracellular fluids, leading to:
- Moisture loss: Measured as drip loss, especially in meat. Cold‑water thawing can reduce drip loss by up to 30 % compared to refrigerator thawing because the temperature gradient is steeper, pulling fluid back into the tissue before it leaks.
- Texture softening: In fruits, the loss of turgor pressure makes berries mushy. A gentle, low‑temperature thaw preserves firmness longer.
Vitamin Stability
Water‑soluble vitamins (C and B‑complex) are sensitive to heat and oxidation. Methods that keep the food below 40°F (4°C) preserve up to 95 % of these vitamins. In contrast, microwave thawing can degrade up to 15‑20 % of vitamin C in leafy greens because of localized hot spots.
Protein Denaturation
Proteins begin to unwind at temperatures above 90°F (32°C). If thawing pushes the outer layers of meat into this range, the proteins coagulate, resulting in a tougher surface once cooked. Cold‑water and sous‑vide thawing keep surface temperatures well below this threshold, maintaining a tender bite.
Fat Oxidation
Exposed fats oxidize when they spend time in the danger zone, producing off‑flavors (rancidity) and potentially harmful compounds. Rapid thawing methods that limit exposure—especially those that keep the food sealed—reduce oxidation risk.
Practical Takeaways
- For nutrient‑dense foods (e.g., leafy greens, berries), prioritize cold‑water or refrigerator thawing to retain vitamins.
- When texture is paramount (steaks, fish fillets), use sous‑vide or vacuum‑sealed cold‑water methods to minimize cell damage.
- Avoid prolonged exposure to temperatures above 50°F (10°C) for any food, as this accelerates both nutrient loss and oxidative reactions.
Large‑Scale Thawing for Holidays and Events: Planning, Timing, and Safety Checks
Thanksgiving turkeys, Christmas hams, and catering orders often require thawing multiple large items simultaneously. Scaling up introduces logistical challenges that go beyond the simple “place on a shelf” approach.
Pre‑Event Thawing Calendar
Create a backward‑counting schedule that accounts for each item’s weight and chosen method. Below is a sample timeline for a 20‑person holiday dinner featuring a 24‑lb turkey, a 12‑lb ham, and a 6‑lb pork loin.
| Item | Method | Thaw Time | Start Date/Time |
|---|---|---|---|
| 24‑lb Turkey | Refrigerator | ≈48 hours | Day ‑ 2, 8 am |
| 12‑lb Ham | Cold‑water (sealed bag) | ≈6 hours | Day ‑ 1, 2 pm |
| 6‑lb Pork Loin | Sous‑vide 38°F | ≈2 hours | Day ‑ 0, 10 am |
Mark each start time on a kitchen wall calendar or a digital reminder app. Include a buffer of at least 30 minutes for unexpected delays.
Space Management and Cross‑Contamination Prevention
- Dedicated thawing trays: Use separate, color‑coded trays (red for poultry, green for pork, blue for seafood). This visual cue reduces the chance of cross‑contamination.
- Bottom‑shelf rule: In commercial‑size refrigerators, reserve the bottom two shelves exclusively for thawing. Place a drip pan underneath to catch runoff.
- Temperature monitoring: Deploy a probe thermometer that logs the internal temperature of each item every 30 minutes. Alerts can be set to trigger when a piece reaches 40°F (4°C).
Backup Plans for Unexpected Delays
If a turkey isn’t fully thawed by the planned time, you have two safe options:
- Cold‑water rescue: Keep the turkey in its original, sealed packaging and submerge it in a large container of cold water, changing the water every 30 minutes. This can finish the thaw in roughly 1 hour per 5 lb.
- Partial‑cook method: Cook the turkey at a lower temperature (275°F/135°C) for an extended period, ensuring the interior reaches 165°F (74°C). This approach requires careful temperature monitoring to avoid over‑cooking the outer skin.
Post‑Thaw Holding Times for Large Events
Once thawed, keep the meat refrigerated at 35‑38°F (2‑3°C) and cover it loosely with foil. For a turkey, you have up to 2 days before cooking; for ham, 3 days; for pork loin, 4 days. If the event is delayed beyond these windows, re‑freeze only if the food has stayed below 40°F the entire time.
Regulatory Guidelines and Industry Standards: Knowing the Rules Behind the Recommendations
Government agencies and food‑industry bodies publish detailed thawing standards that inform the best‑practice advice you see online. Understanding the rationale behind these rules can help you adapt them to your home kitchen while staying compliant with safety expectations.
USDA and FDA Core Requirements
- USDA 9‑Hour Rule: Thawed poultry, meat, or seafood must be cooked within 9 hours if kept at 40°F (4°C) or lower. This is why refrigerator thawing often includes a “use‑by” date.
- FDA Food Code 4‑Hour Limit: For ready‑to‑eat foods that have been thawed and then held at 41°F (5°C) or above, the maximum holding time is 4 hours before the product must be either cooked, discarded, or returned to proper refrigeration.
- Labeling Requirement: Commercial packages must include a “Thaw Before Cooking” statement if the product is not intended for direct cooking from frozen. Home cooks can adopt this practice for clarity.
European Union (EU) Regulations
The EU’s Regulation (EC) No 852/2004 mandates that frozen foods be thawed under “controlled conditions” that prevent the product from exceeding 5°C (41°F) for more than 2 hours. This aligns with the “danger zone” concept but adds a stricter time limit for commercial operations.
International Standards (ISO 22000)
ISO 22000, a globally recognized food‑safety management system, emphasizes hazard analysis and critical control points (HACCP). Thawing is identified as a critical control point (CCP) because it directly influences microbial growth. The standard recommends:
- Documented monitoring of temperature during thawing.
- Verification that thawed items do not exceed 4°C (39°F) for longer than 2 hours.
- Corrective actions, such as discarding or re‑freezing, if limits are breached.
Applying These Standards at Home
While you’re not subject to commercial audits, you can emulate the rigor:
- Use a digital probe to log temperature every 30 minutes.
- Set a timer for the 2‑hour maximum exposure rule when using cold‑water or microwave methods.
- Maintain a simple log sheet on your fridge door noting start time, method, and expected cook‑by time.
Adopting these practices not only reduces risk but also builds confidence when serving guests or preparing meals for vulnerable populations (children, elderly, immunocompromised).
Troubleshooting Common Thawing Problems: From Ice Crystals to Unexpected Refreezing
Even with a solid plan, thawing can go awry. Below are the most frequent hiccups and evidence‑based solutions.
Problem 1: Persistent Ice Crystals in the Center
Symptoms: After the outer layers feel soft, the core remains rock‑hard.
- Cause: Insufficient time or uneven temperature distribution.
- Fix: Switch to a lower‑temperature water bath (e.g., 35°F/2°C) and extend the water‑change interval to 45 minutes, allowing the core to catch up without warming the surface.
- Preventive tip: Cut large items (turkey, roast) into halves or quarters before thawing; smaller pieces thaw uniformly.
Problem 2: Excessive Drip Loss
Symptoms: A pool of liquid forms in the tray, leaving the meat dry.
- Cause: Rapid thawing at temperatures above 45°F (7°C) causes cellular fluids to leak.
- Fix: Pat the meat dry with paper towels before cooking and consider brining the meat after thawing to re‑infuse moisture.
- Preventive tip: Use the cold‑water method with a sealed bag; the water pressure keeps fluids inside the bag.
Problem 3: Unwanted Refreezing During Transfer
Symptoms: After thawing, the food refreezes in the fridge, creating a hard outer shell.
- Cause: Temperature shock when moving from a warm environment to a cold one.
- Fix: Allow the food to sit at room temperature for 10‑15 minutes (no longer than 30 minutes) before placing it in the refrigerator. This gradual transition prevents condensation that can freeze.
- Preventive tip: Keep the refrigerator door closed as much as possible; a sudden influx of warm air can lower the internal temperature below 32°F (0°C) temporarily.
Problem 4: Off‑Flavors After Thawing
Symptoms: A metallic or “freezer‑burn” taste appears, especially in fish.
- Cause: Oxidation of lipids during prolonged exposure to air.
- Fix: Re‑seal the package tightly using a vacuum sealer before thawing. If oxidation has already occurred, marinating the fish in acidic ingredients (lemon juice, vinegar) can mask the off‑flavor.
- Preventive tip: Store fish in airtight, double‑wrapped packaging and label with a freeze‑by date; use within 3‑4 months.
Problem 5: Bacterial Growth Detected by Odor or Sliminess
Symptoms: A sour smell or slick surface appears after thawing.
- Cause: The food spent too long in the danger zone, allowing pathogens to proliferate.
- Fix: Discard the item—no amount of cooking can guarantee safety once spoilage is evident.
- Preventive tip: Set a strict timer for each thawing method and never exceed the recommended time. Use a kitchen timer or smartphone alarm.
By recognizing these warning signs early and applying the corrective steps, you can rescue many thawing mishaps before they jeopardize a meal.
Frequently Asked Questions
1. Can I thaw meat on the countertop if I cover it with foil?
No. Covering the meat does not keep it out of the danger zone. Bacteria can still multiply on the surface, so countertop thawing is unsafe.
2. How long can I keep food in the refrigerator after it’s been thawed?
General guidelines are 1‑2 days for poultry, 3‑4 days for beef, pork, and lamb, and 24‑48 hours for seafood. Always check for signs of spoilage before cooking.
3. Is it safe to use a sink filled with warm water to speed up thawing?
Warm water quickly raises the outer temperature of the food into the danger zone, encouraging bacterial growth. Stick to cold water and change it regularly.
4. My microwave has a “defrost” button but no power level setting—what should I do?
Even without a specific power level, the defrost button typically cycles the microwave on and off to simulate lower power. Pause the cycle every few minutes to turn the food and ensure even thawing.
5. Can I refreeze food that I thawed in the refrigerator?
Yes, if the food has remained at 40°F (4°C) or below and has not been left out for more than two hours. However, repeated freezing can affect texture and flavor, so it’s best to plan portions to avoid refreezing.
Related posts:
 Understanding Meat Extenders
 How to Freeze Pesto: Preserving the Flavors of Summer
 Can Frozen Food Go Bad? The Surprising Answer
 Frozen Food Safety
 Freeze Frame: The Food Storage Mistakes That Are Costing You Money
 The Best Cold Brew Coffee Makers for a Refreshing Drink
 Best Ways to Reheat Thanksgiving Leftovers
 Your Complete Guide to Avoiding Food Poisoning This Summer