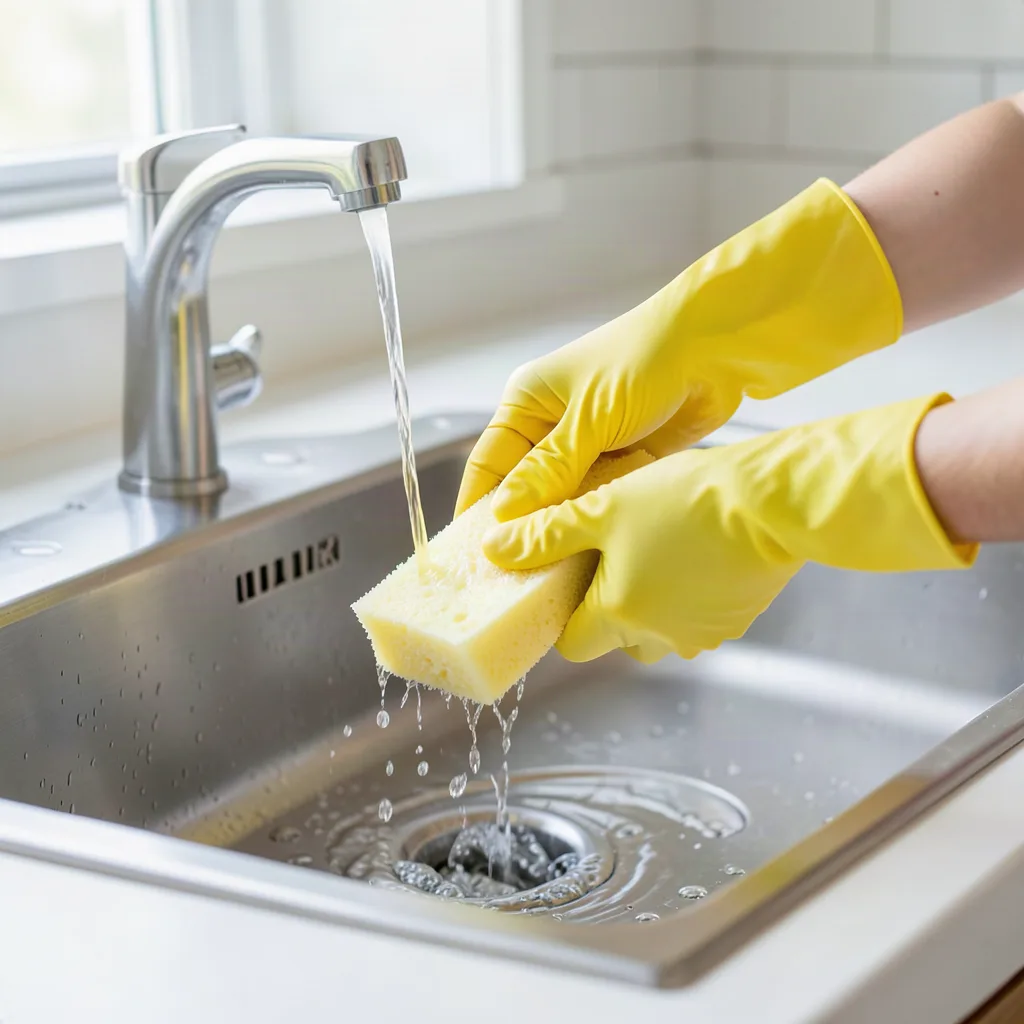
Keeping a kitchen sponge clean is more than a matter of aesthetics; it directly impacts the health of everyone who prepares food in that space. Shared sponges, especially in busy households or communal kitchens, can become breeding grounds for bacteria, mold, and unpleasant odors if they are not regularly and correctly sanitized. This guide walks you through evidence‑based, practical methods to safely sanitize your shared kitchen sponges, explains why each step matters, and offers a maintenance plan that fits into everyday life without requiring special equipment or chemicals.
Key takeaways
- Microwave wet sponges on high for 1-2 minutes to reduce bacteria by up to 99.9%.
- Boil sponges for 5 minutes to kill most vegetative bacteria and yeasts.
- Soak sponges in a bleach-water solution for 5 minutes for heavy-duty disinfection.
- Replace sponges every 3-4 weeks or when they develop persistent odors and crumbling fibers.
- Store sponges in ventilated areas and separate them by task to limit cross-contamination.
Why Regular Sponge Sanitization Matters
Sponges are porous, absorbent, and often stay damp for long periods—conditions that favour microbial growth. Studies have shown that kitchen sponges can harbor Escherichia coli, Staphylococcus aureus, and even Salmonella after just a few days of use. While most healthy adults can tolerate occasional exposure, the risk escalates for children, elderly relatives, or anyone with a compromised immune system. Regular sanitization reduces the microbial load, limits cross‑contamination between dishes, countertops, and hands, and helps keep unpleasant smells at bay.
Choosing the Right Sanitization Method for Your Situation
Not every method works for every kitchen. Consider the tools you already have, the amount of time you can dedicate, and any sensitivities to chemicals. Below is a quick comparison:
- Boiling water – Simple, chemical‑free, works for most standard sponges.
- Microwave – Fast, but requires a microwave‑safe, water‑soaked sponge.
- Dishwasher – Convenient if you already run a load; use the top rack.
- Bleach solution – Highly effective; must be rinsed thoroughly.
- Vinegar & baking soda – Natural, pleasant scent, moderate efficacy.
Pick one method as your primary routine and keep a backup for days when your preferred tool is unavailable.
Method 1: Boiling Water Disinfection
What you need: A large pot, water, kitchen tongs, timer.
- Fill the pot with enough water to fully submerge the sponge.
- Bring the water to a rolling boil (212°F / 100°C).
- Using tongs, lower the sponge into the boiling water.
- Maintain a gentle boil for 5 minutes. This duration kills most vegetative bacteria and yeasts.
- Remove the sponge with tongs and place it on a clean towel to air‑dry.
Boiling does not remove odors but does dramatically lower the viable microbial count. Replace the sponge after 4–6 weeks of regular use, as the fibers degrade and become harder to clean.
Method 2: Microwave Sanitization (Quick and Effective)
Safety note: Only use sponges that do not contain metal scrubbers. Always keep the sponge wet; a dry sponge can ignite.
- Wet the sponge thoroughly under running water and wring out excess water so it’s damp, not dripping.
- Place the sponge on a microwave‑safe plate.
- Microwave on high power for 1–2 minutes. The exact time depends on your microwave’s wattage; start with 1 minute and add 30‑second increments if needed.
- Let the sponge sit for an additional minute; it will continue to steam internally.
- Remove with oven mitts (it will be hot) and allow it to cool and dry.
This method can reduce bacterial counts by up to 99.9 % when performed correctly. If you notice a lingering smell, combine with a vinegar rinse (see Method 5).
Method 3: Dishwasher Cycle Sanitization
Most modern dishwashers have a “sanitize” or “high‑heat” cycle that reaches temperatures of 150°F (65°C) or higher. To use this method:
- Place the sponge on the top rack, ensuring it does not block the spray arms.
- Select the sanitize or heavy‑wash setting.
- Run the cycle as you normally would for dishes.
- After the cycle, remove the sponge and let it air‑dry completely before the next use.
This approach is convenient because it requires no extra steps if you already run the dishwasher daily. However, not all dishwashers achieve true sanitizing temperatures, so check your appliance’s manual for confirmation.
Method 4: Bleach Solution Disinfection (When You Need a Strong Kill‑Step)
Bleach (sodium hypochlorite) is a proven disinfectant. Use it sparingly and always rinse well to avoid chemical residue.
- Mix 1 tablespoon of regular household bleach (5–6 % sodium hypochlorite) with 1 quart (≈1 L) of cool water.
- Submerge the sponge fully and let it soak for 5 minutes.
- Remove the sponge and rinse under running water until the smell of bleach disappears.
- Squeeze out excess water and place the sponge in a well‑ventilated area to dry.
Because bleach can degrade sponge fibers over time, reserve this method for sponges that have become heavily soiled or develop a persistent odor.
Method 5: Natural Cleaners – Vinegar and Baking Soda
Vinegar (acetic acid) and baking soda (sodium bicarbonate) are mild yet effective at reducing odors and loosening grime.
- Vinegar soak: Fill a bowl with equal parts white distilled vinegar and warm water. Submerge the sponge for 30 minutes, then rinse and squeeze.
- Baking soda paste: Mix 2 tbsp baking soda with a splash of water to form a paste. Rub the paste into the sponge, let sit for 10 minutes, then rinse thoroughly.
These natural methods are especially useful for households with children or pets who may be sensitive to harsh chemicals. They do not achieve the same level of bacterial kill as boiling or bleach, but they are excellent for routine maintenance.
Developing a Practical Sanitization Schedule
Consistency is key. Here’s a realistic weekly plan for a family of four sharing two sponges:
| Day | Task |
|---|---|
| Monday | Microwave each sponge for 1 minute (wet first). |
| Wednesday | Boil both sponges for 5 minutes. |
| Friday | Run a dishwasher sanitize cycle with the sponges on the top rack. |
| Saturday | Vinegar soak for any sponge that smells. |
Adjust the schedule based on usage intensity. High‑traffic kitchens (e.g., shared office break rooms) may need daily microwave sanitization, while a low‑traffic pantry kitchen might get by with a weekly boil.
When to Retire a Sponge
No amount of sanitizing can fully restore a sponge that has become structurally compromised. Look for these signs:
- Persistent foul odor after multiple sanitization attempts.
- Visible mold or discoloration that does not fade with cleaning.
- Hardening or crumbling fibers, indicating wear.
- Loss of absorbency – the sponge no longer holds water effectively.
Replace sponges every 3–4 weeks for heavy use, or sooner if any of the above signs appear. Keep a small stock of inexpensive, high‑quality sponges on hand to avoid gaps in hygiene.
Additional Tips for a Healthier Shared Kitchen
- Label sponges with each user’s name or color‑code them. This reduces cross‑contamination between individuals.
- Separate sponge types: Use one sponge for dishes, another for countertops, and a third for cleaning spills. Different tasks attract different microbes.
- Store sponges in a dry area or in a ventilated container to discourage moisture buildup.
- Use disposable cleaning pads for quick jobs; they eliminate the need for sanitizing after each use.
- Rotate sponges: Keep a rotation of 2–3 sponges per task so each gets a rest period for thorough drying.
Understanding Microbial Dynamics in Kitchen Sponges
Before you can design a robust sanitization routine, it helps to know why sponges become microbial hotspots. A typical kitchen sponge provides three key conditions that favor rapid bacterial proliferation:
- High water activity (aw): The porous matrix holds water in capillary spaces, keeping the aw above 0.95, which is ideal for most bacteria, yeasts, and molds.
- Abundant nutrients: Food residues, grease, and even the cellulose fibers themselves serve as carbon sources. Studies have shown that a single teaspoon of starch left on a damp sponge can sustain bacterial growth for up to 72 hours.
- Warm temperature: Most kitchen environments sit between 68 °F (20 °C) and 78 °F (26 °C). At these temperatures, the doubling time for E. coli is roughly 20 minutes, meaning a small inoculum can reach billions of cells in a day.
These factors combine to produce a classic biofilm—a slimy, protective matrix that adheres to the sponge fibers. Biofilms are notoriously resistant to simple rinsing because the extracellular polymeric substances (EPS) trap water and shield microbes from disinfectants. Understanding this helps explain why a single rinse is insufficient and why methods that deliver heat or chemical penetration (e.g., boiling, microwave, bleach) are needed.
Two practical take‑aways emerge:
- Minimize the time a sponge stays wet. Whenever possible, wring it out thoroughly and store it in a ventilated container.
- Interrupt biofilm formation on a regular cadence—ideally before the community of microbes reaches the exponential phase (approximately 24 hours of continuous dampness).
Assessing Sponge Materials: Cellulose, Microfiber, Silicone, and Emerging Alternatives
Not all sponges are created equal. The material you choose influences both the cleaning efficacy and the sanitization method you can safely employ. Below is a comparative matrix that highlights key properties and edge‑case considerations.
| Material | Absorbency | Heat Tolerance | Chemical Compatibility | Environmental Impact |
|---|---|---|---|---|
| Traditional cellulose (natural or synthetic) | Very high – holds up to 10× its weight in water | Up to 212 °F (100 °C) – safe for boiling, microwave (wet only) | Compatible with bleach, vinegar, baking soda; may degrade with prolonged bleach exposure | Biodegradable if untreated; many commercial variants contain synthetic binders that linger in landfill |
| Microfiber (polyester‑nylon blend) | Moderate – excels at trapping fine particles | Up to 176 °F (80 °C) – risk of melting in microwaves or high‑heat dishwashers | Resistant to most acids; bleach can cause yellowing over time | Non‑biodegradable; contributes to micro‑plastic pollution if not recycled |
| Silicone (food‑grade) | Low – relies on surface tension rather than absorption | Up to 500 °F (260 °C) – safe for oven, stovetop, and high‑heat dishwasher cycles | Neutral to most household cleaners; does not absorb chemicals, so odors are less of an issue | Reusable for years; production energy is higher but offset by longevity |
| Plant‑based “eco‑sponges” (e.g., loofah, coconut coir) | High – natural fibers soak well | Up to 212 °F (100 °C) – safe for boiling; can become brittle if over‑dried | Works well with vinegar and mild detergents; bleach may cause rapid fiber breakdown | Compostable if free of synthetic additives; excellent for zero‑waste households |
Edge‑case example: In a shared office kitchen that prohibits open flames, a silicone pad can be sanitized using a high‑temperature dishwasher cycle without fear of melting, whereas a cellulose sponge would need to be boiled on a stovetop, which may not be permitted. Conversely, in a low‑budget student dorm where power outlets are scarce, a cheap cellulose sponge that can be boiled on a communal kettle is the most pragmatic choice.
When selecting a sponge for a shared environment, consider the following decision tree:
- Do you have reliable access to a microwave? Yes → cellulose or scrub‑free microfiber; No → silicone or plant‑based.
- Is chemical sensitivity a concern (children, pets, allergies)? Yes → avoid bleach; choose vinegar‑compatible materials.
- Do you prioritize sustainability? Yes → compostable plant‑based or long‑life silicone.
Integrating Sanitization into Everyday Kitchen Workflow
Even the most effective sanitization method fails if it is not performed consistently. The goal is to embed hygiene steps into the natural rhythm of cooking, cleaning, and storage. Below are three workflow models that can be adopted depending on the size of the shared kitchen and the frequency of use.
1. The “Task‑Based Rotation” Model
Assign each sponge a specific task (e.g., dishes, countertops, appliances) and a rotation number. After each use, the sponge moves to the next slot on a numbered rack. The rack is designed so that each position is exposed to airflow for at least 30 minutes before the next use. When a sponge reaches the end of the rotation (usually after 4–6 uses), it is earmarked for a sanitization step.
Example: In a family of five, three sponges are labeled “Dish‑1,” “Dish‑2,” and “Dish‑3.” After washing a pot, the user places the used sponge in the “Dish‑2” slot, which is currently empty and drying. The next user grabs “Dish‑3,” and the cycle continues. By the time “Dish‑1” returns to the front, it has been air‑dried for an hour and is ready for a quick microwave zap.
2. The “Time‑Triggered Alert” Model
Use a simple kitchen timer or a smartphone reminder app to signal when a sanitization step is due. For high‑traffic kitchens, a 24‑hour interval works well; for low‑traffic, a 72‑hour interval may suffice. The alert can be paired with a visual cue—such as a red sticker on the sponge handle—that turns green once the sanitization is completed.
Edge case: In a shared office break room, the cleaning staff may forget to sanitize sponges during busy lunch hours. A wall‑mounted digital timer that flashes every 48 hours ensures the task is not overlooked.
3. The “Batch‑Sanitize” Model
When multiple sponges need attention, group them together for a single sanitization event. This approach reduces the cognitive load and saves energy. For example, collect all sponges on Friday evening, run a dishwasher sanitize cycle, and store them dry for weekend use.
Regardless of the model, the following checklist helps maintain consistency:
- Check the visual indicator (sticker, color tag) for each sponge.
- Perform the designated sanitization method (microwave, boil, etc.).
- Rinse thoroughly (if applicable) and place on a drying rack.
- Log the date and method on a small kitchen whiteboard for accountability.
Leveraging Technology: UV‑C Devices, Smart Dispensers, and IoT Monitoring
Modern kitchens increasingly incorporate smart appliances. While many households rely on traditional methods, a handful of tech‑driven solutions can complement or even replace manual sanitization, especially in commercial or high‑volume settings.
UV‑C Sanitizer Boxes
UV‑C (254 nm) light destroys microbial DNA, achieving >99.9 % kill rates within minutes. Compact countertop units can accommodate 2–4 sponges at a time. Key considerations:
- Exposure time: Most units recommend 3–5 minutes per cycle for cellulose sponges; silicone pads may need only 1–2 minutes due to lower absorbency.
- Safety: Ensure the lid seals tightly; UV‑C light leaks can damage skin and eyes.
- Maintenance: Clean the interior quartz sleeve monthly to prevent dust shading the light.
Case study: A co‑working space installed a UV‑C box on the kitchen counter. After a month, the staff recorded a 70 % reduction in reported “spongy” odors and a measurable drop in Staphylococcus colonies on swab tests.
Smart Dispenser & Usage Tracker
Some manufacturers now offer sponges integrated with RFID tags that communicate with a wall‑mounted dispenser. The dispenser tracks how many times a sponge has been used and flashes a warning light when the usage count reaches a preset threshold (e.g., 30 uses). This system automates the “when to replace” decision, removing guesswork.
Implementation steps:
- Install the dispenser near the sink.
- Assign each user a short‑range NFC badge for accountability (optional).
- Set the usage limit based on material durability (cellulose ≈ 30 uses, silicone ≈ 120 uses).
IoT Moisture Sensors for Dry‑Storage
Moisture is the enemy of sanitation. Small Bluetooth‑enabled hygrometers can be placed inside a ventilated sponge container. When relative humidity exceeds 60 %, the sensor sends a push notification to a phone app, prompting users to spread the sponges out or run a quick sanitization cycle.
Edge case: In a humid coastal apartment, the sensor may trigger daily alerts. Pairing the alert with a low‑energy fan (also controllable via the same app) creates an automated drying loop.
Cost‑Effective and Sustainable Practices for Shared Kitchens
Sanitizing sponges does not have to be an expensive habit. Below are strategies that balance budget constraints with environmental stewardship.
Bulk Purchasing and Re‑Packaging
Buying sponges in bulk (e.g., 12‑pack cellulose) reduces per‑unit cost by up to 40 %. To keep them fresh, re‑package them in resealable, biodegradable bags with a desiccant packet. This also prevents the sponges from absorbing ambient moisture before first use.
Reusable Cleaning Pads
Invest in a set of silicone or microfiber pads that can be washed alongside laundry. Because they are not absorbent, they rarely develop odor, and a single weekly wash in the laundry machine (hot cycle) is sufficient for most households. Pair these pads with a small amount of dish soap for light cleaning tasks, reserving the sponges for heavy‑duty scrubbing.
Compostable Plant‑Based Sponges
When a compostable sponge reaches the end of its life, it can be added to a home compost bin (if free of synthetic binders). This eliminates landfill waste. To maximize compostability:
- Choose sponges labeled 100 % natural loofah or coconut coir.
- Rinse them thoroughly before composting to reduce residual food debris.
- Cut them into smaller pieces to speed up decomposition.
Energy‑Saving Sanitization Techniques
Rather than running a full dishwasher cycle for a single sponge, consider these lower‑energy alternatives:
- Electric kettle boil: Place a sponge in a heat‑proof bag, submerge in boiling water for 5 minutes, then let it sit in the kettle’s residual heat for another 5 minutes. This uses roughly 0.1 kWh.
- Microwave with a water bowl: Fill a microwave‑safe bowl with 1 cup of water, place the damp sponge on top, and run for 90 seconds. The steam generated sanitizes both the sponge and the bowl, reducing the need for a separate cleaning step.
These methods cut energy consumption by up to 70 % compared to a full dishwasher run, while still delivering >99 % bacterial reduction.
Creating a Shared Kitchen Hygiene Policy: Guidelines, Training, and Auditing
In environments where multiple families, roommates, or employees interact, a written policy reinforces accountability and provides a reference point for newcomers. Below is a template that can be adapted for residential or commercial settings.
Policy Outline
- Purpose: To maintain a safe, odor‑free, and microbe‑controlled kitchen environment for all users.
- Scope: Applies to all sponges, cleaning pads, and related sanitation equipment used in the kitchen.
- Responsibilities:
- Users – must rinse sponges after each use, label them, and follow the sanitization schedule.
- Designated Hygienist (rotating role) – conducts weekly deep‑cleaning (boil or dishwasher sanitize) and updates the log board.
- Management (if applicable) – supplies approved cleaning agents, replaces worn sponges, and audits compliance monthly.
- Procedures:
- Immediate post‑use rinse under running water.
- Drying on the rack within 5 minutes of rinsing.
- Sanitization on the assigned day (see schedule below).
- Retirement and disposal when any of the “retirement signs” appear.
- Sanitization Schedule (example for a 4‑person household):
- Monday – Microwave (1 min) – Dish sponge A.
- Wednesday – Boil (5 min) – Countertop sponge B.
- Friday – Dishwasher sanitize – All sponges.
- Saturday – Vinegar soak for any sponge with odor.
- Documentation: A dry‑erase board near the sink records date, method, and person responsible for each sanitization event.
- Non‑Compliance: First infraction results in a reminder; repeated infractions trigger a brief training session.
Training Session Blueprint (15 minutes)
- Brief overview of why sponges matter (2 min).
- Live demonstration of the most common method (microwave) – include safety tips (5 min).
- Walkthrough of the log board and how to mark entries (3 min).
- Q&A for edge cases (5 min).
For commercial kitchens, consider adding a short video module that staff can view during onboarding. The video should cover the same points but also illustrate the use of industrial‑grade UV‑C cabinets.
Audit Checklist (monthly)
- Are all sponges labeled and stored correctly?
- Is the log board up‑to‑date for the past 30 days?
- Do any sponges show retirement signs?
- Is the sanitization equipment (microwave, kettle, UV‑C box) functioning and clean?
- Is the moisture sensor within acceptable humidity range?
Document findings and share them in a brief email or posted note. Continuous improvement—such as adjusting the schedule after a spike in usage—keeps the policy relevant and effective.
Frequently Asked Questions
- 1. Can I use the microwave method on a sponge that contains a scrubber side?
- No. Metal scrubbers can spark and cause a fire. Reserve the microwave method for pure‑cellulose sponges only.
- 2. Is it safe to use bleach on a sponge that will later clean food‑contact surfaces?
- Yes, provided you rinse the sponge thoroughly until the bleach smell disappears. Rinsing removes residual chlorine that could otherwise transfer to food.
- 3. How long should a sponge stay in the dishwasher’s sanitize cycle?
- Run the full cycle as programmed by the dishwasher. Most sanitize cycles last 30–45 minutes and reach temperatures above 150°F (65°C), which is sufficient for disinfection.
- 4. Do natural cleaners like vinegar kill all harmful bacteria?
- Vinegar reduces bacterial load but does not achieve the >99.9 % kill rate of boiling or bleach. Use vinegar for routine odor control and combine with a stronger method periodically.
- 5. What’s the best way to dry sponges quickly after sanitizing?
- Place them in a well‑ventilated area on a rack or a clean towel. If you have a small fan, direct airflow over the sponge to accelerate drying. The key is to avoid a damp, enclosed environment where microbes can rebound.
Related posts:
 How to Safely Clean Your Reusable Water Bottle
 How to Clean Your Sea Sponge
 Why SCOBY Might Be the Secret Ingredient Your Skincare Routine Needs
 This Microwave Cleaning Hack Will Blow Your Mind
 Keep Bugs Out of Your House Using This Kitchen Staple
 Forget Bleach: This Kitchen Staple Cleans Everything
 White Sneaker Cleaning Hack
 How to Clean Your Sea Sponge