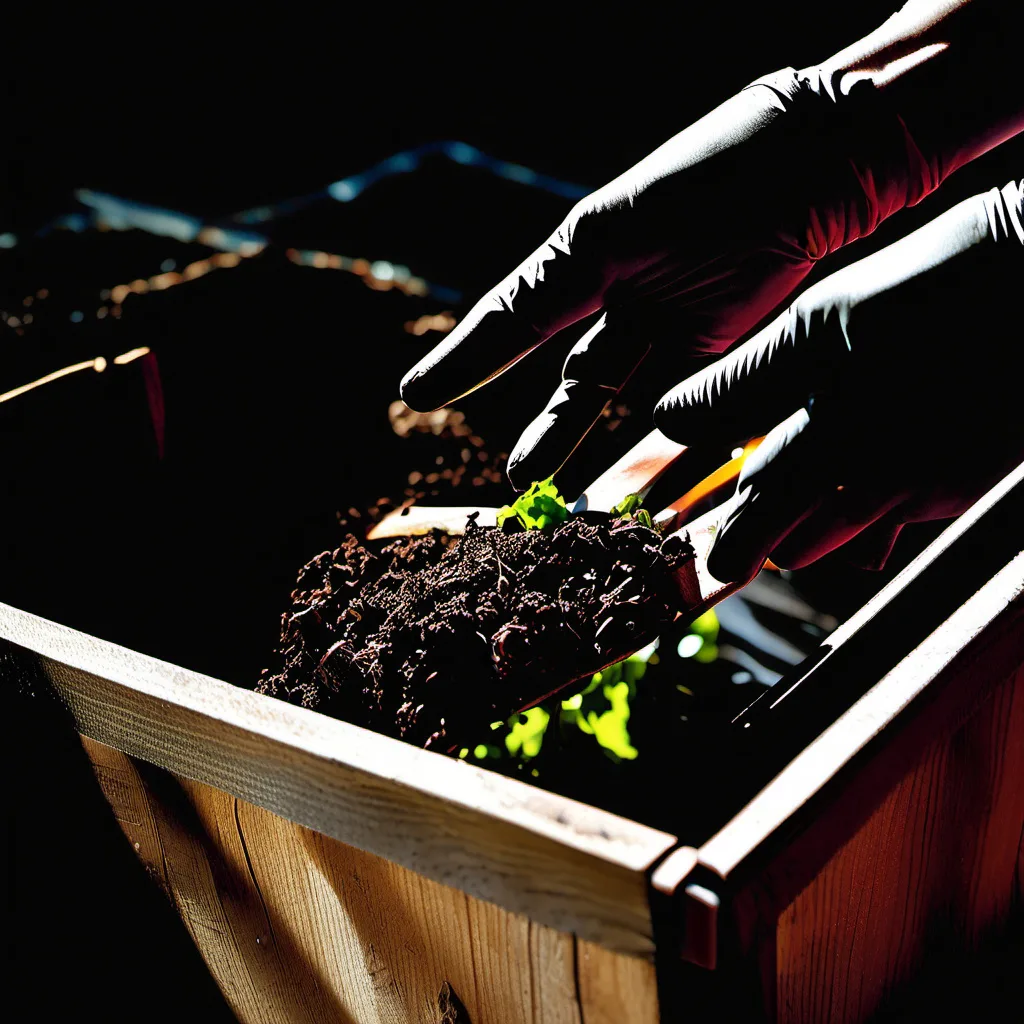
There is something profoundly satisfying about taking the remnants of a family meal—the carrot peels, the coffee grounds, the eggshells—and transforming them into a rich, dark, earthy substance that breathes life back into your garden. Backyard composting is more than just a waste-reduction strategy; it is a rhythmic participation in the natural cycle of decay and rebirth. By diverting organic matter from landfills, where it would otherwise produce methane, and returning it to the soil, you are actively contributing to a healthier planet while rewarding your plants with the finest nutrients available.
Key takeaways
- Maintain a ratio of two to three parts carbon-rich browns to one part nitrogen-rich greens for healthy decomposition.
- Avoid adding meat, dairy, oils, or pet waste to prevent unpleasant odors and keep pests away from your pile.
- Keep the compost as damp as a wrung-out sponge and turn it every few weeks to introduce essential oxygen.
- If the pile smells like ammonia, add dry browns like cardboard or leaves and turn the pile for airflow.
- Place your compost bin on bare soil to allow beneficial microbes and earthworms to enter the pile naturally.
For many, the idea of starting a compost pile feels daunting. There are worries about unpleasant smells, unwanted pests, or the fear that the process is too scientific for the average homeowner. However, composting is fundamentally a natural process. Nature has been composting forest floors for millions of years without any human intervention. The goal of backyard composting is simply to create the ideal environment for nature’s cleanup crew—bacteria, fungi, and earthworms—to work as efficiently as possible. With a few simple guidelines and a bit of patience, anyone can turn their kitchen scraps into “black gold.”
Understanding the Science of Decomposition
At its core, composting is the aerobic decomposition of organic materials. This means that microorganisms use oxygen to break down complex organic molecules into simpler ones. These microbes—primarily bacteria and fungi—require four basic ingredients to thrive: carbon, nitrogen, oxygen, and water. When these elements are balanced, the microbes multiply rapidly, generating heat as a byproduct of their metabolic activity. This heat is crucial because it helps break down tough fibers and kills off many weed seeds and pathogens.
Carbon provides the energy source for the microbes, while nitrogen provides the protein needed for growth and reproduction. If a pile has too much carbon, the decomposition process slows to a crawl. If it has too much nitrogen, the pile can become anaerobic (oxygen-deprived), leading to the production of foul-smelling gases. The art of composting lies in maintaining a balance between these elements while ensuring the pile remains moist and aerated. When these conditions are met, the organic matter transforms into humus, a stable organic substance that improves soil structure and nutrient retention.
Choosing the Right Composting Method
Depending on your available space, time, and physical ability, different composting methods may be more appealing. The first step is deciding whether you want a contained system or an open-air approach.
The Open Pile: This is the most traditional method. You simply designate a spot in the backyard and heap your materials there. It is ideal for those with large yards and plenty of “brown” materials like fallen leaves. The main disadvantage is that it can look untidy and may be more accessible to local wildlife.
The Stationary Bin: A bin made of wood, recycled plastic, or wire mesh provides a structured boundary for your compost. Bins help retain heat and moisture better than open piles and keep the area looking neater. They are excellent for medium-sized yards where you want to concentrate your efforts in one spot.
The Compost Tumbler: Tumblers are sealed containers that can be rotated with a handle. These are perfect for small spaces or for those who find the physical labor of turning a pile with a pitchfork too demanding. Because they are enclosed, they are highly resistant to pests and typically produce compost faster because aeration is easier to achieve. However, they often have limited capacity.
Vermicomposting: If you live in an apartment or have a very small patio, worm composting is a fantastic alternative. Using a specific species of worm, usually Red Wigglers, you can break down food scraps in a small indoor bin. The resulting worm castings are some of the most nutrient-dense fertilizers available.
The Golden Ratio: Balancing Greens and Browns
To keep your compost healthy and odor-free, you must understand the difference between “Greens” and “Browns.” This is the most critical part of the process.
Greens (Nitrogen-Rich Materials): These materials provide the protein necessary for microbe growth. They are typically moist and fresh. Examples include:
- Fruit and vegetable scraps
- Fresh grass clippings (ensure they are pesticide-free)
- Coffee grounds and filters
- Fresh plant trimmings
- Manure from herbivores (cows, horses, rabbits)
Browns (Carbon-Rich Materials): These provide the energy and create air pockets within the pile, preventing it from becoming a compacted, smelly mess. Examples include:
- Dried leaves
- Cardboard (shredded and non-glossy)
- Straw or hay
- Sawdust or wood chips (in moderation)
- Dried corn stalks
- Paper bags and newspaper (shredded)
A general rule of thumb for a successful pile is a ratio of about 2 to 3 parts brown to 1 part green by volume. While this isn’t an exact science, leaning toward more browns is usually safer; too many greens lead to smells, while too many browns simply mean the pile takes longer to break down. A simple practical tip is to always cover a fresh layer of green kitchen scraps with a layer of dried leaves or shredded cardboard.
What to Put in Your Compost (and What to Keep Out)
While most organic matter can be composted, some items can cause significant problems in a backyard setting. Knowing what to exclude is just as important as knowing what to include.
Safe to Compost: Most raw fruit and vegetable peels, apple cores, banana peels, coffee grounds, tea bags (remove staples), eggshells (crushed), nuts in the shell, and old flowers. You can also include small amounts of hair and cotton strings, provided they are 100% natural fibers.
Avoid These Items:
- Meat, Fish, and Dairy: These decompose slowly and produce strong odors that attract rodents and raccoons.
- Oily Foods and Grease: Fats can coat the organic materials, blocking oxygen and slowing decomposition.
- Pet Waste: Waste from dogs or cats can contain parasites and pathogens that are not always killed by the heat of a backyard pile.
- Diseased Plants: If your tomato plants had blight, don’t compost them. The pathogens may survive and reinfect your garden next year.
- Perennial Weeds with Seeds: Unless your pile gets very hot (above 140°F), weed seeds will survive and be spread throughout your garden when you use the finished compost.
- Treated Wood or Glossy Paper: These contain chemicals and glues that can leach toxins into your soil.
Step-by-Step Guide to Starting Your Pile
Starting your compost pile is a straightforward process. Follow these steps to ensure a strong start:
1. Select Your Site: Choose a level, well-drained area. A spot with a mix of sun and shade is ideal; too much sun can dry out the pile, while too much shade can keep it too cold and damp. Placing the pile directly on soil rather than concrete allows earthworms and beneficial microbes to migrate from the ground into your compost.
2. Create a Base: Start with a 4-to-6-inch layer of coarse “browns,” such as small twigs, straw, or wood chips. This creates a foundation that allows air to circulate from the bottom up, preventing the pile from becoming compacted.
3. Layer Your Materials: Begin adding your materials in alternating layers. Add a layer of greens (kitchen scraps), followed by a thicker layer of browns (dried leaves or shredded paper). This “lasagna method” ensures that nitrogen and carbon are distributed evenly.
4. Add a “Starter”: To jumpstart the process, you can add a shovelful of finished compost or a handful of healthy garden soil. This introduces the necessary bacteria and fungi to the new pile.
5. Water Appropriately: As you build, lightly sprinkle each layer with water. The pile should be damp, but not dripping wet. Think of the consistency of a wrung-out sponge.
Maintaining Your Compost for Maximum Efficiency
Once your pile is established, it requires minimal but consistent maintenance to keep the decomposition process moving forward.
Aeration (Turning): Oxygen is the fuel for aerobic bacteria. Over time, the weight of the materials compresses the pile, pushing out air. Use a pitchfork or a compost turner to mix the materials every 2 to 4 weeks. This brings fresh oxygen to the center and moves outer materials inward. If you have a tumbler, simply rotate it a few times a week.
Moisture Management: If the pile becomes too dry, the microbes will go dormant, and decomposition will stop. During hot summer months, you may need to water your pile periodically. Conversely, if the pile becomes too wet (often after heavy rains), add more dry browns and turn the pile to introduce air and absorb excess moisture.
Monitoring Temperature: You don’t need a thermometer, but if you poke a stick or your hand (carefully) into the center of a large pile, you should feel warmth. This heat indicates that the microbes are active. If the pile is cold, it may need more greens or a bit more water.
Troubleshooting Common Composting Issues
Even experienced gardeners encounter hiccups. Most composting problems have simple solutions based on the balance of air, water, and nutrients.
The Pile Smells Like Ammonia or Rotten Eggs: This is a classic sign of an anaerobic environment. It usually means there is too much nitrogen (too many greens) or too much water. To fix this, stir in a generous amount of dry browns (leaves, straw, or cardboard) and turn the pile thoroughly to introduce oxygen.
The Pile Isn’t Heating Up or Breaking Down: This usually indicates a lack of nitrogen or insufficient moisture. Try adding more “greens,” such as fresh grass clippings or a bit of organic fertilizer, and ensure the pile is damp. If the pile is too small, it may struggle to retain heat; try consolidating your materials into a larger mass.
Pests are Visiting the Pile: If you see rodents or flies, it is often because food scraps are exposed on the surface. Always “bury” your greens under a layer of browns. Additionally, ensure you are not adding meat or dairy, which are primary attractants for scavengers.
The Process is Just Too Slow: Decomposition takes time, but you can speed it up by shredding your materials. Small pieces of cardboard and chopped-up vegetable scraps have more surface area for microbes to attack, significantly reducing the time it takes to reach the finished stage.
Harvesting and Using Your “Black Gold”
Depending on the method and the weather, your compost can take anywhere from three months to a year to finish. You will know it is ready when it is dark, crumbly, and smells like a fresh forest floor. You should no longer be able to recognize the original scraps; the banana peels and leaves should have merged into a uniform soil-like texture.
How to Harvest: If you use a bin or pile, screen the compost through a piece of hardware cloth or a mesh sieve to remove any large, undecomposed chunks. These chunks can be tossed back into the new pile to act as a starter.
Ways to Use Your Compost:
- Soil Amendment: Mix 2-3 inches of compost into your garden beds before planting to improve soil structure and nutrient levels.
- Top Dressing: Spread a thin layer of compost on top of your existing lawn or around the base of established perennials. The nutrients will leach down to the roots during watering.
- Potting Mix: Mix equal parts compost, coconut coir or peat moss, and perlite to create a nutrient-rich potting soil for indoor plants.
- Compost Tea: Steep a handful of compost in a bucket of water for 24-48 hours, then strain the liquid. This creates a liquid fertilizer that can be sprayed directly onto leaves (foliar feeding) or watered into the soil.
Advanced Tips for Seasonal Composting
Composting changes with the seasons, and adjusting your approach can ensure year-round productivity.
Winter Composting: In cold climates, composting slows down significantly as microbes become dormant. You can keep your pile active by insulating it with a layer of straw or a burlap sack. While you can still add scraps throughout the winter, don’t expect much breakdown until spring. Many people keep a small, sealed indoor bin for kitchen scraps during the winter and empty it into the outdoor pile once the thaw begins.
Summer Composting: The biggest challenge in summer is evaporation. A pile that dries out will stop composting. Consider placing your bin in a shaded area or covering it with a lid or a piece of carpet to retain moisture. Be mindful of grass clippings in the summer; they are very high in nitrogen and can mat together, blocking air. Always mix them thoroughly with dry leaves or shredded cardboard.
Spring Cleanup: Spring is the best time to turn your winter pile. As the temperature rises, the sudden influx of oxygen and warmth will trigger a burst of microbial activity, often finishing the composting process just in time for your spring planting.
Frequently Asked Questions
Q: Does composting really attract rats and raccoons?
A: It can if the pile is managed poorly. The key is to avoid adding meat, fish, oils, and dairy, which are high-interest foods for pests. Additionally, always bury your “greens” (food scraps) beneath a layer of “browns” (leaves or cardboard). This masks the scent and makes the food less accessible. Using a secure, enclosed tumbler is the most effective way to prevent pest access entirely.
Q: How long does it actually take to get finished compost?
A: It varies. In a high-maintenance “hot compost” system where you turn the pile frequently and balance nutrients perfectly, you can have compost in 2-3 months. In a “cold compost” system where you simply add materials and let them sit, it can take 6 months to 2 years. Most backyard gardeners fall somewhere in the middle, seeing results in about 6 to 9 months.
Q: Can I compost citrus peels and onions?
A: Yes, in a standard backyard pile, citrus and onions are perfectly fine. You may see old advice warning against them because they are acidic or can repel worms, but in a balanced pile, the acidity is neutralized. However, if you are vermicomposting (using a worm bin), use citrus and onions sparingly, as the worms are more sensitive to these materials than bacteria are.
Q: My compost pile is wet and smells like sulfur; what did I do wrong?
A: A sulfur smell usually indicates that the pile has become anaerobic, meaning there is no oxygen reaching the center. This happens when the pile is too wet or too compacted. To fix this, use a pitchfork to turn the pile, breaking up clumps and introducing air. Add a significant amount of dry, carbon-rich materials like shredded cardboard or dry straw to absorb excess moisture and create air pockets.
Q: Can I put paper towels and napkins in my compost?
A: Yes, provided they are not coated in plastic or glossy finishes. Plain paper towels and napkins are excellent “browns.” However, if the paper towel is soaked in heavy chemicals (like bleach or strong cleaning agents), it is better to throw it in the trash to avoid introducing toxins into your garden soil.
Related posts:
 The Green Goddess Guide to Buying Leafy Perfection
 Casetify’s New Compostable Phone Case Reduces Plastic Waste
 Composting Made Easy: The Best Foods to Include in Your Compost Pile
 OXO Compost Bin Review
 Beginner’s Guide to Composting
 The Best Compost Bins for Eco-Friendly Waste Management
 Common Composting Mistakes and How to Avoid Them
 Essential Tips for Better Garden Health