
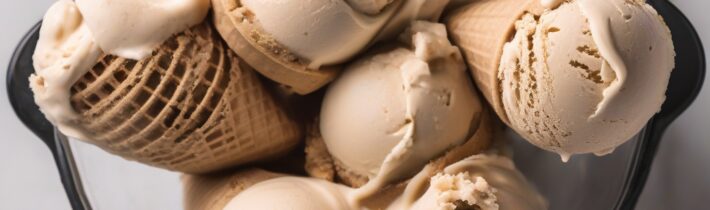
Simple Vegan Ice Cream Recipe: Your Guide to Dairy-Free Bliss
Imagine a world where every scoop of ice cream is not just a delightful treat, but also a tiny act of kindness – to your body, to animals, and to the planet. Sounds pretty sweet, right? Well, that world is within your reach, right in your own kitchen! Forget complicated concoctions and endless lists of obscure ingredients. We’re here to guide you through creating the most incredibly simple vegan ice cream recipe you’ll ever encounter, turning plant-based ingredients into pure, creamy bliss.
Whether you’re new to veganism, exploring dairy-free options for health reasons, or simply looking for a more compassionate way to indulge your sweet tooth, this recipe is your golden ticket. It’s designed to be approachable, forgiving, and utterly delicious, proving that plant-based doesn’t mean compromising on flavor or texture. Get ready to churn (or not to churn!) your way to a homemade dessert that’s bursting with love and natural goodness. Let’s embark on this delightful journey together!
Why Choose Homemade Vegan Ice Cream? A Scoop of Compassion and Health
In a world bustling with choices, opting for homemade vegan ice cream is more than just a culinary decision; it’s a mindful step towards a more compassionate and healthier lifestyle. When you choose to make your own plant-based frozen treat, you’re not just creating a dessert; you’re crafting a statement of care – for yourself, for animals, and for the environment.
Embracing Health and Well-being
One of the most compelling reasons to dive into the world of homemade vegan ice cream is the unparalleled control you gain over your ingredients. Commercial ice creams, even some vegan varieties, can be laden with refined sugars, artificial flavors, and preservatives. When you make it yourself, you dictate what goes in. You can choose natural sweeteners like maple syrup or dates, opt for organic ingredients, and avoid any unwanted additives. This means a dessert that not only tastes incredible but also nourishes your body without compromise. It’s a gentle hug for your digestive system, free from dairy and its common culprits.
A Symphony of Ethical Choices
Beyond personal health, the ethical dimension of vegan ice cream resonates deeply. By choosing plant-based ingredients, you’re actively participating in a food system that is kinder to animals. No cows are involved in the making of your creamy delight, ensuring that your indulgence is free from any animal suffering. This compassionate choice extends to the planet too. Livestock farming is a significant contributor to greenhouse gas emissions and resource depletion. By opting for plant-based alternatives, you’re making a positive impact on the environment, one delicious scoop at a time. It’s a sweet way to contribute to a more sustainable future.
Unleash Your Inner Culinary Artist
Perhaps one of the most exciting aspects of making your own vegan ice cream is the boundless opportunity for customization. Unlike store-bought options that often limit your imagination, your kitchen becomes a canvas for culinary creativity. Do you crave a rich chocolate indulgence? A vibrant berry explosion? A subtle hint of lavender? The choice is entirely yours! You can experiment with different plant milks, sweeteners, and an endless array of flavorings and mix-ins. This creative freedom ensures that every batch you make is a unique expression of your taste, tailored precisely to your cravings. It’s an empowering and truly satisfying experience to craft something so personal and delicious.
The Magic Ingredients for Your Simple Vegan Ice Cream: Purity in Every Scoop
The beauty of this easy vegan ice cream recipe lies in its simplicity. You don’t need a pantry full of exotic items; just a few key players work in harmony to create a truly magical dessert. Each ingredient plays a vital role in achieving that coveted creamy texture and delightful flavor. Let’s explore the stars of our show:
Full-Fat Coconut Milk: The Creamy Foundation
This is arguably the most crucial ingredient in our simple vegan ice cream. Full-fat canned coconut milk is your secret weapon for achieving that rich, luxurious creaminess without any dairy. Look for cans that contain at least 60% coconut extract, and ideally, refrigerate them overnight. This allows the thick coconut cream to separate and rise to the top, leaving the watery liquid at the bottom. We’ll primarily be using the thick cream for the best results. The high fat content in the coconut cream is what mimics the mouthfeel of traditional dairy ice cream, giving it that satisfying, melt-in-your-mouth quality.
Your Preferred Sweetener: A Touch of Sweetness
The choice of sweetener is where you can truly personalize your ice cream. For a natural, unrefined sweetness, maple syrup or agave nectar are excellent choices. They blend seamlessly and add a lovely depth of flavor. If you prefer a more classic sweetness, organic cane sugar or coconut sugar can also be used. For a truly whole-food approach, you can even blend in softened dates, though this might require a high-speed blender for a silky-smooth texture. Remember, the amount of sweetener can be adjusted to your personal taste – start with the recommended amount and add more if you desire a sweeter treat.
Vanilla Extract: The Soul of Sweetness
Never underestimate the power of good quality vanilla extract. It’s not just a flavor; it’s an enhancer, bringing out the best in all the other ingredients and adding a warm, comforting aroma. For a truly gourmet experience, consider using vanilla bean paste or scraping the seeds from a fresh vanilla bean. This will infuse your ice cream with tiny specks of vanilla, elevating both its appearance and its flavor profile.
A Pinch of Salt: The Flavor Amplifier
It might seem counterintuitive to add salt to a sweet dessert, but trust us on this one! Just a tiny pinch of fine sea salt works wonders in balancing and amplifying all the other flavors. It cuts through the richness, prevents the ice cream from being overly sweet, and makes every other ingredient taste more vibrant and pronounced. It’s the subtle secret ingredient that makes a good dessert truly great.
Optional Enhancements: Elevating Texture and Flavor
While the above ingredients are all you truly need for a delicious simple vegan ice cream, a few optional additions can take it to the next level:
- Lecithin (liquid or granules): A natural emulsifier, a teaspoon of lecithin can help create an even smoother, creamier texture and prevent ice crystal formation.
- Guar Gum or Xanthan Gum: A tiny amount (1/4 to 1/2 teaspoon) can act as a stabilizer, improving the texture and preventing iciness, especially in no-churn methods. Use sparingly as too much can make it gummy.
- Nut Butter: For an even richer, nuttier flavor and added creaminess, a tablespoon or two of cashew butter or almond butter can be a wonderful addition.
Step-by-Step Guide to Your Dreamy Vegan Ice Cream: Churn or No-Churn!
Now for the exciting part – bringing these simple ingredients together to create your very own batch of creamy, dreamy vegan ice cream! We’ll cover both methods: using an ice cream maker for optimal texture, and a simple no-churn method for those without specialized equipment. Both yield delicious results, so choose what works best for you!
Preparation is Key: Setting the Stage for Success
- Chill Your Coconut Milk: If you haven’t already, place your cans of full-fat coconut milk in the refrigerator overnight (or at least 8 hours). This is crucial for separating the thick cream from the watery liquid.
- Chill Your Equipment (if churning): If using an ice cream maker, ensure its bowl has been frozen for at least 12-24 hours according to manufacturer instructions. A well-chilled bowl is essential for proper churning.
- Gather Your Tools: You’ll need a mixing bowl, a whisk or electric mixer, a spatula, and an airtight freezer-safe container for storage.
Method 1: Using an Ice Cream Maker (The Creamiest Option)
This method typically yields the smoothest, most professional-tasting ice cream due to continuous agitation during freezing.
- Harvest the Cream: Open the chilled cans of coconut milk carefully. Scoop out only the thick, solid coconut cream from the top, leaving the clear liquid behind (you can save this for smoothies!).
- Combine Ingredients: In a large mixing bowl, combine the coconut cream, your chosen sweetener (maple syrup, agave, etc.), vanilla extract, and a pinch of salt. If using optional lecithin or nut butter, add them now.
- Whisk Until Smooth: Using a whisk or an electric mixer on medium speed, whisk the mixture until it’s completely smooth, creamy, and well combined. Ensure any solid sweeteners are fully dissolved. Taste and adjust sweetness if desired.
- Chill the Base (Optional but Recommended): For even better results, cover the bowl and refrigerate the mixture for at least 30 minutes to an hour. A colder base churns more efficiently.
- Churn Away! Pour the chilled mixture into your pre-frozen ice cream maker bowl. Churn according to your machine’s instructions, usually for 20-30 minutes, or until the ice cream reaches a soft-serve consistency.
- Freeze for Firmness: Transfer the soft-serve ice cream to your airtight freezer-safe container. Press a piece of parchment paper or plastic wrap directly onto the surface of the ice cream to prevent ice crystals. Freeze for at least 4-6 hours, or until firm.
Method 2: The No-Churn Method (Effortlessly Simple)
No ice cream maker? No problem! This method still delivers a wonderfully creamy result with minimal effort. It relies on whipping the coconut cream to incorporate air, which helps create a lighter texture.
- Harvest and Whip Cream: Open the chilled cans of coconut milk. Scoop out only the thick, solid coconut cream into a large mixing bowl. Using an electric mixer (handheld or stand mixer with a whisk attachment) on high speed, whip the coconut cream for 3-5 minutes until it’s light, fluffy, and holds soft peaks, similar to whipped cream.
- Fold in Flavor: Gently fold in your chosen sweetener, vanilla extract, and a pinch of salt. If using optional lecithin or gum, whisk them into the sweetener before folding to ensure no clumps. Be careful not to overmix, as you want to retain the air you’ve whipped in.
- Transfer and Freeze: Pour the mixture into your airtight freezer-safe container. Again, press parchment paper or plastic wrap directly onto the surface.
- Freeze and Stir: Freeze for 2 hours, then remove and stir vigorously with a spoon or spatula to break up any ice crystals forming. Repeat this stirring process every 1-2 hours for the first 6-8 hours of freezing. This helps achieve a smoother texture.
- Final Freeze: After the initial stirring period, let it freeze undisturbed for another 4-6 hours, or until completely firm.
Whichever method you choose, remember that patience is a virtue when it comes to freezing. The longer it freezes (within reason!), the firmer your ice cream will be. Before serving, let your homemade vegan ice cream sit at room temperature for 10-15 minutes to soften slightly for the perfect scoopable consistency. Enjoy the fruits of your compassionate labor!
Flavor Fantasies: Elevating Your Simple Vegan Ice Cream
Once you’ve mastered the basic simple vegan ice cream recipe, a whole world of flavor possibilities opens up! This is where you can truly let your imagination soar and create unique, personalized treats. Think of your creamy base as a blank canvas, ready for your artistic touch. Here are some inspiring ideas to get you started:
Classic Combinations, Elevated
- Rich Chocolate Indulgence: Whisk in 1/4 to 1/2 cup unsweetened cocoa powder (depending on desired intensity) with your base ingredients. For an extra decadent treat, melt 1/2 cup of vegan dark chocolate chips and swirl it into the mixture before freezing, or fold in chocolate chunks after churning.
- Vibrant Berry Swirl: Blend 1 cup of fresh or frozen berries (strawberries, raspberries, blueberries) with a tablespoon of sweetener and a splash of lemon juice until smooth. Swirl this puree into your ice cream base just before freezing.
- Mint Chocolate Chip: Add 1-2 teaspoons of pure peppermint extract to your base. Once churned (or before the final freeze for no-churn), fold in a handful of vegan chocolate chips or finely chopped vegan chocolate.
Nutty & Decadent Creations
- Peanut Butter Perfection: Add 1/4 to 1/2 cup of creamy peanut butter to your base mixture. For a delightful crunch, fold in roasted peanuts or vegan chocolate chips.
- Salted Caramel Dream: Make a simple vegan caramel sauce (using coconut cream, maple syrup, and a pinch of salt). Swirl generously into your ice cream base before freezing. A sprinkle of flaky sea salt on top after serving is divine!
- Pistachio Power: Blend 1/2 cup of shelled, unsalted pistachios into a paste with a tiny bit of your coconut cream before adding to the main base. For texture and color, fold in some chopped pistachios after churning.
Exotic & Unique Blends
- Mango Tango: Blend 1 cup of ripe mango chunks until smooth and fold into your base. A dash of lime juice can brighten the flavor.
- Coffee Kick: Dissolve 1-2 tablespoons of instant espresso powder or strong brewed coffee into a small amount of warm coconut milk before adding to your base.
- Chai Spice: Infuse your coconut milk with chai tea bags (steep for 10-15 minutes, then remove) or whisk in 1-2 teaspoons of chai spice blend (cinnamon, cardamom, ginger, cloves, nutmeg).
Irresistible Toppings & Mix-ins
Don’t stop at the ice cream itself! The right toppings can elevate your creation even further:
- Fresh fruit (berries, sliced bananas, mango)
- Toasted nuts (almonds, pecans, walnuts)
- Vegan chocolate sauce or ganache
- Coconut flakes (toasted or raw)
- Vegan whipped cream
- Crumbled vegan cookies or brownies
- A drizzle of extra maple syrup or agave
The key is to have fun and experiment. Start with small additions and taste as you go. Your kitchen is your playground, and your homemade vegan ice cream is waiting to be transformed into your next favorite dessert!
Troubleshooting & Tips for Perfection: Mastering Your Vegan Ice Cream
Even with a simple recipe, sometimes questions arise, or things don’t go exactly as planned. Don’t worry! Making homemade vegan ice cream is a learning process, and with a few tips and tricks, you’ll be a pro in no time. Here’s how to troubleshoot common issues and ensure your next batch is nothing short of perfect.
Common Issues and Their Solutions
-
Problem: My ice cream is too icy/hard.
Solution: This is the most common complaint with dairy-free ice cream. It often happens due to too much water content or not enough fat. Ensure you’re using full-fat canned coconut milk and only the thick cream, discarding the watery liquid. Adding a bit more sweetener (sugar acts as an anti-freeze) or a tiny amount of a stabilizer like guar gum (1/4 to 1/2 teaspoon per batch) can also help. For no-churn, make sure you whip the coconut cream until fluffy and stir every 1-2 hours during the initial freezing phase to break up ice crystals.
-
Problem: My ice cream is grainy or has sugar crystals.
Solution: This usually means your sweetener wasn’t fully dissolved. When making your base, whisk vigorously or blend until you’re sure all sugar granules have disappeared. Using liquid sweeteners like maple syrup or agave nectar can help prevent this issue entirely.
-
Problem: My ice cream is too soft, even after freezing.
Solution: This could be due to too much sweetener (which lowers the freezing point) or not enough freezing time. Ensure your freezer is set to a sufficiently cold temperature. If using an ice cream maker, make sure the bowl is thoroughly frozen. For no-churn, ensure your coconut cream was whipped sufficiently to incorporate air.
-
Problem: My ice cream tastes too much like coconut.
Solution: While some love the coconut flavor, if you prefer it less prominent, ensure you use good quality vanilla extract (or other strong flavorings like chocolate or coffee) to balance it out. You can also try using a ‘light’ coconut milk for part of the liquid, but be aware this will affect creaminess. Some brands of coconut milk have a more neutral flavor than others; experimentation might be needed.
Expert Tips for Unbeatable Vegan Ice Cream
- Always Use Full-Fat Coconut Milk: We can’t stress this enough! The fat content is critical for a creamy, scoopable texture.
- Chill Everything: A colder base mixture and a super-cold ice cream maker bowl (if using) will result in a faster churn and smaller ice crystals, leading to a smoother ice cream.
- Don’t Overfill Your Ice Cream Maker: Leave room for the mixture to expand as it churns and incorporates air.
- Let it Soften Before Serving: Homemade vegan ice cream tends to freeze harder than dairy ice cream. Take it out of the freezer 10-15 minutes before you plan to serve to allow it to soften to a perfect scoopable consistency.
- Store Properly: Always store your ice cream in an airtight container with a piece of parchment paper or plastic wrap pressed directly onto the surface to prevent freezer burn and ice crystal formation.
- Experiment with Sweeteners: Different sweeteners (maple syrup, agave, cane sugar, dates) will impact both flavor and texture. Find your favorite!
- Embrace the Process: Making homemade ice cream is a joyful culinary adventure. Don’t be afraid to experiment, taste, and adjust. Each batch is a step towards perfection!
With these insights, you’re well-equipped to create consistently delicious, creamy, and compassionate vegan ice cream that will delight your taste buds and impress your friends and family!
FAQ: Frequently Asked Questions About Vegan Ice Cream
As you embark on your journey to create delightful homemade vegan ice cream, you might have a few questions. We’ve gathered some of the most common inquiries to help you feel confident and empowered in your kitchen!
Q1: Can I make this simple vegan ice cream recipe without an ice cream maker?
A1: Absolutely! Our guide includes a detailed no-churn method. It involves whipping the chilled coconut cream until fluffy, folding in your flavors, and then freezing. The key to a good no-churn texture is to stir the mixture every 1-2 hours during the initial freezing phase to break up ice crystals and ensure a smoother result. It’s a fantastic option for anyone without specialized equipment!
Q2: What can I use instead of coconut milk if I don’t like the flavor or have an allergy?
A2: While full-fat coconut milk provides the best creaminess, you have alternatives! You can use a base of soaked and blended cashews (cashew cream) for a very neutral, rich flavor. Another option is to use commercial vegan heavy cream alternatives (often soy, oat, or almond-based) specifically designed for whipping or cooking. Just be aware that the fat content and resulting texture might vary, so you might need to adjust sweeteners or add a stabilizer like guar gum.
Q3: How long does homemade vegan ice cream last in the freezer?
A3: For optimal freshness and texture, homemade vegan ice cream is best enjoyed within 1-2 weeks. After this, it might start to develop more ice crystals or freezer burn, affecting its creamy consistency. Always store it in an airtight container with a piece of parchment paper pressed directly onto the surface to minimize air exposure and prolong its quality.
Q4: Why is my vegan ice cream icy, even if I used full-fat coconut milk?
A4: Icy texture often points to too much water and not enough fat or sugar relative to the water content, or insufficient churning/stirring. Ensure you’re only using the thick, solid cream from the top of the chilled coconut milk cans, discarding the watery liquid. Make sure your sweetener is fully dissolved. For churned ice cream, a super-cold machine bowl is crucial. For no-churn, whipping the coconut cream until light and fluffy and stirring regularly during initial freezing helps incorporate air and prevent large ice crystals.
Q5: Can I use different natural sweeteners like dates or stevia in this recipe?
A5: Yes, you can! For dates, you’ll need to soak them in warm water for about 10-15 minutes, then blend them with a small amount of the coconut cream until completely smooth before incorporating into the main base. This adds fiber and a rich, caramel-like sweetness. For stevia or other sugar substitutes, be mindful that they don’t contribute to the texture in the same way sugar does (sugar helps prevent iciness). You might need to add a small amount of a natural thickener like guar gum (1/4 teaspoon) to compensate for the lack of sugar’s textural properties.
Embrace the Sweetness: Your Journey to Vegan Ice Cream Bliss
As we wrap up this delightful exploration into the world of simple vegan ice cream, we hope you feel inspired, empowered, and ready to create your own masterpieces. This isn’t just about making a dessert; it’s about embracing a more compassionate way of living, one delicious scoop at a time. It’s about discovering the incredible versatility of plant-based ingredients and the joy of crafting something truly special with your own hands.
Remember, every batch you make is an opportunity for learning, for creativity, and for sharing love. Don’t be afraid to experiment with new flavors, to tweak the sweetness to your liking, or to invent your own signature mix-ins. The beauty of homemade vegan ice cream lies in its adaptability and the personal touch you bring to it.
So, go ahead! Chill that coconut milk, gather your ingredients, and let the magic unfold. Whether you’re churning with an ice cream maker or gently stirring your no-churn creation, you’re on your way to a treat that’s not only incredibly delicious but also aligns with your values. Savor each spoonful, knowing that you’ve created something wonderful, wholesome, and full of kindness. Happy scooping!
Related posts:
 Countertop Ice Maker: A Must-Have Appliance for Summer Entertaining
 Ice Cream for Breakfast? Try These Recipes
 Dairy-Free Ice Cream Recipe: Indulge in a Creamy, Guilt-Free Treat
 Delicious Foods Made with Oat Milk for a Dairy-Free Treat
 I Have Lactose Intolerance But Still Love Ice Cream—These Are My Go-To Dairy-Free Treats
 Ben & Jerry’s Light Ice Cream Launch
 The Ultimate Oat Milk Showdown: Which Creamy Alternative Reigns Supreme?
 Best Vegan Ice Cream: Indulgent Plant-Based Treats