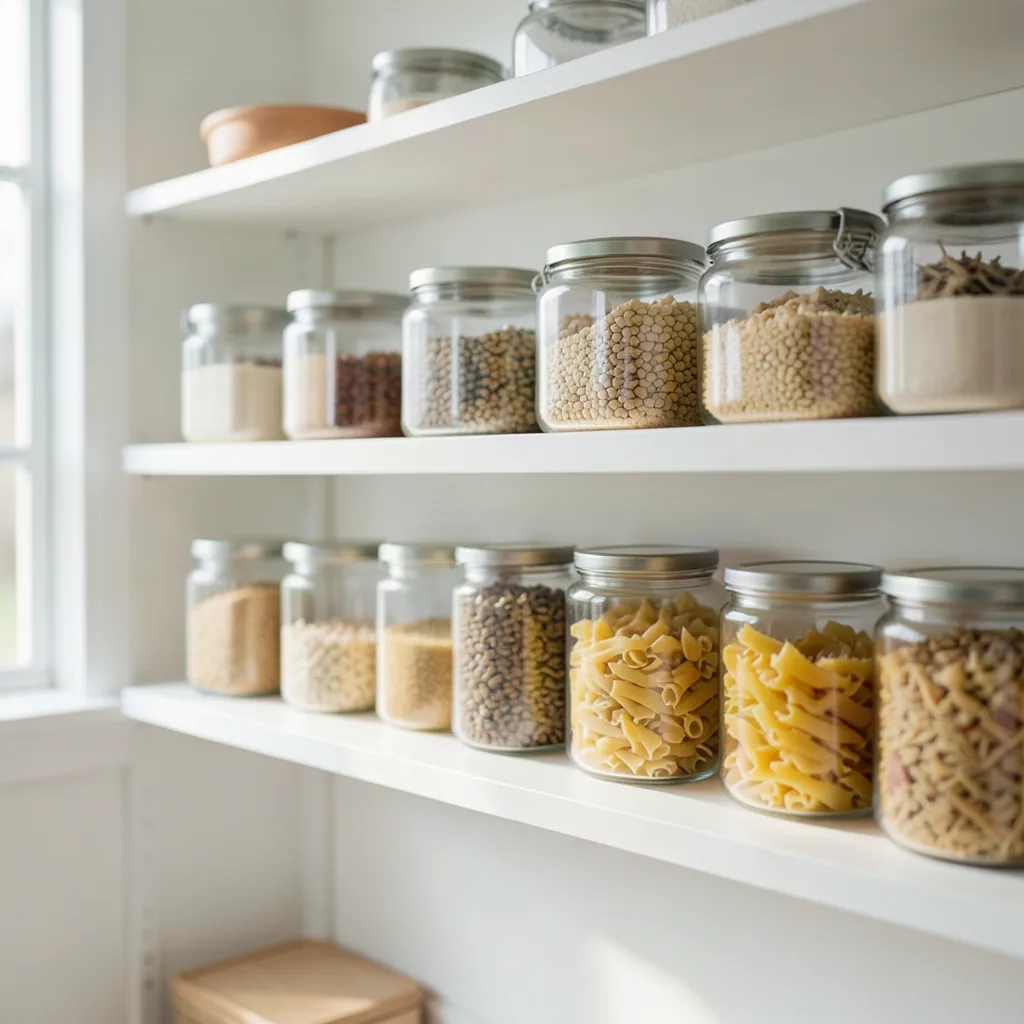
Keeping a pantry tidy can feel like a never‑ending battle, especially when you juggle school lunches, snack cravings, and weekly grocery trips for a busy family. The good news is that you don’t need a complete remodel or expensive storage systems to create a functional, inviting space. By applying a few thoughtful habits and low‑cost tools, you can turn a chaotic cupboard into a clear, efficient hub that saves time, reduces waste, and eases mealtime stress.
Key takeaways
- Group items into logical zones like breakfast or snacks to help family members find ingredients quickly.
- Use clear, airtight containers and labels to track inventory and protect food from pests.
- Implement a first-in-first-out system to ensure older items are used first and food waste is reduced.
- Create a dedicated, accessible kid-friendly snack zone to encourage independence and reduce clutter.
- Perform a quick monthly audit to wipe shelves, check expiration dates, and adjust for seasonal needs.
1. Assess Your Space and Inventory
Before you move any jars or boxes, take a step back and map out the pantry’s dimensions. Measure the height, width, and depth of each shelf, noting any obstacles such as light fixtures or vent ducts. Then, pull every item out and place it on a clean countertop or table. As you do this, write down a quick inventory: what you have, how many of each, and where you’d ideally store them. This exercise reveals hidden gaps, tells you which shelves are under‑utilized, and gives you a realistic sense of the volume you need to accommodate.
Use a simple spreadsheet or a printable checklist to record categories (canned goods, grains, snacks, etc.). Seeing the numbers on paper helps you decide whether you need more containers, a pull‑out drawer, or simply a better arrangement.
2. Declutter Expired and Unused Items
One of the quickest ways to free up space is to discard anything past its prime. Check the best‑by or use‑by dates on all packaged foods. If you find items you’ve never opened, consider donating them to a local food bank—just be sure they’re still within their safe consumption window.
For products that are still good but unlikely to be used (e.g., a specialty spice you bought on a whim), set them aside in a “donate” bin. This reduces visual clutter and prevents the pantry from becoming a storage graveyard.
3. Group Items by Category
Human brains locate items faster when they’re organized in logical groups. Arrange your pantry into clear zones:
- Breakfast staples: cereals, oatmeal, pancake mix.
- Baking supplies: flour, sugar, baking powder, chocolate chips.
- Snacks: crackers, granola bars, dried fruit.
- Canned and jarred foods: tomatoes, beans, sauces.
- Dry goods: rice, pasta, quinoa, lentils.
- Condiments & spices: oils, vinegars, herbs.
When you need to restock, you’ll know exactly which shelf to head to, and kids will find their favorite snacks without rummaging through unrelated items.
4. Use Clear Containers and Labels
Opaque boxes can hide inventory, leading to duplicate purchases and forgotten ingredients. Invest in a handful of clear, airtight containers for high‑use items like flour, sugar, cereal, and pasta. Not only do they protect against pests, but they also let you see at a glance how much is left.
Label each container with a simple, legible tag. Hand‑written labels work, but for a polished look, use a label maker or printable stickers. Include the item name and, if useful, the purchase date. This practice supports a “first‑in‑first‑out” rotation and makes it easier to spot when you need to replenish.
5. Optimize Shelf Height and Depth
Most pantries have uniform shelves, but not all items need the same vertical space. Adjust shelf brackets (if they’re movable) so that taller items—like cereal boxes or large jars—have a dedicated row, while shorter containers sit on lower shelves. This prevents wasted vertical space and reduces the need to stack items precariously.
For deep shelves, consider using tiered risers or pull‑out baskets. A tiered riser turns a single deep shelf into two shallow layers, making it easier to see items at the back. Pull‑out baskets slide out like a drawer, allowing you to access the rear of the pantry without lifting heavy boxes.
6. Implement a First‑In‑First‑Out System
Food waste often stems from items hidden at the back of the pantry that are forgotten until they expire. The FIFO method solves this: place newly purchased goods behind older ones, ensuring the oldest stock is used first.
Practical steps:
- When restocking, move existing containers forward.
- Put the new package behind the older one.
- Use a small “new” sticker on the front of fresh items for a week, then remove it.
This habit takes only a minute during each grocery unload but can dramatically cut waste over time.
7. Create a Kid‑Friendly Zone
Kids love to help (and to snack). Designate a low‑lying shelf or a pull‑out basket for age‑appropriate items such as snack packs, fruit cups, and single‑serve crackers. Use colorful bins or labels with pictures to guide them toward healthy choices.
By giving children a defined spot, you reduce the likelihood of them climbing onto higher shelves or pulling out heavy cans. It also encourages independence: they can grab a snack without adult assistance, freeing you for other tasks.
8. Maintain the System with a Monthly Check
Even the best‑planned pantry can slip back into disorder if you don’t revisit it regularly. Set a recurring calendar reminder—perhaps the first Saturday of each month—to perform a quick audit:
- Wipe down shelves with a damp cloth.
- Check for expired dates.
- Re‑align containers after any recent purchases.
- Restock the “kid zone” with fresh, nutritious options.
This 15‑minute ritual keeps the space tidy, reinforces the FIFO habit, and gives you a chance to adjust for seasonal items (e.g., holiday baking supplies).
Seasonal Rotation and Holiday Planning
One of the most overlooked aspects of pantry management is the way the calendar influences what you store and how you retrieve it. Seasonal foods, holiday traditions, and even school schedules create natural cycles that, if anticipated, can keep the pantry from becoming a chaotic catch‑all. Below is a step‑by‑step framework for aligning your pantry with the year’s rhythm.
- Map the culinary year. Create a simple table (paper or digital) that lists the months on the horizontal axis and the major food categories on the vertical axis. Highlight when you typically bake pies (November‑December), grill outdoors (May‑September), or serve school lunches (September‑June). This visual cue tells you which shelves will see the most traffic and which will sit idle.
- Pre‑position seasonal bins. Use clear, stackable bins labeled “Fall Baking” or “Summer BBQ.” When the season arrives, slide the bin onto a dedicated shelf and fill it with the appropriate items—canned pumpkin, spice mixes, marshmallows, or corn‑on‑the‑cob bags. When the season ends, empty the bin back into the main pantry or store it elsewhere, freeing up space for the next cycle.
- Holiday‑specific inventory sheets. For holidays that require a unique set of ingredients (e.g., Easter hot cross buns, Hanukkah latkes), draft a one‑page checklist that lives on the pantry door. As you shop, tick off items and place them in a “holiday‑ready” drawer. After the celebration, move any leftovers to a “post‑holiday” shelf and evaluate whether they belong in the regular rotation.
- Rotate bulk purchases. Bulk bins of flour, sugar, or dried beans can sit for months. To prevent them from becoming stale, schedule a “seasonal swap” every three months: move the oldest bulk containers to the front of the shelf and replenish with newly purchased stock. This practice dovetails with the first‑in‑first‑out principle while respecting seasonal demand.
- Adjust lighting for seasonal visibility. During winter, natural light is scarce, and you may rely more on pantry lighting. Install battery‑operated LED strips that can be dimmed or brightened according to the time of year. Brighter light in the winter helps you see low‑stock items that might otherwise be overlooked.
Edge case example: families that observe multiple cultural holidays may need overlapping bins. In this scenario, assign each cultural tradition its own color‑coded bin (e.g., red for Lunar New Year, green for St. Patrick’s Day). The color code becomes a quick visual cue, preventing accidental mixing of ingredients that belong to distinct celebrations.
Smart Inventory Management with Apps and QR Codes
Manual spreadsheets work, but technology can turn pantry upkeep into a near‑automatic process. Modern smartphones, inexpensive QR code stickers, and pantry‑specific apps give you real‑time insight into stock levels, expiration dates, and even nutritional breakdowns.
- Choose an app that fits your workflow. Popular options include “Pantry Check,” “Out of Milk,” and “Sortly.” Look for features such as barcode scanning, cloud sync across family members, and the ability to attach photos. Some apps even generate shopping lists based on low‑stock alerts.
- Generate QR codes for each container. Use a free online QR generator to create a code that links to the item’s entry in your chosen app. Print the code on waterproof label paper and affix it to the lid of a clear container. When you scan the code with your phone, the app opens directly to the item’s quantity, expiration date, and usage notes.
- Automate expiration reminders. Set the app to push a notification seven days before an item expires. Pair this with a weekly family “pantry sprint” where the notified items are earmarked for the next meal plan, reducing waste without extra mental load.
- Leverage voice assistants. If you have a smart speaker, integrate your pantry app via IFTTT or native skill. A quick command like “Hey Alexa, what’s the status of our canned tomatoes?” can pull the data without you opening the app.
- Track nutritional goals. Some advanced pantry apps let you tag items with macros (protein, carbs, fats). When you’re planning a family dinner, you can filter for high‑protein items or low‑sugar snacks, aligning pantry content with health objectives.
Edge case: households with limited Wi‑Fi coverage in the pantry. In such cases, use a Bluetooth barcode scanner that syncs with the app when you’re in the kitchen, ensuring the data still updates even if the pantry itself is a dead zone.
Pest Prevention and Moisture Control Strategies
Even the most orderly pantry can become a haven for insects, rodents, or mold if moisture and food residues are not managed properly. Below are evidence‑based tactics that go beyond the usual “keep it clean” advice.
- Implement a double‑seal system. Store dry goods (rice, beans, nuts) in airtight containers, then place those containers inside a secondary zip‑top bag. The outer layer acts as a barrier against tiny pantry moths that can chew through thin plastic.
- Use natural repellents. Place a small sachet of dried lavender, bay leaves, or cedar chips on each shelf. These scents deter moths and beetles without chemicals. Replace the sachet every three months, or when the scent fades.
- Control humidity with desiccant packs. Purchase food‑grade silica gel packets (often found in shoe boxes) and tuck one into each deep shelf. Monitor the packets; when they turn pink, replace them. For larger pantries, consider a digital hygrometer; aim for a relative humidity of 45‑55%.
- Seal entry points. Inspect the pantry door frame for gaps. Use foam weatherstripping to create a tighter seal, preventing ants or small rodents from slipping in. If the pantry has a vent, install a fine mesh screen.
- Rotate high‑risk items. Products like flour, cornmeal, and pet food are especially attractive to pantry pests. Store them in the lowest, most isolated shelf and rotate them every two months, moving older bags to the front.
Edge case: homes in humid climates where condensation forms on pantry walls. Install a small wall‑mounted dehumidifier or place a moisture‑absorbing brick (often sold for closets) on the back wall. Run the unit for a few hours each week during the rainy season to keep the environment dry.
Customizing the Pantry for Dietary Needs and Allergies
When a family member follows a specific diet—gluten‑free, keto, vegan, or a strict allergy regimen—the pantry must become a safe zone, not a source of accidental cross‑contamination. The following system creates clear visual and physical separation while keeping the pantry functional for everyone.
- Designate a “safe” shelf. Choose the highest or lowest shelf (depending on child safety) and reserve it exclusively for allergy‑free items. Use a bright, contrasting color for the shelf liner (e.g., neon green for gluten‑free) to make the zone instantly recognizable.
- Color‑code containers. Assign a color palette: blue for vegan, orange for keto, red for nut‑free. Purchase matching lids or use colored silicone bands. This visual cue reduces the chance of grabbing the wrong product during a hurried meal prep.
- Separate cooking oils. Some oils are processed on shared equipment and may contain trace allergens. Store dedicated allergen‑free oils (e.g., extra‑virgin olive oil for a nut‑free household) in a sealed, labeled jar on the safe shelf.
- Maintain a “cross‑contamination log.” Keep a small notebook on the pantry door where family members can note any accidental exposure. Over time, patterns emerge that help you tighten storage practices.
- Use dedicated utensils. Store a set of allergen‑free measuring spoons, cups, and small containers in a drawer that is only used for the safe shelf. Label the drawer with a pictogram (e.g., a wheat stalk with a slash) for quick identification.
Edge case: a shared pantry in a multi‑family building where each unit has different dietary restrictions. In such situations, install a low‑profile, lockable compartment for each family’s exclusive items. The lock can be a simple combination padlock, and the compartment can be a set of stacked plastic bins that slide out like a drawer.
Emergency Preparedness and Long‑Term Food Storage
Beyond daily meals, a well‑organized pantry can serve as the backbone of a family’s emergency plan. The goal is to store enough non‑perishable food to sustain each family member for at least 72 hours, while keeping the items accessible and fresh.
- Calculate caloric needs. Multiply the average daily caloric requirement (e.g., 2,200 kcal for adults, 1,800 kcal for children) by three days and by the number of family members. This total guides the quantity of high‑energy foods you’ll need.
- Select shelf‑stable foods. Prioritize items with low water content and long shelf lives: canned beans, ready‑to‑eat meals, dehydrated fruits, energy bars, and powdered milk. Include a mix of protein, carbohydrates, and fats to maintain nutritional balance.
- Label for rotation. Use a bold, waterproof label that reads “EMERGENCY – ROTATE BY” followed by the date. Store these items on a dedicated “disaster” shelf that is separate from everyday foods to avoid accidental consumption.
- Integrate water storage. While not a pantry item per se, keep a stack of 1‑liter water bottles on the top shelf. If space is limited, use a collapsible water carrier that can be stored under the pantry door.
- Practice a drill. Once a quarter, simulate a power outage or severe weather event. Have each family member retrieve a pre‑packed “go‑bag” from the pantry, verify that the food is still sealed, and note any items that need replacement.
Edge case: families living in apartments with fire‑code restrictions on pantry weight. In this scenario, use lightweight, vacuum‑sealed meals that occupy less volume and weigh less than traditional canned goods. Rotate them every six months to keep the stock fresh.
Advanced Storage Solutions: Pull‑Out Systems, Door Organizers, and Vertical Racks
When the basic shelves are already maximized, it’s time to think three‑dimensional. Pull‑out systems, door‑mounted organizers, and vertical racks transform underused space into highly accessible storage.
- Pull‑out drawers for deep shelves. Install inexpensive metal or wood slides (often sold as “pantry pull‑out bins”). These convert a 12‑inch deep shelf into a shallow drawer that slides out fully, exposing the back row. Ideal for canned goods or bulk bags that would otherwise be hidden.
- Door‑mounted spice racks. Use a magnetic strip or a slim, adhesive rack on the pantry door. Magnetic spice tins snap onto the strip, freeing up shelf space while keeping spices visible. For families with many spices, label each tin with a QR code that links to a recipe database.
- Vertical tiered racks. Stackable metal or acrylic racks can be placed against the back wall, creating multiple shallow layers. They work well for snack packets, tea bags, or small condiment bottles that are otherwise lost in the back of a deep shelf.
- Hanging baskets from the ceiling. If the pantry has a sturdy overhead beam, attach a few small wire baskets using S‑hooks. Use them for items you need to keep out of reach of children—like large bags of flour or specialty oils.
- Adjustable tension rods. Place a tension rod horizontally across a deep shelf and hang small baskets or mesh bags from it. This creates a “second tier” without drilling holes, perfect for renters who need a non‑permanent solution.
Edge case: a pantry with an angled ceiling. Cut custom acrylic shelves to fit the slope, then mount pull‑out trays that glide on low‑friction ball bearings. This ensures smooth operation even on an incline, and the transparent material lets you see items at a glance.
By integrating these advanced solutions, you turn a modest pantry into a multi‑functional storage hub that adapts to the family’s evolving needs, from everyday meals to special occasions and emergency preparedness.
FAQ
How often should I review pantry items?
A quick visual scan once a week is enough to spot items that need to be used soon. A deeper, more thorough check—including date verification and shelf cleaning—should be done monthly. Align this with your grocery shopping schedule for maximum efficiency.
What are safe ways to store bulk items?
Transfer bulk purchases (flour, rice, nuts) into airtight, food‑grade containers made of glass, BPA‑free plastic, or stainless steel. Store these containers on lower shelves to reduce the risk of tipping. For items that are prone to moisture (e.g., oats), add a small desiccant packet or keep the container in a cool, dry part of the pantry.
How can I keep kids from making a mess?
Beyond a dedicated kid‑friendly zone, use clear, resealable bags or snack containers that close securely. Teach children to close lids after each use, and consider a small “clean‑up” bin for wrappers that can be emptied daily. Positive reinforcement—praising them for putting things back—helps turn the habit into a routine.
What are budget‑friendly organizing tools?
p
Dollar stores and discount retailers often carry sturdy plastic bins, tension rods, and adhesive hooks. Repurpose items you already have: an empty shoe box can become a snack drawer, and a muffin tin works well for portioning small packets of sauces or spices. The key is to choose uniform sizes so the visual clutter is minimized.
How to handle limited pantry space in small homes?
Maximize vertical space with stackable shelves or hanging organizers that attach to the pantry door. Use the back of the pantry door for magnetic spice racks or a slim hanging basket for packets and small jars. If you truly run out of room, consider a rolling cart that can be tucked under the kitchen table when not in use.
Related posts:
 Nicole Cogan’s Refrigerator Look Book Tour
 Pantry Hierarchy: Organizing Your Kitchen for Optimal Efficiency
 The Gross Truth About How Often You Should Really Clean Your Fridge
 Guide to Storing Pantry Staples Properly
 Pantry Organization with Alana Chernila
 Practical Methods for Reducing Household Waste
 Inside Alex Thomopoulos’s Refrigerator
 Essential Vegan Pantry Staples Every Plant-Based Kitchen Needs