
Getting in shape doesn’t require an expensive gym membership. With just a jump rope, you can get a great full-body workout in the comfort of your own home. Jumping rope burns calories, builds muscle, improves coordination, and boosts heart health.
Benefits of Jumping Rope
- Burns calories – 10 minutes of jumping rope burns about 100-200 calories
- Builds muscle – works muscles in legs, shoulders, core, arms, and back
- Improves coordination
- Increases agility
- Boosts heart health
- Convenient – can be done anywhere
- Inexpensive – only requires a rope
15 Rope Exercises To Do At Home
1. Basic Jump
Stand with feet hip-width apart holding the rope handles. Swing rope over head and jump as it passes under feet. Land lightly on balls of feet. Repeat.
2. High Knees
Do basic jump while lifting knees as high as possible. Engages core.
3. Butt Kicks
Do basic jump while kicking heels back to touch glutes. Works leg and glute muscles.
4. Crossovers
Do basic jump while crossing right leg in front, then left leg in front. Coordinates upper and lower body.
5. Skaters
Jump to right bringing right foot behind left leg, bend knee. Jump to left bringing left foot behind right leg. Mimics skater’s lunge.
6. Heel Raises
Raise heels off floor bringing weight onto toes. Lower heels back to floor. Repeat quickly. Strengthens calves.
7. Jogging
Do basic jump with slow, light jogging pace. Low impact cardio.
8. Running
Increase jogging pace for higher intensity cardio.
9. Double Unders
Turn rope twice for each jump. Very fast pace coordination exercise.
10. Cross Arm
Crisscross arms in front while doing basic jump. Works shoulders and coordination.
11. Backwards Jumping
Turn around and jump over rope backwards. Engages different muscles.
12. One-Foot Jumping
Jump on right foot then left foot. Improves balance and leg strength.
13. Criss-Cross
Jump forward and backward, left and right in a criss cross pattern.
14. Boxer Skip
Do basic jump while punching opposite hand forward. Shadow box with rope.
15. Triangle
Jump while crossing left foot behind right, then right foot behind left, repeat other side.
Mastering the Mechanics: Sizing, Grip, and Form Optimization
Before you begin swinging the rope at high speeds, you must ensure your equipment is tailored to your specific biomechanics. A common mistake among beginners is using a rope that is too long, which causes the rope to bounce off the floor and hit your shins, or too short, which forces you to hunch over. To find your ideal length, stand on the center of the rope with one foot and pull the handles upward. For beginners, the tips of the handles should reach your armpits. As you become more proficient and your form tightens, you may find that shortening the rope by two to three inches allows for faster rotations and less wasted energy. This is known as the “dynamic length,” where the rope clears your head by only a few inches, minimizing the arc and maximizing efficiency.
Your grip is the next critical component. Many people hold the handles with a death grip, which leads to premature forearm fatigue. Instead, hold the handles toward the ends to create a longer lever arm, using a relaxed grip primarily controlled by your thumb and index finger. Imagine you are holding a delicate bird; you want to keep it from flying away without crushing it. Your wrists should be doing 95% of the work. If you find your entire arms are flailing or your shoulders are doing the heavy lifting, your form is leaking energy. Keep your elbows tucked in close to your ribs, as if you are holding a rolled-up towel under each arm. This positioning ensures that the rotation is generated from the wrists, allowing for the rapid, consistent clicking sound that characterizes a pro-level rhythm.
The lower body mechanics are equally vital for longevity. You should never land on your heels. The goal is to maintain a “soft” bounce on the balls of your feet, utilizing your calves and the Achilles tendon as natural springs. Your knees should have a slight, almost imperceptible bend to absorb the shock. Jumping too high is a frequent error; you only need to clear the rope, which is typically less than 5 millimeters thick. Aiming for a jump height of just one inch off the ground will preserve your joints and allow you to sustain longer sessions without the onset of shin splints or lower back discomfort.
Progressive Training Systems: From Tabata to EMOM Protocols
To transform rope jumping from a simple warm-up into a powerhouse metabolic workout, you need structured programming. One of the most effective methods is the Tabata protocol. This involves 20 seconds of maximum-intensity jumping—perhaps using the High Knees or Double Unders mentioned previously—followed by 10 seconds of complete rest. Repeating this for eight rounds creates a four-minute block that spikes the heart rate and triggers the afterburn effect, known as excess post-exercise oxygen consumption (EPOC). This ensures your body continues to burn calories at an elevated rate for hours after the workout is finished.
For those looking to build endurance and mental toughness, the EMOM (Every Minute on the Minute) style is superior. Set a timer for 10 to 20 minutes. At the start of every minute, perform a set number of jumps—for example, 40 Double Unders or 100 Basic Jumps. The faster you complete the task, the more rest you get before the next minute begins. This creates a built-in incentive for speed and efficiency. As your fitness improves, you can increase the repetitions or decrease the total time allowed, constantly challenging your cardiovascular ceiling. This type of training is particularly effective for athletes who need to maintain focus under physical fatigue, such as martial artists or basketball players.
Another advanced strategy is the “Pyramid” method. Start with 10 seconds of jumping and 10 seconds of rest, then 20/20, 30/30, 40/40, and 50/50, before working your way back down to 10/10. This undulating intensity forces the heart to adapt to varying levels of stress and recovery, which is the hallmark of true athletic conditioning. If you find yourself hitting a plateau, try the “Broken 3s” method: jump for three minutes straight (the length of a boxing round), but change the exercise every 30 seconds. For instance, start with Basic Jumps, move to Skaters, then Criss-Cross, and so on. This keeps the mind engaged and prevents the repetitive strain that can come from performing a single movement for an extended duration.
Advanced Footwork: The Art of the Side Swing and Flow
Once you have mastered the 15 exercises in the basic repertoire, the next step is integrating “flow” through transitions like the Side Swing. The Side Swing is a non-jumping move where you bring both handles to one side of your body, whipping the rope in a vertical circle, then repeating on the other side. This is not just for show; it serves as a “working rest.” If your legs are burning but you don’t want to stop the rope, you can perform Side Swings to keep the momentum going while your lower body recovers. Mastering the transition from a Side Swing back into a Basic Jump is the hallmark of an intermediate jumper. It requires precise timing to open the rope at the exact moment it clears your feet.
Beyond the Side Swing, you can explore the “Ali Shuffle,” named after the legendary Muhammad Ali. This involves scissoring your feet forward and backward in a quick, rhythmic motion while the rope passes underneath. Unlike the Basic Jump, the Ali Shuffle distributes weight unevenly, which forces your core to work harder to maintain balance. It is an exceptional drill for agility and foot speed. Another high-level move is the “Toad,” which is a cross-over performed while one leg is lifted. You reach one arm under the opposite knee to cross the rope. While it sounds complex, it is a phenomenal way to build coordination and unilateral leg strength. These moves turn a workout into a cognitive challenge, reinforcing the neural pathways between your brain and your extremities.
To truly reach an elite level, you should practice the “Southpaw” or “Mamba” variations. These involve crossing the arms behind the back or in asymmetrical patterns. While these might seem like circus tricks, they serve a functional purpose: they increase the range of motion in the shoulders and force the rotator cuffs to stabilize the joint while under tension. By varying the angle of the rope and the position of your hands, you ensure that no single muscle group becomes overused, and you build a body that is as mobile as it is strong. Integrating these moves into a continuous 10-minute flow session can be as mentally taxing as a game of chess, providing a unique form of “moving meditation.”
Environmental Considerations: Surfaces, Footwear, and Gear Longevity
Where you jump is just as important as how you jump. Jumping on concrete or asphalt is the most common cause of injury in the rope community. These surfaces have zero “give,” meaning every ounce of impact is sent directly into your ankles, knees, and hips. If you must jump outdoors, seek out a rubberized track or a tennis court with a slight cushion. Indoors, hardwood floors are better than concrete but can still be punishing. The gold standard is a dedicated jump rope mat. These mats are typically made of high-density PVC or rubber and are designed to absorb impact while providing a consistent surface for the rope to strike. A mat also protects your rope from the abrasive friction of the ground, which can snap a cable in a matter of weeks if used on rough pavement.
Footwear choice can make or break your rope routine. Many people reach for running shoes, but these are often suboptimal because they are designed for forward linear motion and often have thick, squishy heels that can lead to ankle instability during lateral moves like Skaters. Cross-trainers or “court” shoes (like those for basketball or tennis) are generally better because they offer lateral support and a flatter sole, providing a stable platform for the balls of your feet. Look for shoes with good arch support and a snug fit; any sliding inside the shoe will lead to blisters and decreased power transfer. If you prefer a minimalist approach, jumping barefoot on a high-quality mat can actually strengthen the small muscles in the feet, but this should be phased in very slowly to avoid overstressing the plantar fascia.
Regarding equipment maintenance, not all ropes are created equal. PVC ropes are the most versatile for all-around use and are particularly good for learning new footwork because they hold their shape in the air. However, in cold weather, PVC can become brittle and snap. If you are training in a cold garage, consider a beaded rope, which uses plastic segments over a nylon cord. Beaded ropes are heavier and provide more “feedback,” making it easier to feel where the rope is in space. For pure speed and Double Under practice, a thin wire cable rope is the standard, but be warned: these move so fast that a mistake can result in a painful “sting” on your arms or legs. Always wipe down your rope after a sweaty session, as salt and oils can degrade the handles’ bearings over time.
Heavy Rope Training: Building Upper Body Power
While the standard jump rope is a cardiovascular tool, weighted or “heavy” ropes transform the movement into a strength-endurance powerhouse. Weighted ropes typically range from 0.5 lbs to as much as 5 lbs. When you switch from a 2-ounce speed rope to a 1-pound weighted rope, the resistance increases exponentially. You will immediately feel the engagement in your forearms, biceps, and especially your posterior deltoids and lats. The heavy rope requires more torque to rotate, which means your core must remain braced to prevent your torso from swaying. This is an excellent way to build a functional, athletic physique without the need for heavy lifting.
Training with a heavy rope requires a slight adjustment in technique. Because the rope has more inertia, your timing must be more deliberate. You cannot “flick” a 2-pound rope with just your wrists; you must use a more robust circular motion of the forearms. This makes heavy ropes an incredible tool for burning more calories in less time. Studies have shown that jumping with a weighted rope can burn up to 25% more calories per minute than a standard rope because of the increased muscular recruitment. It is particularly effective for those who find standard jumping too easy or for athletes like wrestlers and football players who need to build explosive power in their upper bodies while maintaining foot speed.
A pro tip for integrating heavy ropes is the “Contrast Method.” Perform 30 seconds of jumping with a heavy rope, followed immediately by 30 seconds with a lightweight speed rope. The heavy rope pre-activates the nervous system and muscles, making the speed rope feel weightless. This allows you to jump faster than you normally would, training your brain to handle higher velocities. This “over-speed” training is a secret weapon for developing lightning-fast hands and feet. Just be cautious not to overdo heavy rope training; the added weight puts more strain on the rotator cuff, so it is best to limit these sessions to twice a week until your joints have adapted to the load.
Strategic Recovery and Injury Mitigation for High-Impact Training
Because jumping rope is a high-impact activity, recovery is not optional—it is a requirement. The most common ailment is medial tibial stress syndrome, better known as shin splints. This occurs when the muscles and tendons around the tibia become inflamed from repetitive stress. To prevent this, incorporate “Tibialis Raises” into your warm-up: lean your back against a wall, extend your feet in front of you, and lift your toes toward your shins. This strengthens the front of the leg, balancing the force generated by your calves. Additionally, regular foam rolling of the calves and the soles of the feet (using a lacrosse ball) can break up adhesions in the fascia and maintain the elasticity required for jumping.
Another area of concern is the Achilles tendon. Constant jumping puts a massive amount of tension on this tendon. To keep it healthy, perform eccentric heel drops: stand on the edge of a step, rise up on both feet, then slowly lower one heel below the level of the step over a count of three to five seconds. This “lengthening under tension” strengthens the tendon and makes it more resilient to the explosive nature of jumping. If you feel a sharp, localized pain in the tendon, stop immediately. Jumping through tendon pain is a recipe for a long-term injury. Rest, ice, and compression are your best friends in the early stages of any overuse injury.
FAQs
What type of rope is best for jumping?
A beaded rope with weighted handles is easier for beginners to control. An adjustable rope lets you customize length. Speed ropes are very lightweight for advanced users.
How high should I jump over the rope?
Jump just enough to clear the rope – only an inch or two off the floor. Jumping too high increases risk of injury.
How long should I jump rope for?
Aim for 10-20 minutes of jumping rope in your workout. Can break into intervals if needed. Rest if you feel pain or dizziness.
How many calories does jumping rope burn?
Expect to burn about 100 – 200 calories for every 10 minutes of moderate rope jumping.
What muscles does jumping rope work?
Jumping rope engages muscles throughout body – legs, glutes, core, back, shoulders, and arms. It’s a full body exercise.
Related posts:
 46. Bala Jump Rope: The Ultimate Review
 PHA Bodyweight Workout: Efficient Fitness Anywhere, Anytime
 Master the Jump-Lunge-Squat Combo
 Infinity Rope: Weighted Jump Rope Review
 Beginner’s Jump Rope Workout
 The Absolute Best Jump Ropes for Beginners
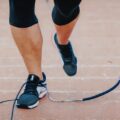 How to Master the Jump Rope Like a Pro
 Understanding Gym Equipment