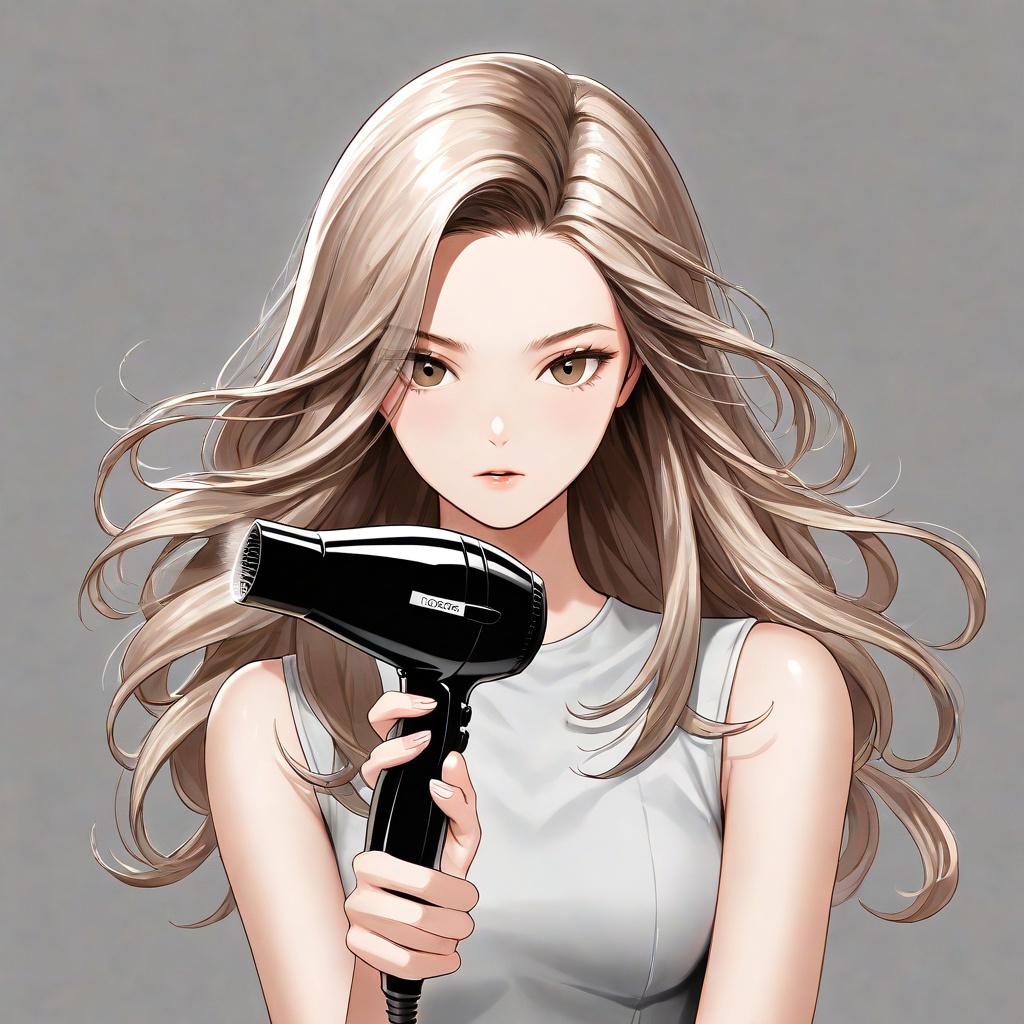
We’ve all seen those magazine spreads and runway shows where models seem to have hair that defies gravity—voluminous, shiny, and impossibly smooth. While genetics and professional colorists certainly play a role, the secret weapon is often a flawless blow-dry. It’s the foundation for any great hairstyle. This isn’t about torturing your hair with high heat until it’s bone-straight; it’s about using technique to enhance your hair’s natural beauty, create lasting style, and protect its health. Whether you have fine, thick, curly, or straight hair, mastering a few key methods can transform your at-home routine into a salon-quality experience.
Think of a great blow-dry as the canvas. It smooths the cuticle, adds shine, and creates the base shape. From there, you can add waves, curls, or texture, but it all starts with a smooth, dry foundation. The goal is to achieve ‘supermodel hair’—hair that looks healthy, moves naturally, and holds its style with an effortless vibe, not a stiff, helmet-like finish.
Prepping Your Canvas: The Wash and Care Routine
You cannot paint a masterpiece on a dirty, unprepared canvas. The same goes for your hair. What you do before you even pick up the dryer is crucial. Start with the right wash for your hair type and goal. If you’re aiming for volume, a clarifying shampoo once a week can remove buildup that weighs hair down. For most blow-outs, a moisturizing or smoothing shampoo and conditioner will help combat frizz.
Key prep steps:
- Scalp Focus: Concentrate shampoo on the scalp to cleanse oils and product buildup. Let the suds run through the ends as you rinse.
- Conditioner Placement: Apply conditioner mainly from mid-lengths to ends, where hair is oldest and driest. Avoid the roots to prevent weighing down your volume.
- Cool Rinse: Finish with a cool water rinse. This helps seal the hair cuticle, boosting shine and reducing frizz before you even start drying.
- The Towel Technique: Never rub hair vigorously with a towel. This roughs up the cuticle, creating instant frizz. Instead, gently squeeze out excess water with a soft microfiber towel or an old cotton t-shirt. Your hair should be damp, not dripping wet, before you begin.
Your Product Arsenal: Picking the Right Allies
Blow-dry products are not optional; they are your heat-activated styling team. They protect, shape, and hold. Using the right ones makes the difference between fighting your hair and working with it.
- Heat Protectant (Non-Negotiable): This is your first layer of defense. Spray it evenly on damp hair before any other product. It creates a barrier against heat damage, reducing breakage and preserving color.
- Blow-Dry Cream or Primer: These lightweight lotions smooth the hair cuticle, provide light hold, and often contain ingredients to boost shine and fight humidity. Perfect for fine to medium hair.
- Volumizing Mousse or Root Lift Spray: Applied at the roots on damp hair, these give lift and lasting body. For fine hair, a mousse applied throughout can add much-needed substance.
- Smoothing Serum or Oil: Best for thick, frizz-prone, or curly hair. Apply a small amount (pea-sized for fine hair, dime-sized for thick) to mid-lengths and ends to tame flyaways and add polish. Avoid the roots.
- Texture Spray (For Finish): Used on dry hair, a texture spray adds grit, separation, and hold without stiffness, perfect for that ‘lived-in’ model look.
Rule of Thumb: Start with less product. You can always add more, but too much will weigh hair down and make it look greasy.
Sectioning is Everything: The Professional’s Secret
This is the single most overlooked step in at-home blow-drying. Trying to dry all your hair at once leads to uneven drying, missed spots, and frustration. Sectioning gives you control, allowing you to systematically dry each segment straight from the root.
How to section like a pro:
- Start with towel-dried, product-applied hair. Use a tail comb to create a clean part.
- Clip the top half of your hair up and out of the way.
- Working on the bottom section, use the comb to create horizontal subsections about 1-2 inches thick. Secure the rest with clips.
- Dry the bottom sections completely before moving up. Unclip the next horizontal section and repeat.
- Finally, unclip the top crown section. For maximum volume, you can further split this into vertical sections around the face and at the crown.
This method ensures every strand gets direct attention from the brush and dryer, creating a smooth, uniform result from root to tip.
Tools of the Trade: Dryer and Brush Breakdown
The right tools are ergonomic extensions of your hands. You don’t need the most expensive kit, but understanding their purpose is key.
The Dryer: Look for one with multiple heat and speed settings and a concentrator nozzle (that flat attachment). The nozzle is essential—it directs the airflow in a controlled sheet, smoothing the hair against the brush. Ionic dryers can help reduce frizz by breaking down water molecules faster. Always use the nozzle.
The Brush Brigade:
- Round Brush: The classic for volume and curl. The larger the barrel, the looser the wave. Smaller barrels create tighter curls or more root lift. Use a ceramic or tourmaline barrel for even heat distribution. Tip: For tension, pull the brush downward while rotating it slightly. The heat sets the shape.
- Paddle Brush: Your best friend for fast, smooth straightening, especially on long hair. Its wide, flat surface covers more area and gently detangles.
- Vent Brush: Lightweight with open bristles, it allows maximum airflow for quick drying and gentle detangling without much styling.
- Denman or Styling Brush: Dense, rubber-based bristles offer maximum tension and control for very straight, sleek styles or defining curls.
Start with hair 80% dry using your hands or a vent brush to avoid over-manipulating wet hair, then switch to your styling brush for the final polish.
Core Technique: Tension, Angle, and Heat
This is the heart of the supermodel blow-dry. It’s a three-part harmony.
- Tension: Hold the hair section taut with the brush. The brush pulls the hair straight while the dryer’s heat sets it in that smooth position. Without tension, you’re just blowing hot air around frizz.
- Angle: For volume at the roots, point the dryer nozzle downward as you dry the root section, and lift the hair at the roots away from your head with the brush. For a flatter, sleeker look, keep the hair and dryer directed downward.
- Heat & Cool: Use high heat and high speed to quickly set the shape in each section. Once the section is dry and styled, hit it with a blast of the cold shot button for 5-10 seconds. This cools the hair, locking the cuticle shut and ‘setting’ the style for incredible longevity and shine.
Work in small, manageable sections. Direct the airflow down the hair shaft, following the brush, to smooth the cuticle.
Tailoring the Technique to Your Hair Type
Fine, Flat Hair: Goal is volume. Use a volumizing shampoo and mousse at roots. Dry hair upside down initially with a vent brush to get roots 80% dry. Then, section and use a medium-round brush, lifting roots at a 90-degree angle. Finish with a cool shot. Avoid heavy products on ends.
Thick, Frizzy, or Wavy Hair: Goal is smoothness and control. Use a smoothing shampoo, conditioner, and a nourishing blow-dry cream. Ensure hair is very damp (not wet) before starting. Use a paddle brush or large round brush with firm tension. Dry each section slowly and completely before moving on to prevent residual dampness from causing frizz. A smoothing serum on ends is key.
Curly Hair (For a Blow-Out): Goal is straightening or creating a ‘blow-out’ wave. Use a strong smoothing cream and heat protectant. Start with hair as straight as possible—use a Denman brush or paddle brush with maximum tension in small sections. Keep the dryer and brush moving slowly to ensure each section gets fully heated and straightened. The round brush technique can create beautiful, bouncy waves instead of poker-straight hair.
Damaged or Color-Treated Hair: Priority is protection. Use the lowest effective heat setting. A heat protectant is mandatory. Consider a ‘rough dry’ to 90% dry with no brush, then use a gentle paddle brush on low heat for the finish to minimize stress.
Creating Signature Model Styles
A perfect blow-dry is versatile. Here’s how to achieve two iconic looks.
The Sleek, Glass Hair Look: After your smooth blow-dry, take it a step further. Once hair is completely dry and cool, go back over small sections with a flat iron on a medium setting. Before clamping, spritz the section lightly with a shine spray. Use slow, single passes. Finish with a drop of silicone-free shine oil on your palms, rubbed over the surface of your hair.
The Voluminous, ‘Lived-In’ Blow-Out: This is about soft body, not crisp curls. After blow-drying smooth with a large round brush, create loose waves. Take 1-2 inch sections and wrap them around a large-barrel curling iron (1.25” to 1.5”), holding for only 5-8 seconds. Drop the curl, don’t clamp it out. Alternate the direction of the curls for a natural look. Once cool, run your fingers through your hair to break up the waves. Finish with a light-hold texture spray for separation and a touch of grit.
The Finishing Touches and Maintenance
Your blow-dry is done, but a few final steps ensure it lasts.
- Cool It Down: Give your entire head one more pass with the dryer’s cool shot. This finalizes the style.
- Brush Through: Gently brush through your hair with a natural bristle brush to distribute natural oils from root to tip for added shine.
- Dry Shampoo as a Prepper (Not Just a Saver): For fine hair, a light dusting of dry shampoo at the roots before blow-drying can add incredible texture and grip for more volume.
- Sleep Preservation: To make your blow-dry last days, sleep on a silk or satin pillowcase. Loosely tie hair in a low, loose ponytail with a silk scrunchie or use a loose braid.
- Next-Day Revival: If roots fall flat, spritz with a texture spray or dry shampoo at the crown. Use a large round brush and your dryer’s cool shot to lift sections at the root for 10-15 seconds each.
Mastering the Temperature and Airflow Settings for Precision Results
Most at-home stylists make the mistake of treating their dryer like a binary switch—on or off—but professional blow-outs hinge on nuanced temperature and airflow adjustments throughout the process. The key is understanding that different moisture levels in your hair require different heat intensities. Start with the highest heat and speed settings when your hair is damp to mid-length wet. This powerful combination rapidly evaporates surface water without causing the cuticle to ruffle, which happens when heat is applied too timidly to very wet hair. As each section becomes about 80% dry, dial the heat down to medium. This is your shaping phase: the lower heat allows you to smooth the section thoroughly without scorching the now-more-vulnerable hair. For the final polish on completely dry hair, switch to the cool shot. This isn’t just a quick blast; hold the cool air on each styled section for a full 10-15 seconds to thermally lock the style in place. If your dryer has an ‘ionic’ setting, use it during the initial drying phase for frizz-prone hair, as it helps break water molecules into smaller particles for faster evaporation. However, for very fine hair that you want to add texture to, consider turning the ionic function off for the final pass, as it can sometimes make hair too sleek and slippery, preventing product from gripping effectively.
The Art of Rough Drying: Building the Foundation Without a Brush
Before you even pick up a styling brush, a critical step often omitted at home is the ‘rough dry.’ This involves using your hands and the dryer’s concentrator nozzle to remove 60-80% of the moisture without any tension or brushing. The goal is to get the hair to a uniformly damp state, not to style it. To do this correctly, flip your head upside down and use your fingers to lift the roots at the scalp while directing the dryer’s airflow back and forth. Keep the nozzle about 6-8 inches from your head to distribute heat evenly. For thick, dense hair, partition it into four large quadrants (split down the middle and ear to ear) and rough dry each quadrant separately, ensuring no cold, wet patches remain at the scalp. This process does more than just save time; it prevents you from over-manipulating sopping wet hair with a brush, which is a primary cause of breakage and cuticle damage. It also allows any volumizing mousse or root spray to begin activating and lifting before you apply tension. Once your hair is no longer dripping and feels cool to the touch (a sign significant moisture has evaporated), it’s ready for sectioning and detailed brushwork.
Advanced Brush Manipulation: Beyond Basic Rolling
While the article covers brush types, true mastery comes from how you maneuver them. With a round brush, the common error is simply rolling the hair onto the barrel. For maximum root lift and smoothness, the technique is a pull-turn-hold sequence. Start with the brush placed under a 1-inch section at the roots. Pull the brush downward to create tension, then rotate the brush one full turn so the hair wraps around the barrel. Here’s the pro secret: instead of immediately rolling down the length, hold the brush in that rotated position at the root for 3-4 seconds, directing the dryer’s heat right at the point of tension where the brush meets the scalp. This ‘sets’ the root before you progress. Then, slowly roll the brush down the length of the section, following with the dryer nozzle. When you release, do so by continuing the rotation of the brush to unwind the hair, don’t just pull it straight out, which can create kinks. For a paddle brush, use a ‘c-clamp’ grip: let the hair rest in the curve of the bristles and close your hand over it, applying even pressure as you pull down. This creates a broader, flatter smoothing surface than just dragging the brush.
Troubleshooting Common Blow-Dry Failures Mid-Process
Even with perfect prep, things can go awry. Knowing how to correct them without starting over is essential. If you notice a section starting to frizz as you dry it, it’s likely still too wet. Immediately switch your dryer to high heat and high speed, re-clamp the section in your brush with firm tension, and dry it thoroughly from root to tip before the frizz sets. If your hair is drying too quickly and becoming static-y or flyaway, you’ve likely used too high a heat on hair that was already too dry. Mist the offending section lightly with a continuous spray water bottle—just a fine veil—and re-dry it on a medium heat setting with a light application of smoothing serum on your brush bristles. For ‘dented’ hair where a clip mark or brush line has set in, don’t wet it. Use the concentrator nozzle like a targeted steamer: hold it about an inch from the dent on a medium heat, no airflow, for 5 seconds to gently relax the set, then quickly brush the area out. If your round-brush curls fall flat immediately, the section was either too large, too wet when you started curling, or you didn’t use the cool shot long enough. Isolate a smaller, completely dry subsection and repeat, holding the cool air on the curled hair around the brush for a full 15 seconds before release.
Strategic Product Layering for Extreme Conditions and Hair Types
The basic product list is a starting point, but complex hair types or challenging environments require strategic layering. For exceptionally thick, coarse, or curly hair aiming for a pin-straight blow-out, the sequence is: 1) Leave-in conditioner on sopping wet hair, rinsed out slightly. 2) Heat protectant spray. 3) A generous dollop of a strong-hold blow-dry cream worked through mid-lengths to ends. 4) A light gel or ‘glossing’ lotion applied with a fine-tooth comb to the outer layer of hair to create a seal. For fine, oily hair that needs volume to last all day, try this: 1) Dry shampoo at the roots on dry hair *before* you shower to absorb baseline oils. 2) Volumizing shampoo. 3) Root boost spray on towel-dried roots. 4) A lightweight mousse applied only to the roots and mid-lengths, avoiding ends. 5) A texturizing spray on dry ends after styling. In high-humidity climates, add an anti-humectant serum as your final layer. These products often contain polymers that form a flexible shield, blocking moisture from penetrating the hair shaft. Apply a pea-sized amount, emulsified between palms, and lightly ‘paint’ it over the surface of your dry, styled hair, focusing on the hairline and crown.
Ergonomics and Efficiency: Creating a Sustainable Styling Routine
Blow-drying can be physically taxing. Setting up your space ergonomically is key for consistency and avoiding fatigue. Position a full-length mirror with a smaller, magnified mirror beside it so you can see the back of your head without straining. Your dryer cord should have enough slack to move freely; consider using a heat-resistant cord hook to keep it off your shoulders. When sectioning, use professional-quality, long-line duckbill clips that lie flat; they hold more hair securely without creating pressure points. To save your arms, adopt a ‘rest-pull’ rhythm: when drying a section, rest the elbow of your brush hand on the counter or sink ledge for stability, using your wrist and fingers to manipulate the brush. Your dryer hand should hold the dryer like a pencil, not a hammer, with the nozzle acting as an extension of your index finger, directing airflow with precision, not broad arm movements. For very long or thick hair, break the process into two sessions: rough dry and section the entire head first, then take a 2-minute break before beginning the detailed styling with the brush. This prevents rush and sloppy technique in the final, most visible layers.
Extending the Life of Your Blow-Out: The Day 2, 3, and 4 Playbook
A true supermodel blow-out is an investment that should pay dividends for days. The first night’s sleep is critical. Instead of just a loose ponytail, try the ‘pineapple’ method for longer hair: gather all hair at the very top of your head in a silk scrunchie, loose enough that it doesn’t pull, but high enough that you don’t lie on the curls or waves at the back. For a straighter style, a low, loose braid is better. On day two, revival is about targeted intervention. Use a boar bristle brush to redistribute oils from your scalp down the hair shaft, which refreshes shine. For volume, don’t just spray dry shampoo; part your hair on the opposite side, spray the new root line, let it sit for a minute, then brush back to your original part. This creates a ‘bump’ of volume. To reactivate smoothness, use a handheld garment steamer from a distance (at least 12 inches) to lightly steam your hair, then smooth it with a paddle brush as it dries—the steam relaxes minor kinks without washing out the style. By day three or four, focus may shift to strategic up-dos. A sleek, low bun starts with dampening just the hairline with a spray bottle mixed with a drop of conditioner to tame flyaways, then brushing and smoothing into place. The body of the blow-out, now with enhanced texture from natural oils and products, will provide perfect grip and volume for a messy chignon or twisted style, making the final day of your blow-out look intentionally undone and chic.
FAQ: Supermodel Blow-Dry Questions Answered
1. How often should I wash my hair if I want to maintain a blow-dry?
It depends on your hair type. Fine hair may need washing every other day, while thick hair can often go 3-4 days. The key is using dry shampoo strategically on non-wash days to absorb oil at the roots without disturbing the styled lengths. A great blow-dry should last 2-3 days with proper care.
2. My arms get so tired! Any tips for making the process easier?
Absolutely. Section your hair well and clip most of it up. This lets you work on smaller, lighter sections. Rest your elbow on a counter or table for stability when brushing. Use a lighter-weight dryer and brush. Practice will build endurance, but breaking the task into manageable parts is the real secret.
3. Why does my hair look puffy or frizzy after I blow-dry, not smooth?
This usually points to three issues: 1) Not using a concentrator nozzle, so airflow is scattered. 2) Not keeping enough tension with the brush. 3) Applying heat to hair that’s too wet or stopping before it’s 100% dry. Each section must be dried completely under tension to smooth the cuticle. Also, ensure you’re using a smoothing product suited to your hair type.
4. Can I achieve a good blow-dry without any products?
It is not recommended. At minimum, a heat protectant is crucial to prevent long-term damage. Products are designed to work with the heat to style, protect, and hold. Skipping them means you’re working against your hair’s natural tendencies (like frizz or flatness) with only heat, which is less effective and more damaging.
5. How do I add volume at the crown if my hair is very fine and flat?
Focus your prep and technique there. Apply mousse or root spray directly to damp roots at the crown. When drying that top section, blow-dry it upside down first. Then, section it, and when using your round brush, lift the roots perpendicular to your head, holding the heat on the root area for a few extra seconds before following through to the ends. Always finish with a cold shot while the hair is still lifted. Teasing gently at the very root after drying can also add hidden support.
Related posts:
 The Salt Spray Secret to Perfect Beach Hair Every Time
 Should You Wash Your Hair After Every Gym Session?
 57. Perfect Hair Blow Out Guide
 The Game-Changing Air-Dry Shampoo That’s Taking Over Social Media
 The Bowl Method for Curly Hair
 Blow Drying Hair Without Damage: Expert Tips
 Blow Drying Hair Without Damage: Expert Tips
 Easy Summer Updos for Every Hair Type