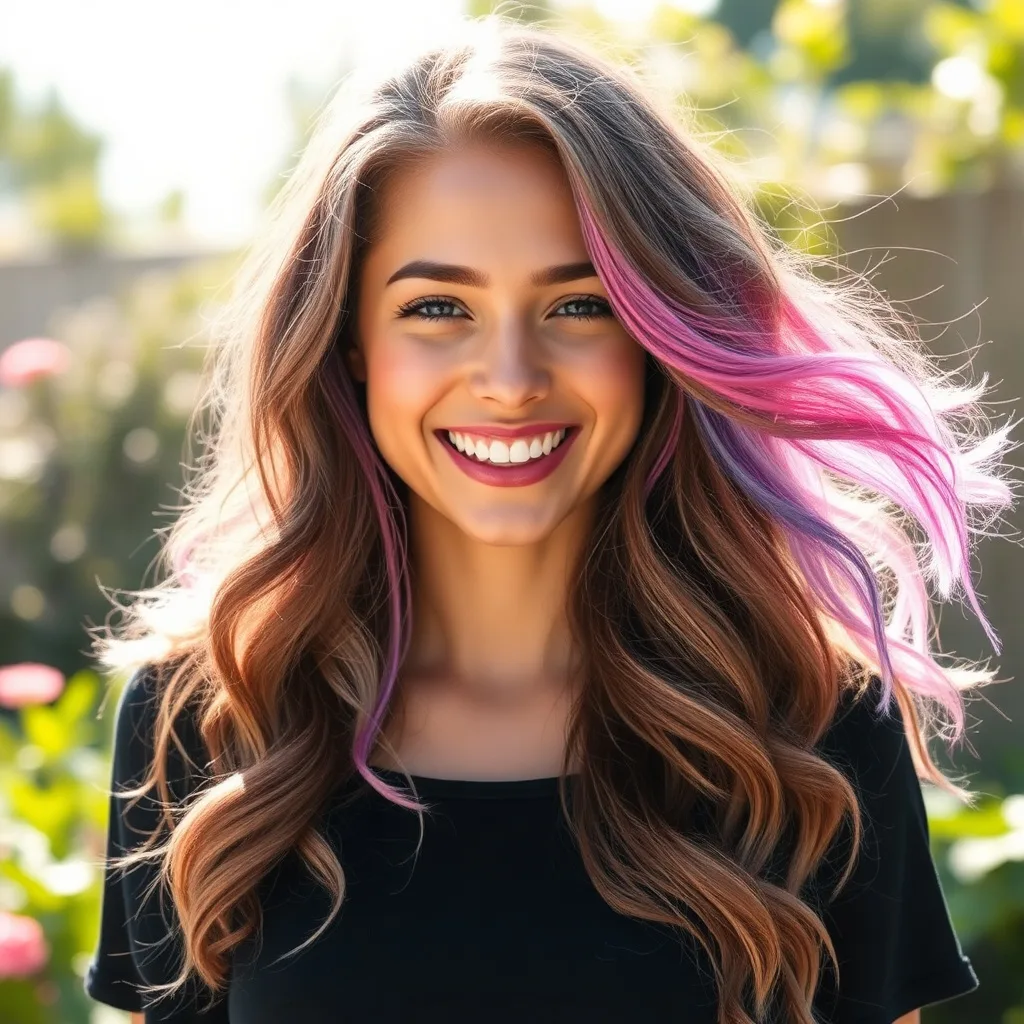
There is something undeniably liberating about the idea of rainbow hair. Whether it is the soft pastel hues of a sunset or the neon vibrancy of a futuristic cityscape, multi-colored hair serves as a powerful tool for self-expression, creativity, and playfulness. However, for many, the path to a “unicorn” mane is paved with hesitation. The thought of harsh bleach, chemical burns, and the daunting commitment of a permanent color change can be enough to keep the most adventurous souls tethered to their natural shade. The good news is that the modern beauty landscape has evolved, offering a plethora of temporary alternatives that allow you to experiment with a full spectrum of color without sacrificing the health of your hair or committing to a long-term maintenance schedule.
Key takeaways
- Use hair chalk for subtle streaks and color waxes for opaque, vibrant pigment on darker hair.
- Apply color sprays in light, layered mists rather than heavy globs to avoid a stiff, paint-like texture.
- Create professional-looking gradients by using bridge colors and blending boundaries with a clean spoolie.
- Remove stubborn wax-based colors by applying conditioner to dry hair before washing to break down the product.
Achieving a rainbow look without the commitment is not just about applying a product; it is about understanding the chemistry of your hair and choosing the right medium for your specific goals. Whether you want a subtle streak of violet for a weekend getaway or a full-blown prismatic transformation for a festival, there are techniques that can deliver high-impact results that wash away with a few shampoos. By focusing on non-permanent pigments that sit on the surface of the hair shaft rather than penetrating the cortex, you can play with your appearance as easily as you change your clothes.
Understanding Your Temporary Color Options
Before diving into the application, it is essential to distinguish between the various types of temporary color products. Not all “temporary” dyes are created equal, and choosing the wrong one can lead to either a lack of visibility or a color that lingers longer than you intended. The primary categories include hair chalks, color sprays, hair waxes, and semi-permanent deposits.
Hair Chalks are essentially highly pigmented pastels designed for hair. They sit on the very outer layer of the hair cuticle and are typically the easiest to remove, often disappearing after a single wash. They are ideal for those who want thin, highlighted streaks of color. Color Sprays provide a more immediate, opaque coverage. They are excellent for full-head transformations or bold blocks of color, though they can leave the hair feeling stiff or “crunchy” if over-applied. Hair Color Waxes combine styling hold with intense pigment. These are particularly effective for those with darker hair, as the wax creates a thick, opaque layer that covers the natural shade more effectively than a translucent spray.
Finally, there are Semi-Permanent Tints. While these are often marketed as temporary, they actually stain the hair shaft and can last anywhere from a few washes to several weeks. These do not require a developer or peroxide, meaning they do not lift your natural color, but they do penetrate deeper than chalk or spray. Understanding these distinctions allows you to match your product to your desired duration of wear and the level of vibrancy you seek.
Mastering Hair Chalks for Subtle Rainbow Streaks
Hair chalk is the perfect entry point for anyone nervous about color. Because it is a dry application, it provides a soft, matte finish that looks more like a natural highlight than a synthetic dye. To get the most out of hair chalk, you should start with clean, dry hair. If your hair is too oily, the chalk may slide off; if it is too damp, it may clump.
To apply, select a small section of hair—about half an inch wide—and hold it taut. Rub the chalk stick firmly from the root to the tip, ensuring you apply consistent pressure. For a more vibrant look, you can layer the chalk, rubbing it over the same section several times. A professional trick to make the color “pop” and stay in place is to use a setting spray. Once you have applied your rainbow of colors, lightly mist the sections with a flexible-hold hairspray. This seals the pigment onto the cuticle and prevents the chalk from rubbing off on your clothes.
For those with very dark hair, chalk can sometimes appear sheer. To combat this, try applying the chalk to a small amount of hair gel first, or use a “liquid chalk” formulation. These provide a more concentrated pigment that adheres better to dark strands. Remember that chalk is best used for “pops” of color rather than full-head coverage, as applying it to every strand can make the hair feel dry and brittle.
High-Impact Transformations with Color Sprays
When the goal is a full unicorn transformation, color sprays are the most efficient tool. They allow for rapid application and provide a level of opacity that chalk cannot match. However, the challenge with sprays is avoiding the “paint-like” texture that can make hair feel stiff. The secret to a professional-looking spray application is the “mist and layer” technique.
Instead of holding the nozzle an inch from your hair and spraying a heavy glob of color, hold the can about 6 to 10 inches away. Apply a light mist, let it dry for thirty seconds, and then apply another layer. This builds the color gradually, resulting in a more natural movement of the hair. To create a rainbow effect, divide your hair into vertical sections. Start with red at the front, transitioning to orange, yellow, green, blue, and purple toward the back. To blend the colors where they meet, use a clean toothbrush or a fine-tooth comb to gently smudge the boundary between two colors while the spray is still slightly tacky.
One practical tip for spray users is to protect your skin and clothing. Temporary sprays can stain foreheads and collars. Use a damp cloth or a bit of petroleum jelly around your hairline to create a barrier. If you do get spray on your skin, a cotton ball soaked in rubbing alcohol or a gentle makeup remover will typically lift the pigment immediately.
Using Color Waxes for Depth and Texture
Hair color waxes are a hidden gem in the world of temporary coloring. Because they are essentially pigmented pomades, they offer two benefits in one: vibrant color and styling hold. This makes them particularly useful for creating sculpted looks, such as twisted braids or sleek buns, where the color is emphasized by the structure of the style.
To apply color wax, start by taking a small amount of the product on your fingertips. Rub your hands together to warm the wax, which helps it blend more smoothly into the hair. Apply the wax to a section of hair using a “kneading” motion, working the product from the mid-shaft to the ends. This ensures that the pigment is evenly distributed and doesn’t leave clumps. Because wax is denser than spray, it is the best option for achieving neon colors on naturally dark hair without needing to bleach.
The beauty of wax is its versatility. You can easily mix two different colors of wax in your palm to create a custom shade—for example, mixing a blue and a red wax to create a deep violet. To achieve a rainbow look, apply different colors to different layers of your hair. Since wax provides hold, you can then braid these sections together, creating a stunning, interwoven prismatic effect that stays secure all day.
Semi-Permanent Tints: The Long-Term Temporary Option
If you want your rainbow hair to last through a vacation or a few weeks of events, semi-permanent dyes are the way to go. Unlike permanent dyes, these are “deposit-only” colors. They do not contain ammonia or peroxide, meaning they do not open the hair cuticle to remove your natural pigment; they simply coat the outside and slightly penetrate the upper layers.
The main caveat with semi-permanents is that the result depends heavily on your starting base. On blonde or light-brown hair, these colors appear vivid and true to the bottle. On dark hair, they often appear as a “tint” or a glow that is most visible under sunlight. To get a true rainbow on dark hair using semi-permanents, you would typically need to lighten the hair first, which moves into the realm of “commitment.” However, you can still achieve a beautiful, subtle prismatic effect on dark hair by choosing highly saturated deep tones like royal blue, magenta, and emerald green.
Application is straightforward: apply the dye to dry hair using a brush, leave it on for the recommended time (usually 30 to 60 minutes), and rinse with cool water. To create a rainbow, use a sectioning clip to divide your hair into thin strips and apply a different color to each. To prevent the colors from bleeding into one another during the rinse, rinse each color section individually or use a very cold water temperature, which helps keep the hair cuticle closed and the pigment locked in.
Creating the Unicorn Gradient: Blending Techniques
The difference between hair that looks like a “science project” and hair that looks like a professional “unicorn” installation is the blend. A harsh line between red and blue can look jarring; a gradient transition looks artistic and intentional. The key to blending is understanding color theory and using the right tools.
First, always arrange your colors in the order of the rainbow: Red, Orange, Yellow, Green, Blue, Indigo, Violet. When transitioning between these, create a “bridge” color. For example, if you are moving from blue to purple, apply a small section of a blue-purple mix in between the two. If you are using sprays or chalks, you can use a clean mascara wand or a spoolie brush to gently brush the edges of the colors into each other. This creates a soft, blurred effect that mimics a natural gradient.
Another effective technique is the “ombré” approach. Instead of vertical stripes, apply the colors horizontally. Start with a deep purple at the roots, transitioning to blue in the mid-lengths, and ending with a bright pink at the tips. This distributes the color in a way that feels more organic and less like a costume. When styling, remember that curls and waves naturally blend colors better than straight hair, as the overlapping strands create a multi-dimensional effect.
Protecting Your Hair During the Process
Even though temporary colors are far safer than permanent dyes, applying multiple products to your hair can still lead to dryness or buildup. The most important rule of temporary coloring is to prioritize the health of your hair. Before applying any color, ensure your hair is hydrated. A deep conditioning treatment the day before can provide a protective barrier and make the hair more receptive to pigment.
Always perform a patch test. Even “non-toxic” temporary dyes can cause allergic reactions in some people. Apply a small amount of the product to the inside of your elbow and wait 24 hours to ensure there is no redness or itching. Additionally, be mindful of the amount of product you use. Overloading your hair with wax or spray can weigh it down and make it feel sticky, which may tempt you to scrub your scalp too harshly during removal.
To maintain the vibrancy of your temporary color while keeping your hair healthy, avoid using harsh clarifying shampoos until you are ready to remove the color completely. Instead, use a sulfate-free, color-safe shampoo and cool water. This prevents the pigment from washing out too quickly and keeps the hair cuticle smooth, reducing the risk of frizz or breakage caused by the temporary additives.
Removal Strategies for Every Method
The “without the commitment” part of rainbow hair depends entirely on how easily you can get the color out. Depending on the method used, your removal strategy will vary. For hair chalk and most color sprays, a standard shampoo and conditioner should do the trick. If the spray was particularly heavy, you may need to shampoo twice—once to break down the product and a second time to clear the pigment.
Hair waxes can be more stubborn because of their oil-based nature. To remove wax effectively, try applying a generous amount of conditioner to dry hair 15 minutes before you shower. The oils in the conditioner help break down the wax, making it slide off more easily during the shampooing process. Avoid using hot water, as this can sometimes “set” certain pigments or cause the wax to smear across your skin during the rinse.
Semi-permanent dyes are the most challenging to remove. If you find that a color is lingering longer than you like, you can use a clarifying shampoo or a gentle exfoliating scalp scrub. Some people find that a mixture of apple cider vinegar and water helps strip away the remaining semi-permanent molecules without damaging the hair. However, avoid the temptation to use harsh bleach or strong chemical strippers, as this defeats the purpose of choosing a temporary option in the first place.
Styling Your Rainbow Mane for Maximum Impact
Once your rainbow colors are in place, the way you style your hair can either hide or highlight your hard work. To make the most of a temporary unicorn look, choose styles that move the different colors around and create visual interest. Braids are the gold standard for rainbow hair. A Dutch braid or a fishtail braid weaves the different colored strands together, creating a beautiful, marbled effect that looks intricate and professional.
For a more whimsical look, try “space buns.” Divide your hair into two high buns, ensuring that each bun contains a mix of the rainbow colors. This creates a playful, symmetrical look that is perfect for festivals or themed parties. If you prefer to leave your hair down, use a wide-barrel curling iron to create loose waves. The curves of the waves allow the colors to overlap and blend, enhancing the gradient effect you worked so hard to achieve.
Finally, consider accessories. Adding a few holographic clips or a shimmering headband can complement the rainbow theme and add an extra layer of polish to your look. Because temporary color can sometimes dull the natural shine of your hair, finish your style with a lightweight glossing serum or a shine spray. This will give your unicorn hair a luminous, healthy glow that makes the colors look more vibrant and expensive.
Frequently Asked Questions
Will temporary rainbow hair damage my natural hair color?
Generally, no. Temporary products like chalks, sprays, and waxes sit on the surface of the hair and do not contain the chemicals (like ammonia or peroxide) required to alter the natural pigment of your hair. Semi-permanent dyes also do not lift your natural color. However, using too many styling products or scrubbing too harshly during removal can cause temporary dryness. Always follow up with a hydrating conditioner to keep your hair healthy.
Can I use these methods on very dark or black hair?
Yes, but the results vary by product. Hair chalk and light sprays may appear sheer or only visible in bright sunlight on black hair. For the most vibrant results on dark hair, hair color waxes are highly recommended because they provide an opaque layer of pigment. Semi-permanent dyes will create a subtle tint rather than a bright neon color unless the hair is pre-lightened.
How many washes does it take to remove temporary color?
It depends on the product. Hair chalk and most color sprays typically wash out in one or two shampoos. Hair waxes may take two to three washes, depending on the amount used. Semi-permanent dyes are the most lasting and can take anywhere from four washes to several weeks to fade completely, depending on your hair’s porosity and the brand of dye.
Can I mix different temporary color brands together?
In most cases, yes. Since temporary colors are largely surface-level pigments, they can be layered or mixed. However, it is always a good idea to test a small section first to ensure the products don’t react poorly (such as clumping or creating an unexpected muddy color). Mixing a wax with a spray, for example, can sometimes create a very heavy texture that is difficult to style.
What should I do if the color stains my skin?
Don’t panic; temporary pigments are designed to be removable. For most sprays and chalks, a cotton pad with micellar water or a gentle makeup remover will work. For more stubborn semi-permanent stains, a mixture of baking soda and a little water can create a gentle paste that lifts the pigment. Be careful not to scrub too hard, as this can irritate the skin; instead, let the product sit for a minute before gently wiping it away.
Related posts:
 Silk Hair Ties: Gentle on Hair, Tough on Tangles
 Blow Drying Hair Without Damage: Expert Tips
 Zoe Kravitz’s Coconut Oil Hair Care Secret
 Hair Accessory Hygiene: The Gross Truth About Dirty Hair Ties
 Perfect Curly Hair Routine
 Gray Hair Treatment Options
 Hair Slugging Beauty Trend Guide
 Easy Summer Updos for Every Hair Type