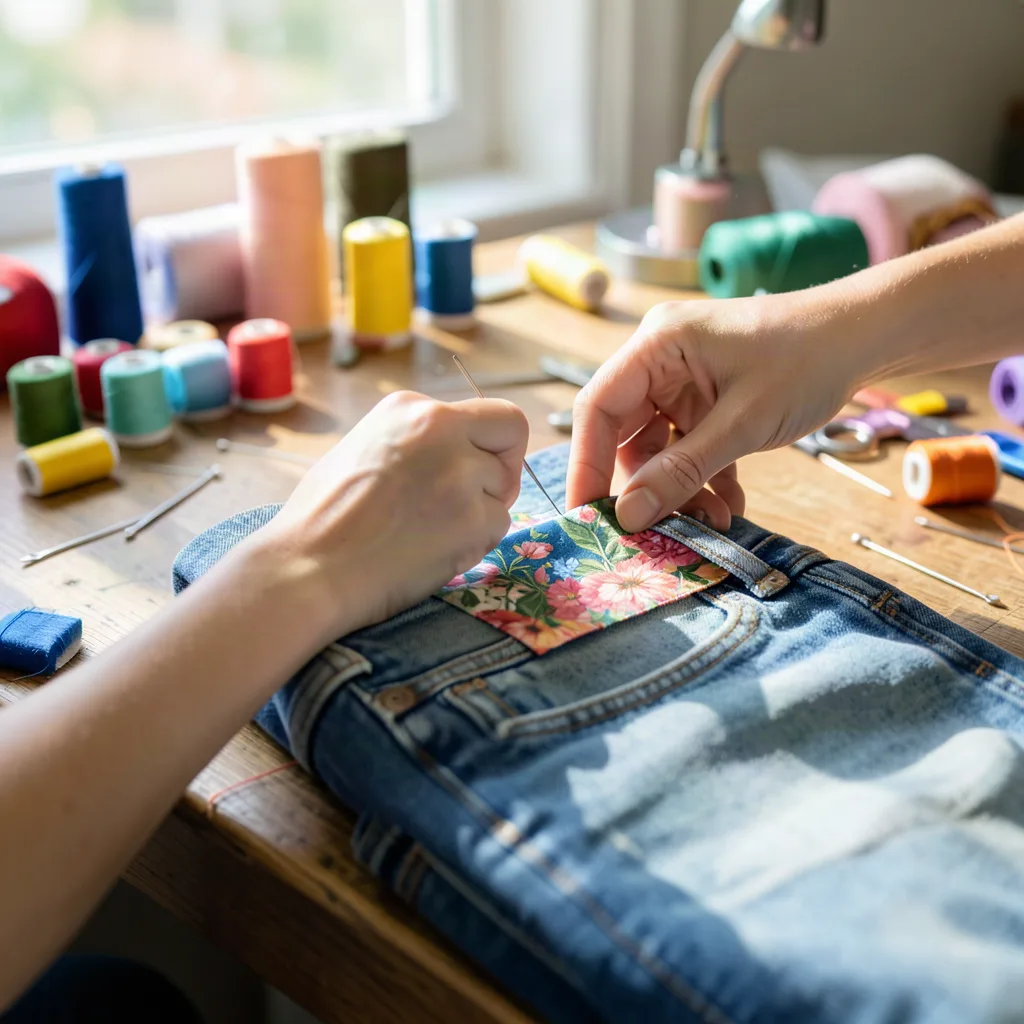
Upcycling clothing is more than a trend; it’s a mindset that blends creativity, sustainability, and personal style. By turning worn‑out garments into fresh, functional pieces, you reduce textile waste, save money, and cultivate a deeper connection with what you wear. This guide walks you through the practical steps, tools, and design principles you need to give your wardrobe a second life, whether you’re a seasoned maker or just curious about sustainable fashion.
Key takeaways
- Use sharp fabric scissors, a seam ripper, and measuring tape to ensure precise cuts and professional finishes.
- Choose garments with good fabric integrity and versatile construction, such as t-shirts or denim, for easier repurposing.
- Experiment with natural dyes, appliqué, and deconstruction to add unique textures and visual interest to your creations.
- Prolong the life of upcycled items by washing them inside out and air-drying to prevent shrinkage.
- Maximize materials by using zero-waste pattern planning and reclaiming hardware like buttons and zippers from unusable clothing.
Understanding Upcycling vs. Recycling
Before you dive in, it’s helpful to differentiate upcycling from recycling. Recycling typically breaks a material down to its raw fibers, which are then re‑spun into new yarn. The original shape and design are lost. Upcycling, on the other hand, preserves the garment’s existing structure while re‑imagining its purpose. A pair of jeans becomes a tote, a t‑shirt transforms into a patchwork top, and a vintage sweater is reborn as a cozy pillow cover. This approach retains the original fabric’s texture and history, making each piece uniquely yours.
Essential Tools and Materials for Beginners
Starting a small upcycling workshop at home doesn’t require a full‑scale sewing studio. Here’s a concise list of tools that cover most projects:
- Sharp fabric scissors – A good pair ensures clean cuts and reduces fraying.
- Seam ripper – Essential for undoing stitches without damaging fabric.
- Hand sewing needles (sizes 70/10 to 90/14) and a basic sewing machine – Machine stitching speeds up seams, but many projects can be completed by hand.
- Measuring tape and fabric chalk – For precise markings that disappear after pressing.
- Iron and ironing board – Pressing seams creates professional‑looking finishes.
- Thread in neutral and bold colors – Choose 100% polyester or cotton for durability.
- Optional embellishments – Buttons, patches, fabric paint, and bias tape add personality.
All of these items can be sourced from local craft stores or second‑hand shops, keeping the upcycling loop circular from start to finish.
Choosing the Right Garments to Upcycle
Not every piece of clothing is a perfect candidate for upcycling. Look for the following characteristics:
- Good fabric integrity – Avoid garments with large holes, excessive pilling, or stretched out seams.
- Versatile construction – Simple cuts (t‑shirts, denim, sweaters) are easier to repurpose than heavily structured pieces.
- Color and pattern – Bold prints can become statement patches; solid neutrals serve as a blank canvas for embellishment.
- Sentimental value – Upcycling a beloved item can give it new meaning while preserving its memory.
When you’re uncertain, experiment on a scrap piece first. This low‑risk trial helps you gauge how the fabric behaves when cut, sewn, or dyed.
Design Principles: From Concept to Sketch
Successful upcycling starts with a clear design plan. Follow these steps to move from idea to execution:
- Identify the end use – Are you making a tote, a skirt, or a decorative pillow? The purpose dictates measurements and construction techniques.
- Measure and map – Use a ruler or measuring tape to record key dimensions (e.g., waist, length, pocket placement). Sketch a rough outline on paper or a digital note‑taking app.
- Select complementary fabrics – Pair denim with canvas for durability, or combine a soft sweater with a sturdy lining for a cozy bag.
- Plan seams and closures – Decide whether you’ll use a zip, button, or simple fold‑over hem. Consider the weight of the fabric when choosing hardware.
- Prototype – Cut a small sample of the main fabric and test stitching with your chosen thread. Adjust tension and stitch length as needed.
Documenting each step saves time later and creates a repeatable pattern for future projects.
Step‑by‑Step Project: Turning an Old T‑Shirt into a Summer Tote
This beginner‑friendly project demonstrates core upcycling techniques while producing a functional accessory you can use right away.
- Gather materials: One oversized cotton t‑shirt, 1‑inch bias tape, ¼‑inch heavy‑weight thread, a sewing machine, fabric scissors, and a pair of fabric‑friendly rivets (optional).
- Cut the base: Lay the shirt flat, cut off the sleeves and neckline, leaving a rectangular piece roughly 12″ x 16″. This will become the tote’s body.
- Reinforce the bottom: Fold the bottom edge up ½” and press. Fold again ½” to encase raw edges, then stitch a straight seam around the folded edge.
- Create handles: Cut two strips 2″ wide from the discarded sleeves. Fold each strip lengthwise, press, and stitch the long edge closed. Attach each handle to the top corners of the tote body, stitching a double‑stitch for strength.
- Finish the top edge: Fold the top edge down ½” and press. Sew a decorative topstitch using bias tape for a polished look.
- Optional embellishments: Add a fabric‑friendly rivet at each handle attachment for extra durability, or sew on a small embroidered patch for personality.
- Final press: Give the entire tote a final press to set seams and smooth any wrinkles.
The result is a lightweight, reusable tote perfect for grocery runs, beach trips, or everyday errands. Because the base fabric is cotton, it’s machine‑washable, extending the tote’s lifespan.
Advanced Techniques: Dyeing, Appliqué, and Deconstruction
Once you’re comfortable with basic stitching, experiment with these higher‑level methods to add depth and originality:
- Fabric dyeing – Use natural dyes (e.g., tea, coffee, beet juice) for subtle, eco‑friendly color shifts. Pre‑wash the garment, soak it in the dye bath, and fix the color with a vinegar rinse.
- Appliqué – Cut shapes from contrasting fabric and sew them onto the base garment using a tight zig‑zag stitch. This technique works well for adding motifs to denim jackets or creating patchwork skirts.
- Deconstruction – Take apart a garment to salvage pockets, zippers, and trims. Re‑assemble these components into a new silhouette, such as converting a pair of cargo pants into a utility skirt.
Each technique introduces new textures and visual interest, turning a simple upcycle into a piece of wearable art.
Maintaining Upcycled Creations
Proper care prolongs the life of your upcycled items and keeps them looking fresh. Follow these guidelines:
- Read the original fabric care label – Most cotton, linen, and polyester blends can be machine washed on a gentle cycle. Silk and delicate knits may require hand washing.
- Turn garments inside out before washing to protect embellishments and printed designs.
- Avoid high heat – Air‑dry whenever possible. If you must tumble dry, use a low‑heat setting to prevent shrinkage of added components.
- Spot‑clean stains promptly with a mild detergent to avoid setting pigments.
- Store flat or on padded hangers to preserve shape, especially for upcycled jackets with added panels.
By treating your creations with care, you reinforce the sustainability loop: each item remains in use longer, reducing the need for new purchases.
Building a Community Around Upcycling
Upcycling thrives when shared. Connecting with like‑minded creators offers fresh ideas, feedback, and a sense of accountability. Consider these avenues:
- Local workshops – Many community centers host “DIY fashion” nights. Teaching a class not only spreads knowledge but also sparks collaborative projects.
- Online forums and Instagram hashtags – Tags like #upcycledfashion, #sustainablewardrobe, and #DIYstyle showcase global talent and provide inspiration for next steps.
- Swap events – Organize a clothing swap where participants bring unwanted items to exchange. The surplus can become material for future upcycling sessions.
- Collaborative challenges – Set a monthly theme (e.g., “Denim Revamp”) and encourage participants to post before‑and‑after photos. Celebrate winners with small eco‑friendly prizes.
These community practices reinforce the idea that sustainable fashion is a collective effort, not an isolated hobby.
Zero‑Waste Pattern Planning: Making the Most of Every Scrape
When upcycling, the most valuable resource is often the fabric itself. A zero‑waste pattern approach forces you to think like a puzzle master, arranging cuts so that every inch of material contributes to the final piece. This mindset not only maximizes the utility of a garment that might otherwise be discarded, but it also reduces the need for supplemental fabric, keeping the project truly circular.
Step‑by‑step workflow
- Lay out the source garment flat on a large, clean surface. Use a transparent grid sheet or a light‑box to see the weave and grain lines clearly.
- Identify natural seams and panels. Many shirts have side seams, yokes, or gussets that can become structural elements in a new design. Mark these with a removable fabric chalk.
- Sketch a modular block system. Instead of drawing a full‑size garment, break the design into repeatable blocks (e.g., 4″×4″ squares, 6″×8″ rectangles). This makes it easier to fit irregular shapes around pockets, seams, and printed motifs.
- Use digital layout tools. Free programs like Inkscape or the PatternMaker app allow you to import a photo of the fabric, set a scale, and drag‑and‑drop blocks. The software can automatically calculate waste percentages, giving you instant feedback.
- Test on muslin. Before cutting the original garment, replicate the layout on a cheap muslin scrap. This trial run reveals hidden grain direction issues and helps you refine seam allowances.
- Cut strategically. Start with the largest pieces first, then fill the remaining gaps with smaller components like pocket flaps or decorative appliqués. Keep a running inventory of each cut piece to avoid accidental duplication.
Edge‑case examples
- Odd‑shaped prints: A t‑shirt with a large, off‑center graphic can become a focal panel for a tote. Position the graphic so it aligns with a seam, then use the surrounding fabric for lining.
- Stretch panels in denim: Many modern jeans feature elastane‑infused side panels. Preserve these panels as reinforcement strips for a backpack strap, ensuring the final product retains stretch where needed.
- Fabric with directional nap: Velvet or corduroy has a clear direction. Rotate the pattern blocks so the nap runs consistently, preventing a mismatched appearance.
By treating each garment as a finite resource, you develop a habit of precision that translates to every future project, whether you’re crafting a minimalist skirt or a complex patchwork jacket.
Transforming Technical Fabrics: Upcycling Sportswear and Outdoor Gear
Technical fabrics—think moisture‑wicking polyester, Gore‑Tex membranes, or neoprene—present unique opportunities and challenges. Their engineered properties (water resistance, breathability, elasticity) make them ideal for high‑performance upcycled items, but they also demand specialized handling to preserve functionality.
Understanding fabric construction
Most performance garments consist of multiple layers: an outer shell (often coated), a middle membrane (e.g., PTFE), and an inner lining (soft mesh). When upcycling, decide which layer you need to retain. For a waterproof tote, keep the outer shell; for a breathable summer vest, the inner mesh may be more appropriate.
Key techniques
- Seam sealing: After stitching technical fabrics, the seams become points of water ingress. Apply a seam‑sealer tape (e.g., waterproof fabric tape) over each seam and press with a low‑heat iron. This restores the original waterproof rating.
- Heat‑bonded stitching: Some synthetic membranes melt under high heat. Use a specialized polyester‑compatible thread and a low‑tension stitch. If possible, employ a serger with a flat‑lock stitch, which locks the edges without piercing the membrane.
- Re‑lamination: If a jacket’s outer coating has worn thin, you can re‑coat the fabric using a spray‑on polyurethane finish. Test on a hidden area first to ensure flexibility is retained.
- Stretch accommodation: When repurposing leggings or compression tops, cut the fabric on the grain line to preserve stretch. Add a non‑stretch interfacing at points that will bear weight, such as straps on a backpack.
Project showcase
Upcycled wind‑breaker backpack: Start with a lightweight, wind‑proof jacket. Remove the sleeves and cut a rectangular panel for the main body (approximately 14″×20″). Keep the jacket’s original zip as the main closure. Reinforce the bottom with a piece of recycled canvas for added durability. Finish the shoulder straps by repurposing the jacket’s elastic cuffs, folding them over, and stitching a reinforced loop. Apply seam tape to all stitching lines, and you end up with a sleek, weather‑ready backpack that retains the jacket’s original water‑repellent finish.
Edge‑case considerations
- Neoprene surf shorts: Neoprene is thick and non‑porous, making it difficult to sew. Use a heavy‑duty needle (size 90/14) and a walking foot on your machine. For decorative accents, apply a fabric adhesive designed for neoprene rather than stitching.
- Reflective trims: Many outdoor garments feature reflective tape that can peel off after washing. Re‑adhere using a heat‑activated bonding film, ensuring the reflective properties remain intact.
- UV‑treated fabrics: Some ski jackets are treated with UV‑blocking chemicals. Avoid harsh detergents; a gentle, pH‑balanced wash will preserve the treatment.
Integrating Reclaimed Hardware and Sustainable Notions
Hardware—zippers, buttons, snaps, buckles—often carries the same story value as the fabric itself. By sourcing reclaimed hardware, you close another loop in the upcycling cycle, reduce demand for new metal production, and add an eclectic aesthetic to your creations.
Where to find quality reclaimed hardware
- Thrift store salvage bins: Many second‑hand shops collect broken garments for parts. Ask staff for a “hardware drawer.”
- Online marketplaces: Platforms like eBay and Etsy have sellers specializing in vintage brass buttons, antique metal zippers, and industrial buckles.
- Industrial surplus stores: Look for “fabric‑friendly” metal components used in workwear or upholstery. These often have reinforced stitching holes.
- DIY extraction: Use a seam ripper and a small pliers set to carefully remove hardware from unusable garments. Clean rusted pieces in a vinegar bath, then dry thoroughly.
Eco‑friendly notions and alternatives
Traditional polyester thread is derived from petroleum. Opt for recycled polyester or organic cotton thread whenever possible. For extra durability, consider using a blended thread that includes a small percentage of nylon, which adds tensile strength without sacrificing biodegradability.
Installation techniques for reclaimed components
- Reinforced buttonholes: When attaching a vintage button to a delicate fabric, stitch a small square of interfacing behind the buttonhole to prevent tearing.
- Snap attachment: Use a snap‑setting tool that aligns the prong with the fabric grain, ensuring the snap sits flush. For stretchy fabrics, place a thin layer of fusible interfacing beneath the snap to distribute pressure.
- Zipper integration: Vintage metal zippers often have larger teeth that can catch on delicate fabrics. Pre‑press a strip of bias tape along the zipper line to act as a protective buffer.
Case study
Upcycled denim jacket with brass hardware: Begin with a faded denim jacket. Replace the original plastic buttons with reclaimed brass toggles sourced from an old coat. Add a vintage metal zipper salvaged from a 1970s parka to the front, using a heavy‑duty sewing machine foot to handle the thicker teeth. Finish the cuffs with antique copper snaps, reinforcing each attachment point with a small patch of canvas. The result is a rugged, heirloom‑quality piece that tells a story spanning multiple decades.
From Closet to Home: Upcycled Textiles for Functional Décor
While many upcyclers focus on wearable items, the same principles apply beautifully to home décor. Converting clothing into functional household objects extends the lifespan of fabric far beyond the average wear cycle and adds a personal touch to living spaces.
Key categories and project ideas
- Window treatments: Use lightweight shirts or silk scarves as decorative curtains. Hem the edges with a double‑fold stitch, add a rod pocket, and attach tie‑backs made from leftover elastic.
- Table linens: Patchwork table runners can be assembled from old dress shirts, using complementary color blocks. Reinforce the underside with a thin, oil‑proof fabric if the runner will be used for dining.
- Pet accessories: Transform a sturdy pair of sweatpants into a dog bed cover. Cut the leg sections into a circular shape, sew them together, and add a non‑slip backing made from reclaimed yoga mat material.
- Acoustic panels: Layer a dense denim panel with a thin foam core, then cover with a decorative fabric from a vintage blouse. Mount on walls to reduce echo in a home studio.
- Storage solutions: Create fabric baskets by folding and stitching the body of a loose‑fit sweater into a cylindrical shape. Add a rope handle made from repurposed belt material.
Technical tips for durability
- Backing selection: For high‑traffic areas, choose a backing fabric that resists abrasion—think canvas, twill, or a recycled polyester blend.
- Edge finishing: Use a serger or a French seam to enclose raw edges, preventing fraying when the piece is washed.
- Stain resistance: Apply a fabric‑friendly, water‑based stain guard to the finished product. Test on a hidden seam first to ensure the finish does not alter color.
Edge‑case scenario
Imagine you have a collection of vintage silk scarves with delicate prints. You want to turn them into a set of decorative pillowcases. Silk is prone to slipping and tearing, so you first line each pillowcase with a lightweight cotton voile. Sew the silk outer layer using a small, fine needle and a silk‑compatible thread. Finish the seams with a hidden ladder stitch for a seamless look. The result is a luxurious, heirloom‑grade pillow that showcases the original prints while remaining functional.
Launching a Small Upcycled Fashion Business: Legal, Pricing, and Brand Storytelling
Turning a hobby into a micro‑enterprise adds a layer of responsibility, but it also amplifies the impact of your sustainable practice. Below is a roadmap that balances creativity with the practicalities of running a small business.
Legal foundations
- Business structure: Choose a structure that matches your scale. A sole proprietorship is easiest for one‑person operations, while an LLC provides liability protection without excessive paperwork.
- Trademark considerations: Before finalizing a brand name, conduct a trademark search on the USPTO database. Even a modest Etsy shop benefits from a unique logo to avoid infringement.
- Product safety compliance: If you sell items for children, ensure compliance with the Consumer Product Safety Improvement Act (CPSIA) in the U.S. This includes testing for lead in dyes and small parts.
Cost calculation and pricing strategy
- Material cost accounting: Track the original purchase price of each garment, even if it was donated. Assign a nominal cost (e.g., $2 per donated shirt) to reflect its contribution to the final product.
- Labor valuation: Record the time spent on each step—design, cutting, sewing, finishing. Multiply by an hourly rate that reflects your skill level (e.g., $15‑$25 per hour).
- Overhead inclusion: Factor in utilities, equipment depreciation, and platform fees (Etsy charges 5% transaction fee plus payment processing).
- Profit margin: Add a 30‑40% margin for sustainability‑focused markets, where consumers are willing to pay a premium for ethical storytelling.
Brand storytelling techniques
- Visual narrative: Include before‑and‑after photos in every product listing. Use a consistent filter to create a cohesive aesthetic.
- Impact metrics: Quantify the environmental benefit—e.g., “This tote saved 0.8 kg of cotton waste, equivalent to 12 m² of landfill space.”
- Community involvement: Highlight collaborations with local charities or workshops where a portion of sales funds textile‑recycling programs.
Scaling responsibly
As demand grows, consider establishing a small production line with a partner seamstress. Maintain quality control by creating a detailed SOP (Standard Operating Procedure) that includes fabric inspection criteria, stitching tension settings, and final inspection checklists. Remember that the essence of upcycling is authenticity—avoid mass‑producing at the expense of the handcrafted story.
Troubleshooting Common Upcycling Challenges: Fabric Behavior, Fit, and Durability
Even seasoned makers encounter obstacles. Below is a diagnostic guide that helps you pinpoint and resolve typical problems, ensuring that each upcycled piece meets both aesthetic and functional standards.
1. Unexpected shrinkage after washing
- Cause: Many fabrics—especially cotton blends—are pre‑shrunken during manufacturing. If the original garment was never pre‑washed, it may contract after the first wash.
- Solution: Pre‑shrink all components before cutting. Soak the garment in warm water, then tumble dry on low heat. If shrinkage occurs after the piece is assembled, gently stretch the damp fabric back to dimensions and pin it to a flat surface to air‑dry.
2. Fraying edges on low‑weight fabrics
- Cause: Lightweight knits or sheer fabrics lack sufficient thread count to hold a standard straight stitch.
- Solution: Finish raw edges with a narrow rolled hem using a rolled‑hem foot, or apply a thin strip of fusible interfacing before stitching. For extremely delicate silk, consider a hand‑stitched slip stitch to keep the edge tidy.
3. Uneven stretch in reclaimed elastics
- Cause: Elastic fibers degrade over time, resulting in inconsistent tension.
- Solution: Test stretch by pulling a 2‑inch segment; if it extends more than 1.5 times its length, replace it. When re‑using, double‑fold the elastic and sew a narrow casing to distribute stress evenly.
4. Color bleeding from dyed fabrics
- Cause: Some low‑quality dyes are not set properly, especially on vintage garments.
- Solution: Perform a colorfast test by dampening a hidden area and pressing a white cloth. If color transfers, treat the fabric with a commercial color‑fixer (e.g., Rit ColorStay) before any further manipulation.
5. Hardware pulling out of fabric
- Cause: Thin or loosely woven fabrics cannot bear the shear force of heavy metal hardware.
- Solution: Reinforce the attachment zone with a double layer of canvas or denim. Sew a small “X” of reinforcing stitches around the hole before inserting the hardware.
6. Poor fit after deconstructing a garment
- Cause: When repurposing a garment’s panels, the original grain may not align with the new silhouette, leading to distortion.
- Solution: Draft a new pattern that respects the original grain direction. Use a muslin mock‑up to test drape and adjust seam allowances accordingly.
7. Seam slippage on high‑stress areas
- Cause: Using a low‑torque stitch on heavy denim or canvas can cause seams to open under load.
- Solution: Switch to a reinforced stitch such as a triple‑stitch or a flat‑lock. For extra security, backstitch at the beginning and end of each seam.
By keeping this troubleshooting checklist handy, you’ll be able to diagnose issues quickly, adapt your techniques, and maintain the high standards that make upcycled fashion both beautiful and built to last.
FAQ
Q1: Is it safe to upcycle garments that have been treated with chemicals, such as stain‑removing sprays?
A1: Most commercial stain removers evaporate after drying, but if a garment feels sticky or has a strong chemical odor, test a small hidden area first. Wash the piece separately before beginning any alterations to remove residual chemicals.
Q2: How can I upcycle fabrics that shrink when washed?
A2: Pre‑shrink the fabric by washing it according to the care label before cutting. If the item is already shrunken, use a gentle stretch while damp and pin it to a flat surface, allowing it to air‑dry in the desired dimensions before proceeding.
Q3: What’s the best way to attach heavy hardware, like metal buckles, to delicate fabrics?
A3: Reinforce the area with a backing of interfacing or a second layer of fabric. Sew a double‑stitch around the attachment point, and consider using a fabric‑friendly rivet or a small leather patch to distribute pressure.
Q4: Can I upcycle clothing for children, and are there special safety considerations?
A4: Absolutely. Choose fabrics that are free of loose threads, small detachable parts, and toxic dyes. Avoid small buttons or embellishments that could become choking hazards. Opt for organic cotton or bamboo blends when possible.
Q5: How do I price my upcycled pieces if I want to sell them?
A5: Calculate the cost of materials (including any new fabric, thread, and hardware) and add a modest labor fee based on the time spent. Compare similar items on platforms like Etsy to gauge market rates, and highlight the sustainability story—consumers often value the environmental impact as part of the price.