
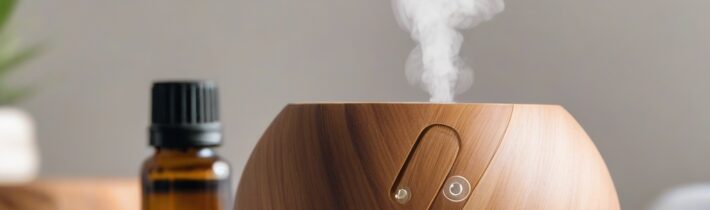
Essential oil diffusers have become cherished companions in our quest for well-being, filling our spaces with soothing aromas and therapeutic benefits. They transform our homes into havens of peace, focus, or invigoration, all with the simple magic of nature’s purest essences. But just like any beloved tool, your diffuser needs a little tender loving care to continue performing at its best. Neglecting its cleanliness can diminish its effectiveness, shorten its lifespan, and even compromise the purity of the very air you’re trying to enhance. Think of cleaning your diffuser not as a chore, but as an act of self-care, ensuring that every mist you inhale is as pristine and potent as intended.
This comprehensive guide will walk you through the compassionate and correct way to clean your essential oil diffuser, transforming a simple task into a mindful ritual that supports your overall well-being. We’ll cover everything from daily rinses to deep cleans, ensuring your aromatic journey remains uninterrupted and utterly delightful.
Why Cleaning Your Diffuser Isn’t Just Good, It’s Essential for Well-being
Imagine a pristine canvas waiting for a masterpiece, only to find it covered in dust and old paint. That’s what happens when essential oil residue and mineral deposits from water build up inside your diffuser. Over time, these residues can:
- Diminish Aroma & Therapeutic Benefits: Old oil residue can mix with new oils, altering their scent profile and reducing their therapeutic efficacy. You might not be getting the pure lavender calm or invigorating citrus boost you expect.
- Reduce Mist Output & Longevity: Clogged ultrasonic plates or nebulizer tubes struggle to create a fine mist, leading to reduced diffusion and putting strain on the diffuser’s motor, ultimately shortening its life.
- Harbor Unwanted Guests: Stagnant water and oil residue can become breeding grounds for mold, bacteria, and yeast. Inhaling these can counteract the very health benefits you seek from essential oils.
- Lead to Unpleasant Odors: Instead of a fresh, uplifting aroma, you might notice a stale or musty smell emanating from your diffuser, a clear sign it’s time for a cleanse.
By keeping your diffuser clean, you’re not just maintaining an appliance; you’re preserving the integrity of your aromatherapy practice and safeguarding the purity of your personal sanctuary. It’s an investment in your health and peace of mind.
Daily Care: Simple Habits for a Happy Diffuser
Consistency is key to keeping your diffuser sparkling and efficient. Just a few moments of care after each use or at the end of the day can prevent major buildup and extend the life of your device significantly. This daily ritual is incredibly simple:
- Empty Remaining Water: Always unplug your diffuser first. Pour out any leftover water from the reservoir. Avoid pouring water out of the side with the air vent, as this can damage internal components.
- Wipe Down the Interior: Using a soft, clean cloth or paper towel, gently wipe the entire inside of the water reservoir. Pay attention to the ultrasonic plate (the small ceramic disc at the bottom).
- Rinse (Optional, but Recommended): A quick rinse with clean water can help remove any lingering oil film. Again, dry thoroughly.
That’s it! By ensuring no standing water remains and wiping away fresh oil residue, you prevent mineral deposits from hardening and oils from becoming sticky. This small habit makes a world of difference in the long run.
The Weekly Refresh: A Deeper Clean for Optimal Performance
Even with daily care, essential oils and water minerals can gradually accumulate. A weekly deep clean is vital to dissolve these stubborn residues and restore your diffuser to its pristine condition. White vinegar is your best friend here – it’s natural, effective, and readily available.
Method 1: White Vinegar Power (Recommended for Ultrasonic Diffusers)
White vinegar is a gentle yet powerful natural solvent that effectively breaks down essential oil residue and mineral buildup without harsh chemicals.
- Unplug and Empty: Ensure your diffuser is unplugged and empty of any water.
- Add Water and Vinegar: Fill the reservoir with clean water up to about half the fill line, then add 10-15 drops of pure white vinegar. For larger diffusers or more buildup, you can use a 50/50 water-vinegar solution.
- Run Briefly: Turn on your diffuser and let it run for about 5-10 minutes. This allows the vinegar solution to circulate and work its magic on the ultrasonic plate and internal components.
- Drain and Wipe: Unplug the diffuser, carefully pour out the vinegar solution.
- Clean and Rinse: Using a cotton swab dipped in pure white vinegar, gently clean around the edges of the ultrasonic plate and any crevices where residue might hide. Then, wipe the entire reservoir with a soft, damp cloth.
- Final Rinse: Rinse the reservoir thoroughly with fresh water, then wipe it dry with a clean cloth. Allow it to air dry completely before its next use.
The subtle scent of vinegar will dissipate quickly, leaving your diffuser fresh and ready for your next aromatic adventure.
Tackling Tough Buildup: When Your Diffuser Needs Extra Love
Sometimes, despite our best efforts, a diffuser might develop stubborn buildup, especially if it’s been neglected for a while or if you use heavier, thicker essential oils. If your diffuser isn’t misting properly, making unusual noises, or has visible sticky residue, it’s time for an intensive care session.
- Extended Vinegar Soak: Instead of just running the vinegar solution, let it sit in the reservoir for 30 minutes to an hour (or even overnight for very stubborn cases). This gives the vinegar more time to dissolve hardened deposits.
- Rubbing Alcohol for Residue: For exceptionally sticky oil residue that vinegar can’t quite tackle, a small amount of rubbing alcohol (isopropyl alcohol) can be incredibly effective. Dampen a cotton swab or a corner of a soft cloth with rubbing alcohol and gently wipe the inside of the reservoir, focusing on the ultrasonic plate and any areas with visible residue. Important: Do NOT run rubbing alcohol through your diffuser or soak plastic parts in it, as it can damage certain plastics. Use it only for targeted wiping.
- Gentle Scraping (Last Resort): If there’s a hard, crusty mineral deposit on the ultrasonic plate that won’t budge, you can very, very carefully use a soft toothbrush or a toothpick to gently dislodge it. Be exceedingly gentle, as scratching the plate can permanently damage your diffuser.
- Thorough Rinsing: After any intensive cleaning, it’s paramount to rinse your diffuser several times with clean water to ensure all cleaning agents are removed. A final wipe and air dry will complete the process.
Remember, patience and gentleness are your allies when dealing with tough buildup. Your diffuser will thank you with renewed vigor!
Special Considerations for Different Diffuser Types
While the vinegar method is excellent for most ultrasonic diffusers, other types might require slightly different attention:
- Nebulizing Diffusers: These diffusers use no water, directly atomizing pure essential oils. They are prone to clogging, especially with thicker oils. For cleaning, add a small amount of rubbing alcohol to the glass reservoir and run the diffuser for 5-10 minutes. The alcohol will dissolve the oil residue. Empty, then run with clean water for a few minutes to clear any alcohol.
- Evaporative or Heat Diffusers: These generally have simpler cleaning needs. For evaporative diffusers with absorbent pads, simply replace the pad regularly. For heat diffusers, wipe down the tray or dish with a damp cloth after each use. A cotton swab with rubbing alcohol can remove sticky residue from the heating plate.
Always refer to your diffuser’s manufacturer manual for specific cleaning instructions, as some models may have unique requirements or materials.
FAQ: Your Diffuser Cleaning Questions Answered
Let’s address some common queries to ensure your diffuser cleaning journey is smooth and clear.
Q1: How often should I clean my essential oil diffuser?
A1: We recommend a quick rinse and wipe-down after every use or at the end of each day. A deeper clean with white vinegar should be performed weekly, or more frequently if you use your diffuser daily or switch between many different essential oils.
Q2: Can I use dish soap or other cleaning detergents to clean my diffuser?
A2: It’s generally best to avoid dish soap or other chemical detergents. They can leave a residue that might interfere with the diffuser’s function, impact the purity of your essential oils, and be difficult to rinse completely. White vinegar is a far safer and more effective natural alternative.
Q3: My diffuser isn’t misting after cleaning. What should I do?
A3: First, ensure it’s completely dry. Then, double-check that the ultrasonic plate is free of any residue. If a stubborn deposit remains, try another targeted vinegar soak or a very gentle wipe with rubbing alcohol on a cotton swab. If the problem persists, consult your diffuser’s manual or contact the manufacturer, as there might be a mechanical issue.
Q4: Is it okay to leave water and essential oils in my diffuser overnight or for several days?
A4: It’s not recommended. Leaving water and essential oils in the diffuser can lead to mineral buildup, oil residue hardening, and potentially foster microbial growth. Always empty and wipe your diffuser after each use to maintain optimal hygiene and performance.
Q5: Can I put tap water in my essential oil diffuser, or should I use distilled water?
A5: Most diffusers are designed to work with tap water. However, if you live in an area with particularly hard water (high mineral content), distilled water can help reduce mineral buildup and extend the life of your diffuser. If using tap water, regular weekly cleaning becomes even more crucial.
Embrace Purity: A Final Word on Diffuser Care
Caring for your essential oil diffuser is a small, yet significant, act of self-care and respect for the tools that enhance your daily life. By committing to regular cleaning, you ensure that every breath you take is filled with the pure, unadulterated essence of your essential oils, contributing positively to your health, mood, and overall well-being. Let this simple routine be a reminder that true wellness often begins with mindful habits and a compassionate approach to everything you cherish. A clean diffuser is a happy diffuser, and a happy diffuser creates a harmonious home.
Related posts:
 Vinegar Laundry Hacks
 How to Deep-Clean Your Coffee Maker ASAP
 Mineral Water Health Benefits
 The 7 Best Hair Diffusers For Soft, Bouncy Curls And Waves
 I tried 7 top-rated essential oil diffusers—these 2 felt like luxury
 This Chic Diffuser Charms Looks More Like An Accesory Than A Wellness Gadget
 Homemade Apple Cider Vinegar
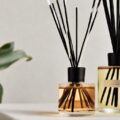 8 Reed Diffusers That Can Instantly Liven Up Any Space