
For decades, the Victoria’s Secret Fashion Show represented a pinnacle of aesthetic perfection, showcasing a look that blended lean muscle with graceful curves. While the wings and glamour took center stage, the physical preparation behind the scenes was an intensive masterclass in strength and conditioning. Specifically, the sculpted glutes and toned legs seen on the runway were not the result of luck or genetics alone, but of a targeted, science-backed approach to resistance training.
p>
Achieving a strong, lifted lower body requires more than just doing a few sets of squats. It demands an understanding of glute anatomy, the application of progressive overload, and a commitment to recovery. This guide reveals the principles and specific exercises that mirror the high-performance routines used by top fitness models to build strength, shape, and stability.
Understanding the Anatomy of the Glutes
To train the glutes effectively, you must first understand that the “butt” is not one single muscle, but a complex of three distinct muscles, each with a different function. A comprehensive runway-ready workout targets all three to create a balanced, three-dimensional look.
- Gluteus Maximus: This is the largest muscle in the body and the primary driver of hip extension. It is responsible for the “projection” and overall size of the glutes. Exercises like hip thrusts and deadlifts primarily target this muscle.
- Gluteus Medius: Located on the outer side of the hip, the medius is crucial for hip abduction (moving the leg away from the body) and pelvic stability. Training the medius creates the “shelf” look and prevents the hips from dipping during movement.
- Gluteus Minimus: The smallest of the three, sitting underneath the medius, it assists in abduction and internal rotation. While it doesn’t contribute as much to visible shape, it is essential for joint health and balance.
By incorporating movements that push, pull, and abduct, you ensure that no part of the posterior chain is neglected, leading to a more functional and aesthetic result.
The Foundation: Heavy Compound Movements
The core of any professional glute routine is built upon compound movements. These are exercises that engage multiple joints and muscle groups simultaneously, allowing you to lift heavier loads and trigger greater muscle hypertrophy (growth).
The Hip Thrust: The Gold Standard
If there is one exercise that defines the modern glute workout, it is the hip thrust. Unlike the squat, which is quad-dominant, the hip thrust places the maximum tension on the glutes at the peak of the contraction.
How to perform: Sit on the floor with your upper back against a stable bench. Place a barbell across your hips (using a pad for comfort). Drive through your heels, pushing your hips toward the ceiling until your torso is parallel to the floor. Squeeze your glutes hard at the top for a full second before lowering slowly.
Pro Tip: Keep your chin tucked toward your chest and your gaze forward. This prevents over-arching the lower back and ensures the glutes are doing the work.
Romanian Deadlifts (RDLs)
RDLs are essential for targeting the “glute-ham tie-in,” the area where the bottom of the glutes meets the top of the hamstrings.
How to perform: Hold a barbell or dumbbells in front of you. With a slight bend in your knees, hinge at the hips, pushing your glutes back as if you are trying to close a car door with your backside. Lower the weights along your shins until you feel a deep stretch in your hamstrings, then drive your hips forward to return to a standing position.
Unilateral Training for Symmetry and Stability
One of the secrets to the balanced look of runway models is unilateral training—working one leg at a time. This eliminates muscle imbalances and forces the stabilizing muscles (like the gluteus medius) to engage more intensely.
Bulgarian Split Squats
Often feared but incredibly effective, the Bulgarian split squat is a powerhouse for glute development.
How to perform: Stand a few feet in front of a bench and place your rear foot on the bench. Step forward with your lead leg. Lower your hips until your front thigh is nearly parallel to the floor. To shift the focus from the quads to the glutes, lean your torso slightly forward (about 30 degrees) and ensure your front shin remains relatively vertical.
Walking Lunges
Lunges add a dynamic element to the workout, improving balance and coordination while keeping the heart rate elevated.
Actionable Guidance: Take longer steps to place more emphasis on the glutes. Short steps tend to target the quadriceps more. Focus on pushing off the front heel to propel yourself forward.
Shaping and Sculpting with Accessory Lifts
Once the heavy lifting is complete, accessory movements are used to “polish” the muscle. These exercises typically use cables or bands to provide constant tension throughout the entire range of motion.
Cable Kickbacks
Kickbacks allow for an isolated contraction of the gluteus maximus without involving the lower back.
How to perform: Use an ankle strap attached to a low cable pulley. Lean forward slightly, holding onto the machine for stability. Kick your leg back and slightly outward (at a 45-degree angle) to engage both the maximus and the medius. Avoid arching your back; the movement should come entirely from the hip joint.
Seated Hip Abductions
Whether using a machine or a resistance band around the knees, abductions target the gluteus medius.
Pro Tip: To increase the intensity, lean your torso forward while performing seated abductions. This changes the angle of the hip and allows for a deeper contraction of the outer glutes.
The Importance of Progressive Overload
You cannot perform the same workout with the same weights for months and expect your body to change. The key to the transformation seen in professional athletes and models is progressive overload.
Progressive overload is the gradual increase of stress placed upon the body during exercise. This forces the muscle fibers to repair and grow back stronger and larger. You can achieve this in several ways:
- Increasing Weight: Adding five pounds to your hip thrust every two weeks.
- Increasing Volume: Adding an extra set or increasing the rep count (e.g., moving from 8 reps to 12 reps with the same weight).
- Improving Tempo: Slowing down the eccentric (lowering) phase of the movement to increase time under tension.
- Reducing Rest: Shortening the break between sets to increase metabolic stress.
Keep a training log. Tracking your lifts ensures that you are actually progressing and not just “going through the motions.”
Mind-Muscle Connection: The Secret Ingredient
Many people can perform a squat, but few can truly feel their glutes working. The “mind-muscle connection” is the ability to consciously focus on the muscle being targeted.
To master this, try these techniques:
- Glute Activation: Before your heavy lifts, perform two sets of bodyweight glute bridges or clamshells. This “wakes up” the nerves and ensures the glutes are firing before you add weight.
- Internal Cues: Instead of thinking “move the weight up,” think “squeeze my glutes to push the floor away.”
- The Pause: Incorporate a one-to-two second isometric hold at the top of every rep. This maximizes the contraction and forces the brain to recognize the muscle engagement.
Recovery, Nutrition, and Sleep
Muscle is not built in the gym; it is built during recovery. Without the proper fuel and rest, intense training can lead to burnout or injury rather than growth.
Protein and Hypertrophy
To build lean muscle, your body needs amino acids. Prioritize high-quality protein sources such as grilled chicken, fish, tofu, lentils, and Greek yogurt. Aim for roughly 0.7 to 1 gram of protein per pound of body weight to support muscle repair.
Complex Carbohydrates for Energy
Don’t fear carbs. Complex carbohydrates like sweet potatoes, quinoa, and oats provide the glycogen necessary to power through heavy lifting sessions. Consuming a small amount of carbohydrates 60-90 minutes before your workout can significantly improve your performance.
The Role of Sleep
Growth hormone is primarily released during deep sleep. Aim for 7-9 hours of quality sleep per night. Lack of sleep increases cortisol (the stress hormone), which can hinder muscle growth and encourage fat retention around the midsection.
A Sample 8-Week “Runway Ready” Program
For those looking to implement these principles, here is a structured approach. This program should be performed twice a week, with at least 48-72 hours of rest between lower-body sessions.
Day A: Power and Projection
- Hip Thrusts: 4 sets of 8-10 reps (Heavy)
- Romanian Deadlifts: 3 sets of 10-12 reps
- Bulgarian Split Squats: 3 sets of 8 reps per leg
- Cable Kickbacks: 3 sets of 15 reps per leg
- Plank with Leg Lifts: 3 sets of 45 seconds
Day B: Shape and Stability
- Goblet Squats (Heels Elevated): 3 sets of 12 reps
- Walking Lunges: 3 sets of 20 total steps
- Seated Hip Abductions: 4 sets of 15-20 reps
- Glute Bridges (Weighted): 3 sets of 15 reps (with a 3-second hold at the top)
- Side-Lying Clamshells: 3 sets of 20 reps per side
Note: For the first two weeks, focus on form. In weeks 3-8, apply progressive overload by increasing weight or reps.
Balancing Aesthetics with Functional Strength
While the visual result of a glute workout is often the primary motivator, the functional benefits are far more valuable. The glutes are the engine of the human body. Strong glutes protect the lower back from injury, improve athletic performance, and support better posture.
It is important to approach this journey with compassion. Every body is different, and genetic insertions determine where we store muscle and fat. The goal should not be to mimic a specific person’s body, but to become the strongest, healthiest version of yourself. Focus on the feeling of strength, the ability to lift more, and the energy you gain from a consistent routine.
Advanced Training Techniques to Break Through Plateaus
Once you have mastered the fundamental movements and established a baseline of strength, you may encounter a plateau where progress stalls. In professional athletic training, this is where advanced intensity techniques are introduced to create new stimuli for the muscle fibers. These methods increase metabolic stress and maximize the “pump,” which is the accumulation of blood and metabolites in the muscle tissue, signaling the body to trigger further hypertrophy.
The Power of Supersets and Giant Sets
A superset involves performing two exercises back-to-back with no rest in between. For glute development, the most effective approach is the “Pre-Exhaust” or “Post-Exhaust” method. In a pre-exhaust superset, you start with an isolation movement (like cable kickbacks) to fatigue the glutes, then move immediately into a compound movement (like hip thrusts). This ensures the glutes are the limiting factor in the compound lift, rather than the lower back or quads.
Example Routine: Perform 12 reps of seated hip abductions, followed immediately by 10 reps of weighted glute bridges. Rest for 90 seconds and repeat for three sets. This combination forces the gluteus medius to stabilize the joint before the gluteus maximus is pushed to failure.
Dropsets for Maximum Fiber Recruitment
Dropsets are a high-intensity technique where you perform a set to failure, then immediately reduce the weight by 20-30% and continue for as many reps as possible. This allows you to recruit different motor units within the muscle that weren’t fully exhausted by the heavier weight.
Practical Application: On your final set of Romanian Deadlifts, once you can no longer maintain perfect form with your primary weight, quickly strip the plates or swap to lighter dumbbells and perform another 8-12 reps. This pushes the muscle beyond its normal failure point, creating the micro-tears necessary for growth.
Tempo Training and Time Under Tension (TUT)
Many trainees focus solely on the number of reps, but the time the muscle spends under tension is a primary driver of growth. By manipulating the tempo, you can increase the difficulty of an exercise without needing to add more weight, which is particularly useful for those managing joint sensitivity.
The 4-1-1-1 Method: Use a four-second eccentric (lowering) phase, a one-second pause at the bottom (stretch), a one-second explosive concentric (lifting) phase, and a one-second hard squeeze at the top. Applying this tempo to Bulgarian Split Squats transforms a standard movement into an intense endurance and strength challenge, forcing the muscle to stabilize the weight through every single inch of the range of motion.
Optimizing Hip and Ankle Mobility for Maximum Depth
A common barrier to glute growth is not a lack of effort, but a lack of mobility. If your joints are tight, your body will naturally compensate by shifting the load to other muscles—usually the lower back or the quadriceps—to complete the movement. To achieve the deep stretch and full contraction required for a runway-ready physique, you must address the mobility of the hips and ankles.
Addressing Reciprocal Inhibition
Reciprocal inhibition is a neurological process where a tight muscle on one side of a joint prevents the opposing muscle from contracting fully. In the case of the glutes, chronically tight hip flexors (common in those who sit for long periods) can “turn off” the glutes, a phenomenon often called “gluteal amnesia.” If your hip flexors are tight, your glutes cannot reach full extension at the top of a hip thrust or squat.
The Solution: Incorporate dynamic stretching before your workout. The “World’s Greatest Stretch” (a deep lunge with a thoracic rotation) is an excellent way to open the hip capsule. Additionally, performing a 30-second couch stretch per side can release the psoas and rectus femoris, allowing the glutes to fire with maximum intensity.
The Role of Ankle Dorsiflexion
Ankle mobility is often overlooked, yet it is critical for exercises like squats and lunges. If your ankles are tight (limited dorsiflexion), your heels will lift off the ground, or your torso will lean too far forward to maintain balance. This shifts the center of gravity and takes the tension off the glutes, placing it instead on the knees and lower back.
Mobility Drill: Perform weighted ankle mobilizations. Stand facing a wall with your toes a few inches away. Keep your heel glued to the floor and drive your knee forward until it touches the wall. If you cannot reach the wall without your heel lifting, your ankle mobility is limited. Spend 2-3 minutes per side performing this movement to increase the range of motion, which will immediately improve your depth and glute engagement in compound lifts.
PNF Stretching for Permanent Gains
Proprioceptive Neuromuscular Facilitation (PNF) is an advanced stretching technique that involves contracting and then relaxing the target muscle. This “tricks” the nervous system into allowing a deeper stretch than traditional static stretching.
How to perform: While in a pigeon stretch (targeting the glutes and piriformis), contract the glute of the stretched leg by pushing it hard into the floor for 5-10 seconds. Then, exhale and sink deeper into the stretch for 20 seconds. This cycle of contract-relax allows for a more significant increase in hip flexibility, which translates to a better range of motion during heavy lifting sessions.
Adapting the Runway Routine for Home Environments
Not everyone has access to a fully equipped gym with barbells and cable machines. However, the physiological principles of hypertrophy—tension, metabolic stress, and overload—can be applied anywhere. The key to home-based glute growth is substituting heavy external loads with increased instability, higher repetitions, and mechanical disadvantages.
Substituting Heavy Weights with Resistance Bands
Resistance bands are the closest home alternative to cable machines because they provide accommodating resistance. This means the tension increases as the band is stretched, mirroring the resistance curve of many gym machines.
- For Cable Kickbacks: Anchor a long loop band to a heavy piece of furniture (like a sofa leg) and loop the other end around your ankle. Ensure the band is stretched even at the starting position to maintain constant tension.
- For Seated Abductions: Place a mini-band just above your knees. To increase the difficulty, perform the movement while leaning forward and adding a 3-second pause at the peak of the abduction.
Using Household Objects for Progressive Overload
When you lack dumbbells, look for objects that can be safely held. A backpack filled with books, heavy water jugs, or a laundry detergent bottle can serve as makeshift weights. The goal is to find something that allows you to reach failure within the 8-15 rep range.
The Home-Based Bulgarian Split Squat: Use a chair or the edge of a bed for your rear foot. Hold a heavy backpack against your chest (Goblet style) or hold a heavy jug in each hand. To make this harder without more weight, increase the tempo: lower yourself for 5 seconds, hold for 2, and explode upward.
Bodyweight Progressions and Mechanical Advantage
If you have no equipment at all, you can still grow your glutes by changing the leverage of the exercise. For example, a standard glute bridge is relatively easy. To make it harder, move to a single-leg glute bridge. By removing one point of contact, you effectively double the load on the working glute.
The “Air” Hip Thrust: Use a couch or sturdy chair as your bench. Instead of a weight, place a heavy pillow or a bag of rice on your hips. Focus on the “posterior pelvic tilt”—tucking your chin and curling your pelvis under—to ensure the glutes are doing the work rather than the lower back. Incorporate “pulse reps” at the top of the movement (small 2-inch movements) to keep the muscle under constant tension for 30-60 seconds per set.
The Synergy Between Core Stability and Glute Power
The glutes do not operate in isolation; they are part of a kinetic chain that includes the core and the lower back. For the glutes to produce maximum force, the pelvis must be stable. If the core is weak, the pelvis will tilt or shift, leading to “energy leaks” where the force generated by the legs is lost before it can effectively move the weight.
The Role of the Transverse Abdominis (TVA)
While the “six-pack” muscles (rectus abdominis) are visible, the transverse abdominis acts as the body’s internal corset, wrapping around the midsection to stabilize the spine. A strong TVA allows you to maintain a neutral pelvis during heavy RDLs and squats, preventing the common mistake of arching the lower back (hyperlordosis), which can cause injury and reduce glute activation.
The “Bracing” Technique: Instead of sucking your stomach in, imagine someone is about to punch you in the gut. You should feel your entire midsection expand and tighten 360 degrees. This creates intra-abdominal pressure, which locks the spine in place and provides a solid foundation for the glutes to push against.
Correcting Pelvic Tilt for Better Engagement
Many people struggle with an anterior pelvic tilt, where the front of the pelvis tips forward and the back tips up, creating an exaggerated curve in the lower back. This position puts the glutes in a chronically stretched state, making it difficult for them to contract fully.
The Correction: During any glute exercise, focus on a “posterior pelvic tilt.” Imagine you are trying to pull your belly button toward your chin. This tucks the tailbone and aligns the hips, placing the gluteus maximus in the optimal position to generate power. Practice this during glute bridges: instead of pushing your hips as high as possible (which often leads to arching), push until your body is a straight line from shoulder to knee, focusing on the tuck.
Integrating Core-Glute Stability Drills
To improve the communication between your core and your posterior chain, incorporate stability drills into your warm-up. These exercises teach the brain to coordinate the TVA and the glutes simultaneously.
- Dead Bugs: Lying on your back, slowly lower the opposite arm and leg while keeping your lower back pressed firmly into the floor. This trains the core to resist extension, which is vital for heavy lifting.
- Bird-Dogs: From a tabletop position, extend the opposite arm and leg. Focus on keeping the hips perfectly level—imagine a glass of water resting on your lower back that you cannot spill. This engages the gluteus medius and the deep core muscles together.
Long-Term Periodization: From Hypertrophy to Definition
A common mistake is following the same workout routine indefinitely. The human body is an adaptation machine; once it has adapted to a specific stress, it stops changing. To maintain the sculpted look of a professional model over the long term, you must implement periodization—the systematic planning of athletic training.
The Macrocycle: The Big Picture
A macrocycle is your overall goal for the year. For a glute-focused program, this might be divided into three distinct phases: a Strength Phase, a Hypertrophy Phase, and a Definition/Maintenance Phase.
- The Strength Phase (4-8 Weeks): Focus on heavy loads and low repetitions (4-6 reps). The goal here is to increase the maximum amount of weight you can lift. By increasing your strength in the hip thrust or squat, you create the capacity to use heavier weights in the next phase.
- The Hypertrophy Phase (8-12 Weeks): This is the “growth” phase. Shift to moderate weights and higher repetitions (8-12 reps). Incorporate the advanced techniques like supersets and tempo training mentioned earlier to maximize muscle volume.
- The Definition Phase (4-6 Weeks): Focus on higher repetitions (15-20 reps) and shorter rest periods. This phase emphasizes metabolic stress and caloric expenditure, helping to “reveal” the muscle you’ve built by reducing the layer of fat over the glutes.
The Importance of the Deload Week
You cannot train at 100% intensity forever without risking injury or central nervous system (CNS) burnout. Every 4th or 5th week, implement a deload week. A deload is not a week off, but a week of reduced intensity.
How to Deload: Reduce your lifting weights by 30-50% and cut your total sets in half. This allows your joints, tendons, and nervous system to recover fully while maintaining the habit of training. Most people find that they return from a deload week significantly stronger than they were before, as the body finally completes the repair process that was delayed during the high-intensity weeks.
Tracking Biometrics Beyond the Scale
Because muscle is denser than fat, the scale is often a lying indicator of progress. To truly track your periodization success, use diverse metrics:
- Progressive Load Log: Are you lifting more weight today than you were six weeks ago?
- Measurement Tapes: Measure the widest part of the hips and the glute-ham tie-in area.
- Performance Markers: Can you perform 10 Bulgarian split squats with a weight that previously only allowed for 6?
- Visual Documentation: Take photos in the same lighting and poses every four weeks to track the change in “shelf” and projection.
Troubleshooting Common Form Issues for Different Body Types
Fitness guides often present a “one size fits all” approach, but human anatomy varies wildly. Your bone structure—specifically the length of your femurs and the width of your pelvis—will dictate how you should perform glute exercises to get the best results without pain.
The “Long Femur” Challenge
People with long thigh bones (femurs) relative to their torso often struggle with squats and lunges. Because the lever arm is longer, the weight naturally shifts forward, putting excessive pressure on the knees and making it harder to keep the torso upright. This often leads to the user feeling the exercise in their quads rather than their glutes.
The Adjustment: If you have long femurs, adopt a wider stance in your squats and lunges. By widening the base, you effectively shorten the distance the hip has to travel and allow the glutes to take more of the load. Additionally, using heels-elevated squats (placing your heels on small weight plates or a wedge) can help you stay more upright and increase the depth of the movement, which is where the maximum glute stretch occurs.
Dealing with Pelvic Width and Hip Impingement
The angle of the hip socket (acetabulum) varies from person to person. Some people have sockets that face more forward, while others have them facing more to the side. This can lead to “hip impingement,” a pinching sensation in the front of the hip during deep squats or certain abduction movements.
The Adjustment: If you feel a pinch in the hip, avoid forcing a “perfect” vertical torso. Instead, allow your torso to lean forward naturally during squats and lunges. For seated abductions, try slightly rotating your toes inward or outward to find the angle where the gluteus medius engages without irritating the hip joint. Remember: the goal is muscle tension, not achieving a specific look in the mirror that causes joint pain.
Solving “Quad Dominance”
Many trainees find that no matter how hard they try, their quadriceps take over every lower-body movement. This is often due to a combination of tight hip flexors and a lack of gluteal awareness.
The Adjustment: Prioritize “glute-first” movements. Start your workout with hip thrusts or glute bridges rather than squats. By fatigueing the glutes first (pre-exhaustion), you force the body to rely on them during subsequent compound movements. Additionally, focus on the “push through the heels” cue. If your weight shifts toward your toes during a lunge or squat, the quads will always dominate. Imagine you are trying to push the floor away from you using only your heels.
Frequently Asked Questions
Q: How often should I train my glutes for maximum growth?
A: For most people, training glutes 2 to 3 times per week is ideal. Muscle protein synthesis typically lasts for 36-48 hours after a workout, so hitting the muscles every other day allows for optimal growth while providing enough time for the tissues to repair.
Q: Can I grow my glutes without using heavy weights?
A: While bodyweight exercises (like glute bridges and lunges) are great for beginners or maintenance, significant muscle growth (hypertrophy) generally requires external resistance. If you don’t have access to a gym, use resistance bands or weighted backpacks to create the necessary tension for growth.
Q: Why do I feel my lower back during hip thrusts or RDLs?
A: This usually happens due to an anterior pelvic tilt (arching the back). To fix this, focus on “tucking your tailbone” and engaging your core throughout the movement. In RDLs, ensure you are hinging at the hips rather than bending at the waist. If the pain persists, lower the weight and record your form to check for alignment.
Q: Do I need to do cardio to get the “runway look”?
A: Cardio is excellent for heart health and calorie expenditure, but too much high-intensity cardio can sometimes interfere with muscle growth. For a toned look, prioritize strength training and incorporate moderate activity like walking (10k steps a day) or low-impact swimming to maintain lean muscle mass.
Q: How long does it take to see visible results?
A: While some feel a “pump” immediately after a workout, actual muscle hypertrophy takes time. Most people see noticeable changes in strength and shape within 8 to 12 weeks of consistent training and proper nutrition. Patience and consistency are the most important factors.
Related posts:
 Transform Your Living Room Into a Booty-Building Powerhouse
 Resistance Band Glute Workouts
 Perfect Your Squat Form
 Marching Glute Bridge: The Move Your Booty Needs
 Single-Leg Glute Bridge: Targeting the Booty
 This Full-Body Resistance Band Workout Will Transform Your Home Gym
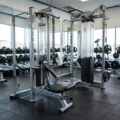 Understanding Gym Equipment
 Perfect Your Glute Bridge