A dishwasher is often perceived as a self-cleaning appliance, but over time, it inevitably succumbs to a buildup of food particles, mineral deposits, and soap scum. If your dishes are coming out with a cloudy film or the machine emits an unpleasant musty odor, you are not alone. While commercial cleaners are readily available, many homeowners are turning to the vinegar dishwasher cleaning hack. This simple, cost-effective method is lauded for its ability to cut through grime and descale internal components without the use of harsh chemicals.
Key takeaways
- Manually clean the filter and spray arms before running the vinegar steam cycle to ensure effective debris removal.
- Place a bowl of white vinegar on the top rack and run a hot cycle to dissolve grease and scale.
- Follow the vinegar cycle with a baking soda cycle to scrub away remaining grime and neutralize lingering odors.
- Never mix vinegar with bleach, as this creates dangerous toxic gas, and check your manual for manufacturer warnings.
Understanding Why Your Dishwasher Needs a Deep Clean
Dishwashers operate in a harsh environment characterized by high temperatures, moisture, and food debris. Even with a filtration system, residual grease and minerals from “hard water”—water with high concentrations of calcium and magnesium—eventually coat the heating element, the spray arms, and the interior walls. When these minerals build up, they can impede water flow, leading to poor cleaning performance. Furthermore, trapped food particles in the filter or drain can decompose, creating the perfect breeding ground for bacteria and mold, which results in that persistent, foul smell. Routine maintenance is not just about aesthetics; it is about preserving the mechanical integrity of your appliance.
The Science Behind Vinegar as a Cleaning Agent
Distilled white vinegar is primarily composed of acetic acid, typically at a concentration of 5%. This acidity is the secret weapon for household cleaning. When applied to the mineral deposits common in dishwashers, the acetic acid undergoes a chemical reaction that breaks down the alkaline mineral bonds, effectively dissolving the scale. Additionally, vinegar acts as a mild disinfectant, helping to neutralize odors by balancing the pH levels inside the machine. Because it is biodegradable and non-toxic, it is a preferred alternative for those seeking a sustainable approach to home maintenance, provided it is used correctly and not mixed with incompatible substances like bleach.
Step 1: Clearing the Filter and Spray Arms
Before introducing vinegar, you must perform a manual inspection. Most modern dishwashers have a removable filter located at the bottom of the tub. Twist it out and rinse it under hot running water, using a soft scrub brush or an old toothbrush to dislodge any trapped food particles. Check the spray arms next; tiny holes can easily become clogged with debris or mineral buildup. If you notice blockages, use a toothpick or a thin piece of wire to gently clear them. Ensuring these components are physically clean is essential for the vinegar cycle to be effective.
Step 2: The Vinegar Steam Cycle
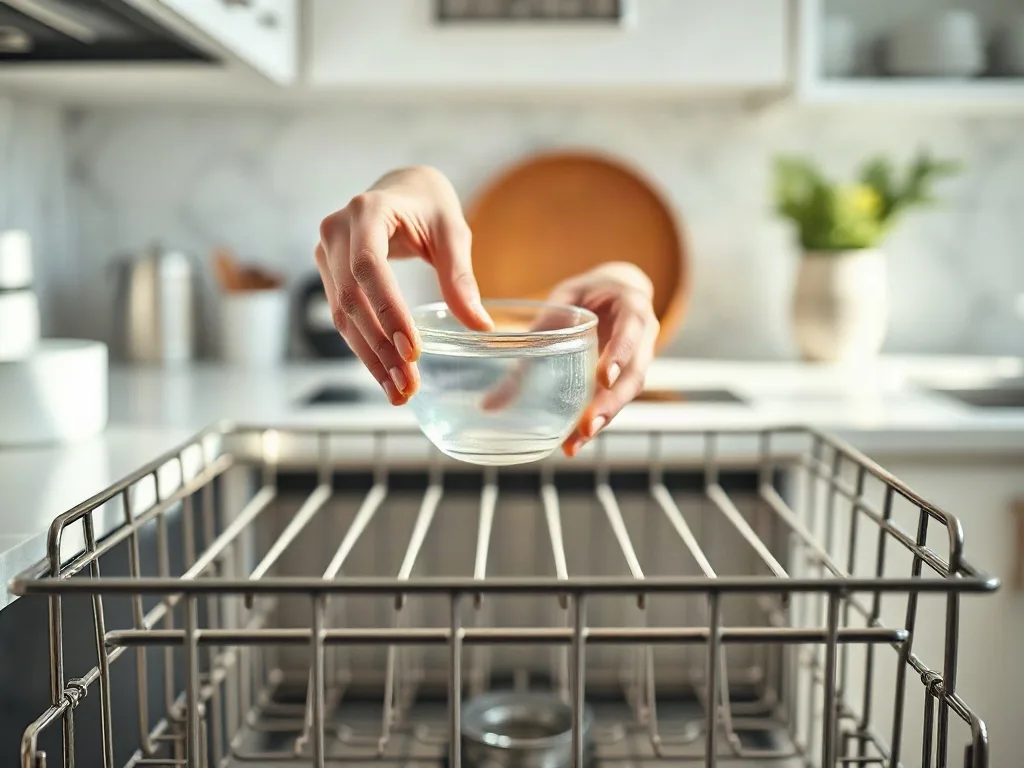
Once the physical debris is removed, place a dishwasher-safe bowl filled with one to two cups of plain white vinegar on the top rack of your empty dishwasher. Do not pour the vinegar into the detergent dispenser, as the acid can potentially degrade rubber gaskets and seals over time if left concentrated. By placing the bowl upright, the vinegar will distribute throughout the wash cycle as the water circulates. Run the dishwasher on its hottest setting. The combination of high-temperature water and the vaporized vinegar will work to dissolve grease and mineral buildup across the entire interior cavity.
Step 3: The Baking Soda Refresh
After the vinegar cycle finishes, you may notice some lingering odors or stubborn stains. This is where baking soda (sodium bicarbonate) comes in. Sprinkle one cup of baking soda across the bottom of the dishwasher floor. Run a second short cycle, again on the hottest setting. The baking soda acts as a mild abrasive to scrub away any loosened grime and helps to deodorize the appliance completely. This two-step process—acidic vinegar followed by alkaline baking soda—is the most effective way to restore a dishwasher to a “like-new” state.
Common Pitfalls and Safety Precautions
While vinegar is an excellent cleaner, it is not a cure-all. Never mix vinegar with bleach; this combination creates toxic chlorine gas, which is extremely dangerous to inhale. Additionally, check your appliance manual before initiating a vinegar clean. Some manufacturers warn against using acidic solutions because they can potentially erode specific types of rubber seals or protective coatings if used too frequently. If you have a high-end stainless steel interior, ensure you are wiping down the door edges and the rubber gasket manually with a diluted solution rather than relying solely on the cycle if you are concerned about long-term exposure to acidity.
Establishing a Sustainable Maintenance Schedule
Consistency is key to preventing the buildup from returning. Rather than waiting for your dishwasher to smell or underperform, incorporate a cleaning routine into your monthly schedule. A quick monthly wipe-down of the gasket with a vinegar-dampened cloth, combined with a deep clean every three months, will significantly extend the lifespan of your machine. Furthermore, scrape your plates thoroughly before loading them to reduce the amount of organic material entering the filter, which directly correlates to how often your dishwasher needs a deep, labor-intensive cleaning.
Troubleshooting Persistent Film: Beyond the Vinegar Cycle
If you have completed the vinegar and baking soda cycles but still notice a chalky, white film on your glassware, you are likely dealing with deep-seated mineral etching rather than simple surface scale. Hard water deposits can become baked onto the surface of glasses during the high-heat drying phase, creating a permanent haze. To diagnose this, soak a glass in a concentrated vinegar bath for 30 minutes. If the film disappears, it was mineral buildup; if it remains, the glass has likely undergone “etching,” which is a permanent chemical change to the silica caused by excessive detergent use or overly hot water. To prevent future etching, reduce the amount of detergent used—especially if you have soft water—and ensure you are using a rinse aid. Rinse aid lowers the surface tension of water, allowing it to sheet off surfaces rather than bead up and evaporate into mineral spots, effectively acting as a secondary line of defense against the very deposits you are trying to remove.
The Critical Role of the Air Gap and Drain Hose
Often, the “musty” smell returns shortly after a deep clean, suggesting that the problem resides outside the main tub. The drain hose connects your dishwasher to the garbage disposal or the sink drain, and it is a common trap for stagnant water and organic sludge. If your dishwasher does not have a high loop in the drain hose—or if it lacks an air gap device—dirty water from the sink can backflow into the dishwasher. To verify this, inspect the drain hose for any kinks or sagging points where water might pool. A simple fix is to ensure the hose is elevated above the level of the sink drain connection. If the odor is particularly pungent, the drain hose itself may be coated in biofilm that no internal vinegar cycle can reach. In these instances, disconnecting the hose and flushing it with a long, flexible brush or a high-pressure hose attachment may be necessary to restore proper drainage and sanitation.
Managing Rubber Gasket Integrity and Door Seal Hygiene
The rubber gasket, or door seal, is the most neglected part of the dishwasher. Because it is not directly exposed to the high-pressure spray of the wash cycle, it becomes a magnet for “gunk”—a mixture of soap scum, grease, and food particles that can lead to mold growth and leaks. To clean this area, avoid harsh scrubbers that can tear the rubber. Instead, use a soft microfiber cloth dipped in a 1:1 solution of white vinegar and water. Pay close attention to the bottom corners of the door, where debris tends to accumulate due to gravity. Once cleaned, apply a very thin layer of food-grade silicone lubricant to the gasket if it feels brittle or dry. This prevents the rubber from cracking, which is essential for maintaining the airtight seal required for the dishwasher to heat correctly and prevent moisture from escaping into your kitchen cabinets.
The Impact of Water Temperature on Cleaning Efficacy
Dishwashers rely on high temperatures to melt fats and activate enzymes in detergents. If your water heater is set too low, the vinegar hack will be significantly less effective, as the acid requires heat to properly break down mineral bonds. Most manufacturers recommend an inlet water temperature of at least 120°F (49°C). If your dishwasher is located far from the water heater, the water in the pipe may be cold when the cycle begins. A practical hack is to run your kitchen sink faucet until the water is steaming hot before starting the dishwasher. This ensures that the very first “fill” of the dishwasher starts with hot water rather than the cold water sitting in your pipes, allowing the vinegar cycle to reach its full cleaning potential from the very first minute of operation.
Detergent Overdose: The Hidden Cause of Build-Up
Many users assume that more detergent equals cleaner dishes, but the opposite is true. Excess detergent creates a thick, soapy foam that the dishwasher pump cannot fully evacuate. This creates a cycle of residue buildup that traps food particles and makes the interior surfaces feel greasy. If you find yourself needing to use the vinegar hack more than once a month, analyze your detergent dosage. If you have soft water, you likely only need half the recommended amount. Furthermore, if you use detergent pods, you may be locked into an “all-or-nothing” dose that is too high for smaller loads. Switching to a powder or liquid detergent allows you to scale the amount of cleaner to the actual soil level of your dishes, which will significantly reduce the amount of secondary residue left behind for the vinegar to clean up.
Optimizing Water Softening and Rinse Aid Synergy
While vinegar effectively tackles existing mineral crusts, it does not prevent them from reforming during the next wash. If your home has hard water, the vinegar hack is merely a reactive measure. To make your dishwasher more resilient, evaluate your rinse aid usage. Rinse aid is not a luxury; it is a surfactant that breaks the surface tension of water, forcing it to slide off dishes and internal surfaces rather than evaporating into mineral-heavy spots. If you rely on vinegar cleaning, consider installing an inline water softener for your kitchen plumbing or ensuring your dishwasher’s internal salt reservoir—common in European models—is properly filled with dishwasher-grade salt. This salt regenerates the ion-exchange resin inside the machine, preventing calcium and magnesium from ever bonding to your heating element in the first place.
The Role of Enzymes in Preventing Biofilm
Modern dishwasher detergents are complex chemical cocktails designed to break down proteins, starches, and fats. However, if your detergent is old or stored in a humid environment, the enzymes can lose their efficacy. When enzymes fail to break down food molecules, those molecules settle on the dishwasher tub walls, creating a ‘biofilm’ that vinegar alone cannot fully strip away. To prevent this, store your detergent in an airtight container under the sink, away from the steam of the dishwasher. If you notice a persistent slimy film on the interior walls even after a cleaning cycle, you may be using a detergent that is not compatible with your water chemistry. Switching to a high-enzyme formula specifically labeled for ‘hard water’ can prevent this layer from forming, effectively reducing the need for frequent acidic deep cleans.
Addressing the ‘Hidden’ Rack and Wheel Maintenance
Often, the vinegar cycle is focused on the tub and spray arms, completely ignoring the mechanical components that facilitate the wash: the rack wheels and track systems. Over time, these plastic wheels accumulate a waxy buildup of soap and grease, causing the racks to stick, rattle, or tilt. This tilting is detrimental because it alters the angle of the spray arms, preventing water from reaching the dishes at the intended trajectory. Use a small brush and a concentrated vinegar-water solution to scrub the wheels and the tracks they run on. If the wheels appear pitted or misshapen, they are likely harboring bacteria that the vinegar cycle cannot reach. Replacing these inexpensive plastic components can restore the structural integrity of your loading system and ensure that the spray arms operate in the exact plane designed by the manufacturer.
Managing the Float Switch and Sensor Accuracy
Deep inside the bottom of your dishwasher tub sits a small, often overlooked component: the float switch. This safety device prevents the machine from overfilling by rising with the water level. If a layer of mineral scale or congealed grease hardens around the base of the float, it can become stuck in the ‘up’ position, causing the machine to think it is already full and preventing it from filling with enough water to clean effectively. Conversely, if it is stuck in the ‘down’ position, the dishwasher may overfill, leading to leaks. During your next maintenance cycle, locate the float switch and gently wiggle it to ensure it moves freely. If it feels sluggish, use a toothbrush and a vinegar-soaked cloth to clear the debris from its housing. Ensuring this sensor works correctly is vital for the water-to-detergent ratio to remain consistent, which in turn maximizes the efficacy of your cleaning cycles.
Strategic Loading to Aid Self-Cleaning Dynamics
The way you load your dishwasher directly impacts how much ‘self-cleaning’ the appliance can do. When the machine is overcrowded, the spray arms cannot rotate freely, and the water cannot circulate properly to flush out the debris that the vinegar cycle is meant to remove. A common mistake is nesting bowls or placing tall items in a way that blocks the spray arm’s path. Furthermore, always face soiled surfaces toward the center of the machine. If dishes are loaded incorrectly, the wash cycle is less efficient at moving food particles toward the filtration system. By optimizing your loading technique, you assist the machine in its natural duty of self-flushing, which keeps the filter cleaner for longer and reduces the frequency with which you need to reach for the vinegar bottle.
Frequently Asked Questions
Can I use apple cider vinegar instead of white vinegar? While apple cider vinegar has similar acidic properties, it contains sugars and sediments that can leave a sticky residue or potentially attract pests. Always use plain, distilled white vinegar for cleaning purposes to ensure a residue-free finish.
How often should I perform this cleaning hack? For the average household, performing a full vinegar and baking soda cleaning cycle once every three months is sufficient. If you live in an area with particularly hard water, you may want to increase this frequency to once a month to prevent scale buildup.
Will vinegar damage the rubber seals in my dishwasher? When used in the recommended dilution—a bowl of vinegar circulating with hot water—it is generally safe. However, avoid letting concentrated, undiluted vinegar sit on rubber gaskets for extended periods, as it can cause them to dry out or crack over time.
Why is there still a smell after I run the vinegar cycle? If the smell persists, the source is likely trapped debris in the drain hose or a heavily soiled filter that wasn’t cleaned manually. Check the drain hose for clogs and ensure the filter is completely free of organic buildup.
Can I use this method on all dishwasher types? Yes, the vinegar method is safe for standard stainless steel and plastic interior dishwashers. However, if you have a vintage model or an appliance with unique specialty coatings, consult the manufacturer’s care guide to confirm that acidic cleaners are permitted.
Related posts:
 The Gross Truth About How Often You Should Really Clean Your Fridge
 Creative Ways to Use Baking Soda
 How to Safely Clean Your Yoga Equipment
 White Sneaker Cleaning Hack
 DIY Natural Cleaning Products with Essential Oils
 Keep Bugs Out of Your House Using This Kitchen Staple
 How to Deep-Clean Your Coffee Maker ASAP
 Forget Bleach: This Kitchen Staple Cleans Everything