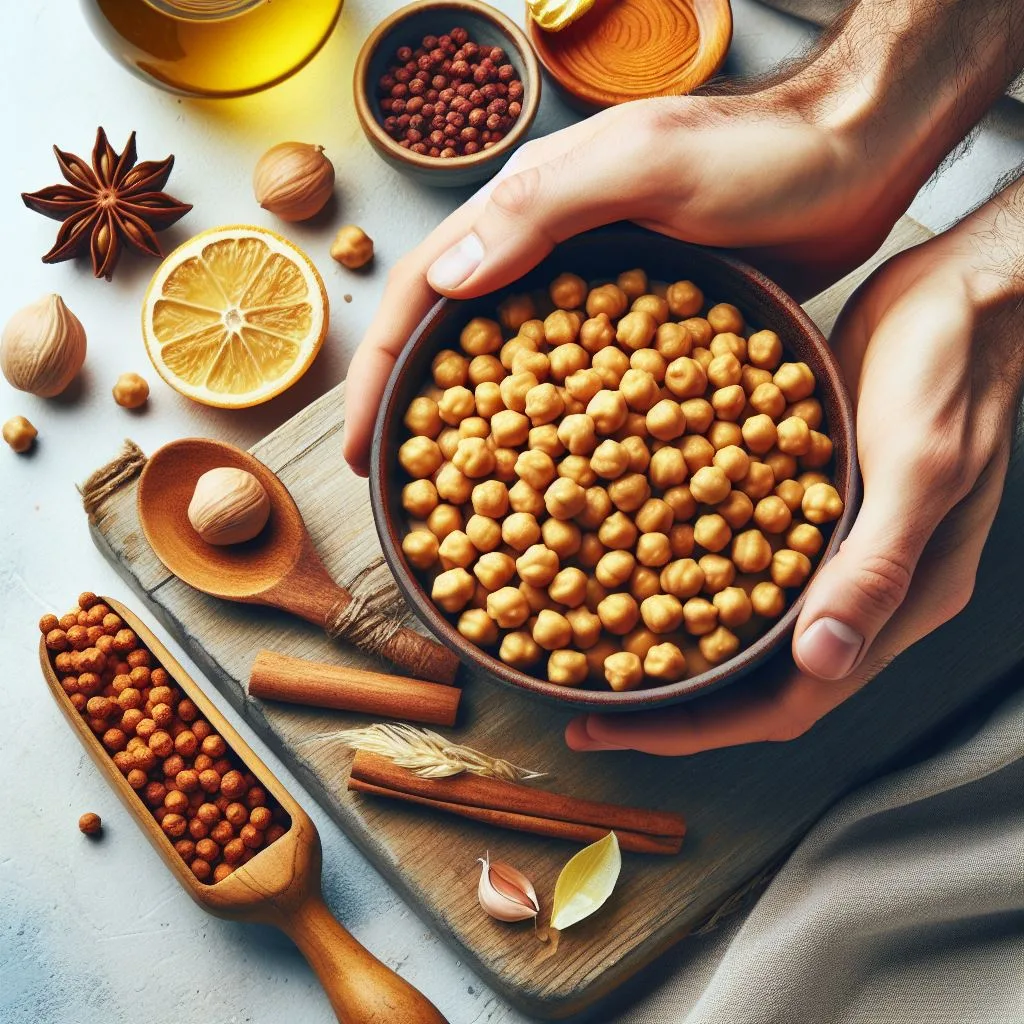
Looking for a delicious way to incorporate more plant-based protein into your diet? Chickpeas are a versatile and nutritious option that can fulfill your protein needs while tantalizing your taste buds. This easy chickpea recipe is not only simple to prepare but also packed with flavor and goodness, making it an ideal choice for anyone seeking a healthy, protein-rich meal.
Why Chickpeas Are a Superfood
Chickpeas, also known as garbanzo beans, are a powerhouse of nutrients. Rich in protein, fiber, and essential vitamins and minerals, they offer numerous health benefits. Including chickpeas in your diet can help with weight management, blood sugar control, and improving digestive health. They’re also incredibly eco-friendly, making them a staple in sustainable diets.
Ingredients You’ll Need
- 1 can (15 oz) of chickpeas, drained and rinsed
- 2 tablespoons of olive oil
- 1 teaspoon of ground cumin
- 1/2 teaspoon of paprika
- 1/4 teaspoon of garlic powder
- Salt and pepper to taste
- Fresh parsley or coriander for garnish (optional)
Step-by-Step Cooking Instructions
- Preheat your oven to 400°F (200°C).
- Spread the chickpeas on a baking sheet and pat them dry with a paper towel.
- In a small bowl, mix the olive oil, cumin, paprika, garlic powder, salt, and pepper.
- Drizzle the spice mixture over the chickpeas and toss until evenly coated.
- Bake in the preheated oven for 25-30 minutes, or until the chickpeas are golden and crispy.
- Remove from the oven and let cool for a few minutes.
- Sprinkle with fresh parsley or coriander before serving, if desired.
This roasted chickpea recipe can be enjoyed on its own as a snack, or added to salads, bowls, and wraps for a protein boost.
Health Benefits of This Chickpea Recipe
By choosing chickpeas as your protein source, you’re not only treating yourself to a delectable meal but also reaping health rewards. The fiber in chickpeas can aid in lowering cholesterol levels and the risk of heart disease. Their protein content is perfect for muscle repair and growth, making them a great post-workout meal for fitness enthusiasts.
Customizing Your Chickpea Dish
One of the best things about this chickpea recipe is its versatility. Feel free to add your favorite spices or herbs to suit your palate. You can also incorporate veggies like bell peppers or onions for an extra nutritional punch.
Mastering the Science of the Perfect Crunch
While the basic roasting method is straightforward, achieving a professional-grade crunch that lasts requires understanding the moisture dynamics of the legume. The primary obstacle to a truly crispy chickpea is the residual water trapped under the thin, translucent skin. To elevate your snack from merely firm to shatteringly crisp, consider the extra step of skinning the chickpeas. While it sounds tedious, you can simply roll the rinsed chickpeas between two clean kitchen towels with gentle pressure; the skins will loosen and slide right off. Removing these skins allows moisture to escape more efficiently during the roasting process, preventing the interior from steaming itself into a mushy texture.
Temperature management is another critical factor. While 400°F is the standard, every oven has unique hot spots. If you find your chickpeas are browning too quickly on the outside while remaining soft inside, try a two-stage thermal approach. Start at 375°F for the first 20 minutes to dehydrate the core, then crank the heat to 425°F for the final 5 to 10 minutes to achieve that golden-brown exterior. Furthermore, never crowd the pan. If the chickpeas are touching, they will create a micro-environment of steam. Use two baking sheets if necessary to ensure each bean has at least half an inch of breathing room. This airflow is what facilitates the Maillard reaction, the chemical process between amino acids and reducing sugars that gives roasted foods their distinctive savory flavor.
Finally, the cooling process is just as vital as the cooking. Resist the urge to eat them immediately. As chickpeas cool, the starches undergo retrogradation, which further firms up the structure. For the absolute best results, turn the oven off, crack the door open an inch, and let the chickpeas sit inside for another 10 minutes. This slow descent in temperature helps pull out the last traces of internal vapor, ensuring they don’t turn chewy the moment they hit room temperature.
Global Flavor Profiles to Elevate Your Protein Game
Once you have mastered the technique of the basic roast, the spice cabinet becomes your playground. The original cumin and paprika blend is a classic, but you can transport your palate across the globe with a few simple adjustments. For a Mediterranean twist, try a combination of dried oregano, lemon zest, and a pinch of sumac. The sumac provides a tart, citrusy punch that cuts through the earthiness of the bean, while the lemon zest essential oils release during roasting to perfume the entire kitchen. Be sure to add the zest halfway through the cooking time to prevent it from burning and becoming bitter.
If you crave something with a deeper, more complex heat, look toward a North African Harissa blend. Mix your olive oil with a tablespoon of Harissa paste before tossing the chickpeas. The chilis, garlic, and caraway seeds in the paste create a sticky, spicy glaze that caramelizes beautifully. For an East Asian-inspired profile, whisk together toasted sesame oil, a splash of low-sodium tamari, and a pinch of five-spice powder. The tamari adds a rich umami depth, though you should reduce the added salt in the recipe to compensate. Because tamari contains sugars, keep a close eye on the oven during the last five minutes to prevent scorching.
Don’t overlook the potential for sweet applications. Roasted chickpeas can serve as a high-protein alternative to sugary cereal or granola. Toss your chickpeas in a neutral oil like coconut or grapeseed, and season with cinnamon, nutmeg, and a tiny drizzle of maple syrup. The sugars in the syrup will create a brittle, candy-like shell. These are particularly effective when paired with vegan yogurt or as a topping for a warm bowl of morning oatmeal, providing a textural contrast that keeps the meal interesting until the last bite.
Strategic Meal Prepping and Integration
The true power of this recipe lies in its ability to act as a “protein crouton” for a variety of dishes. To maximize efficiency, batch-roast three to four cans of chickpeas on a Sunday afternoon. While the existing article mentions storage, the key to maintaining their utility is how you re-incorporate them into meals. For salads, keep the chickpeas in a separate container and only add them seconds before eating. If they sit in a dressed salad for even ten minutes, they will absorb the vinaigrette and lose their signature snap.
Think beyond the salad bowl. These roasted gems are an incredible addition to creamy soups, such as butternut squash or roasted tomato basil. Instead of bread-based croutons that become soggy and offer little nutritional value, a handful of crispy chickpeas adds fiber, protein, and a nutty flavor that complements the sweetness of root vegetables. You can also use them as a filling for “taco” night. Mash about 20% of the roasted chickpeas with a fork and leave the rest whole; this creates a varied texture that mimics the mouthfeel of traditional fillings while providing a much higher nutrient density.
For those who follow a “grain bowl” philosophy, the chickpeas serve as the anchor. Build your bowl with a base of quinoa or farro, add a generous portion of steamed kale or massaged spinach, and top with the chickpeas. To tie it all together, use the “spice dust” left over on the baking sheet. Scrape those concentrated bits of toasted spices and oil into a small jar of tahini and lemon juice to create a cohesive dressing that echoes the flavors of your protein source. This ensures that no part of the seasoning goes to waste and that every component of the bowl feels intentional.
The Bioavailability and Synergy of Plant Proteins
While the FAQ correctly notes that chickpeas are not a complete protein, understanding how to pair them can significantly enhance your body’s ability to utilize their nutrients. The concept of “protein complementing” doesn’t necessarily require eating different proteins in the same mouthful, but doing so can optimize your amino acid profile throughout the day. Chickpeas are low in the essential amino acid methionine but high in lysine. Grains like brown rice, corn, and whole wheat are the opposite—low in lysine but high in methionine. By serving your roasted chickpeas alongside a slice of sprouted grain toast or over a bed of wild rice, you create a complete protein profile comparable to animal sources.
Furthermore, chickpeas are an excellent source of non-heme iron, which is the type of iron found in plants. Non-heme iron is more difficult for the body to absorb than the heme iron found in meat. However, you can significantly boost absorption by pairing your chickpeas with a source of Vitamin C. The citric acid in a squeeze of fresh lime, the ascorbic acid in bell peppers, or even a side of broccoli creates a chemical environment that makes the iron more bioavailable. This is particularly important for plant-based athletes or those prone to anemia who rely on legumes for their mineral intake.
The fiber content in chickpeas also plays a role in metabolic health beyond simple digestion. The specific type of fiber found in chickpeas—mostly insoluble—acts as a prebiotic, feeding the beneficial bacteria in your gut microbiome. As these bacteria ferment the fiber, they produce short-chain fatty acids (SCFAs) like butyrate, which have been linked to reduced inflammation and improved colon health. When you roast the chickpeas, you aren’t just making a snack; you are providing a slow-release fuel source for your entire digestive ecosystem, which in turn supports immune function and mood regulation.
Alternative Cooking Methods: Air Fryers and Stovetops
While the oven is the traditional tool for roasting, the air fryer has revolutionized the chickpea game for those seeking maximum efficiency. An air fryer is essentially a high-powered convection oven that circulates air much more rapidly. To adapt this recipe for an air fryer, lower the temperature to 375°F and reduce the cooking time to 12-15 minutes. Because the basket allows air to reach the chickpeas from all angles, you’ll find they get even crispier than they do on a flat baking sheet. The key is to shake the basket every five minutes to ensure even browning. This method is particularly useful for small batches or when you don’t want to heat up the entire kitchen during the summer months.
If you prefer a chickpea that is crispy on the outside but creamy and tender on the inside, the stovetop pan-searing method is superior. Heat a cast-iron skillet over medium-high heat with a tablespoon of avocado oil (which has a higher smoke point than olive oil). Add the seasoned chickpeas and cook, tossing frequently, for about 8 to 10 minutes. This flash-frying technique blisters the skin and creates a savory crust while the interior remains moist. This version is less like a shelf-stable snack and more like a warm, gourmet component for a Mediterranean mezze platter, paired with cool tzatziki or a spicy muhammara dip.
For those starting with dried chickpeas rather than canned, a pressure cooker (like an Instant Pot) is a game-changer. Cooking dried beans from scratch allows you to control the texture and avoid the metallic aftertaste sometimes associated with canning. Soak the beans for at least 8 hours, then pressure cook for 12 minutes with a natural release. The beans should be “al dente”—firm enough to hold their shape but cooked through. Once cooked, proceed with the roasting instructions. The result is a noticeably creamier interior and a more robust, nutty flavor profile that canned varieties simply cannot match.
Troubleshooting and Storage Hacks
One common frustration with roasted chickpeas is the “explosion” factor—where the beans pop in the oven like popcorn. This usually happens when the chickpeas haven’t been dried thoroughly enough or when the temperature is too high too fast. The steam builds up inside the skin and has nowhere to go. If you hear popping, simply turn the oven down by 25 degrees and ensure you’ve patted them dry with a lint-free cloth. Another common issue is the chickpeas becoming chewy after storage. This is caused by humidity. If you live in a humid climate, consider adding a food-grade silica gel packet to your storage container to wick away excess moisture.
If your chickpeas do go soft, don’t throw them away. You can easily re-crisp them by tossing them back into a hot oven or air fryer for 3 to 5 minutes. They will regain their crunch almost instantly. Alternatively, if you find you’ve over-salted a batch, you can pulse them in a food processor to create a “protein dust.” This savory crumble can be used as a breading for tofu or as a salty, crunchy topping for pasta dishes, ensuring that even a culinary mishap contributes to your plant-based protein goals.
For the ultimate storage hack, consider the container material. Glass jars are far superior to plastic bags for maintaining crunch. Plastic is slightly porous and allows more airflow and moisture exchange than non-porous glass. A tightly sealed Mason jar kept in a cool, dark pantry is the gold standard for keeping your chickpeas snack-ready for those mid-afternoon energy slumps. By understanding these small nuances of storage and preparation, you transform a simple bean into a reliable, high-performance staple of your healthy lifestyle.
FAQs About Chickpeas and Plant-Based Protein
- Are chickpeas a complete protein source?
- While chickpeas contain several essential amino acids, they are not considered a complete protein on their own. Pairing them with other protein sources like grains can ensure you get all the amino acids your body needs.
- How can I store leftover roasted chickpeas?
- Leftover roasted chickpeas can be stored in an airtight container at room temperature for up to four days. For the best texture, enjoy them within the first two days.
- What other dishes can I make with chickpeas?
- Chickpeas are incredibly versatile and can be used in a variety of dishes, including hummus, stews, curries, and salads.
- Are canned chickpeas as nutritious as dried ones?
- Both canned and dried chickpeas have similar nutritional profiles, but it’s important to look for canned options with no added salt or preservatives.
- Can chickpeas help with weight loss?
- Yes, chickpeas can be a great addition to a weight loss diet due to their high fiber content, which can help you feel full and satisfied.
Embrace the simplicity and nutrition of chickpeas with this easy recipe, and make your plant-based protein dreams a reality!
Related posts:
 High-Protein Foods That Pack a Serious Nutritional Punch
 Chickpea Rice Is Here to Replace Your Grain Game
 Beyond Breakfast: The Plant-Based Sausage That’s Changing the Morning Game
 Chickpea Products Are Having a Moment and Here’s Why
 Managing Fiber Intake with IBS
 15-Minute Dairy-Free Dinner Ideas
 Creative Chickpea Recipe Collection
 Fiber for Healthy Aging: Nourishing Your Body as You Grow Older