
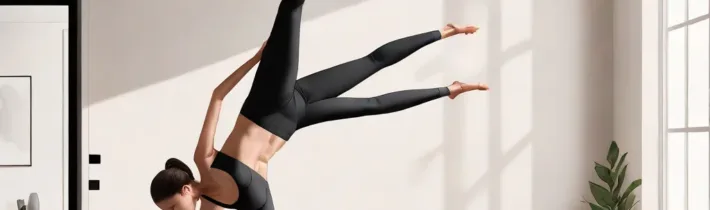
Turning a living room into a personal stretch studio is easier than most people think. A blank wall becomes a versatile prop that supports alignment, adds resistance, and gives you a reference point for depth. With a few square feet of clear floor and a willingness to experiment, you can build a daily mobility habit that fits into a busy schedule without any equipment.
Why Use the Wall for Stretching?
The wall offers three unique advantages. First, it provides a stable surface that eliminates wobble, letting you focus on the stretch rather than balance. Second, it creates a measurable endpoint; you can see exactly how far your hand or foot travels, which makes progress tangible. Third, the vertical plane encourages proper spinal alignment because the body naturally stacks against a flat surface. Research on proprioception shows that fixed reference points improve joint position sense, so each session can sharpen body awareness over time.
Preparing Your Space Safely
Clear a corridor at least six feet wide and eight feet long. Remove rugs that slide, and place a thin yoga mat or folded towel for cushioning under the knees and hips. Keep a water bottle nearby and set a timer for each hold. If you have any recent injuries, consult a healthcare professional before trying deep wall stretches. A quick visual check: the wall should be free of nails, picture frames, or sharp corners that could catch clothing.
Essential Wall Stretch Moves for the Upper Body
Start with the chest opener. Stand facing the wall, place the forearms on the surface at shoulder height, and step back until you feel a gentle stretch across the pectorals. Hold for 30 seconds, breathing evenly. Next, the shoulder flexion stretch: face away from the wall, extend one arm overhead, and press the palm flat against the surface. Lean forward slightly to deepen the stretch in the latissimus dorsi and anterior deltoid. Repeat on the other side. For the thoracic rotation, stand sideways with the hip touching the wall, place the opposite hand on the wall at chest height, and rotate the torso away while keeping the hips square. Perform 8‑10 slow repetitions per side.
Lower‑Body Wall Stretches for Hips and Hamstrings
The classic hamstring stretch becomes more controlled with the wall. Sit with one leg extended, the sole of the foot pressing into the wall, and hinge at the hips toward the toes. Keep the spine long and avoid rounding. Hold 45 seconds, then switch legs. For the hip flexor release, kneel facing the wall with the back knee on the mat, the front foot flat on the floor, and the front shin pressing into the wall. Gently push the hips forward while maintaining an upright torso. This targets the iliopsoas and rectus femoris. A figure‑four variation adds a glute stretch: cross the ankle of the front leg over the opposite knee, press the crossed knee toward the wall, and lean forward.
Core and Spine Mobility Against the Wall
Wall planks build endurance while teaching neutral spine. Place forearms on the wall at shoulder height, step feet back until the body forms a straight line, and engage the abdominals. Hold 20‑30 seconds, then progress by moving feet farther away. The wall cat‑cow mobilizes the thoracic spine: start on hands and knees with the hands on the wall, inhale to arch the back (cow), exhale to round (cat). Perform 10 cycles, focusing on segmental movement. Finally, the standing spinal twist: stand with the back against the wall, feet hip‑width apart, rotate the torso to one side while keeping the hips anchored, and press the opposite hand into the wall for leverage. Hold 20 seconds each side.
Building a 15‑Minute Daily Routine
Combine the moves into a flowing sequence. Warm up with 2 minutes of marching in place and arm circles. Then follow this order: chest opener (30 s), shoulder flexion (30 s each side), thoracic rotation (8 reps each side), hamstring stretch (45 s each leg), hip flexor release (45 s each side), figure‑four glute stretch (30 s each side), wall plank (30 s), wall cat‑cow (10 cycles), standing spinal twist (20 s each side). Cool down with 1 minute of slow diaphragmatic breathing. Adjust hold times as flexibility improves, but keep the total session near 15 minutes to encourage consistency.
Progress Tracking and Variations
Use a simple spreadsheet or notebook. Record date, hold duration, perceived intensity on a 1‑10 scale, and any sensations. Over weeks you’ll notice longer holds and lower intensity ratings for the same stretch. To advance, increase the distance from the wall, add a light resistance band looped around the foot for hamstring work, or incorporate dynamic pulses (small bounces) at the end of each hold. For variety, try a wall‑supported pigeon pose or a wall‑assisted side bend.
Common Mistakes and How to Fix Them
Rushing into deep ranges before the muscles are warm leads to strain. Always start with the warm‑up. Rounding the lower back during hamstring stretches shifts load to the spine; keep a slight bend in the knee and hinge from the hips. Letting the shoulders creep toward the ears during wall planks reduces core engagement; actively draw the shoulder blades down. Holding the breath creates tension; synchronize breath with movement. Finally, neglecting the non‑dominant side creates asymmetry; always mirror each stretch.
Integrating Breathwork and Mindful Awareness Into Wall Stretching
Breath is the bridge between the nervous system and the musculoskeletal system. When you press a limb against the wall, the body receives a clear proprioceptive cue; pairing that cue with a deliberate inhale‑exhale cycle amplifies the relaxation response. Begin each hold with a slow nasal inhale lasting four counts, pause for one count, then exhale through the mouth for six counts. This 4‑1‑6 pattern activates the vagus nerve, reduces sympathetic tone, and allows the targeted tissue to lengthen with less protective guarding.
Use the wall as a tactile anchor for a body‑scan meditation. While in the chest opener, notice the pressure of the forearms on the surface, the subtle expansion of the rib cage, and any areas of tension that surface. Label each sensation without judgment — tightness, warmth, tingling — and return focus to the breath. Over weeks this practice sharpens interoceptive accuracy, making it easier to detect early signs of overstretch before they become painful.
For a deeper integration, try a “breath‑synchronized pulse” at the end of a static hold. After the prescribed time, keep the position and add tiny, rhythmical movements timed to the exhale: a micro‑rock of the pelvis in the hip‑flexor release, or a gentle press‑release of the palms in the shoulder flexion stretch. The pulses should be barely visible, serving only to encourage fluid exchange in the fascia without triggering a stretch reflex.
Tracking breath quality alongside hold duration adds a valuable data point. Note whether the breath remained smooth, became shallow, or required a pause. A trend toward smoother breathing at the same intensity signals improved tissue compliance and nervous‑system adaptation.
Finally, close each session with a minute of diaphragmatic breathing while standing tall against the wall, heels, sacrum, upper back, and head all making contact. This “wall‑aligned reset” reinforces the postural template you have just practiced and carries the calm state into the rest of your day.
Adapting Wall Stretches for Specific Populations: Seniors, Office Workers, and Athletes
Older adults often contend with reduced bone density, joint stiffness, and balance concerns. The wall eliminates the balance demand, but the intensity must be moderated. Shorten holds to 15‑20 seconds, increase the number of repetitions, and keep the range of motion within a comfortable zone. A folded towel behind the knee during the hamstring stretch reduces knee compression, and a small cushion under the hips in the hip‑flexor release lessens anterior pelvic tilt strain.
Office workers typically present with forward‑head posture, rounded shoulders, and tight hip flexors from prolonged sitting. Prioritize thoracic extension and scapular retraction drills: wall slides (arms overhead, elbows bent 90°, sliding up and down the wall) and wall angels (arms in a “W” to “Y” pattern) directly counteract the desk‑induced kyphosis. Pair these with a standing hip‑flexor release where the back knee rests on a chair instead of the floor, allowing a more upright torso and less lumbar load.
Athletes benefit from dynamic, sport‑specific variations. A sprinter can use the wall for a “wall‑drive” drill: from a staggered stance, drive the front knee toward the wall while the rear foot pushes off, mimicking the acceleration phase. A swimmer gains from a wall‑supported lat stretch with a slight torso rotation, replicating the reach phase of the stroke. In each case, keep the volume low (2‑3 sets of 8‑10 reps) and integrate the drills into the warm‑up rather than the cool‑down to prime the nervous system.
For individuals with hypertension, avoid prolonged inverted positions where the head is below the heart. All wall stretches in this guide keep the head at or above heart level, but monitor blood pressure response during the first few sessions. If dizziness occurs, reduce the angle of lean or shorten the hold.
Pregnant participants (with clearance) can use the wall for supported squats and pelvic tilts. Place a stability ball between the lower back and the wall, feet shoulder‑width, and perform slow squats to 90°. The ball provides lumbar support and encourages optimal fetal positioning while the wall guarantees alignment.
Using Props and Accessories to Expand the Wall Studio
A thin yoga mat is the baseline, but a few inexpensive props multiply the exercise repertoire. A yoga block placed under the hand in the thoracic rotation raises the contact point, allowing a deeper twist without compromising shoulder integrity. A strap looped around the foot during the hamstring stretch lets you maintain a neutral spine while gently pulling the toes toward you, useful when flexibility limits the reach.
Resistance bands anchored to the wall add a controllable load. Loop a light band around the distal thigh for a resisted hip‑flexor release: as you press the hips forward, the band pulls the femur posteriorly, engaging the gluteus maximus eccentrically. For the chest opener, hold the band ends in each hand and press the forearms into the wall; the band’s tension encourages scapular protraction control.
A small massage ball or lacrosse ball pinned between the wall and the upper trapezius creates a self‑myofascial release station. Lean into the ball, locate a tender spot, and hold for 30‑60 seconds while breathing. This can be done before the upper‑body sequence to reduce protective tone and improve the quality of subsequent stretches.
Foam rollers positioned vertically against the wall support the spine during a “wall‑supported cat‑cow” where the hands rest on the roller instead of the floor. The roller’s instability forces deeper core activation and provides a gentle thoracic mobilization as the spine rolls over the cylinder.
Storage solutions keep the space tidy and inviting. A wall‑mounted rack for bands, a hook for the strap, and a shallow shelf for blocks turn the corner into a permanent micro‑studio. Visual cues — like a printed mobility calendar on the wall — reinforce habit formation and make the area feel purposeful rather than ad‑hoc.
Programming Periodized Mobility Cycles for Long‑Term Progress
Mobility, like strength, responds to systematic variation. Organize training into four‑week mesocycles: a “foundation” week emphasizing frequency (daily 10‑minute sessions, low intensity), a “development” week adding load (bands, longer holds), a “peak” week introducing dynamic flows (wall‑supported sun salutations, controlled articular rotations), and a “deload” week returning to gentle breathing and short holds. This wave prevents overuse and consolidates gains.
Within each week, alternate focus areas: Day 1 upper‑body, Day 2 lower‑body, Day 3 spine and core, Day 4 full‑body integration, Day 5 active recovery (foam rolling, breathwork), Day 6 skill work (balance, coordination drills using the wall), Day 7 rest. The rotation ensures no single joint complex receives excessive daily stress while still providing daily stimulus.
Progressive overload can be quantified by three variables: distance from the wall, hold duration, and external resistance. Increase only one variable per week. For example, week 1: 30‑second chest opener at 30 cm from wall. Week 2: same distance, 40‑second hold. Week 3: move to 45 cm, back to 30‑second hold. This linear model is easy to track in a spreadsheet and reduces injury risk.
Periodically test a “benchmark stretch” — such as the wall‑supported hamstring stretch — using a goniometer or a smartphone app that measures joint angle. Record the angle at a standardized distance (e.g., heel 10 cm from wall). Improvements of 5‑10° over a mesocycle indicate true tissue adaptation rather than temporary neural inhibition.
Integrate mobility cycles with strength and conditioning periods. During a hypertrophy block, keep mobility volume moderate (2‑3 sessions per week) to avoid interference. In a deload or off‑season block, raise mobility frequency to daily, using the wall routine as the primary movement practice. This alignment respects the principle of specificity while preserving joint health.
Troubleshooting Plateaus and Customizing Range‑of‑Motion Measurements
Plateaus often stem from neural accommodation rather than structural limits. When a stretch feels stagnant for two weeks, introduce a “contract‑relax” (PNF) element: in the hamstring stretch, press the heel into the wall for five seconds (isometric contraction of the hamstrings), then relax and deepen the hinge on the exhale. The brief contraction triggers autogenic inhibition, allowing a few extra degrees of length.
Another lever is altering the stretch vector. For the shoulder flexion stretch, shift the hand laterally 10 cm while maintaining palm contact. This changes the line of pull on the latissimus and engages different fascicles. Rotate the torso slightly toward the stretching arm to bias the posterior capsule. Small angular adjustments can unlock new tissue layers without increasing overall intensity.
Custom measurement tools improve objectivity. A simple “wall‑distance ruler” — a tape measure affixed vertically — lets you note the exact distance from the wall to the fingertip or toe at end‑range. Record the distance weekly. A decreasing distance (i.e., you can stand closer) signals improved flexibility. For spinal rotation, mark the wall at shoulder height; note how far the opposite hand travels along the mark during the standing twist.
Address asymmetries by testing each side independently. If the right hamstring consistently measures 5 cm farther from the wall than the left, allocate an extra 15 seconds to the tighter side for three consecutive sessions, then reassess. This targeted approach prevents the dominant side from masking a deficit.
Finally, consider tissue quality. Chronic tightness may reflect fascial adhesions rather than muscle shortness. Incorporate a weekly “wall‑shear” session: using a massage ball against the wall, perform slow, sustained shear strokes along the IT band, thoracic paraspinals, and plantar fascia. Improved glide often translates to greater stretch tolerance in subsequent sessions.
Building a Sustainable Habit: Environment, Scheduling, and Technology Integration
Consistency outweighs intensity. Design the environment to reduce friction: keep the mat rolled out, props on the rack, and a water bottle on the shelf. A visual cue — such as a small chalkboard with the day’s focus written in bold — signals the brain that the space is ready for practice.
Anchor the routine to an existing habit. If you brew coffee each morning, place the mat beside the kitchen counter and perform the 15‑minute sequence while the coffee steeps. The temporal link (coffee → stretch) leverages habit stacking, making the new behavior automatic within a few weeks.
Use a timer app with interval presets (e.g., 30 s work, 10 s transition) to eliminate decision fatigue. Many free apps allow custom interval sets; program the exact sequence from the article so the phone guides you through each move, freeing mental bandwidth for breath and sensation.
Track adherence with a habit‑tracker calendar. Mark each completed session with a green dot; a streak of 21 days creates psychological momentum. If a day is missed, note the reason (travel, fatigue, schedule conflict) and plan a “make‑up” micro‑session (5 minutes) later that day to preserve the streak.
Leverage community accountability. Share a weekly progress photo of your wall‑distance ruler on a private group or with a training partner. Positive feedback loops reinforce identity as a “mobile mover” and provide external motivation on low‑energy days.
Periodically refresh the routine to avoid monotony. Every month, swap one static hold for a dynamic flow (e.g., replace the static chest opener with a wall‑supported “thread‑the‑needle” movement). Novelty stimulates dopaminergic pathways, making the practice feel rewarding rather than obligatory.
FAQ
Can I do these stretches if I have limited wall space?
Yes. A single clear wall segment about four feet wide is enough for most moves. You can also use a sturdy door frame for the upper‑body stretches.
How often should I practice to see results?
Daily practice yields the fastest gains in mobility, but three to four sessions per week still produce noticeable improvements within a month.
Are wall stretches safe during pregnancy?
Many wall‑supported stretches are gentle and can be adapted, but always get clearance from your prenatal care provider before starting a new routine.
What if I feel sharp pain instead of a stretch?
Sharp pain signals that the joint or tissue is being overloaded. Stop immediately, reduce the range, and consult a qualified therapist if the sensation persists.
Can I combine wall stretches with strength training?
Absolutely. Use the wall routine as a mobility warm‑up before lifting, or as a cool‑down to restore length after a workout.
Related posts:
 Lindsay Ellingson’s Stress-Relieving Yoga Move
 Nick Jonas’ Morning Stretch Routine Is Surprisingly Doable
 Art of Wall Hangings: Maryanne Moodie’s Instagram Guide
 Desk Yoga for Back Pain Relief
 Stretches to Relieve Foot Pain
 Managing Hip Pain from Sitting
 Perfect Your Glute Bridge
 How to Stretch Safely Without Going Too Far