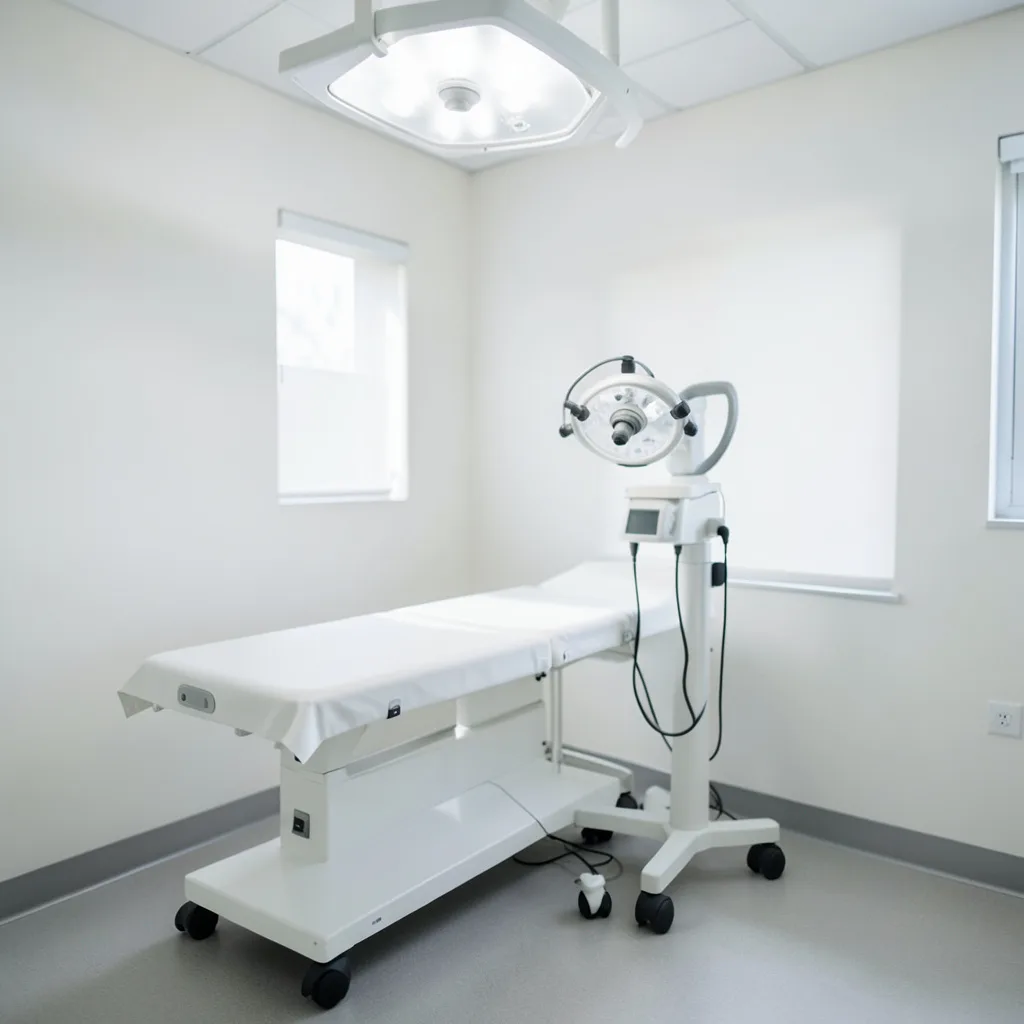
Colposcopy is a diagnostic tool used to examine the cervix, vagina, and vulva for abnormal cells that could develop into cervical cancer. While the word may sound intimidating, the procedure is generally quick, minimally invasive, and performed in an outpatient setting. Understanding what happens before, during, and after a colposcopy can reduce anxiety, help you prepare effectively, and ensure you follow the right steps for optimal care.
Why a Colposcopy May Be Recommended
Healthcare providers typically suggest a colposcopy after one of the following screening results:
- Abnormal Pap test findings (e.g., ASC-US, LSIL, HSIL).
- Positive high‑risk human papillomavirus (HPV) test.
- Visible lesions on the cervix during a routine pelvic exam.
The goal is to obtain a clearer view of the tissue and, if necessary, collect targeted biopsies. Early detection of precancerous changes allows for timely treatment, which can prevent progression to invasive cancer.
Preparing for Your Appointment
Good preparation helps the procedure run smoothly and makes you feel more in control. Follow these practical steps:
- Schedule wisely: Choose a time when you are not on your period, as blood can obscure the view. Mid‑cycle (about a week after your period ends) is ideal.
- Discuss medications: Inform your provider about any blood‑thinning drugs (e.g., aspirin, warfarin) or recent use of vaginal medications. You may be asked to pause certain products for 24‑48 hours.
- Plan for comfort: Arrange transportation home, especially if you anticipate feeling sore afterward. Many women find it helpful to have a friend or family member accompany them.
- Wear appropriate clothing: Choose loose, comfortable clothing that is easy to remove, such as a simple skirt or a pair of shorts.
- Bring a list of questions: Write down any concerns about the procedure, possible pain, or follow‑up steps. Having a checklist ensures you cover everything during the visit.
What Happens During the Procedure
A colposcopy typically lasts 10‑20 minutes. The process includes several distinct stages:
- Positioning: You will lie on an exam table with your feet placed in stirrups, similar to a standard pelvic exam.
- Speculum insertion: The clinician gently inserts a speculum to keep the vaginal walls open and expose the cervix.
- Application of a solution: A dilute vinegar (acetic acid) or a 5% iodine solution is applied to the cervix. These agents temporarily highlight abnormal cells, which appear white or darker than the surrounding tissue.
- Colposcopic examination: The colposcope, a lighted magnifying instrument, is positioned a short distance from the vulva. You will not feel the colposcope itself; it simply provides the clinician with a detailed view on a monitor.
- Targeted biopsies (if needed): If the clinician identifies suspicious areas, they will use a small punch tool to collect one or more tissue samples. The biopsies are usually less than 2 mm in size and cause minimal discomfort.
- Endocervical curettage (optional): In some cases, a tiny brush is used to sample cells from the canal inside the cervix. This step is decided based on the visual findings and the initial screening results.
Throughout the procedure, you can ask the clinician to pause or explain what they are seeing. Communication helps keep anxiety low and ensures you understand each step.
Managing Discomfort and Pain
Most women describe the sensation as a mild pinch or cramping, comparable to a Pap test. Here are evidence‑based tips to keep discomfort to a minimum:
- Deep breathing: Slow, diaphragmatic breaths can relax the pelvic muscles.
- Warm compress: Applying a warm (not hot) compress to the lower abdomen after the exam can ease any lingering cramping.
- Over‑the‑counter pain relievers: If you anticipate soreness, taking ibuprofen (200‑400 mg) 30 minutes before the appointment is often effective. Check with your provider if you have contraindications.
- Distraction techniques: Listening to calming music or focusing on a point on the ceiling can shift attention away from the procedure.
If you experience significant pain during the exam, let the clinician know immediately. They can pause, adjust the speculum, or apply a topical anesthetic if appropriate.
Understanding Biopsy Results
Biopsy samples are sent to a pathology lab, where a specialist examines the cells under a microscope. Typical reporting categories include:
- Negative/Normal: No abnormal cells detected.
- CIN 1 (low‑grade): Mild dysplasia, often monitored with repeat screening rather than immediate treatment.
- CIN 2 or CIN 3 (high‑grade): More pronounced cellular changes that may require treatment such as excisional procedures (e.g., LEEP, cold‑knife conization).
- Invasive cancer: Rare, but if identified, a multidisciplinary oncology team will outline the next steps.
Results are usually available within 1‑2 weeks. Your provider will discuss the findings in person or via a secure patient portal, explaining what each result means for your health and next steps.
Post‑Procedure Care and Follow‑Up
After a colposcopy, most women can resume normal activities the same day. However, there are a few practical considerations to keep in mind:
- Bleeding: Light spotting is common for up to 48 hours, especially if biopsies were taken. Use a panty liner rather than a tampon for the first 24 hours to avoid disrupting the healing tissue.
- Sexual activity: Refrain from intercourse, tampon use, or douching for 24‑48 hours if biopsies were performed. This reduces infection risk.
- Hygiene: Gently wash the external genital area with warm water. Avoid scented soaps or sprays for a few days.
- Signs of infection: Contact your provider if you notice increasing pain, foul discharge, fever, or heavy bleeding.
- Follow‑up appointments: Depending on the pathology report, you may need a repeat colposcopy, a treatment procedure, or simply routine screening at the recommended interval.
Emotional Aspects and Support Resources
Even when the medical aspects are clear, the emotional response to a colposcopy can be significant. Here are strategies to address anxiety and uncertainty:
- Normalize the experience: Remember that colposcopy is a routine follow‑up to a screening test. Millions of women undergo it each year without complications.
- Seek peer support: Online forums, local support groups, or patient advocacy organizations (e.g., the American Cervical Cancer Foundation) provide shared stories and coping tips.
- Professional counseling: If you find the anticipation or results overwhelming, a mental‑health professional can help process feelings and develop coping mechanisms.
- Mind‑body practices: Guided meditation, yoga, or journaling can reduce stress before and after the appointment.
Key Takeaways for a Successful Colposcopy Experience
Summarizing the most actionable points can help you feel prepared:
- Schedule the appointment mid‑cycle and avoid your period.
- Discuss any medications or recent vaginal products with your clinician.
- Bring a support person and arrange transportation home.
- Use deep‑breathing and distraction techniques to manage discomfort.
- Follow post‑procedure guidelines regarding bleeding, sexual activity, and hygiene.
- Stay informed about biopsy results and understand the possible next steps.
- Address emotional reactions by connecting with support resources.
Colposcopy for Specific Patient Populations
While the basic steps of a colposcopic exam are consistent, certain groups require tailored approaches to maximize safety and diagnostic yield. Below are three commonly encountered scenarios and practical recommendations for each.
- Pregnant patients: Hormonal changes during pregnancy can cause the transformation zone to appear more ectocervical, which may obscure lesions. Clinicians should use a lower concentration of acetic acid (2‑3%) to reduce irritation and avoid endocervical curettage unless absolutely necessary. Biopsies are generally safe after the first trimester, but the decision must weigh the risk of bleeding against the benefit of early detection. If a high‑grade lesion is suspected, a multidisciplinary discussion with obstetrics and oncology is advisable.
- Adolescents and young adults: The cervical epithelium in this age group is often immature, resulting in a larger ectocervical transformation zone. This can lead to false‑positive visual changes. Providers should consider a watch‑ful‑waiting strategy for low‑grade abnormalities (e.g., ASC‑US with negative HPV) and reserve colposcopy for persistent high‑risk HPV or high‑grade cytology. When biopsies are taken, using a smaller punch (1 mm) can limit discomfort and scarring, which is particularly important for future fertility considerations.
- Post‑menopausal women: Atrophy of the vaginal and cervical tissues can make visualization challenging. Application of a mild estrogen cream 2‑3 days before the appointment can re‑epithelialize the area, improving image clarity. Additionally, a higher magnification setting (up to 20×) may be required to discern subtle acetowhite changes. If the transformation zone is entirely within the endocervical canal, a combined colposcopy‑directed endocervical sampling (e.g., a cytobrush) is often the most reliable method.
Each of these populations also benefits from a pre‑visit counseling session that explains the rationale for any modifications, thereby reducing anxiety and improving compliance.
When Colposcopy Is Not the First Choice: Alternative Diagnostic Tools
In some clinical pathways, other technologies can either complement or replace colposcopy. Understanding their indications helps avoid unnecessary procedures.
- HPV genotyping: High‑risk HPV types 16 and 18 carry a substantially higher probability of progression to cancer. When these types are identified, some guidelines allow direct referral to treatment (e.g., loop electrosurgical excision) without an interim colposcopy, especially if the patient has a prior history of high‑grade disease.
- Automated visual evaluation (AVE) with artificial intelligence: Emerging AI platforms analyze cervical images captured with a standard digital camera. Early studies suggest comparable sensitivity to colposcopy for detecting CIN 2+. These tools are useful in low‑resource settings where a trained colposcopist is unavailable.
- Trans‑vaginal ultrasound with Doppler: While not a replacement for colposcopy, ultrasound can identify invasive lesions that extend beyond the cervix, prompting a more aggressive work‑up.
- Self‑collected HPV testing: For women who cannot attend a clinic promptly, self‑sampling kits provide a reliable method to detect high‑risk HPV. Positive results can be triaged directly to colposcopy, streamlining the diagnostic cascade.
Clinicians should document the reason for selecting an alternative pathway, including patient preferences, resource constraints, and risk stratification scores.
Navigating Insurance, Costs, and Access Barriers
Financial and logistical obstacles can delay diagnosis, especially for underserved populations. Below is a step‑by‑step guide to help patients and providers mitigate these challenges.
- Verify coverage before the appointment: Most private insurers and Medicare cover colposcopy when it follows an abnormal Pap or HPV test. However, prior authorization may be required. Encourage patients to call their insurer with the procedure code (CPT 57452) and ask for a written confirmation.
- Utilize sliding‑scale clinics: Community health centers often offer colposcopy on a reduced fee schedule based on household income. Provide a list of local centers and the documentation needed for eligibility.
- Explore patient assistance programs: Pharmaceutical companies that produce acetic acid solutions or iodine stains sometimes fund outreach programs. Contact the manufacturer’s patient‑support line for details.
- Consider tele‑triage for pre‑visit counseling: A brief video call can reduce the number of in‑person visits, saving travel costs and time off work. Document the telehealth encounter in the same manner as an office visit to satisfy billing requirements.
- Apply for Medicaid waivers where applicable: Some states have waivers that cover preventive services for undocumented immigrants. Social workers can assist with the application process.
By proactively addressing these factors, providers can decrease no‑show rates and improve overall health outcomes.
Optimizing the Clinical Setting: Communication and Comfort Strategies
Even a technically flawless colposcopy can feel distressing if the environment is not patient‑centered. The following checklist helps staff create a supportive atmosphere.
- Pre‑room briefing: Before the patient enters, the nurse should review the procedure steps aloud, confirm the presence of a support person, and ask about any recent changes in health (e.g., new allergies).
- Temperature control: Keep the exam room at a comfortable 22‑24 °C. Cold speculum blades can cause involuntary muscle tightening; warming the speculum under warm water for 30 seconds reduces this effect.
- Visual distraction: Install a ceiling-mounted monitor displaying calming nature scenes or a simple color gradient. Studies show that visual distraction can lower reported pain scores by up to 15%.
- Audio options: Offer headphones with a selection of guided meditations, podcasts, or white‑noise tracks. Allow the patient to control volume to maintain a sense of agency.
- Language services: For non‑English speakers, arrange for a certified medical interpreter before the appointment. Provide written consent forms in the patient’s preferred language to avoid misunderstandings.
- Post‑procedure debrief: After the exam, spend 3‑5 minutes summarizing what was observed, what samples were taken, and the anticipated timeline for results. Hand out a one‑page summary with contact numbers for urgent concerns.
Implementing these measures has been linked to higher patient satisfaction scores and lower anxiety levels measured by the State‑Trait Anxiety Inventory (STAI).
Technical Mastery: Colposcope Settings, Image Capture, and Documentation
Accurate documentation is essential for longitudinal care and for medico‑legal protection. Mastery of the equipment goes beyond simply turning the knob.
- Light source calibration: Perform a weekly check of the xenon or LED intensity using a photometer. Aim for a consistent luminous flux of 400–500 lux at the cervical surface; fluctuations can alter the appearance of acetowhite lesions.
- Magnification strategy: Begin at 5× to locate the transformation zone, then increase to 15–20× for detailed assessment of suspicious areas. Record the magnification level in the image metadata.
- Digital image storage: Save raw files in DICOM format to preserve pixel integrity. Attach a brief annotation layer indicating the clock‑face location of each biopsy site (e.g., “12 o’clock, 3 mm from external os”).
- Video documentation: When possible, capture a short video loop (10‑15 seconds) while applying acetic acid. This provides a dynamic view of the whitening pattern, which can be reviewed by a second pathologist for consensus.
- Standardized reporting template: Use the Swede score or the International Federation for Cervical Pathology (IFCPC) terminology to describe findings. Include columns for lesion size, color, margin, and vascular pattern.
- Quality assurance audits: Quarterly, a senior colposcopist should review a random sample of 10% of stored images for consistency. Discrepancies trigger a brief retraining session.
Adhering to these technical protocols not only improves diagnostic accuracy but also facilitates research collaborations that rely on high‑quality visual data.
Post‑Biopsy Management: Algorithms for Follow‑Up and Treatment Options
After pathology results return, clinicians must decide between observation, repeat colposcopy, or definitive treatment. The following algorithm outlines evidence‑based pathways.
- Negative or CIN 1: Recommend repeat cytology and HPV testing in 12 months. If both remain negative, return to routine 3‑year screening.
- CIN 2: Offer two options: (a) conservative management with a 6‑month colposcopic check if the patient desires fertility preservation; or (b) immediate excisional treatment (LEEP) if she prefers definitive therapy. Discuss the 10‑15% risk of recurrence after LEEP.
- CIN 3 or AIS (adenocarcinoma in situ): Proceed with excisional procedures—either LEEP or cold‑knife conization—based on lesion size and desire for future pregnancy. For lesions >2 cm, a radical trachelectomy may be considered in specialized centers.
- Invasive carcinoma: Refer to a multidisciplinary tumor board within two weeks. Staging should include MRI of the pelvis and PET‑CT if nodal involvement is suspected.
Special considerations:
- Positive margins after LEEP: Perform a repeat conization within 4‑6 weeks to achieve clear margins, especially in women over 35.
- Immunocompromised patients (e.g., HIV‑positive): Shorten surveillance intervals to 6 months regardless of pathology because of higher progression rates.
- Pregnant women with CIN 2/3: Delay definitive treatment until the second trimester unless invasive cancer is suspected; meanwhile, schedule a colposcopy every 12 weeks to monitor progression.
Document the chosen pathway in the electronic health record, include patient consent, and schedule the next appointment before the patient leaves the office.
Emerging Research and Future Innovations in Cervical Assessment
The field of cervical diagnostics is evolving rapidly. Keeping abreast of upcoming technologies can help clinicians offer cutting‑edge care.
- Optical coherence tomography (OCT): This non‑invasive imaging modality provides cross‑sectional views of cervical epithelium at micrometer resolution. Early trials suggest OCT can differentiate CIN 2/3 from normal tissue without the need for biopsies.
- Multiplexed molecular markers: Panels that combine HPV DNA, mRNA, and host‑cell methylation patterns are being validated to predict which lesions will progress. Integration of these panels with colposcopic findings could create a risk‑adjusted management algorithm.
- Portable colposcopes with smartphone integration: Low‑cost devices equipped with Bluetooth connectivity allow images to be uploaded to cloud‑based AI analysis in real time. Pilot programs in rural clinics have demonstrated a 20% reduction in unnecessary referrals.
- Therapeutic vaccines: Clinical trials are evaluating prophylactic HPV vaccines as adjunctive therapy for high‑grade lesions, aiming to boost immune clearance after excision.
- Patient‑reported outcome measures (PROMs): New validated questionnaires capture pain, anxiety, and satisfaction specific to colposcopy. Incorporating PROMs into routine practice can guide quality‑improvement initiatives.
Clinicians are encouraged to participate in registries that track long‑term outcomes of these innovations, thereby contributing to the evidence base that will shape future guidelines.
Frequently Asked Questions
1. Is a colposcopy painful?
Most women report only mild discomfort, similar to a Pap smear. A brief pinch may occur when the speculum is inserted or when a biopsy is taken. Over‑the‑counter pain relievers and deep‑breathing techniques can further reduce any sensation.
2. How long does it take to get biopsy results?
Pathology labs typically return results within 7‑14 days. Your provider will contact you to discuss the findings and outline any recommended follow‑up.
3. Can I have sex after a colposcopy?
If no biopsies were performed, most clinicians allow intercourse the next day. After biopsies, it is safest to wait 24‑48 hours to let the tiny tissue samples begin healing and to lower infection risk.
4. Will I need a repeat colposcopy?
A repeat colposcopy is recommended if the pathology report shows high‑grade changes (CIN 2/3) that were not fully treated, or if the initial exam was inconclusive. Your provider will set a timeline based on your specific results.
5. What are the risks of a colposcopy?
Complications are rare. Possible side effects include light spotting, mild cramping, or temporary irritation at the biopsy site. Infection is uncommon but can occur; signs include fever, worsening pain, or foul discharge, which should prompt immediate medical attention.
Related posts:
 HPV Test: The New Alternative to Pap Smears
 Getting Vaccinated Without Parents’ Permission
 Auriculotherapy Explained
 The Surprising Tricks That Make Your Botox Last Way Longer
 HPV Vaccine Safety Guide
 New Tool Detects Melanoma Through Temperature
 HPV Vaccine Significantly Reduces Cervical Cancer Risk
 Sexual Health: Safe Sex Tips for STI Prevention