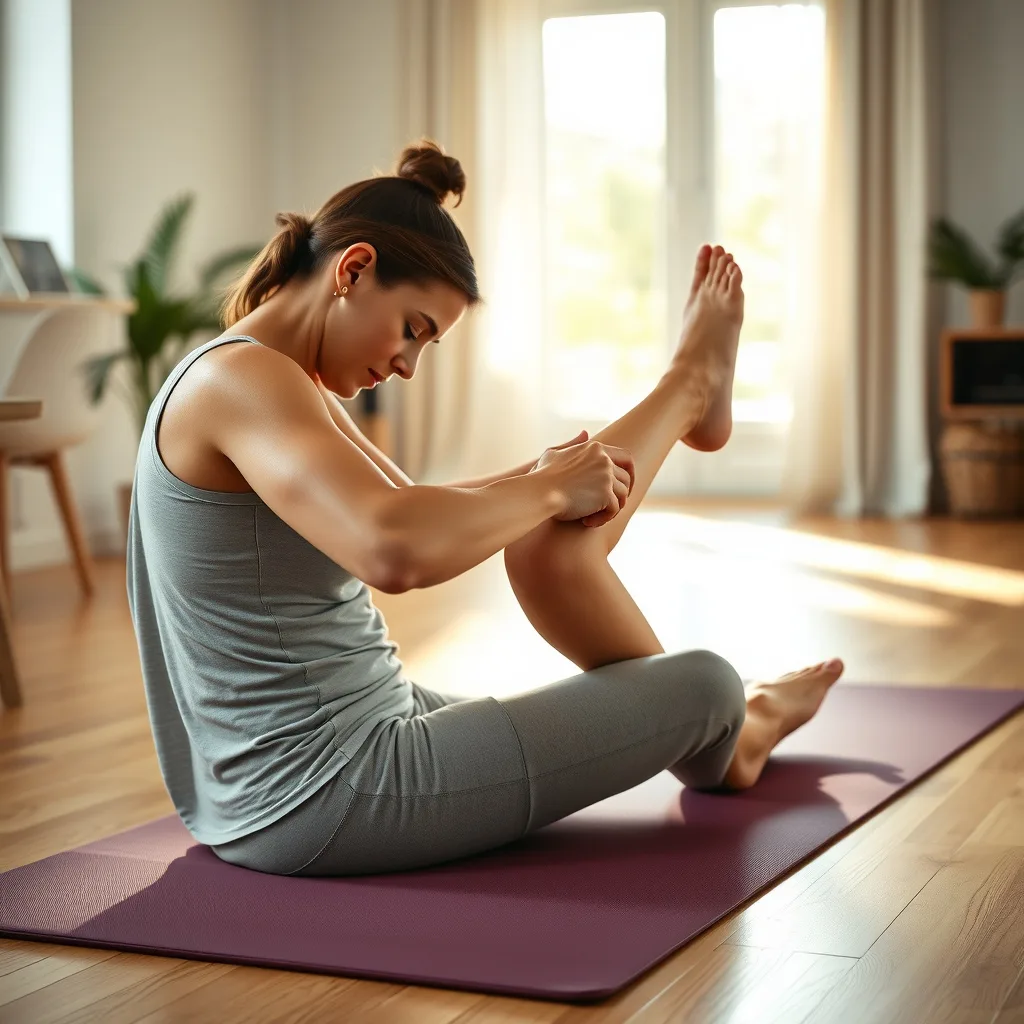
Using a rolling pin on sore muscles might sound like a kitchen hack, but the principle mirrors the science of self‑myofascial release that athletes have relied on for decades.
Key takeaways
- Use a solid wooden or marble rolling pin that is 12-18 inches long and 2-3 inches in diameter for effective pressure.
- Target major muscle groups like calves, hamstrings, and quads using slow, deliberate strokes to stimulate tissue relaxation.
- Incorporate diaphragmatic breathing to enhance parasympathetic nervous system response and deepen the effectiveness of muscle release.
- Avoid rolling directly over joints, bones, or inflamed areas, and stop immediately if you experience sharp or shooting pain.
The Science Behind Self‑Myofascial Release
Self‑myofascial release (SMR) works by applying sustained pressure to the fascia, the connective tissue that wraps muscles, nerves, and blood vessels. When fascia becomes tight or develops adhesions, it can restrict range of motion, create trigger points, and contribute to chronic soreness. Research shows that slow, deliberate pressure stimulates mechanoreceptors, encouraging the nervous system to relax the surrounding tissue and improve blood flow. The result is often a temporary increase in flexibility and a reduction in perceived stiffness.
Traditional tools such as foam rollers, massage balls, and handheld sticks all aim to deliver this pressure. A rolling pin, while not designed for therapy, provides a firm, cylindrical surface that can generate comparable force when used with body weight. The key is controlling the amount of pressure and the speed of the roll, just as you would with a purpose‑built roller.
Why a Rolling Pin Can Mimic a Foam Roller
A standard wooden or marble rolling pin typically measures 12 to 18 inches in length and 2 to 3 inches in diameter. This geometry creates a broad contact area that distributes pressure evenly across a muscle belly, similar to a medium‑density foam roller. Because the pin is solid, it does not compress under load, allowing you to target deeper layers of fascia without the “give” that a soft roller provides. Additionally, the smooth surface reduces friction, letting you glide over skin and clothing with minimal irritation.
For people who travel frequently or have limited storage, a rolling pin is a low‑cost, space‑saving alternative. It can be used on the floor, against a wall, or even on a sturdy table, giving you multiple angles of attack for different muscle groups.
Choosing the Right Rolling Pin
Not every rolling pin is created equal. A lightweight plastic pin may flex too much, while an overly heavy marble pin can be unwieldy for smaller frames. Look for a pin that meets these criteria:
- Length of at least 12 inches to span larger muscles such as the quadriceps or latissimus dorsi.
- Diameter between 2 and 3 inches for a comfortable grip and adequate surface area.
- Material that feels solid but not slippery; wood with a light food‑safe finish or polished marble works well.
- Weight between 1.5 and 3 pounds so you can control pressure without excessive effort.
If you already own a pin that is slightly shorter, you can still use it for isolated areas like calves or forearms. For full‑body sessions, a longer pin reduces the need to reposition constantly.
Basic Techniques for Major Muscle Groups
Calves: Sit on the floor with the pin under the lower leg, hands behind you for support. Roll from the Achilles tendon up to just below the knee, pausing on tender spots for 20‑30 seconds.
Hamstrings: Sit with the pin under the back of the thigh, lean forward slightly, and roll from the gluteal fold to the knee. Keep the foot relaxed to avoid overstretching the muscle while pressure is applied.
Quadriceps: Lie face‑down, place the pin under the front thigh, and use your forearms to control the roll from hip to knee. Turn the toes inward and outward to target the vastus medialis and lateralis respectively.
IT Band: Lie on your side with the pin under the outer thigh. Support your upper body on the forearm and roll from the hip down to just above the knee. This area can be sensitive; start with light pressure.
Upper Back (Thoracic Spine): Place the pin horizontally across the upper back while lying supine. Gently roll from the base of the neck to the mid‑back, allowing the spine to extend over the pin. This mobilizes the thoracic vertebrae and releases the rhomboids.
Lats and Posterior Shoulder: Position the pin vertically against a wall, lean the side of your torso into it, and roll from the armpit down to the lower rib cage. Adjust the angle to hit the latissimus dorsi and teres major.
Safety Tips and Contra‑indications
While SMR is generally safe, certain conditions warrant caution. Avoid rolling directly over joints, bony prominences, inflamed tissues, varicose veins, or recent injuries such as muscle tears or fractures. If you have a diagnosed clotting disorder, severe osteoporosis, or are pregnant, consult a healthcare professional before starting any self‑massage routine.
Listen to your body: a “good hurt” feels like a dull, spreading pressure that eases after 20‑30 seconds. Sharp, shooting pain, numbness, or tingling signals that you are compressing a nerve or vascular structure — stop immediately. Hydrate after a session to support tissue recovery, and limit each muscle group to 1‑2 minutes per day to prevent overstimulation.
Integrating Rolling Pin Work into Your Routine
Consistency beats intensity. A practical schedule might look like this:
- Pre‑workout (5‑10 minutes): Light rolling on the muscles you’ll train, focusing on dynamic, short strokes to increase blood flow without deep relaxation.
- Post‑workout (10‑15 minutes): Slower, longer holds on the same groups to aid recovery and reduce delayed‑onset muscle soreness.
- Rest days (15‑20 minutes): Full‑body session covering all major areas, using the pin as a mobility tool rather than a recovery tool.
Pair rolling with static stretching or mobility drills for synergistic effects. For example, after rolling the hip flexors, perform a low‑lunge stretch to cement the newly gained range.
Tracking Progress and Adjusting Pressure
Keep a simple log: date, muscle groups addressed, duration, and a subjective soreness rating (1‑10) before and after. Over weeks you should notice a downward trend in baseline soreness and an upward trend in mobility test scores (e.g., overhead squat depth, toe‑touch distance). If a region remains stubborn, experiment with a slightly heavier pin, a slower roll, or adding a brief isometric contraction (press the muscle into the pin for 5 seconds, then release) to enhance the neurological reset.
Advanced Rolling Pin Techniques: Pin‑and‑Stretch Cross‑Fiber and Oscillatory Mobilizations
Beyond the basic longitudinal roll the rolling pin can deliver three higher‑order techniques that target the nervous system and the sliding surfaces of fascia more precisely. Pin‑and‑stretch involves placing the pin on a tender spot, holding the pressure static for twenty to thirty seconds, then slowly moving the limb through its available range while the pin remains anchored. This creates a shear force that encourages collagen fibers to realign and reduces the protective guarding that the nervous system imposes on a restricted area. Cross‑fiber work is performed by angling the pin perpendicular to the muscle fibers and applying short, back‑and‑forth strokes of one to two centimeters. The goal is to break up adhesions that run transverse to the primary fiber direction, a pattern often seen in chronic overuse zones such as the iliotibial band or the forearm extensors. Oscillatory mobilizations use a rapid, low‑amplitude rocking motion (about two to three cycles per second) while maintaining a moderate compressive load. This vibration stimulates mechanoreceptors that favor parasympathetic tone and can be especially useful before a mobility drill to prime the tissue for greater excursion. Each technique should be introduced gradually; start with one minute per region and monitor for any sharp or radiating sensations.
Practical example: for a tight thoracic spine, place the pin horizontally across the upper back, locate a stiff segment, hold for thirty seconds, then gently extend the spine over the pin while keeping the pressure constant. Follow with cross‑fiber strokes along the paraspinal muscles, then finish with thirty seconds of oscillatory rocking to settle the nervous system. This sequence can be repeated on the contralateral side and integrated into a daily mobility flow.
Tailoring Rolling Pin Sessions for Specific Populations: Desk Workers Endurance Athletes and Older Adults
Desk workers typically present with a forward‑head posture, rounded shoulders, and tight hip flexors from prolonged sitting. A targeted session emphasizes the suboccipital region (using the pin against a wall), the pectoralis minor (pin placed vertically on the anterior chest while leaning into a doorway), and the anterior hip capsule (pin under the thigh while in a half‑kneeling position). Keep each hold to fifteen seconds and repeat three times per side to avoid overstimulating already sensitized tissue. Endurance athletes such as runners and cyclists accumulate repetitive strain in the calves, plantar fascia, and the lateral hip. Their protocol adds a plantar‑fascia specific drill: sit with the pin under the arch, apply body weight, and perform slow toe‑extension‑flexion cycles while the pin remains stationary. This mobilizes the plantar aponeurosis and the intrinsic foot muscles. Older adults often have reduced tissue elasticity and a higher risk of bruising. Use a lighter wooden pin (around one and a half pounds), limit pressure to a comfortable dull ache, and incorporate longer rest intervals (forty‑five seconds between sets). Focus on the thoracic spine, the gluteal region, and the calf complex to support gait efficiency and reduce fall risk.
For each group, schedule sessions three to four times per week, preferably after a light warm‑up such as brisk walking or dynamic stretching. Track subjective comfort on a ten‑point scale and adjust pin weight or session length accordingly.
Integrating Breathwork and Nervous System Regulation with Rolling Pin Work
The autonomic state dramatically influences how fascia responds to mechanical input. Slow diaphragmatic breathing (four‑second inhale, six‑second exhale) shifts the balance toward parasympathetic dominance, lowering muscle spindle sensitivity and allowing deeper tissue release with less perceived pain. Begin each rolling pin session with two minutes of supine breathing, placing one hand on the abdomen to cue expansion. As you transition to a target area, maintain the breath rhythm; on each exhale, visualize the tissue softening under the pin. For pin‑and‑stretch holds, synchronize the stretch phase with a prolonged exhale, which facilitates a reflexive relaxation of the agonist muscle. Conversely, during oscillatory mobilizations a slightly faster breath cadence (three‑second inhale, three‑second exhale) can match the vibration frequency and enhance neuromuscular entrainment. Research on heart‑rate variability shows that consistent breath‑guided self‑myofascial release improves recovery markers such as cortisol reduction and sleep quality. Incorporate a brief post‑session breath reset (one minute of box breathing) to consolidate the parasympathetic shift before returning to high‑intensity activity.
Programming Rolling Pin Use Across Training Cycles: Periodization Warm‑Up vs Cool‑Down and Deload Weeks
Effective integration follows the same periodization principles that govern strength and conditioning. In a preparatory phase (four to six weeks) use the rolling pin primarily as a mobility primer: three to five minutes of light, dynamic rolls on the muscles slated for that day’s workout. Keep pressure low (thirty to forty percent of perceived maximum) and focus on increasing blood flow and joint lubrication. During the competition or peak phase, shift to post‑session recovery rolls: longer holds (forty‑five to sixty seconds) on the primary movers, emphasizing pin‑and‑stretch and cross‑fiber techniques to mitigate delayed‑onset soreness. In deload weeks, reduce total rolling volume by fifty percent and replace deep work with gentle oscillatory mobilizations and breath‑guided sessions. This prevents cumulative micro‑trauma and supports supercompensation. A sample weekly layout for a strength athlete might be: Monday heavy squat – pre‑workout dynamic rolls on quads and glutes; Tuesday upper‑body push – post‑workout deep rolls on pecs and lats; Wednesday active recovery – full‑body breath‑guided session; Thursday deadlift – pre‑workout dynamic rolls on hamstrings and erectors; Friday accessory – post‑workout deep rolls on calves and forearms; Saturday mobility flow – mixed techniques at low intensity; Sunday rest – optional light rolling for relaxation. Adjust the schedule based on soreness logs and performance metrics.
Addressing Common Myofascial Chains and Postural Patterns with a Rolling Pin
Thomas Myers’ Anatomy Trains model maps continuous fascial lines that span multiple joints. The rolling pin can be used to address these lines systematically rather than isolating single muscles. The Superficial Back Line runs from the plantar fascia up the calves, hamstrings, sacrotuberous ligament, erector spinae, and into the scalp. A continuous rolling sequence starts at the foot (pin under the arch), progresses to the calf, then the hamstring, and finishes with the thoracic spine roll described earlier. Perform each segment for thirty seconds, maintaining a steady breath. The Superficial Front Line includes the tibialis anterior, quadriceps, rectus abdominis, and sternocleidomastoid. Roll the anterior shin, then the quadriceps, followed by a gentle abdominal roll (pin placed horizontally across the lower abdomen while supine, knees bent) and finish with a suboccipital release against a wall. The Lateral Line covers the peroneals, IT band, tensor fasciae latae, obliques, and splenius capitis. A side‑lying sequence targeting the lateral thigh, then the lateral torso, and finally the neck side‑benders can improve side‑bending range and reduce unilateral tension. The Spiral Line weaves across the torso; a diagonal rolling pattern from the contralateral hip to the ipsilateral shoulder (pin angled across the trunk) can enhance rotational mobility for throwing athletes. When working a line, move proximally to distally or vice versa in a single session to promote fluid continuity.
Frequently Asked Questions
Can a rolling pin replace a foam roller entirely?
A rolling pin can cover most of the same territory, but foam rollers come in varied densities and textures that target specific needs such as deep tissue work or gentle mobilization. Having both gives you more options.
How often should I roll each muscle group?
Most guidelines suggest 1‑2 minutes per area, 3‑4 times per week. Daily rolling is fine for low‑intensity sessions, but avoid excessive pressure on the same spot day after day.
Is it normal to feel bruised after rolling?
Mild tenderness is common, especially when starting out. Visible bruising indicates too much force or a fragile capillary bed; reduce pressure and allow a day of rest before returning.
Can I use a rolling pin on my neck?
The cervical spine is delicate and houses vital nerves and vessels. Direct rolling on the neck is not recommended. Instead, use a softer tool or seek professional manual therapy for neck tension.
What if I don’t have a rolling pin but have a wine bottle?
A clean, empty wine bottle can serve a similar purpose, though its narrower diameter concentrates pressure more intensely. Use a towel over the bottle to diffuse the force and proceed with extra caution.
Related posts:
 5 Foam Roller Exercises That Will Make Your Muscles Feel Oh So Good
 Managing Hip Pain from Sitting
 Mastering the Pilates Roll-Up: Technique and Benefits
 Could Fascia Manipulation Be The Next Big Thing In Pain Relief?
 The *Best* Foam Roller Stretches for Lower Back Pain Relief
 Stretches to Relieve Foot Pain
 Desk Yoga for Back Pain Relief
 The Recovery Technique Physical Therapists Swear By for Muscle Pain