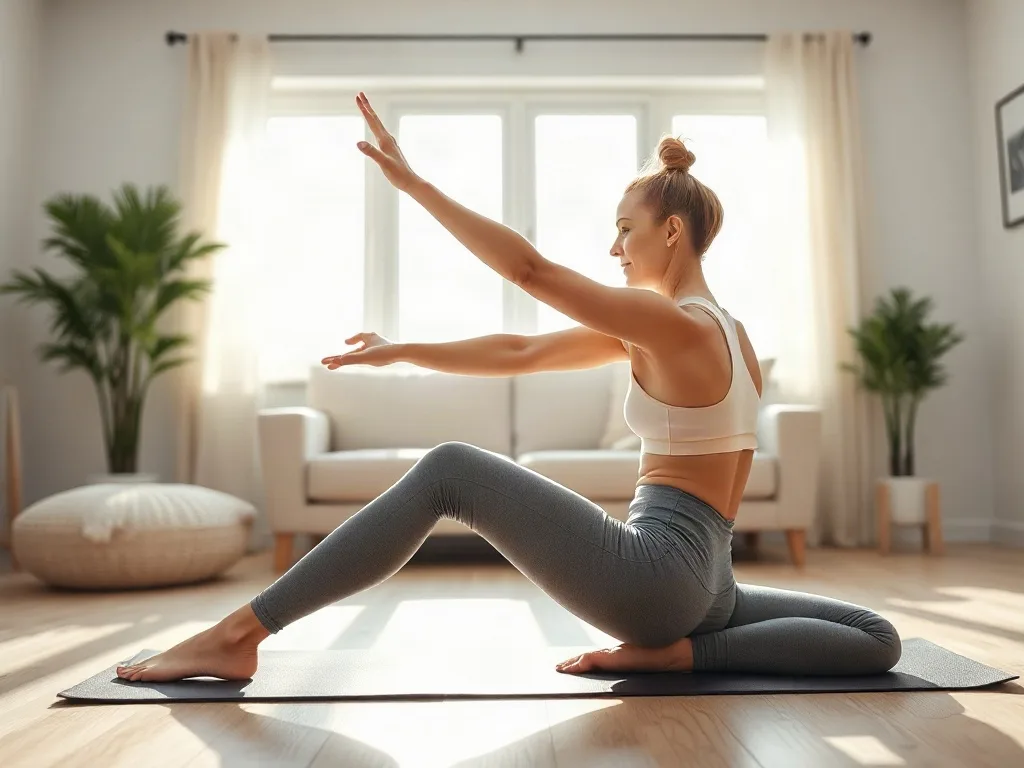
Lower back pain is one of the most common reasons people turn to yoga, yet many feel uncertain about which poses are truly supportive and which might aggravate discomfort. This guide walks you through a balanced sequence of safe, evidence‑informed yoga postures that target the muscles, joints, and fascia surrounding the lumbar spine. You’ll learn how to prepare your body, move mindfully through each pose, and create a sustainable routine that promotes relief without over‑promising quick fixes.
Key takeaways
- Warm up with gentle movements like cat-cow cycles before beginning your yoga practice to prepare spinal joints.
- Use props like blocks, bolsters, and blankets to modify poses, ensuring support and preventing excessive strain on the lumbar area.
- Focus on strengthening the core and glutes, which act as natural braces to protect the spine during daily movements.
- Prioritize consistency over intensity, aiming for short, regular sessions rather than occasional, strenuous workouts.
- Adapt your practice for specific conditions, such as using wall support for osteoporosis or avoiding flexion with spinal stenosis.
Understanding Lower Back Pain
The lumbar region (L1‑L5) bears the majority of the body’s weight and is involved in nearly every daily movement. Common contributors to discomfort include:
- Muscle imbalances – tight hip flexors, weak glutes, or an over‑active erector spinae.
- Postural strain – prolonged sitting, slouching, or improper lifting mechanics.
- Joint irritation – facet joint irritation or mild disc degeneration.
- Stress‑related tension – chronic stress can cause the back muscles to contract.
While yoga is not a substitute for professional medical care, gentle movement can improve circulation, increase range of motion, and support the muscles that protect the spine. The key is to choose poses that lengthen tight areas, activate stabilising muscles, and avoid excessive compression.
Preparing for a Safe Yoga Practice
Before you step onto the mat, take a few minutes to set up a safe environment:
- Consult a health professional if you have acute injury, severe pain, or a diagnosed condition such as spinal stenosis.
- Create a calm space with a non‑slippery surface, a yoga mat, and any props you might need (blocks, bolsters, blankets).
- Warm up gently with neck rolls, shoulder shrugs, and a few cat‑cow cycles to mobilise the spine.
- Focus on breath – inhale through the nose, exhale through the mouth, and aim for a steady, diaphragmatic rhythm.
These steps reduce the risk of strain and help you move from a place of awareness rather than reflexive tension.
Core Yoga Poses that Relieve Lower Back Discomfort
These foundational postures are gentle enough for beginners yet effective at releasing tension in the lumbar area.
Cat‑Cow (Marjaryasana‑Bitilasana)
Start on hands and knees, wrists under shoulders, knees under hips. On an inhale, drop the belly, lift the chest, and look forward (Cow). On an exhale, round the spine, tuck the chin, and engage the abdominal muscles (Cat). Perform 8‑10 cycles, moving with the breath. This fluid motion lubricates the spinal joints and awakens the core.
Child’s Pose (Balasana)
Kneel, sit back on the heels, and fold forward, extending arms in front or alongside the body. Allow the forehead to rest on the mat. Hold for 1‑3 minutes, breathing into the lower back. The pose gently stretches the erector spinae and reduces compression.
Sphinx Pose (Salamba Bhujangasana)
Lie on the belly, prop yourself up on the forearms, elbows under shoulders, and press the forearms into the mat. Keep the shoulders relaxed and the hips grounded. Stay for 30‑60 seconds, focusing on lengthening the front of the torso. This mild backbend strengthens the spinal extensors without excessive pressure.
Gentle Hip Openers to Reduce Tension
Hip tightness often pulls on the lower back, so opening the hips can indirectly alleviate lumbar strain.
Figure Four Stretch (Supine Piriformis Stretch)
Lie on your back, bend knees, and cross the right ankle over the left knee, forming a “4”. Thread the right hand through the opening and clasp the back of the left thigh. Gently pull the left leg toward your chest, feeling a stretch in the right hip and glute. Hold 45‑60 seconds, then switch sides.
Modified Pigeon Pose (Eka Pada Rajakapotasana)
From a tabletop position, slide the right knee forward toward the right wrist, keeping the right foot near the left hip. Extend the left leg straight back. If the hips feel tight, place a blanket under the right hip for support. Stay for 30‑90 seconds, breathing into the hips and lower back. This pose releases the deep gluteal muscles that often contribute to lumbar tension.
Strengthening the Core and Glutes
Strong core and gluteal muscles act as natural braces for the spine, reducing reliance on passive structures.
Bridge Pose (Setu Bandhasana)
Lie on your back, knees bent, feet hip‑width apart, and arms alongside the body. Press into the heels, lift the hips toward the ceiling, and engage the glutes. Keep the shoulders grounded. Hold for 30‑45 seconds, then lower slowly. Repeat 3‑5 times. This activation strengthens the posterior chain without compressing the lumbar discs.
Bird‑Dog (Dvipada Karyasana)
From tabletop, extend the right arm forward and the left leg back, keeping the spine neutral. Hold for 5‑7 breaths, then return to center and switch sides. Perform 8‑10 repetitions per side. The movement trains coordination between the core and stabilising muscles of the back.
Twists for Spinal Mobility
Rotational movements promote fluidity in the intervertebral joints and can relieve stiffness when performed gently.
Supine Spinal Twist (Supta Matsyendrasana)
Lie on your back, draw knees to the chest, then let them fall to the right while turning the head to the left. Extend the arms out to the sides, palms up. Hold for 1‑2 minutes, breathing into the left side of the back. Switch sides.
Seated Twist (Ardha Matsyendrasana – Modified)
Sit with legs extended, bend the right knee, and place the right foot outside the left thigh. Inhale, lengthen the spine; exhale, gently twist toward the right, using the left elbow against the right knee for leverage. Keep the spine long, not forced. Hold 30‑45 seconds, then repeat on the opposite side.
Restorative and Relaxation Poses
After active work, restorative postures allow the nervous system to reset, which can diminish chronic pain signals.
Legs‑Up‑the‑Wall (Viparita Karani)
Sit sideways next to a wall, swing the legs up, and rest the hips close to the wall. Place a folded blanket under the lower back if desired. Stay for 5‑10 minutes, focusing on slow, deep breaths. This pose reverses blood flow, eases lower back pressure, and promotes relaxation.
Reclining Bound Angle (Supta Baddha Konasana)
Lie on your back, bring the soles of the feet together, and let the knees fall open. Place a bolster or pillows under the knees for support. Keep the arms relaxed by the sides. Remain for 3‑5 minutes, breathing into the hips and lower back.
Building a Consistent Routine
Consistency matters more than intensity. Here are practical tips to integrate these poses into daily life:
- Start small: Commit to a 10‑minute session 3‑4 times per week. Gradually increase duration as comfort improves.
- Use a timer: Allocate specific time blocks for each pose (e.g., 1 minute per stretch) to avoid lingering too long in any one position.
- Track progress: Keep a simple journal noting which poses feel good, any changes in discomfort, and how you feel after each session.
- Pair with breathwork: Incorporate diaphragmatic breathing or a brief 5‑minute meditation at the end of each practice to enhance relaxation.
- Listen to your body: If a pose increases pain, back off, use props, or modify the angle. Pain that persists beyond mild discomfort should be evaluated by a health professional.
By weaving these movements into a regular habit, you support the muscles that protect the spine, improve mobility, and create a calmer mind‑body connection.
Adapting Yoga for Common Back‑Related Conditions
Back discomfort is not a one‑size‑fits‑all problem. The underlying cause—whether it is a bulging disc, sacroiliac joint irritation, spinal stenosis, or post‑partum strain—determines which movements are therapeutic and which could exacerbate the issue. Below are condition‑specific adaptations that keep the spine safe while still delivering the benefits of gentle movement.
Spinal Stenosis: Emphasising Extension with Minimal Load
People with narrowing of the spinal canal often feel relief when the lumbar curve is gently extended, but they must avoid positions that compress the vertebrae. A modified version of Locust Pose performed on a folded blanket can provide a mild extension without forcing the lower back. Lie prone, place a thin bolster under the chest, and keep the forearms relaxed at the sides. Lift the shoulders a few centimeters off the mat, feeling a stretch across the front of the torso. Hold for 20‑30 seconds and repeat three times. If any pinching sensation appears, lower the chest or switch to a seated back‑bend on a block.
Herniated Disc: Prioritising Neutral Spine and Controlled Rotation
When a disc protrusion is present, the goal is to maintain a neutral vertebral alignment while gently mobilising surrounding tissues. A safe entry point is the Supine Knee‑to‑Chest with Opposite Arm Reach. Lying on the back, draw the right knee toward the chest and extend the left arm overhead, keeping the shoulders flat. This creates a gentle stretch of the piriformis and gluteus medius without loading the disc. Switch sides after 30 seconds. For those who tolerate it, a very soft supine twist—using a strap around the thigh to guide the rotation—can improve facet joint mobility without excessive torque.
Sacroiliac (SI) Joint Dysfunction: Targeting the Deep Hip Rotators
The SI joint is a common pain generator for people who sit for long periods. Strengthening the deep external rotators (e.g., the piriformis) can stabilise the joint. A seated version of Clamshells works well on the mat. Sit on a folded blanket, knees bent, feet together. Place a resistance band around the knees and press the knees apart while keeping the feet together. Perform 2‑3 sets of 12‑15 repetitions, focusing on the sensation in the outer hips. If a band is unavailable, a towel can provide enough tactile feedback.
Pregnancy‑Related Lower Back Pain: Supporting the Growing Belly
During the second and third trimesters, the centre of gravity shifts forward, placing extra strain on the lumbar spine. Poses that open the chest and gently lengthen the front body while keeping the belly supported are ideal. Supported Wide‑Legged Forward Fold using a wall or a sturdy chair can relieve tension. Stand with feet wider than hip‑width, place hands on a chair back, and hinge at the hips, allowing the torso to rest on the support. The spine stays neutral, and the stretch targets the hamstrings and lower back without compressing the abdomen.
Older Adults with Osteoporosis: Avoiding Flexion‑Heavy Movements
Bone density concerns demand a cautious approach. Forward folds that involve deep spinal flexion should be replaced with standing balance and gentle extension. A Wall‑Supported Warrior I (Virabhadrasana I) with the back foot only lightly touching the wall offers a safe way to strengthen the legs and engage the lumbar extensors. Keep the spine long, avoid overarching, and hold for 20‑30 seconds per side.
Post‑Surgical Recovery: Re‑Establishing Core Awareness
After lumbar surgery, the primary objective is to rebuild the deep core muscles (transversus abdominis and multifidus) without loading the incision site. The Dead‑Bug progression performed on a firm mattress is highly effective. Lie on the back, arms extended toward the ceiling, knees bent at 90 degrees. Slowly lower the right arm overhead while extending the left leg, keeping the lower back pressed into the floor. Return to start and repeat on the opposite side. Begin with 5 repetitions per side, gradually increasing as comfort improves.
Integrating Props and Adaptive Equipment for Enhanced Support
Props are not merely accessories; they are essential tools that transform a generic posture into a personalised therapeutic experience. By strategically placing cushions, blocks, straps, and even everyday objects, practitioners can protect vulnerable structures while still achieving the intended stretch or strengthening effect.
Blocks as Mini‑Elevators
When a pose demands a higher hip level than the mat can provide, a yoga block placed under the sit‑bones creates a gentle hip‑opening angle without forcing the pelvis into excessive external rotation. For example, in a seated forward fold, a block under the knees reduces strain on the hamstrings and protects the lumbar spine from rounding.
Bolsters for Passive Lengthening
Long‑hold restorative poses benefit from a bolster that supports the torso, allowing the muscles to relax completely. In a supine twist, placing a bolster lengthwise under the spine encourages a natural curve, reducing the need for active engagement of the back muscles. This is especially helpful for individuals with chronic muscle guarding.
Straps for Alignment Cues
Yoga straps can guide limbs into proper alignment when flexibility is limited. In a seated hamstring stretch, loop a strap around the foot and gently pull the leg toward the torso, keeping the spine elongated. The strap provides a clear sense of distance and prevents the practitioner from rounding the back to reach the foot.
Folded Blankets for Joint Protection
Joint pain in the knees, wrists, or ankles can be mitigated by adding a folded blanket under the joint. In a modified Table‑Top position, a blanket under the wrists cushions the pressure points, making it easier to maintain a neutral spine while the shoulders stay relaxed.
Everyday Household Items as Substitutes
Not everyone owns a yoga prop library. A sturdy kitchen chair can replace a block for seated poses; a rolled‑up towel can act as a lumbar roll during supine work; a firm pillow can serve as a bolster for gentle backbends. The key is to ensure the item is stable, non‑slipping, and appropriate for the body’s dimensions.
Progressive Sequencing: From Gentle Warm‑up to Targeted Strength
A well‑structured sequence moves the practitioner from a state of calm awareness to a focused activation of the muscles that support the spine, and then back down to relaxation. The following three‑phase model can be adapted for any time constraint, from a 10‑minute micro‑session to a full 45‑minute practice.
Phase 1 – Mobilisation and Breath Synchronisation (3‑5 minutes)
Begin with rhythmic diaphragmatic breathing while seated on a cushion. Inhale to lengthen the spine, exhale to draw the belly button toward the spine, creating a subtle core engagement. Follow with gentle spinal waves: from a seated position, tilt the pelvis forward and backward, feeling the lumbar vertebrae glide. This prepares the nervous system and awakens proprioception.
Phase 2 – Targeted Activation and Lengthening (6‑12 minutes)
Choose three to four poses that alternately challenge stability and provide a stretch. A sample progression could be:
- Dynamic Bird‑Dog: From tabletop, extend opposite arm and leg, then return, repeating 8‑10 times per side. Focus on a neutral spine and avoid sagging in the low back.
- Standing Half‑Moon with Wall Support: Place one hand on a wall at hip height, lift the opposite leg, and open the chest. This challenges balance while reinforcing lumbar extension.
- Low Lunge with Quad Stretch: Step the right foot forward, lower the left knee, and tuck the left foot under the hip. Reach back with the left hand to gently pull the left foot toward the glutes, stretching the quadriceps and reducing anterior pelvic tilt.
- Supine Bridge with Iso‑Hold: Lift the hips, then pause for 10 seconds, engaging the glutes and hamstrings before lowering.
Phase 3 – Integration and Relaxation (2‑4 minutes)
Finish with a calming pose that allows the nervous system to reset. A seated forward fold over a bolster, or a reclining twist with a strap, works well. Encourage the practitioner to place one hand on the belly and notice the breath, reinforcing the mind‑body connection that underlies pain modulation.
Combining Yoga with Complementary Therapies (Foam Rolling, Breathwork, Mindfulness)
Yoga does not exist in isolation; it can be amplified when paired with other low‑impact modalities. The following integrations are evidence‑based and can be incorporated before, during, or after the yoga flow.
Foam Rolling for Myofascial Release
Rolling the thoracolumbar fascia before a session can increase tissue pliability, making subsequent stretches more effective. Spend 30‑60 seconds on each side of the erector spinae, moving slowly from the sacrum to the shoulder blades. Avoid rolling directly over the vertebral column; instead, focus on the muscles adjacent to the spine.
Box Breathing for Autonomic Regulation
Box breathing (inhale 4 seconds, hold 4, exhale 4, hold 4) can be practiced at the start of the session to activate the parasympathetic nervous system. This reduces the perception of pain by lowering cortisol levels and improving oxygen delivery to the muscles.
Guided Imagery for Pain Desensitisation
During a restorative pose, invite the practitioner to visualise a warm, soothing light traveling along the spine, gently loosening each vertebra. This mental rehearsal has been shown to diminish the central sensitisation that often underlies chronic back pain.
Progressive Muscle Relaxation (PMR) Post‑Practice
After the yoga flow, guide the practitioner through a brief PMR sequence: tense a muscle group for five seconds, then release completely. Start at the feet and work upward, ending with the lumbar region. The contrast between tension and release heightens body awareness and can reveal hidden areas of guarding.
Integrating Light Resistance Bands
For those who need a stronger stimulus, a light resistance band (5‑10 lb) can be looped around the thighs during Bridge Pose to increase glute activation. The added resistance forces the practitioner to engage the posterior chain more fully, promoting spinal stability.
Designing a Home or Workplace Routine that Fits Busy Schedules
Time constraints are often the biggest barrier to consistent practice. By breaking the full sequence into modular “micro‑chunks,” individuals can weave therapeutic movement into everyday activities without sacrificing productivity.
Morning Micro‑Routine (5‑Minute Desk Warm‑up)
While still seated, perform seated cat‑cow motions: inhale to arch the upper back, exhale to round. Follow with seated spinal twists, using the chair back as a lever. Finish with a seated forward fold, reaching the hands toward the floor while keeping the spine elongated. This awakens the lumbar area before the day’s demands begin.
Lunchtime Reset (10‑Minute Standing Flow)
Step away from the desk and find an open space. Begin with a few rounds of Sun Salutation A, modifying any deep forward folds with a block. Incorporate a standing side‑bend to stretch the intercostal muscles, which indirectly eases pressure on the lower back. Conclude with a brief standing forward fold, allowing the head to hang heavy for a gentle decompressing effect.
Evening Unwind (15‑Minute Restorative Series)
Set a calming ambiance with dim lighting and a soft playlist. Use a bolster or rolled blanket under the knees in a supine position, then transition to Legs‑Up‑the‑Wall for five minutes. Follow with a reclined bound angle, and finish with a guided body scan meditation lasting three minutes, focusing on releasing any residual tension in the lumbar region.
Digital Reminders and Tracking
Utilise a smartphone app or calendar alerts to prompt short movement breaks every 90 minutes. A quick 30‑second standing hip hinge can reset spinal alignment and prevent prolonged flexion from computer work. Log each session in a simple spreadsheet, noting duration, perceived comfort, and any modifications used. Over time, patterns emerge that guide adjustments to the routine.
Travel‑Friendly Adaptations
When on the road, a yoga mat may not be feasible. A hotel pillow can serve as a prop for seated twists, and a sturdy suitcase can replace a block for hip‑opening poses. Even a wall can become a support for a standing forward bend, allowing the practitioner to maintain consistency regardless of location.
Monitoring Progress and Knowing When to Seek Professional Help
Self‑assessment is a critical component of any pain‑relief program. While yoga can be a powerful ally, certain warning signs indicate that additional medical evaluation is warranted.
Objective Measures to Track Improvement
- Range of Motion (ROM) Tests: Measure the distance you can comfortably reach in a seated forward fold or the angle of hip extension in a bridge pose. Record these numbers monthly to quantify gains.
- Pain Diary: Rate pain on a 0‑10 scale before and after each session. Note activities that trigger spikes (e.g., prolonged sitting, heavy lifting).
- Functional Benchmarks: Track how many repetitions of Bird‑Dog you can perform with perfect form, or how long you can hold a plank without lumbar sagging.
Red‑Flag Symptoms that Require Immediate Attention
If any of the following occur, pause the yoga practice and consult a healthcare professional:
- Sudden, sharp pain that radiates down the leg and worsens with coughing or sneezing.
- Numbness, tingling, or weakness in the feet or toes.
- Loss of bladder or bowel control.
- Persistent pain that does not improve after two weeks of consistent, gentle practice.
Collaborating with a Physical Therapist or Certified Yoga Therapist
When possible, schedule a joint session with a physical therapist who understands yoga biomechanics. They can prescribe specific modifications, adjust alignment cues, and integrate therapeutic exercises that complement the yoga flow. A certified yoga therapist can also design a personalised sequence that respects the individual’s medical history while still offering progressive challenges.
Adjusting the Routine Based on Feedback
Listen to the body’s signals. If a particular pose consistently produces discomfort, replace it with a gentler alternative that targets the same muscle group. For instance, if Bridge Pose aggravates the sacroiliac joint, switch to a supported Pelvic Tilt on a bolster, which offers similar glute activation with less joint compression.
Frequently Asked Questions
Q1: How often should I practice yoga for lower back pain?
A: Aim for 3‑5 short sessions (10‑20 minutes each) per week. Consistency helps maintain flexibility and strength without over‑loading the lumbar area.
Q2: Can I do these poses if I have a herniated disc?
A: Many of the listed poses are low‑impact, but you should obtain clearance from a medical professional first. Focus on gentle stretches like Child’s Pose and avoid deep forward folds or intense twists.
Q3: Should I use props for every pose?
A: Props are encouraged whenever they help you maintain alignment and comfort. Blocks, blankets, and bolsters can reduce strain and make each posture accessible.
Q4: How long should I hold each stretch?
A: For most static stretches, 30‑60 seconds is sufficient. For restorative poses, you can stay 3‑10 minutes, depending on your schedule and comfort level.
Q5: Will yoga replace physical therapy?
A: Yoga can complement physical therapy by reinforcing mobility and core strength, but it should not replace a prescribed rehabilitation program unless advised by your therapist.
Related posts:
 Dealing with Low Back Pain While Sleeping
 Dangers of Over-Stretching
 Master Chair Pose Without Falling Over: A Yoga Guide for Real People
 Managing Hip Pain from Sitting
 Dealing with Low Back Pain While Sleeping
 Lindsay Ellingson’s Stress-Relieving Yoga Move
 Desk Yoga for Back Pain Relief
 Best Sex Positions for Those with Back Pain