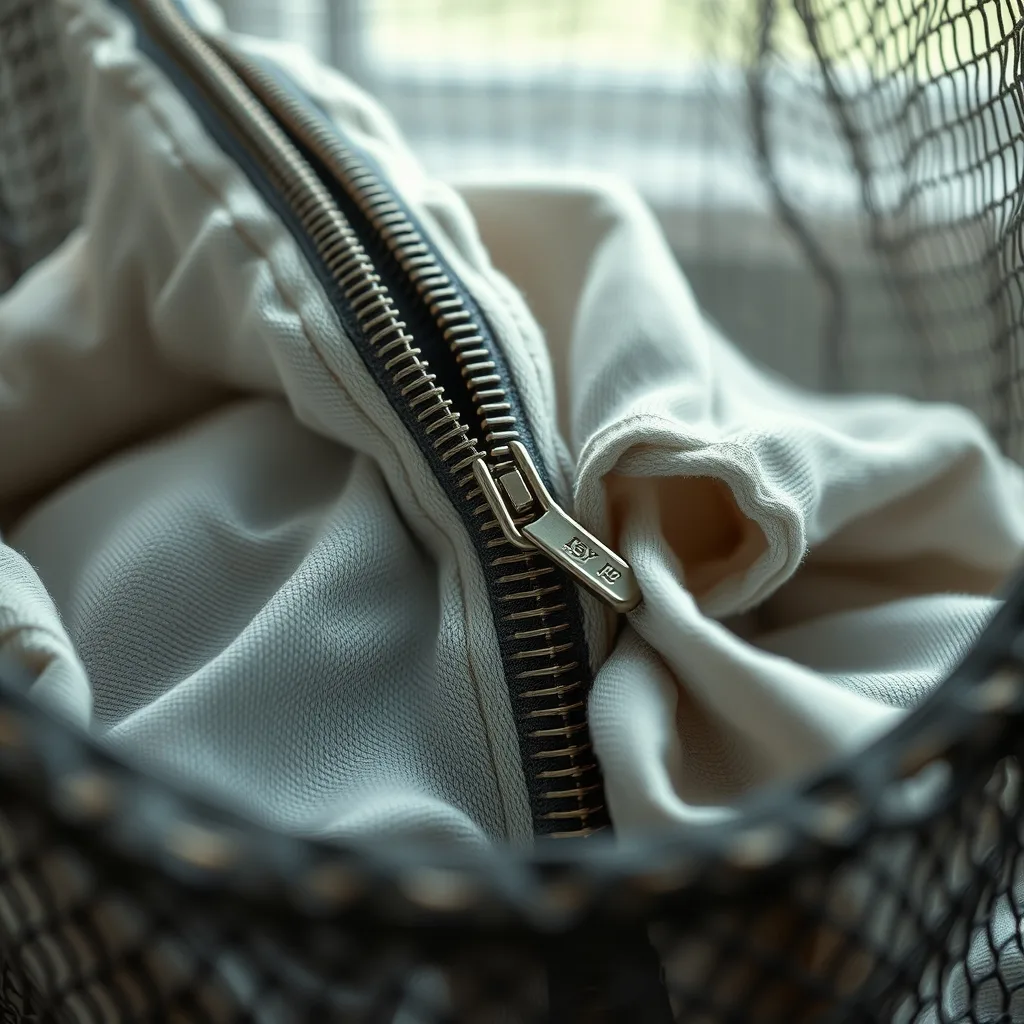
Ever opened a freshly laundered shirt only to find a jagged tear where the zipper met the fabric? You’re not alone. Zipper snags are a surprisingly common laundry nightmare, and they can turn a routine wash into a costly repair job. This article breaks down the science behind why zippers get caught, explores the everyday habits that make it happen, and equips you with practical steps to keep your garments gliding smoothly for years to come.
Key takeaways
- Zip all garments fully and turn items with exposed zippers inside out before washing.
- Use mesh laundry bags to isolate items with heavy-duty or metal zippers from delicate fabrics.
- Select gentle wash cycles and cold or warm water to prevent thermal expansion of teeth.
- Keep drum loads moderate to reduce friction and minimize the risk of fabric catching in zippers.
- Lubricate metal zippers with silicone or wax to ensure smooth movement and prevent sticking.
Understanding the Mechanics of a Zipper
A zipper is a simple yet clever mechanical device. It consists of two rows of interlocking teeth—either metal or molded plastic—joined by a slider that moves up and down to engage or disengage the teeth. When the slider is pulled, a small metal or polymer hook on the slider pushes the teeth together, creating a seal; pulling the opposite way separates them.
Two design features are especially relevant to laundry:
- Tooth profile. The shape and spacing of the teeth determine how tightly they mesh and how easily they can catch on fibers.
- Slider alignment. If the slider is slightly misaligned, the teeth may not sit flush, leaving a tiny gap where fabric can slip in.
Both factors are vulnerable to the tumbling action, water pressure, and friction inside a washing machine.
Common Causes of Zipper Snagging in the Wash
While each laundry load is unique, several recurring culprits account for the majority of zipper-related mishaps:
- Open zippers. When a zipper is left partially or fully open, the exposed teeth act like tiny hooks that can snag loose threads, lint, or even other garments.
- Heavy fabrics rubbing against zip teeth. Denim, canvas, and towels have a rough surface that can grind against the zipper, especially when the garment is twisted.
- Improper washing machine settings. High‑speed spin cycles generate strong centrifugal forces, pushing garments against the drum and each other. The resulting pressure can force fabric into the teeth.
- Worn or damaged sliders. Over time, sliders can lose their smooth glide, creating micro‑gaps where fibers become trapped.
- Overloading the machine. A crowded drum limits movement, causing garments to press tightly against one another and increasing the chance of snagging.
Fabric Types and Their Interaction with Zippers
Not all fabrics behave the same way in a wash. Understanding the interaction between fabric texture and zipper construction helps you make smarter laundry choices.
- Knits and jersey. These stretchy, smooth fabrics tend to slide past zip teeth, but if a knit is pulled tight around a zip, the elasticity can pull the fabric into the teeth.
- Woven cottons and linens. Their relatively flat weave offers less friction, yet they can fray at the edges, creating loose threads that latch onto zippers.
- Denim and heavy synthetics. The rough surface and weight increase the likelihood of the fabric pressing into the teeth during high‑speed spins.
- Delicates (silk, lace). While they are less likely to catch, they can be torn if a zipper teeth punctures the thin material.
Matching the garment’s fabric weight to an appropriate wash cycle reduces the mechanical stress on the zipper.
Pre‑Wash Preparations to Protect Zippers
Simple pre‑wash habits can dramatically lower the risk of snags:
- Close every zipper. Before loading, zip all jackets, pants, and bags fully. For garments with a zip that can’t be closed (e.g., zippered pockets), turn the item inside out.
- Secure sliders. If a slider feels loose, gently press it back into place with a pair of pliers, being careful not to crush the teeth.
- Fasten snaps and buttons. Loose hardware can also catch on zip teeth.
- Use a laundry bag for high‑risk items. Mesh bags keep zippers isolated from other pieces while still allowing water flow.
- Inspect for frayed threads. Trim any loose threads near the zipper with a small pair of scissors; they act like bait for the teeth.
These steps take only a minute but provide a protective barrier that most washing machines cannot replicate.
Choosing the Right Laundry Settings
Even a perfectly prepared garment can suffer if the machine’s cycle is too aggressive. Here’s how to select the safest settings:
- Temperature. Cold or warm water is sufficient for most fabrics and reduces the expansion of metal teeth, which can become slightly larger in hot water.
- Spin speed. Opt for a medium spin (600–800 RPM) for mixed loads. Reserve high‑speed spins for sturdy items like towels that are kept in separate loads.
- Cycle type. Use the “delicate” or “hand‑wash” cycle for garments with heavy or decorative zippers. These cycles have slower agitation and shorter spin phases.
- Load size. Follow the manufacturer’s capacity guidelines. A half‑full drum gives each piece room to move without constantly colliding.
When in doubt, err on the side of gentler settings; you can always repeat the rinse if extra water removal is needed.
Post‑Wash Care and Maintenance of Zippers
After the wash, a quick inspection can catch early signs of wear before they become major problems.
- Dry the garment properly. Air‑drying is ideal for delicate zippers. If you must use a dryer, select a low‑heat setting and remove the item before the cycle ends to prevent the teeth from grinding against the drum.
- Lubricate metal zippers. A tiny dab of silicone‑based lubricant or a specialized zipper wax can restore smooth movement. Apply with a cotton swab and wipe away excess.
- Check slider alignment. If the slider feels sticky, gently realign it with pliers or replace it if it’s severely worn.
- Repair frayed seams. Small tears near the zipper can be sewn with a matching thread, preventing loose fibers from getting caught.
- Store garments correctly. Hang jackets and pants on wide, padded hangers to keep the zipper straight and avoid pressure points.
These habits extend the lifespan of both the zipper and the garment.
Long‑Term Strategies for Durable Zipper Performance
Beyond individual washes, adopting a holistic approach to clothing care yields the best results.
- Invest in quality zippers. Garments with brass or heavy‑duty molded plastic teeth tend to hold up better than cheap, thin metal versions.
- Rotate your wardrobe. Wearing the same zip‑heavy items week after week increases wear. Rotate pieces to distribute stress evenly.
- Separate heavy‑zip items. Keep denim jackets, cargo pants, and outdoor gear in their own loads to avoid cross‑snagging with lighter fabrics.
- Perform regular maintenance. Schedule a quarterly check of all zippered items. Replace worn sliders or entire zippers before they fail.
- Consider alternative closures. For garments you wash frequently, look for versions with snap buttons or magnetic closures that eliminate zip friction entirely.
These strategic choices reduce the cumulative wear on zippers and keep your entire wardrobe in better condition.
Eco‑Friendly Practices and Sustainable Clothing Care
Taking care of zippers isn’t just about convenience—it’s also an environmentally responsible habit. Extending the life of a garment means fewer purchases, less textile waste, and a smaller carbon footprint.
- Repair instead of replace. A functional zipper can often be fixed with a simple slider swap, saving the garment from being discarded.
- Use natural detergents. Harsh chemicals can degrade metal and plastic over time. Plant‑based detergents are gentler on both fabrics and hardware.
- Cold‑water cycles. Energy‑saving washes reduce greenhouse‑gas emissions while also protecting metal teeth from thermal expansion.
- Recycle old zippers. Some fabric recycling programs accept garments with metal components, ensuring the metal is reclaimed.
By integrating these practices into your routine, you protect your clothes and contribute to a more sustainable home.
Quick Reference Checklist
Keep this list on your laundry room wall or inside a drawer for a fast reminder before each load.
- Close all zippers and fasten all hardware.
- Turn zip‑heavy garments inside out.
- Place delicate items in mesh laundry bags.
- Choose a gentle cycle with cold or warm water.
- Use medium spin speed; avoid overloading.
- Inspect zippers after drying; lubricate if needed.
- Repair frayed threads and misaligned sliders promptly.
How Washing Machine Design Influences Zipper Wear
Not all washing machines treat a zipper the same way. The geometry of the drum, the type of agitation, and the way water is pumped through the load create distinct stress patterns that can either protect or pulverize a zipper. Understanding these mechanical nuances lets you match your garments to the most compatible appliance.
Front‑load versus top‑load drums
- Horizontal drum (front‑load) – The drum rotates on a horizontal axis, creating a tumbling action that lifts garments and drops them back onto the drum surface. This motion tends to keep zip teeth oriented outward, reducing direct contact with other fabrics. However, the high‑speed spin at the end of the cycle can generate a centrifugal force that pushes heavy items against the drum wall, forcing fabric into the teeth if the load is packed too tightly.
- Vertical drum (top‑load with agitator) – An agitator spins in the center of the drum, pushing water and clothing outward in a circular pattern. The agitator’s protruding fins can snag on an exposed zipper, especially if the zipper is left partially open. The resulting friction can dull teeth or bend the slider.
- Vertical drum (top‑load with impeller) – Impeller models use a low‑profile disc that creates turbulent water flow rather than a mechanical arm. The gentler motion reduces the chance of a zipper catching on hardware, but the rapid water currents can still drive loose threads into the teeth during the rinse phase.
**Practical tip:** If you own both a front‑load and a top‑load machine, reserve the top‑load agitator for items without zippers (e.g., towels, sheets) and use the front‑load for zip‑heavy garments. When the front‑load’s spin speed is adjustable, set it to a medium range (600–800 RPM) for mixed fabrics and drop to low (400–500 RPM) for delicate outerwear.
Load‑distribution sensors
Modern machines often include sensors that detect unbalanced loads and automatically adjust spin speed or add extra rinse cycles. While convenient, these sensors can misinterpret a heavy jacket with a large zipper as an unbalanced load, prompting the machine to increase spin speed abruptly. The sudden surge may force the jacket’s fabric into the teeth, especially if the zipper is near the edge of the drum. To avoid this, manually select a “balanced‑load” or “extra‑care” option when washing zip‑heavy pieces.
Edge case – Small‑capacity machines
Compact or portable washers typically have a drum volume of 2–3 kg. Because the drum is small, every garment occupies a larger percentage of the interior space, meaning the zipper is more likely to rub against the drum or other items. In these machines, the safest approach is to use a mesh laundry bag for any item with a metal or heavy‑duty zipper, and to limit the spin speed to the lowest setting.
Specialized Zipper Materials and Coatings: Care Tips for Metal, Plastic, and Waterproof Types
Zippers are no longer limited to plain brass or inexpensive nylon. Manufacturers now offer a spectrum of materials designed for specific performance goals—corrosion resistance, UV stability, silent operation, or water‑tight sealing. Each material demands a tailored maintenance routine.
Stainless‑steel and brass zippers
- Corrosion risk – Even stainless steel can develop rust in highly chlorinated water or when exposed to salty air (e.g., beach vacations). After washing, dry the zipper thoroughly and, if possible, give it a quick wipe with a cloth lightly dampened with a 50/50 water‑vinegar solution. The mild acidity neutralizes chloride ions and slows oxidation.
- Lubrication – A thin film of silicone spray keeps the teeth gliding and creates a barrier against moisture. Apply only a drop to a cotton swab; excess spray can attract lint.
- Polishing – For visible brass that has dulled, use a non‑abrasive metal polish designed for jewelry. Polish only the exposed teeth, avoiding the fabric surrounding the zipper.
Molded‑plastic (polymer) zippers
- Heat sensitivity – High‑temperature washes can warp the polymer teeth, causing misalignment. Keep plastic zippers on warm (30‑40 °C) cycles, and avoid the dryer’s high‑heat setting.
- Static buildup – Synthetic fabrics generate static, which can cling to plastic teeth and create a “sticky” feel. Adding a half‑cup of white vinegar to the rinse cycle reduces static and also helps keep the polymer flexible.
- UV degradation – Outdoor gear with plastic zippers may become brittle after prolonged sun exposure. Store such items in a shaded closet, and if the teeth start cracking, replace the entire zipper with a UV‑stabilized version.
Waterproof (sealed) zippers
These are typically made from coated nylon with a rubberized backing, used on rain jackets, dry‑sacks, and scuba gear. The coating prevents water from penetrating the seam but can be compromised by abrasive detergents.
- Detergent choice – Use a low‑ph, fragrance‑free detergent; avoid bleach or oxygen‑based brighteners that can eat away at the coating.
- Rinse thoroughly – Residual soap can create a film that reduces the zipper’s water‑proof rating. Run an extra rinse cycle if you suspect buildup.
- Re‑coating – Some specialty outdoor brands sell a silicone‑based spray that restores the water‑repellent layer. Apply sparingly after the garment is completely dry.
**Edge case – Mixed‑material zippers** – Some garments combine metal teeth with a polymer tape (e.g., fashion jackets). In these hybrids, treat the metal portion as stainless steel and the tape as plastic, applying both lubrication and heat‑care measures.
Field‑Ready Zipper Maintenance: Outdoor Gear, Travel Bags, and Extreme Conditions
When you’re far from a laundry room, the same principles that protect a zipper at home must be adapted to the environment. Snow, sand, salt, and mud each present unique challenges.
Snow and ice
- Ice can freeze the slider in place, making it impossible to open. A quick solution is to warm the slider with your hands or a portable hand‑warmer for 30 seconds, then gently wiggle the pull tab.
- For prolonged exposure, apply a thin layer of petroleum‑based lubricant (e.g., a dab of petroleum jelly) to the teeth before the next use. The oil creates a barrier that prevents ice crystals from forming between the teeth.
Sand and dust
- Granular particles act like tiny abrasives, grinding down the teeth. After a desert hike, shake the bag vigorously over a trash can to dislodge loose grit, then brush the teeth with a soft‑bristled toothbrush.
- If sand has infiltrated the slider channel, use a can of compressed air to blow it out. Follow with a swipe of a lint‑free cloth lightly dampened with a mixture of water and a few drops of dish soap.
Salt water (coastal or marine use)
- Salt accelerates corrosion on metal components. Rinse the zipper with fresh water as soon as you return to shore, then dry it with a microfiber towel. For added protection, spray a light coat of anti‑corrosion spray designed for marine hardware.
- Backpacking tents often feature coated plastic zippers that can become gummy after exposure to salty spray. Wipe the teeth with a solution of one part isopropyl alcohol to two parts water; the alcohol evaporates quickly, leaving the coating intact.
Extreme heat
In desert environments, the temperature inside a backpack can exceed 45 °C. Heat can expand metal teeth, making them sit slightly apart and increasing the chance of fabric snagging. Before a long trek, pre‑condition the zipper by running it through a warm (not hot) water rinse, then allow it to air‑dry. This pre‑expansion reduces the differential when the gear heats up on the trail.
Portable repair kits
For the true adventurer, a compact zipper‑repair kit can be a lifesaver. Look for a kit that includes:
- Mini pliers with a flat head for slider adjustment.
- Replacement sliders (both metal and plastic) sized for common tooth counts (e.g., 5 mm, 8 mm).
- Silicone‑based wax in a squeezable tube.
- A small roll of heavy‑duty nylon thread for stitching a torn stop‑pin.
Practice swapping a slider on a discarded piece of fabric before you need it in the field; the muscle memory will save you minutes of frustration.
DIY Zipper Rescue: Step‑by‑Step Repairs for Teeth, Slider, and Stop‑Pin Issues
Professional tailors can replace an entire zipper in under an hour, but most minor failures can be solved at home with a few tools. Below are three common failure modes and the exact actions you can take.
1. Misaligned or bent teeth
- Lay the garment flat on a hard surface with the zipper fully opened.
- Identify the problematic segment (you’ll feel a snag when you run your fingertip along the teeth).
- Using a pair of flat‑nose pliers, gently press each bent tooth back into line. Work from the bottom up, applying even pressure to avoid breaking the tooth.
- After realigning, run the slider a few times to test smoothness. If the teeth still catch, repeat the process or consider a full zipper replacement.
2. Slider that won’t close
- Remove the top stop pin. This is the small metal piece that prevents the slider from sliding off. Use a thin nail or a specialized stop‑pin remover to pry it up.
- Slide the faulty slider off the teeth.
- Take a new slider that matches the tooth size (measure the distance between two adjacent teeth; common sizes are 5 mm and 8 mm).
- Align the new slider so that the pull tab faces upward, then gently push it onto the teeth.
- Re‑attach the stop pin by inserting it into the hole and gently tapping it with a hammer or the back of a screwdriver until it’s flush.
- Test the zipper repeatedly; it should now close cleanly.
3. Broken stop‑pin or missing end‑stop
- Locate the nearest stitch line at the top or bottom of the zipper.
- Thread a needle with a heavy‑duty nylon or polyester thread that matches the garment’s color.
- Pass the needle through the fabric loop where the original stop pin sat, then pull the thread tight to create a makeshift barrier.
- Secure the thread with a few tight backstitches, then knot and trim the excess.
- For a more permanent fix, purchase a replacement stop pin (often sold in sets of 5 mm or 8 mm) and crimp it into place using a small pair of pliers.
Edge case – Zipper teeth missing entirely
If a segment of teeth has peeled off (common with low‑grade plastic zippers), the only reliable repair is to replace that section of the zipper. You can sew in a short “patch” zipper: cut a piece of matching zipper a few centimeters longer than the damaged area, align the ends, and stitch the patch using a heavy‑duty sewing machine or a hand‑sewing whip stitch. Ensure the patch’s teeth line up with the original teeth to avoid a new snag point.
Chemistry in the Wash: Detergents, Water Hardness, and Their Effect on Zipper Longevity
Beyond mechanical forces, the chemical environment inside the washer can accelerate zipper wear. The interaction of surfactants, builders, and mineral ions influences corrosion, lubrication loss, and even the structural integrity of polymer teeth.
Surfactant type
- Anionic surfactants (e.g., sodium lauryl sulfate) are excellent at lifting dirt but can be harsh on metal finishes, especially when combined with high alkalinity.
- Non‑ionic surfactants (e.g., alkyl polyglucoside) are milder and less likely to strip protective coatings from metal or polymer zippers.
For zip‑heavy garments, choose a detergent that lists “non‑ionic” or “gentle” as a primary surfactant.
Builders and water softeners
Builders such as zeolites or phosphates bind calcium and magnesium ions, preventing scale buildup on machine parts. However, excessive builder concentration can leave a mineral film on metal teeth, which over time becomes a microscopic abrasive. If you use a high‑efficiency (HE) detergent with a built‑in water‑softener, add a rinse‑only fabric softener (free of silicone) to neutralize any residual mineral deposits.
Water hardness
Hard water (above 180 ppm calcium carbonate) accelerates corrosion on brass and steel. To mitigate, install an in‑line water softener or add a commercial water‑softening agent to each load. Alternatively, a cup of white vinegar in the final rinse cycle chelates the hardness ions, protecting the zipper’s metal.
pH level
Most laundry detergents operate at a pH of 9–10. Alkaline environments can cause the protective lacquer on coated plastic zippers to soften, making them more prone to scratches. If you regularly wash zip‑heavy items, select a low‑pH detergent (pH 7–8) or dilute a standard detergent with water to bring the pH down.
Edge case – Bleach and chlorine
Chlorine bleach is notorious for causing rust on steel zippers and turning brass a dull gray. Even a small amount of residual bleach can continue to corrode the teeth after the cycle ends. If you must use bleach for stain removal, apply it directly to the stained area with a cotton swab, rinse thoroughly, and then run an extra rinse cycle without detergent.
Preventive Accessories and Smart Practices: Zipper Guards, Laundry Bags, and Tech Solutions
While proper washing technique is essential, a proactive approach using accessories and technology can further reduce zipper mishaps.
Zipper guards and protectors
- Silicone zipper sleeves – These thin, flexible tubes slide over the teeth, providing a smooth, low‑friction surface that prevents fabric from catching. They are especially useful for heavy‑duty outdoor jackets that are washed frequently.
- Fabric tape strips – A narrow strip of heat‑bonded fabric (often used in quilting) can be sewn over the top edge of a zipper to keep the teeth covered when the garment is stored. This prevents lint and loose threads from nesting in the teeth between washes.
- Magnetic closures – For DIY enthusiasts, swapping a problematic zipper for a magnetic snap system eliminates the mechanical teeth altogether. Magnetic closures are ideal for lightweight jackets and bags where a silent, snag‑free closure is desired.
Smart laundry bags
Beyond the standard mesh bag, consider a double‑layer bag with an inner lining of soft nylon. The outer mesh allows water flow, while the inner layer cushions the zipper. Some premium brands also embed a small pocket that holds the pull tab, keeping it from dangling into other garments.
Tech‑enabled reminders
Modern smartphones can serve as a checklist hub. Create a “Laundry Zipper” reminder in your favorite task app that triggers every time you open the washing‑machine app or set a timer. Include sub‑tasks like “zip all jackets” and “inspect sliders.” Some smart washers even have a “zippers‑detected” sensor that flashes a warning if metal objects are present; pair this with a voice‑assistant routine that announces, “Close all zippers before starting.”
Edge case – High‑frequency laundry rooms
In communal laundry facilities (apartments, gyms), the same machine is used by many, increasing the chance of stray metal shards or lint buildup. Keep a small portable lint roller in your laundry bag and run it over the zipper after each wash. This quick habit removes microscopic debris that could otherwise embed into the teeth over time.
Long‑term storage hack
When seasonal garments are stored for months, place a small piece of silica gel near the zipper and a thin strip of waxed paper over the teeth. The silica gel absorbs moisture that could cause rust, while the waxed paper acts as a barrier against dust. Rotate the garments every few weeks to prevent the waxed paper from adhering permanently to the fabric.
By integrating these accessories and digital cues into your routine, you create multiple layers of protection that keep zippers functional and your clothes looking pristine.
Frequently Asked Questions
1. Can I wash a jacket with a broken zipper?
Yes, but first zip it closed or turn it inside out to prevent the broken teeth from catching on other fabrics. If the zipper is severely damaged, consider repairing it before the next wash.
2. Does using fabric softener affect zipper performance?
Fabric softener can leave a thin residue on metal teeth, making them slightly sticky. If you notice reduced glide, rinse the garment in a short extra rinse cycle or wipe the teeth with a damp cloth.
3. Are there specific detergents that are safer for metal zippers?
Mild, enzyme‑free detergents are less likely to cause corrosion on metal components. Look for products labeled “gentle” or “for delicate fabrics.”
4. How often should I lubricate my zippers?
A light lubrication every 3–4 washes is sufficient for most metal zippers. For heavy‑use outdoor gear, apply a silicone‑based lubricant once a month.
5. What’s the best way to replace a damaged slider?
Purchase a replacement slider that matches the original tooth type (metal or plastic). Use a small pair of pliers to gently remove the old slider by pulling the stop pin, slide the new piece into place, and re‑attach the stop pin. If you’re uncomfortable with this, a local tailor can perform the swap quickly.
Related posts:
 The Art of Upcycling: Giving Your Clothes a Second Life
 Core Workout with Sliders
 I did slider workouts for a week—here’s why they’re great for beginners
 Effective Slider Exercises
 Creating a Plastic-Free Home
 How to Repair Clothes Instead of Replacing
 Biggest Suitcases Review
 Why Your Clothes Might Be Causing That Mysterious Rash